If you are curious about how to run Home Assistant OS (HAOS) on Proxmox (a free/open source virtualization platform), you’ve come to the right place. This post is a detailed guide on how to get Home Assistant OS (HAOS) as a virtual machine (VM) up and running quickly on Proxmox VE 7.4. This post does not cover supervised, container, or other Home Assistant installation methods. This is strictly for the “appliance” version of Home Assistant, Home Assistant OS (HAOS).
Update June 23, 2023: Proxmox VE 8.0 is now released. It has a number of enhancements to simplify the installation process on newer CPUs. I would suggest using Proxmox VE 8.0 instead of 7.4. Check out my guide: Home Assistant: Proxmox VE 8.0 Quick Start Guide
Update June 19, 2023: Minor updates in the initial Home Assistant configuration section to reflect the latest HA changes.
Update May 1, 2023: Tteck released a script to automate Intel microcode updates. I added an optional section to the guide for the microcode update.
More Home Assistant Related Posts
I’ve written a number of posts related to Home Assistant which you might find useful:
Home Assistant: Getting Started Guide
Home Assistant: Ultimate Restore Guide
Home Assistant: Monitor Proxmox with Glances
Home Assistant: Installing InfluxDB (LXC)
InfluxDB 1.x Automated Backups
Home Assistant: InfluxDB Data Management (LXC)
Home Assistant: Installing Grafana (LXC) with Let’s Encrypt SSL
InfluxDB + Chronograf: Configuring Let’s Encrypt SSL

First, why would you run Home Assistant OS as a VM? Well, Home Assistant is typically not very resource hungry and even old mini-PCs from several years ago would have a lot of left over computing resources that you can run other services. Running Proxmox VE, which is a free hypervisor based on KVM, has a nice management UI and is pretty easy to use. It allows you to run HAOS in a VM, and you can then run other VMs or LXC containers on the same hardware.
If you are new to Home Assistant, not super nerdy, and just want a super reliable and easy to use “appliance”, then don’t go the Proxmox VE route. Just grab a cheap used mini/ultra-mini PC and run Home Assistant OS on it “bare metal” and be done with it. But if you know you want HAOS as a VM, potentially do LXC containers down the road, Proxmox VE is a great (and free) option. Even though Home Assistant can do backups, being able to do a whole HAOS VM snapshot at the hypervisor level can be great for roll-back from failed upgrades or “oh crap” mistakes.
Please note that the actual install of Home Assistant OS inside of a VM leverages the awesome tteck scripts. This makes the process super easy, grabs the latest version of HAOS, and enables GUI-driven advanced customizations. He regularly updates his scripts, so he may add features in the future not covered in my post. But I do cover new settings he added in May 2023.
Proxmox Storage Recommendations
Proxmox is designed to be used on everything from an old PC to high-end enterprise production environments. There is certainly some debate on what type of storage configuration you should use. For example, should I use ZFS? Should I use multiple physical storage devices and use ZFS mirroring? Do I need a separate boot drive? Separate log and cache drives?
Those are all valid questions to ask in an enterprise production environment. However, for a home environment my thinking is KISS (keep it simple stupid), unless you REALLY know what you are doing. Why overly complicate your configuration for a home server?
For a home environment where you have a NAS (such as Synology, QNAP, etc.) I would suggest:
- Use a single SSD/NVMe (likely M.2) drive in your server. Make sure it’s large enough for future growth.
- Use the EXT4 (default) filesystem with LVM-thin (also default)
- Use Proxmox’s built-in backup to do nightly backups of all VMs and LXC containers to your NAS
- Use Home Assistant’s Google Drive backup add-on to do nightly backups to the cloud
- For extra protection, replicate your NAS’s Proxmox backups to a cloud provider
Of course super nerds will want to deviate and throw in ZFS, do ZFS mirroring, and use multiple storage devices. More power to them if that’s what they want. But for the vast majority of Home Assistant users, a single drive with robust backup is more than sufficient.
Proxmox VE 8.0 Quick Start Guide
This post is written for Proxmox VE 7.4, which is no longer the latest version. I would strongly suggest looking at using Proxmox VE 8.0. This 7.4 guide has been fully updated for 8.0: Home Assistant: Proxmox VE 8.0 Quick Start Guide
Creating Proxmox USB Boot Media
In order to install Proxmox on your server, we need to create a bootable USB drive. This is super easy and you can use your favorite tool like Balena Etcher (Mac/PC/Linux). The Proxmox VE installer ISO is very small, at just a bit over 1GB, so your boot media need not be large.
- Download the latest “Proxmox VE ISO Installer” (I’ll be using 7.4-1.)
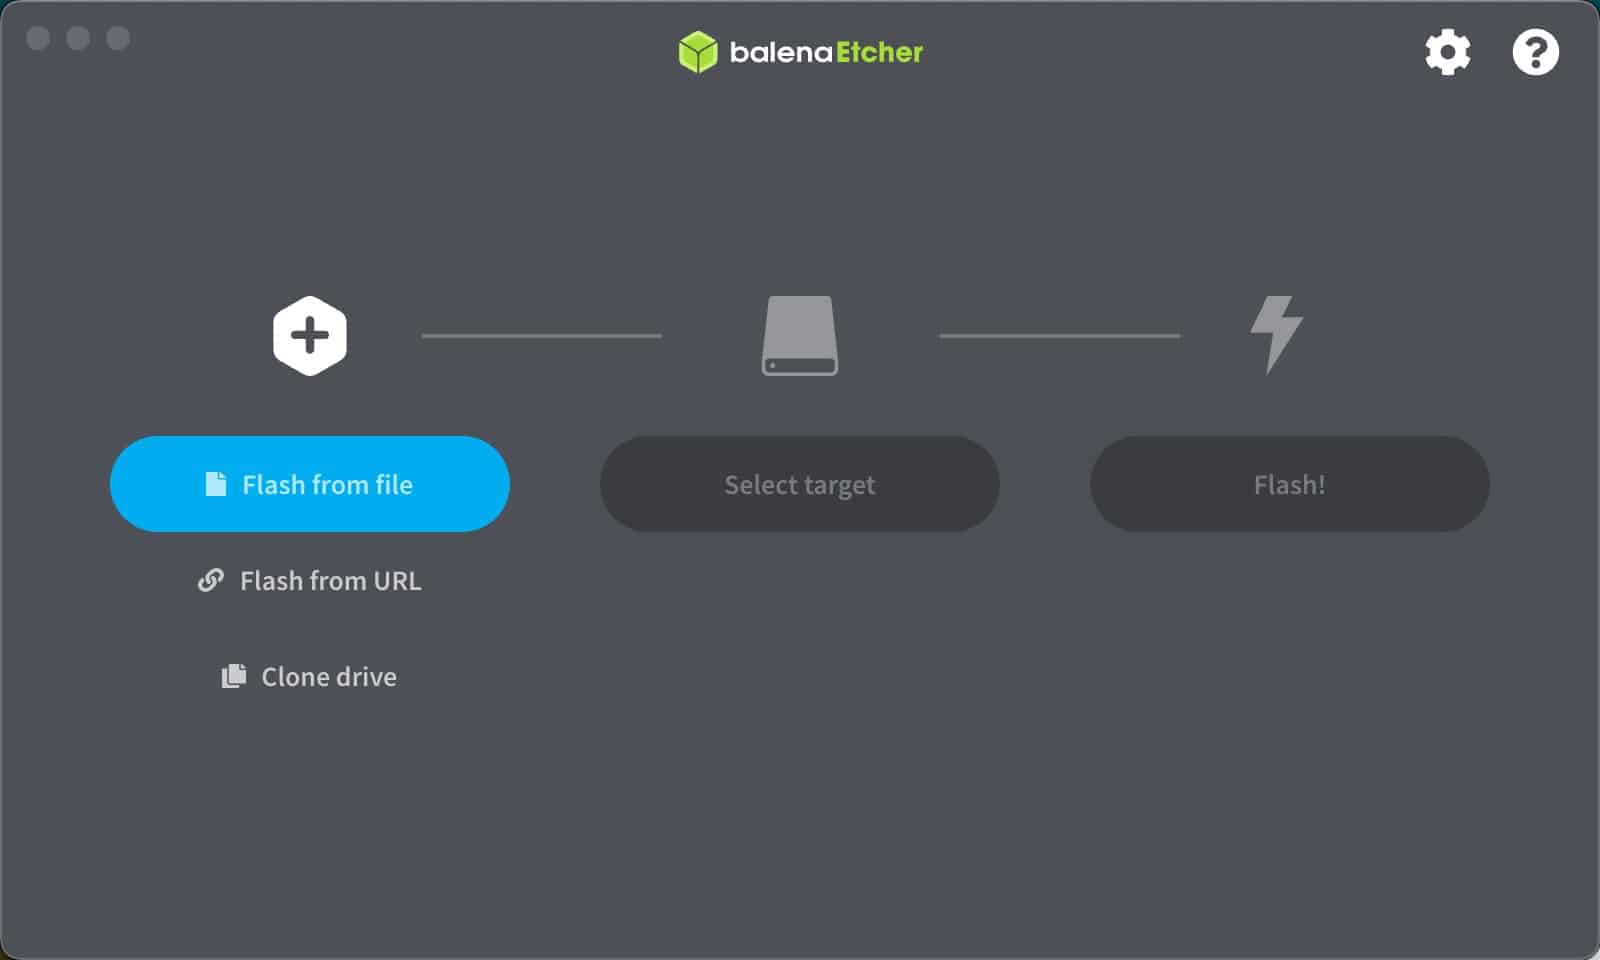
- Download and install Balena Etcher
- Insert your USB boot media
- Launch Balena Etcher and select Flash from file
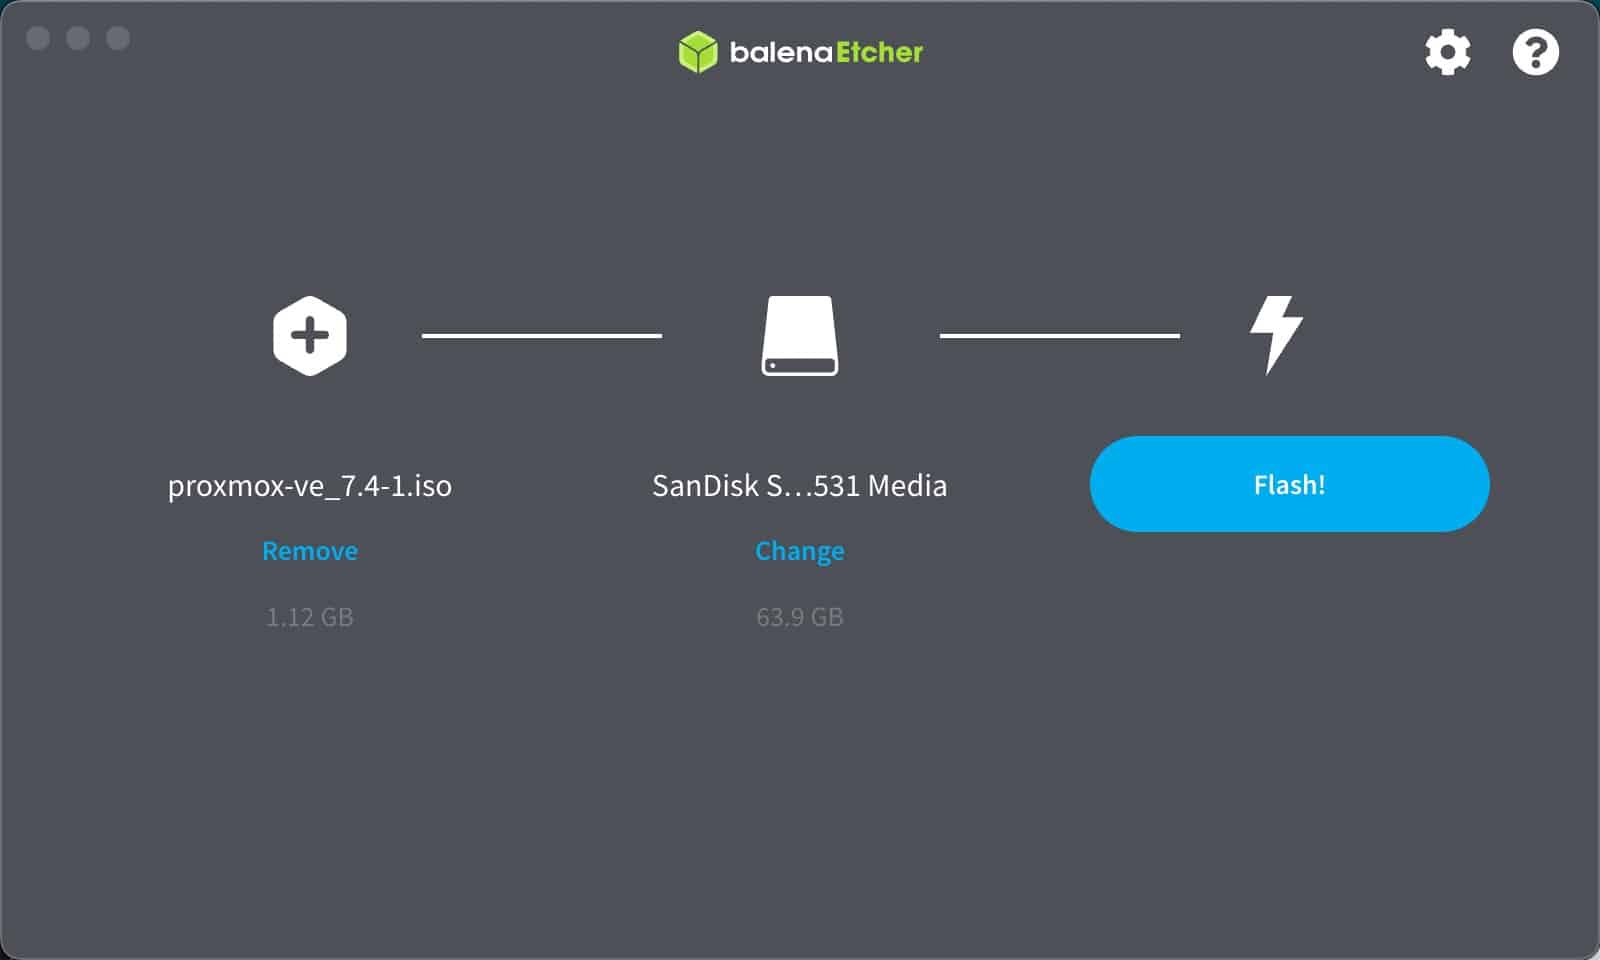
5. Locate the Proxmox VE ISO you downloaded
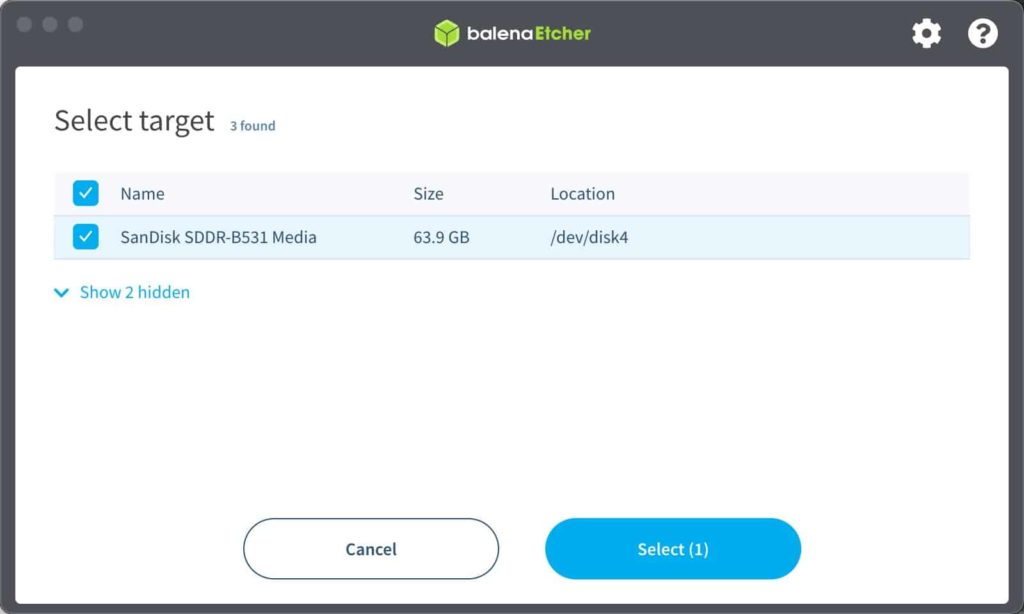
6. Click on Select target and select your USB boot media
7. Click on Flash to write the image to the boot media. On a Mac you may be prompted for your password.
8. Wait a minute or so for the image to be written and verified.

9. After the image is written close Balena Etcher and remove your USB boot media. On a Mac it is automatically safely dismounted so just pull it out.
Installing Proxmox VE
- Connect a keyboard and monitor to your Proxmox server/mini-pc/NUC/etc.
- Power off your server and insert the USB boot media
- Power on your server and press the right key to enter your BIOS setup (varies by manufacturer)
- Depending on what OS you were previously running, a few settings might need to be tweaked. The name of these settings and menu location varies by BIOS manufacturer.
- Enable Virtualization (may be called VT-x, AMD-V, SVM, etc.)
- Enable Intel VT-d or AMD IOMMU (if available, not required for HA, but for future proofing)
- Leave UEFI boot enabled
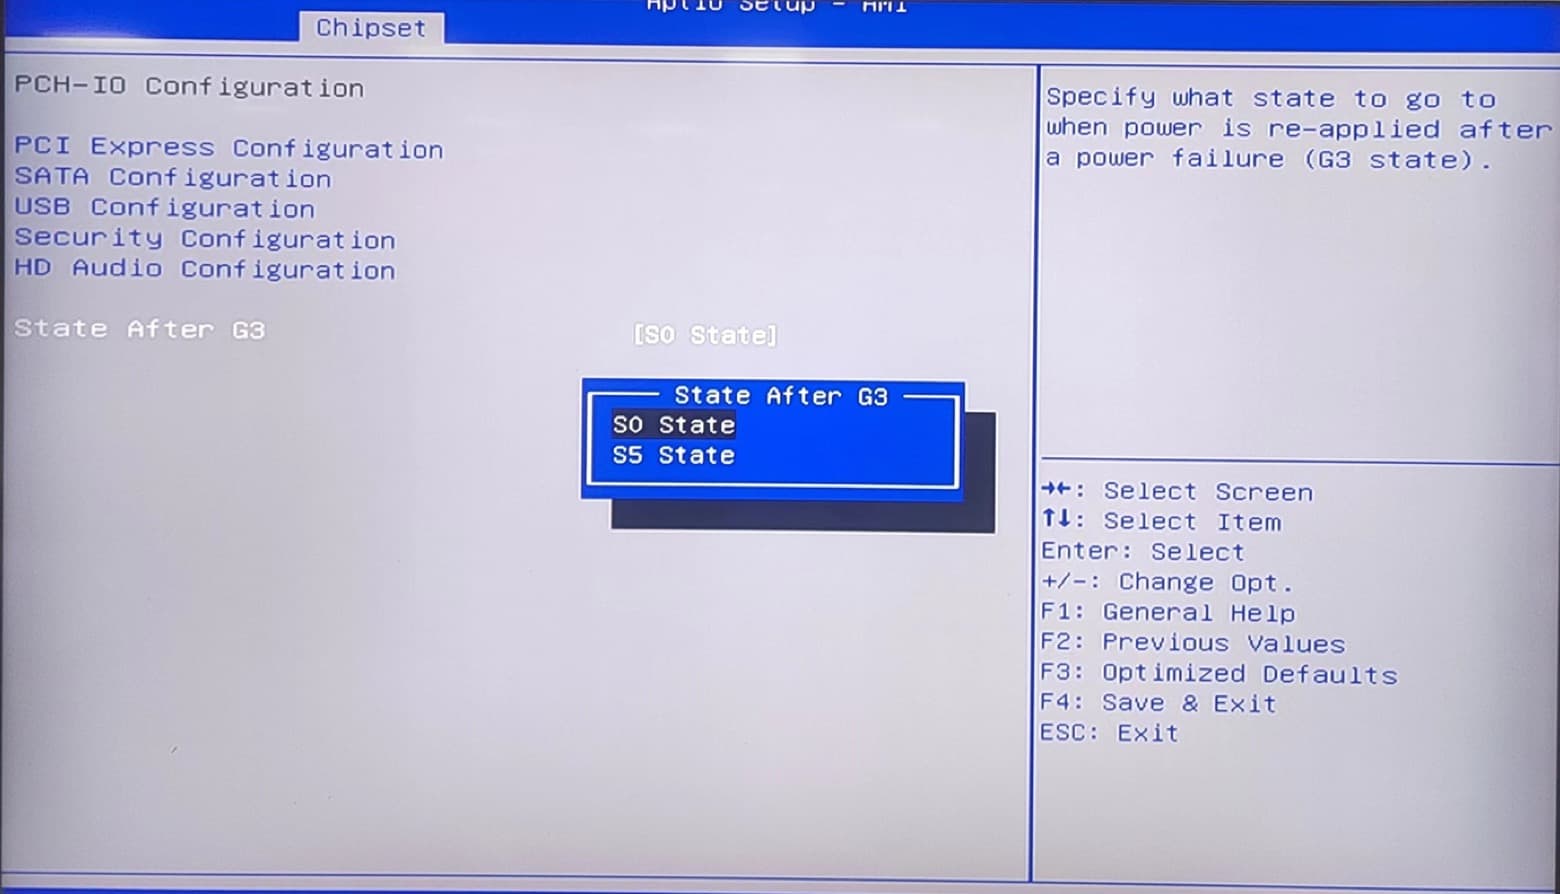
- Enable auto-power on (if available)
- Note this setting can be hard to find or have non-obvious names (e.g. setting State after G3 to S0 State). This ensures that after an unexpected power outage your Proxmox server powers on without intervention.
- If you think down the road you might add a PCIe card (like a m.2 Google Coral TPU), make sure you look through the BIOS settings and DISABLE any PCIe power management (ASPM) options you find.
- Change the boot order to set your USB boot media at the top
5. Save the BIOS settings and reboot. If all goes well, Promox VE installer will start up.
Note 1: If Proxmox starts to boot then you get stuck on a black screen, you might need to try the nomodeset boot parameter workaround. The black screen can happen due to graphics driver issues. See this Reddit thread for help.
Note 2: If the initial installer hangs on a message similar to “Starting the installer GUI – see tty2” you may need to force VGA support via the CLI. You can check out this Proxmox FrameBuffer forum post. Follow post #1 to create a X11 driver file then restart X, and the Proxmox installer GUI should appear. After the installer is done you will need to power cycle the host to boot into Proxmox.
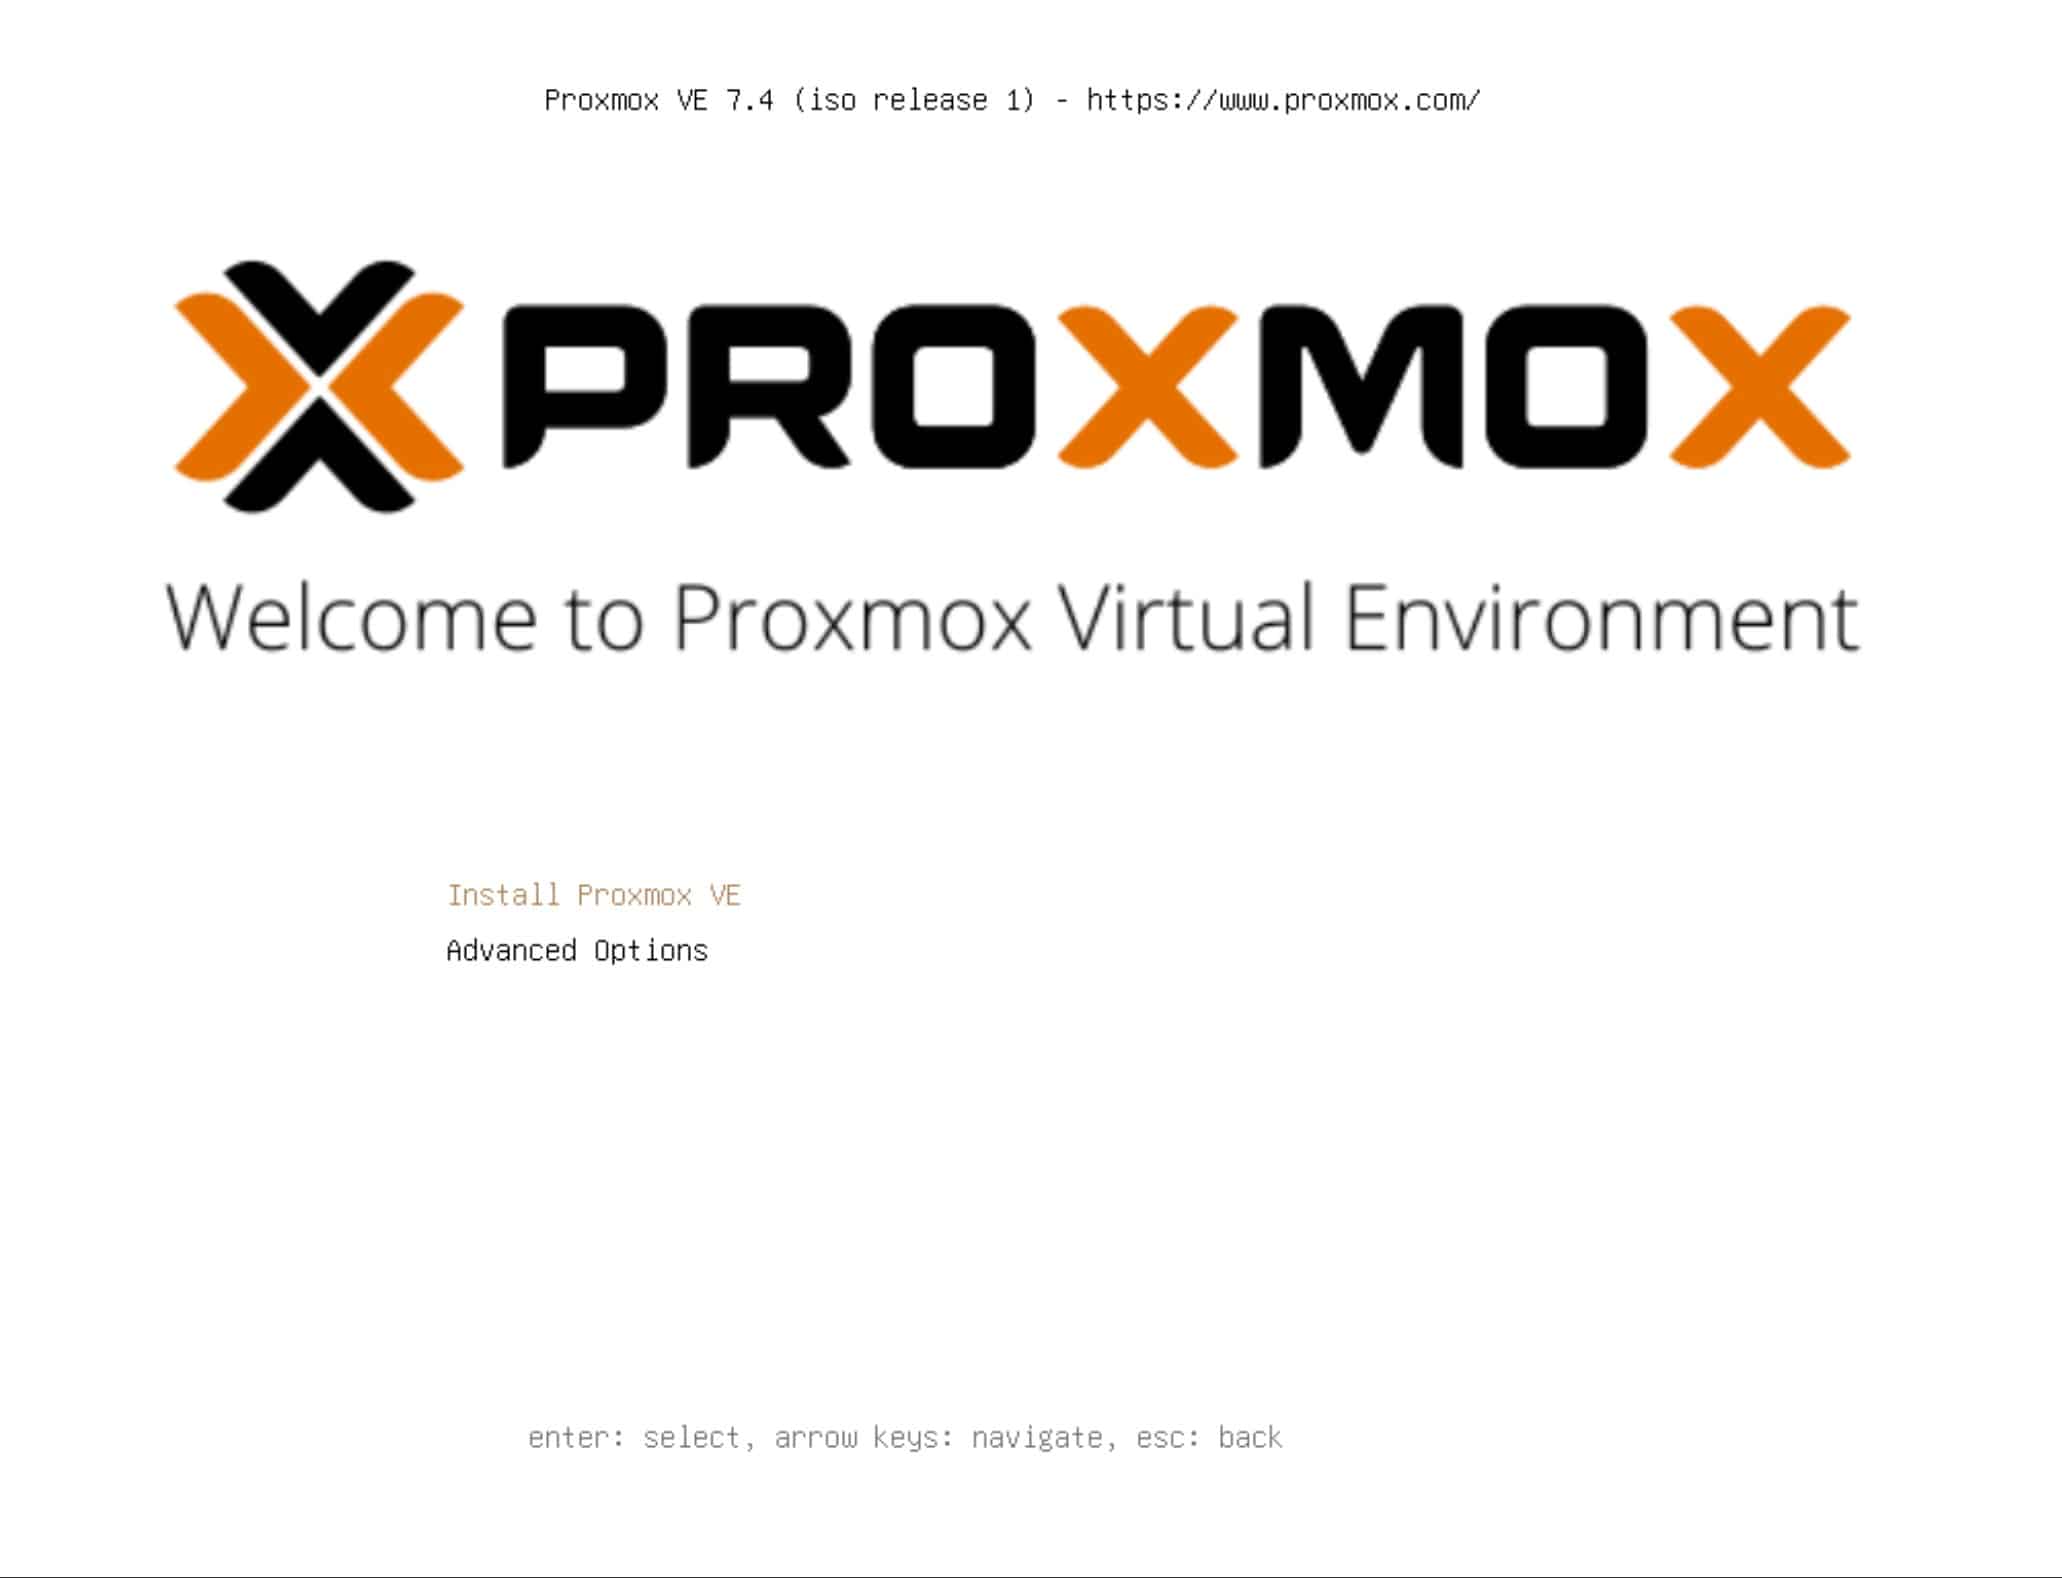
6. Press Enter to Install Proxmox VE
7. Select I agree on the EULA
8. Select the Target Harddisk
Note: Don’t change the filesystem unless you know what you are doing and want to use ZFS, Btrfs or xfs. The default is EXT4 with LVM-thin, which is what we will be using.
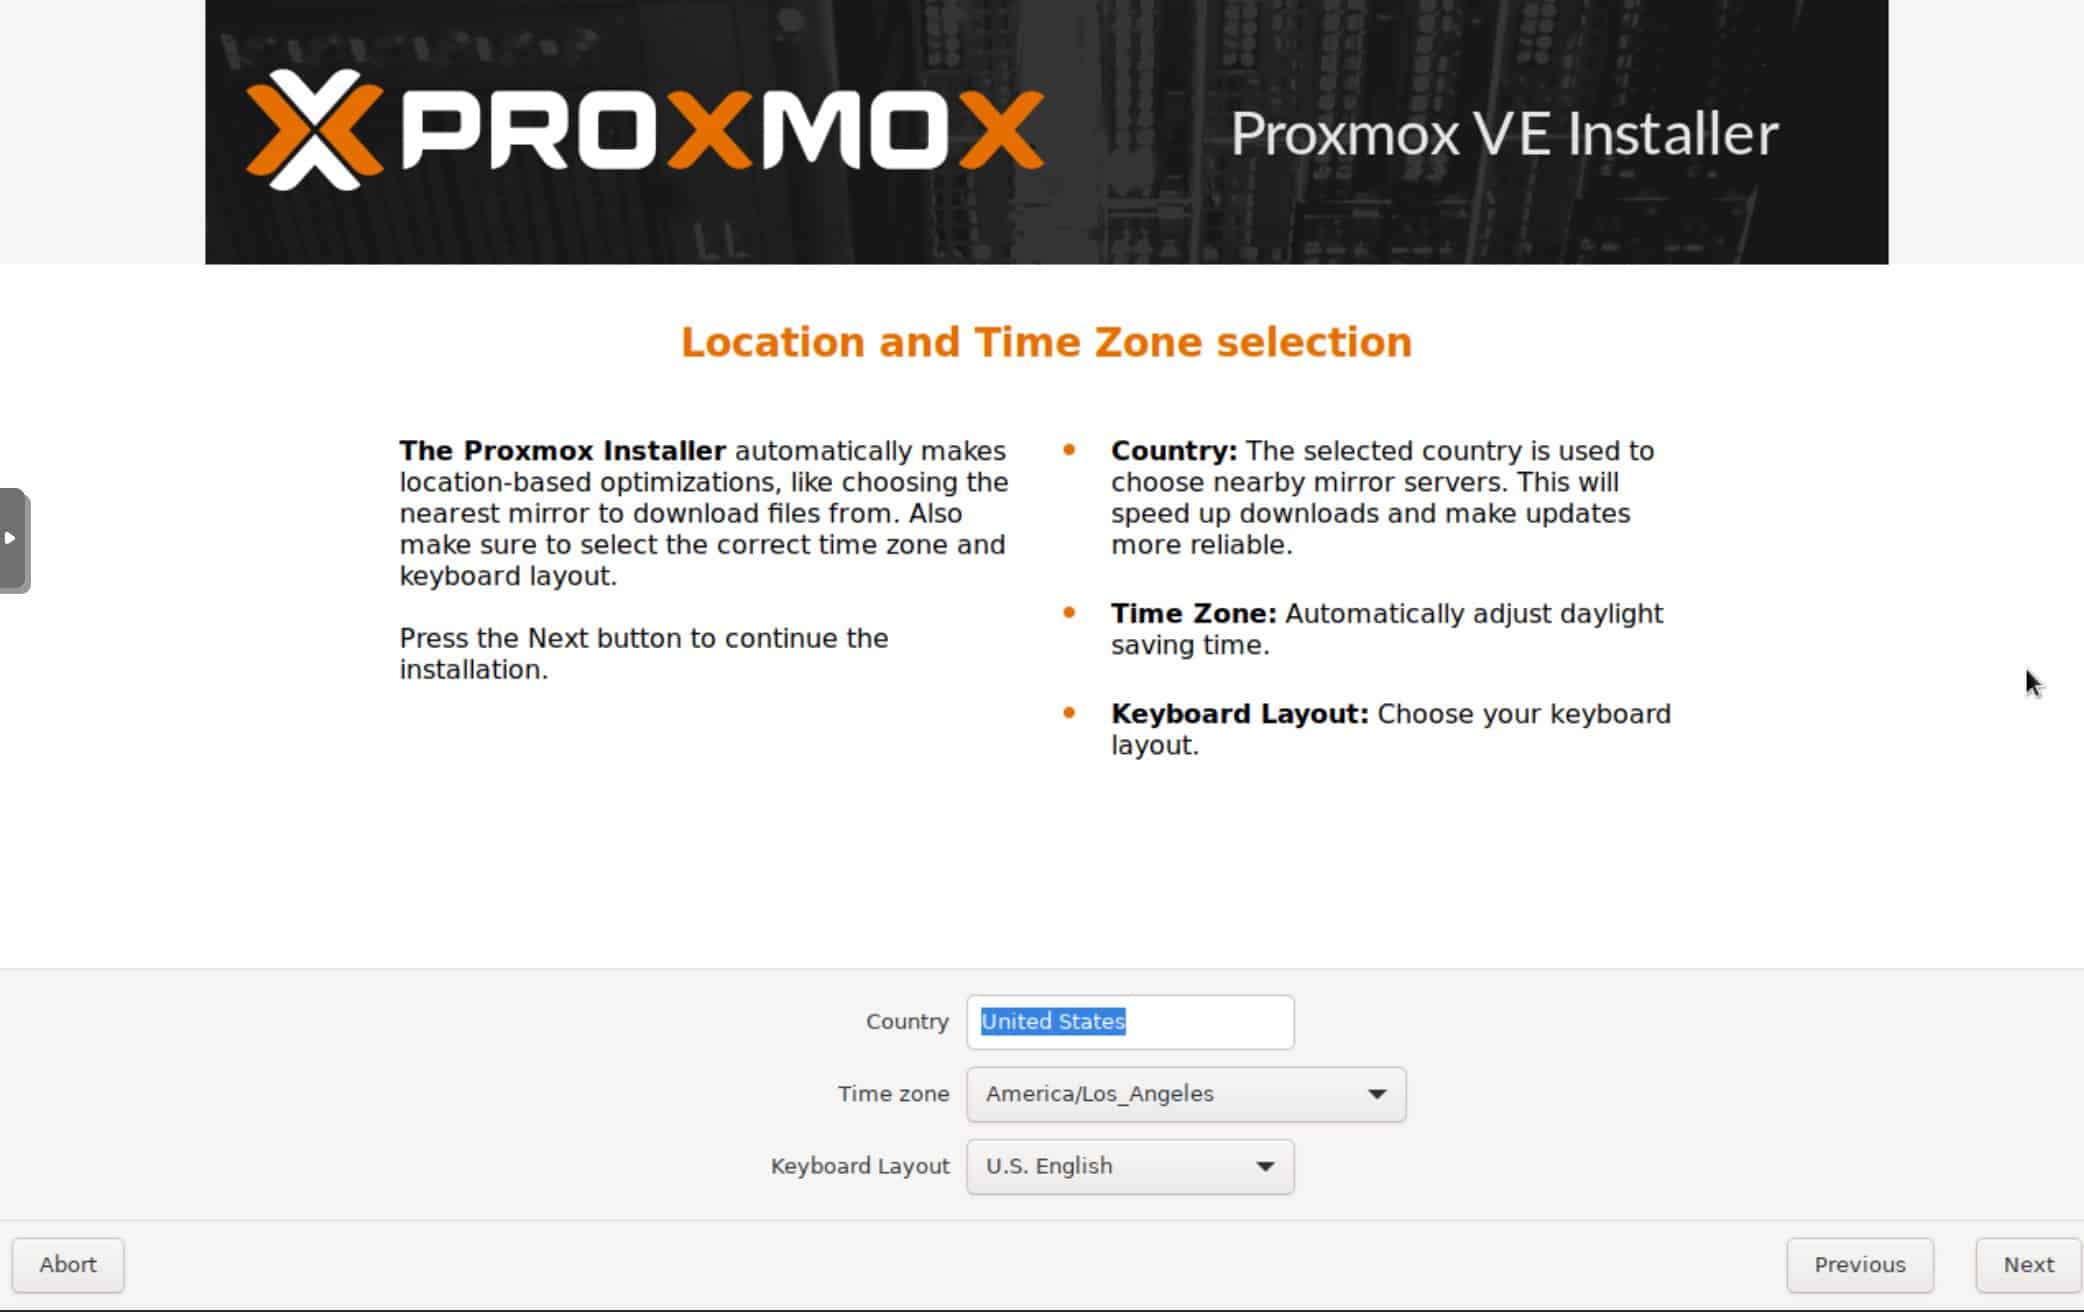
9. Select your Country, Time zone and Keyboard Layout
Note: These settings are important so verify they are accurate
10. Enter a strong password and an email address
Note: E-mail address will be used for alerts.
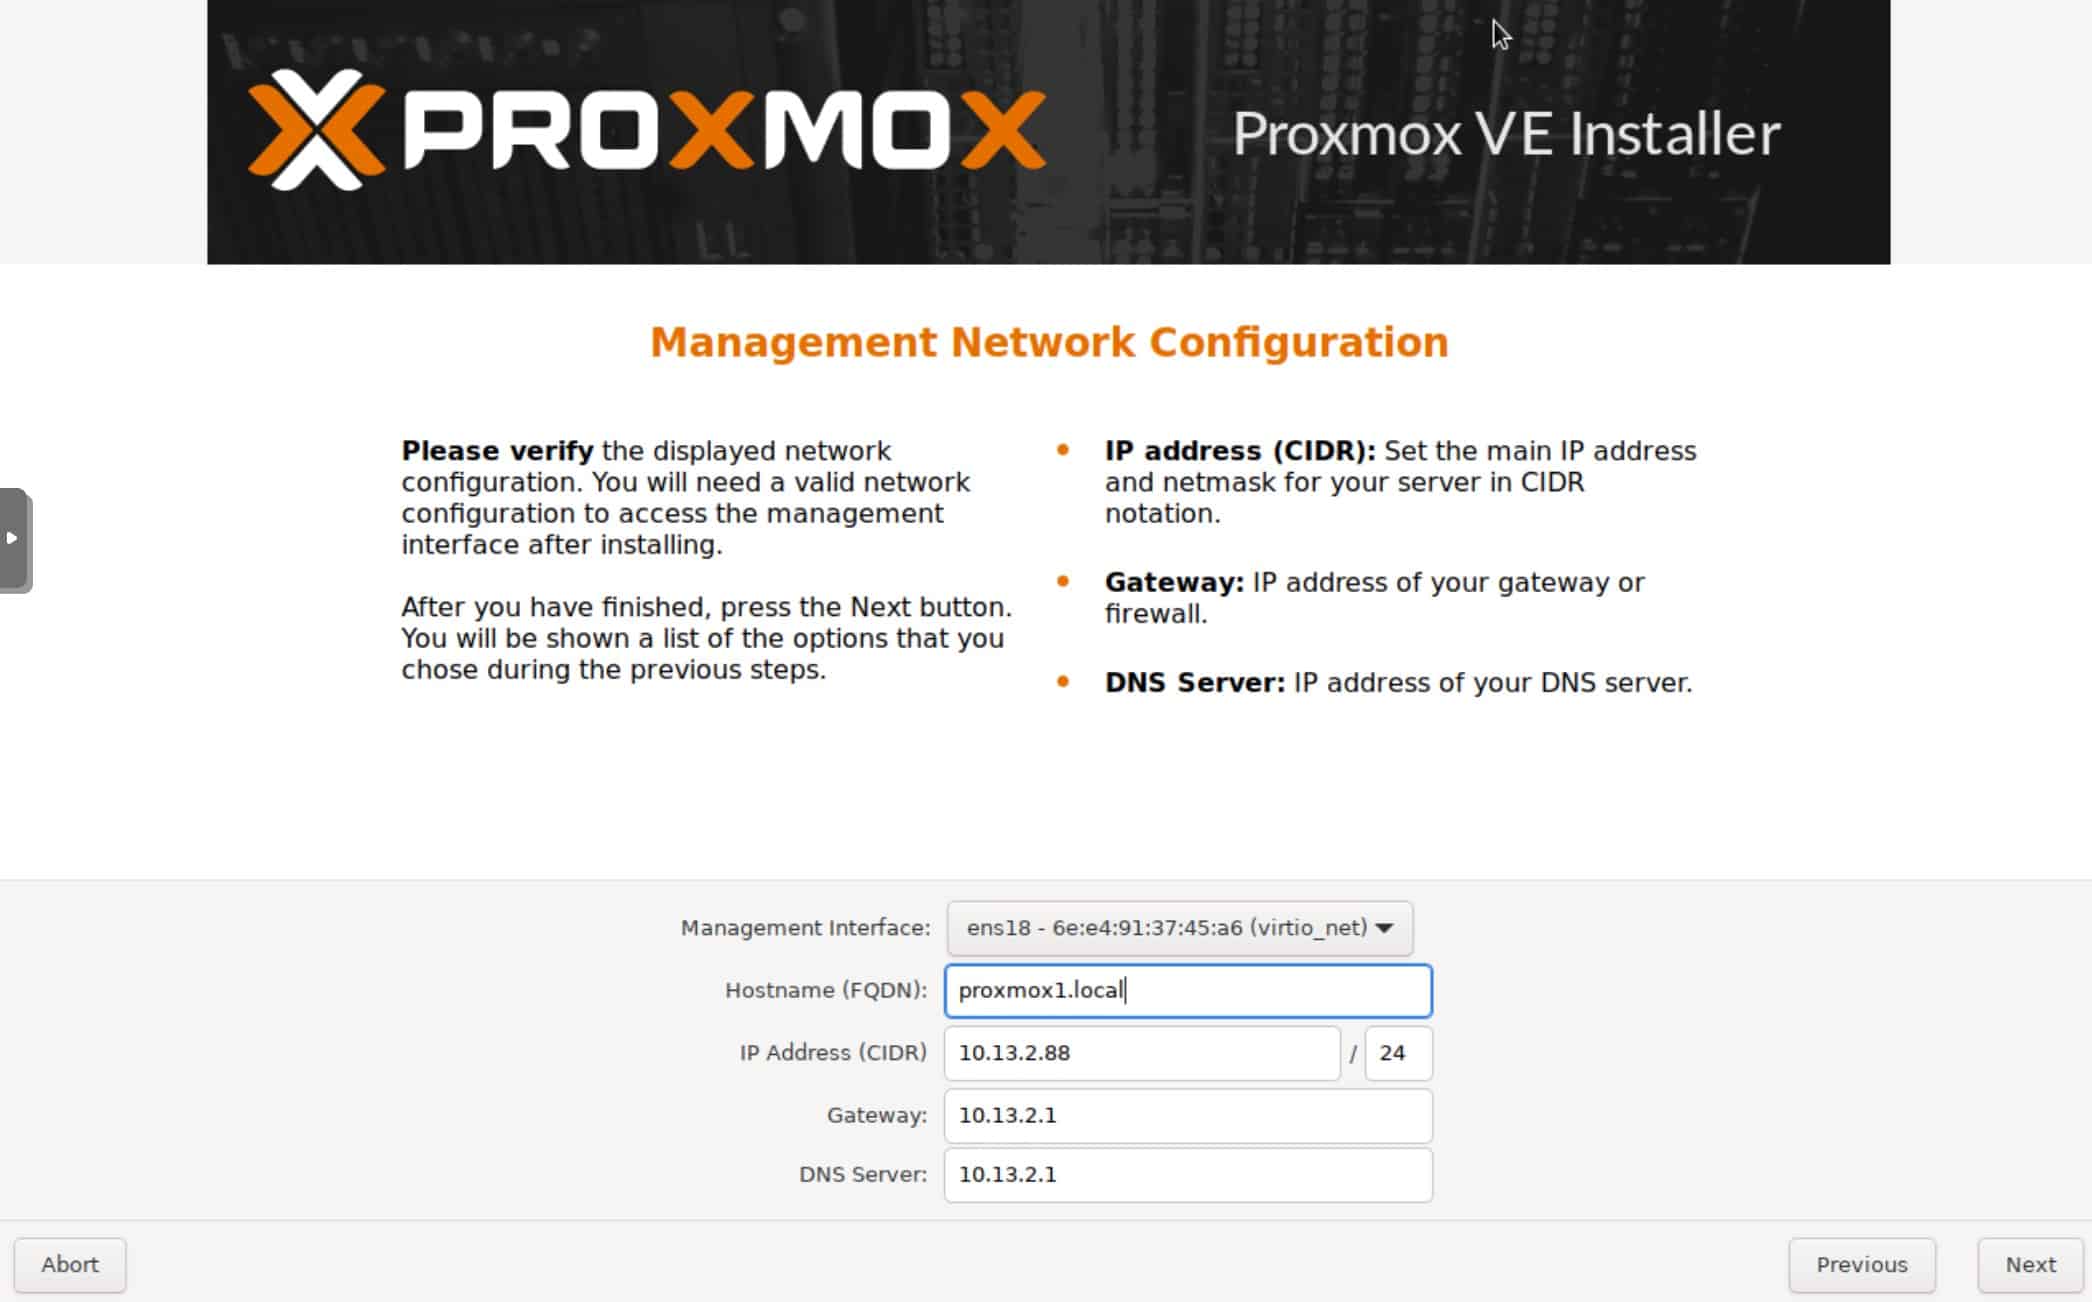
11. Select your Management Interface, Hostname, IP address, Gateway and DNS Server.
Note 1: If your server is plugged into the network it should grab a DHCP address and populate the other information. I strongly recommend either using a static IP, or create a DHCP reservation for this server. You don’t want the IP to change on you.
Note 2: Put some thought into the Proxmox hostname you want to use. YOU CAN’T change this later or Proxmox will have serious (likely unrecoverable) problems. I’d use something generic like proxmox1.
12. Triple check everything on the Summary screen is correct then select Install. Make sure Automatically reboot after successful installation is checked.
Proxmox Post Install Configuration
Before we install Home Assistant, we need to do a couple of configuration tasks. First, we need to update Proxmox with the latest packages and optionally install a newer kernel. I’ll show installing the latest 6.2 kernel, which is newer than the 5.x series that is the default. Please note you MUST run the post-configuration script before you do any Proxmox updates or deploy HAOS. If not, you will likely see 401 errors with the enterprise repositories since you don’t have a Proxmox license.
- Open a browser and navigate to the IP address and port 8006 (e.g. https://10.13.2.200:8006). Click through all your browser warnings and connect anyway.
- Login with the root username the password you selected during the install process.
Note: You will get a subscription warning. We will fix that in a second. Acknowledge the warning.
3. In the left pane click on the hostname of your Proxmox server.
4. Click on Shell and paste in the following command to run the awesome tteck post install script:
bash -c "$(wget -qLO - https://github.com/tteck/Proxmox/raw/main/misc/post-pve-install.sh)"

5. The tteck script will ask you a series of questions. Run the script and answer Y to all of the questions. Wait a few minutes for all of the updates to install.

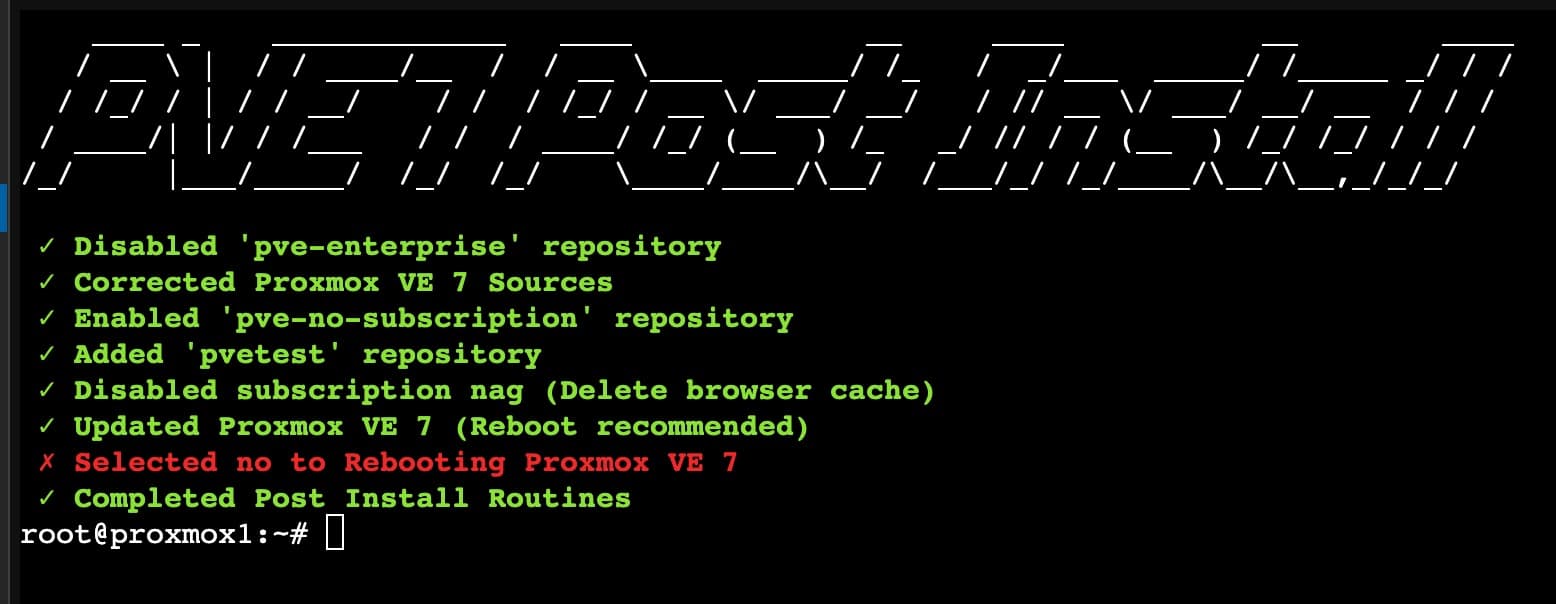
6. When asked if you wish to reboot Proxmox VE 7 press enter on yes.
Linux Kernel 6.2 (Optional)
As of this writing, the Linux Kernel 6.2.x is the latest available for Proxmox. You can stick with the default 5.x, or opt into the 6.2 branch. If you are running on newer processors, like the Intel 12th Generation Alder Lake, I’d use the latest kernel. Depending on when you are reading this, there may be a newer kernel than 6.2.x. Check Proxmox release notes for the latest.
1. Log back into Proxmox, go to the Shell and run the following commands. Press Y to complete the installation.
					apt install pve-kernel-6.2
reboot
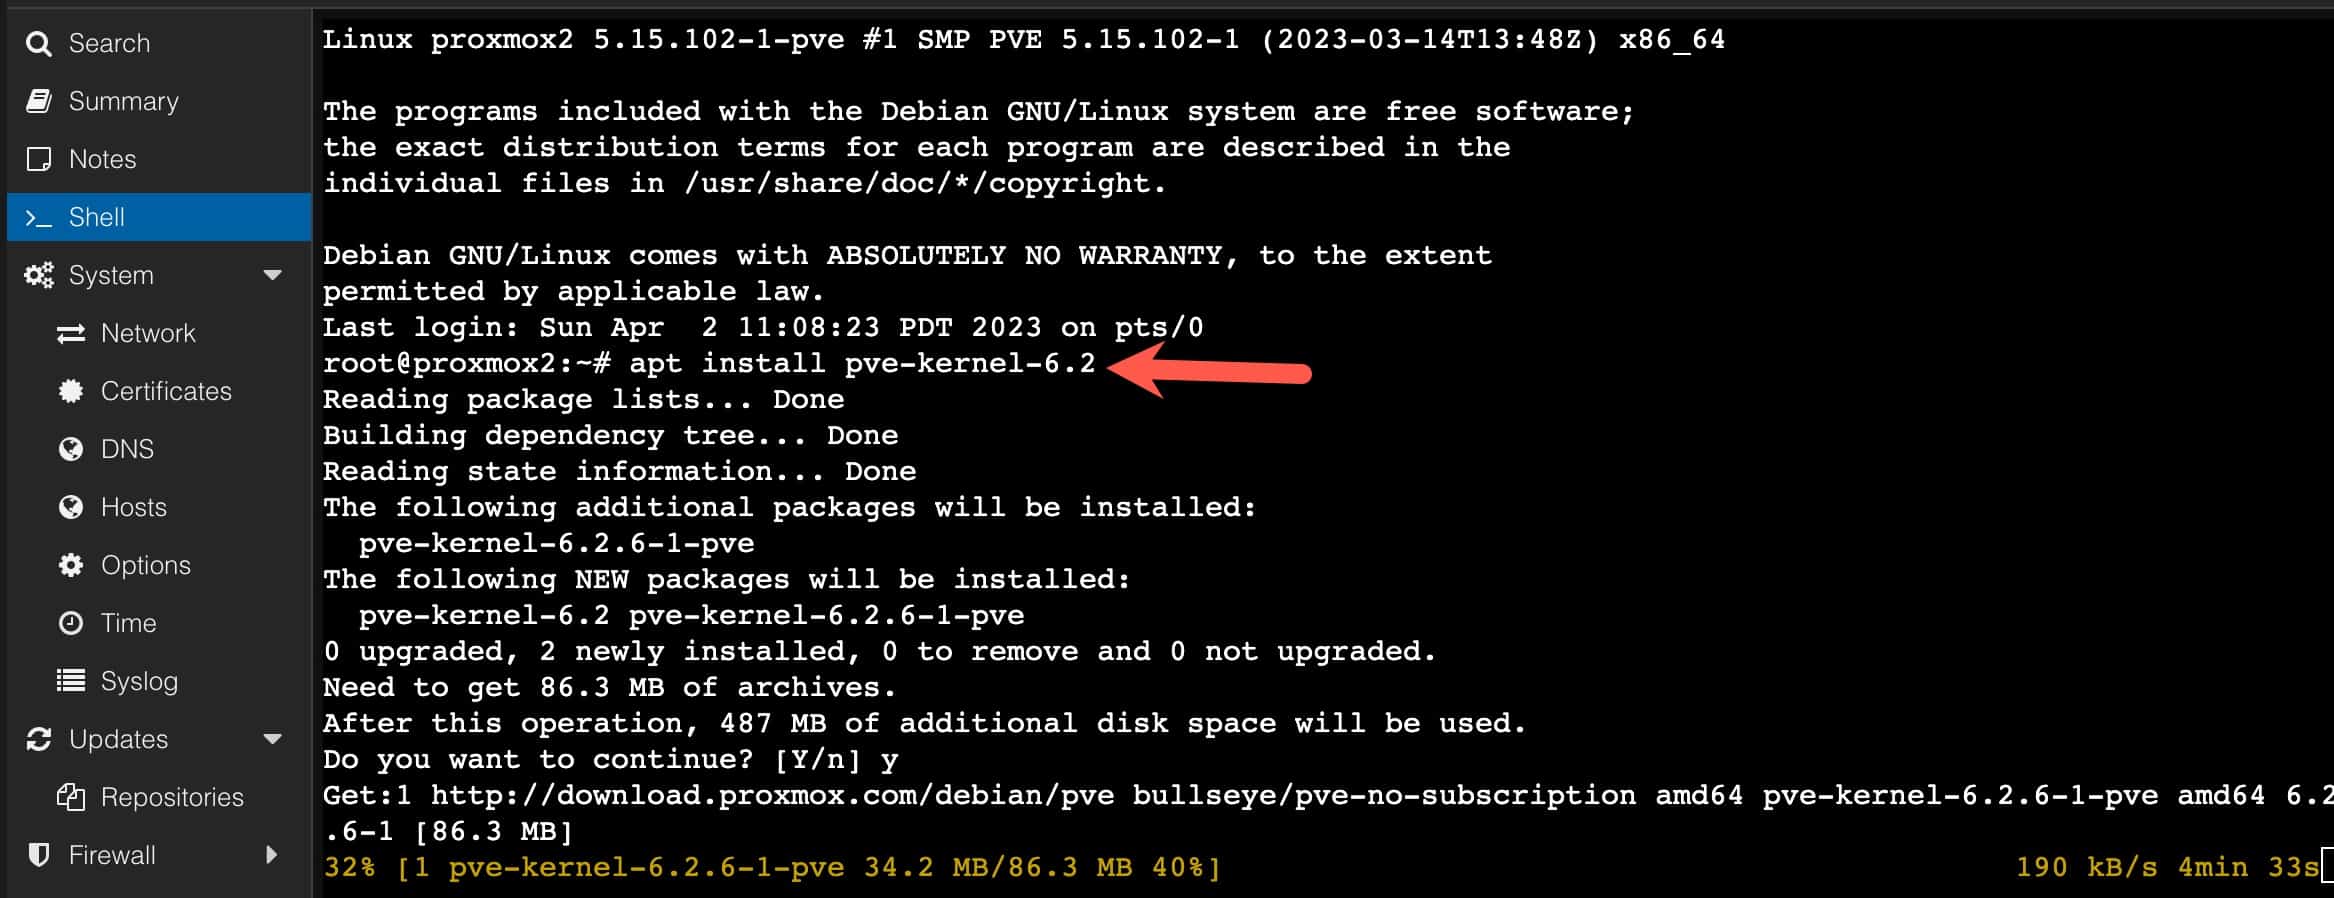
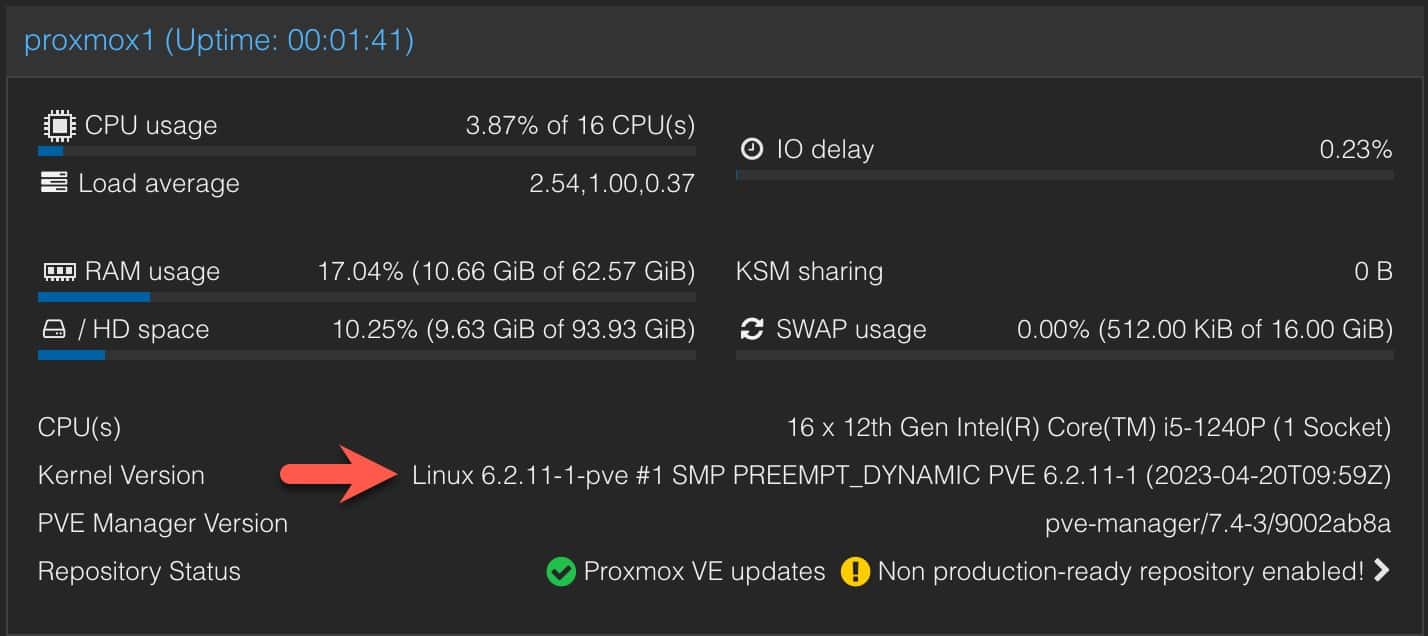
2. Once you see Setting Up pve-kernel-6.2 (7.4-1) … wait a minute or two, then refresh your browser. The reboot is silent and very quick.
Intel Microcode Update (Optional)
Intel releases new microcode for their processors from time to time. This is different from BIOS firmware, as the Intel microcode runs inside the processor. It can fix CPU bugs or make other changes, as needed. If you are running on an Intel system you can use the following tteck script to download the latest Intel microcode and install it. A reboot will be needed for the microcode to take effect.
bash -c "$(wget -qLO - https://github.com/tteck/Proxmox/raw/main/misc/microcode.sh)"
After the Proxmox host reboots you can run the following command to see if any microcode update is active. Not all CPUs need microcode updates, so you may well not see anything listed.
journalctl -k --grep="microcode updated early to"

Installing Home Assistant OS (HAOS) VM
For the HAOS installation we will be using the awesome tteck Proxmox Helper Scripts.
- Login to Proxmox and select your server in the left pane.
- Click on Shell in the middle pane.
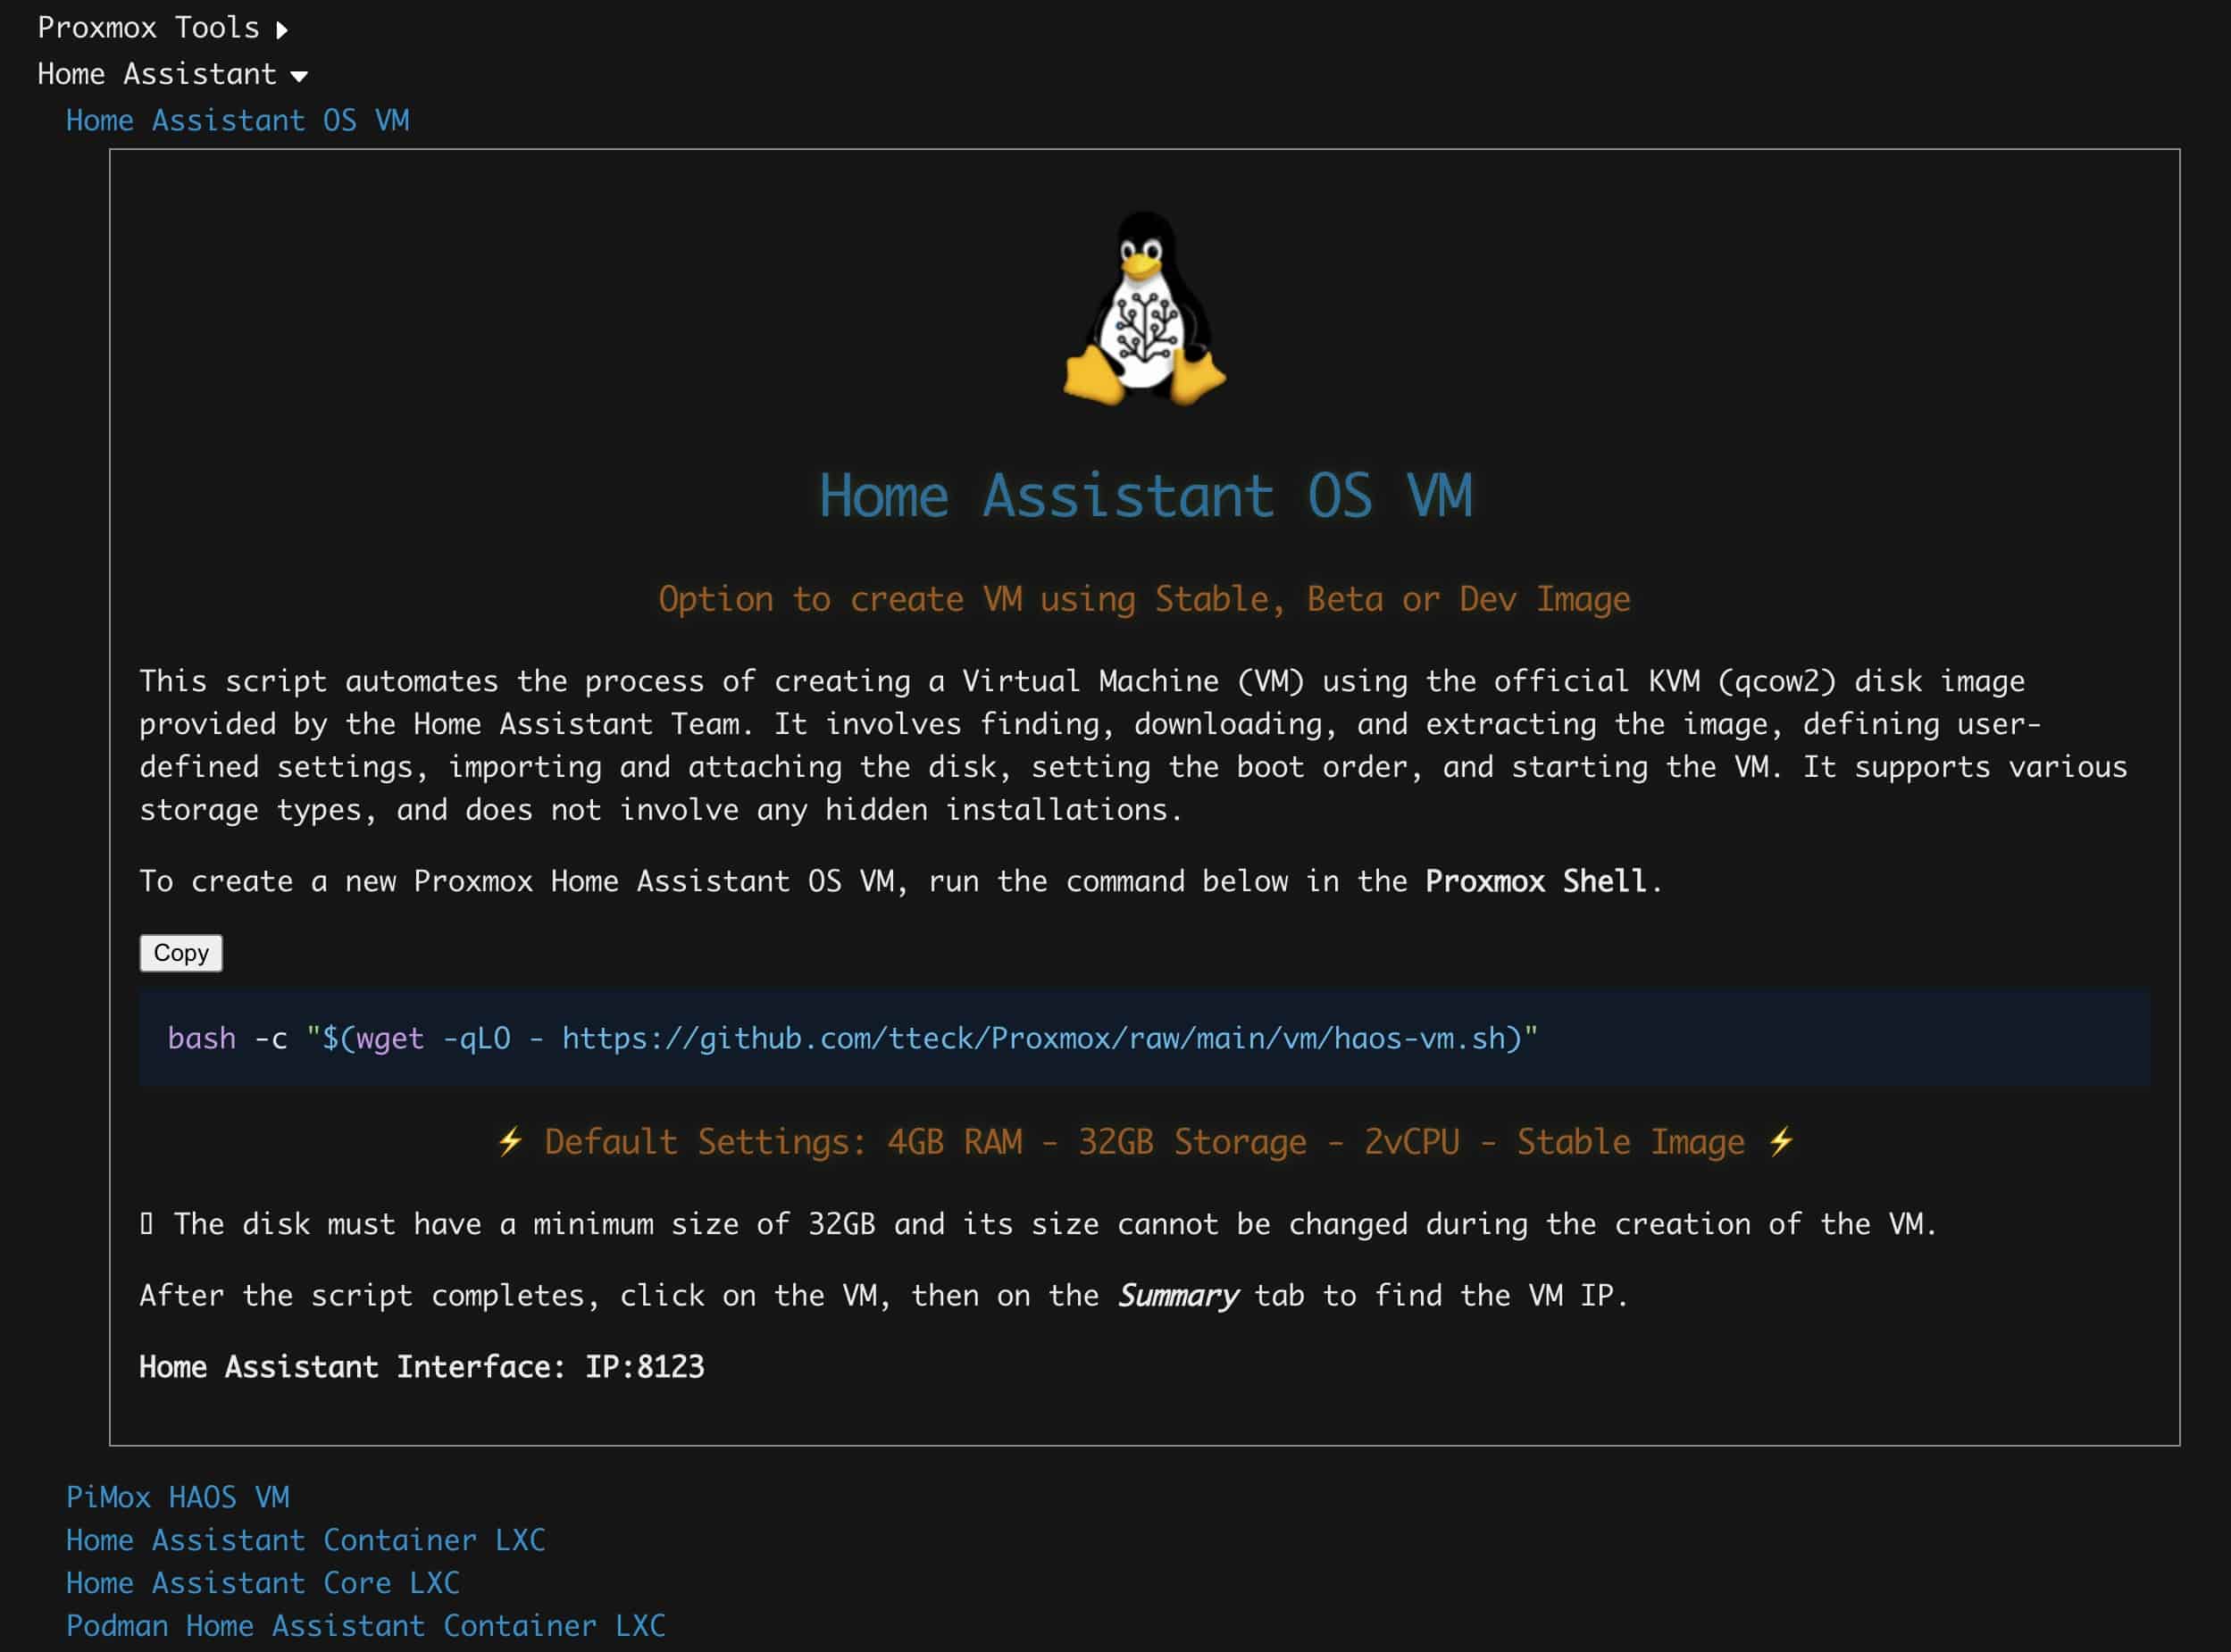
- Enter the following command to start the HAOS install via the tteck Proxmox script.
Note: We will be using the advanced settings to optimize the configuration. The script automatically downloads the latest HAOS stable image, creates the Proxmox VM, and will configure the hardware and networking.
bash -c "$(wget -qLO - https://github.com/tteck/Proxmox/raw/main/vm/haos-vm.sh)"
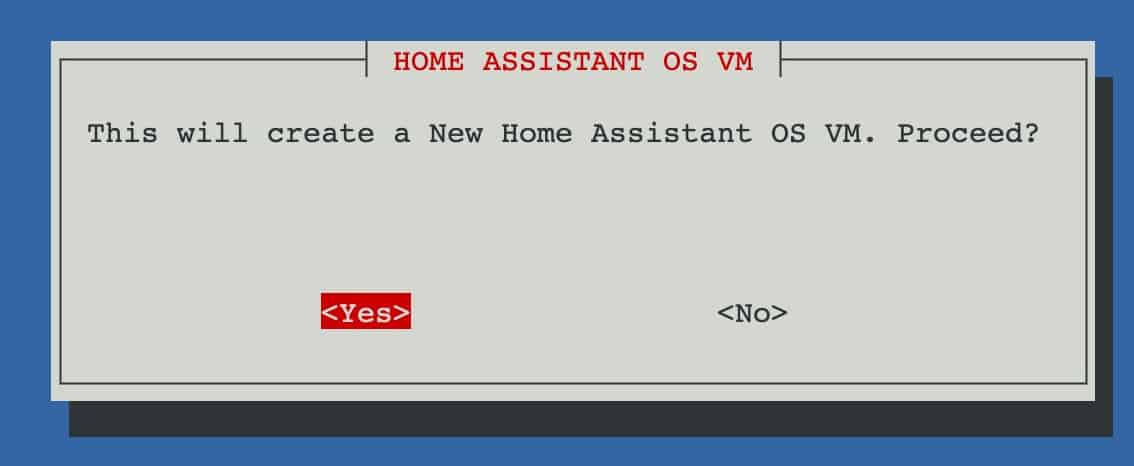
4. Press Enter to proceed.
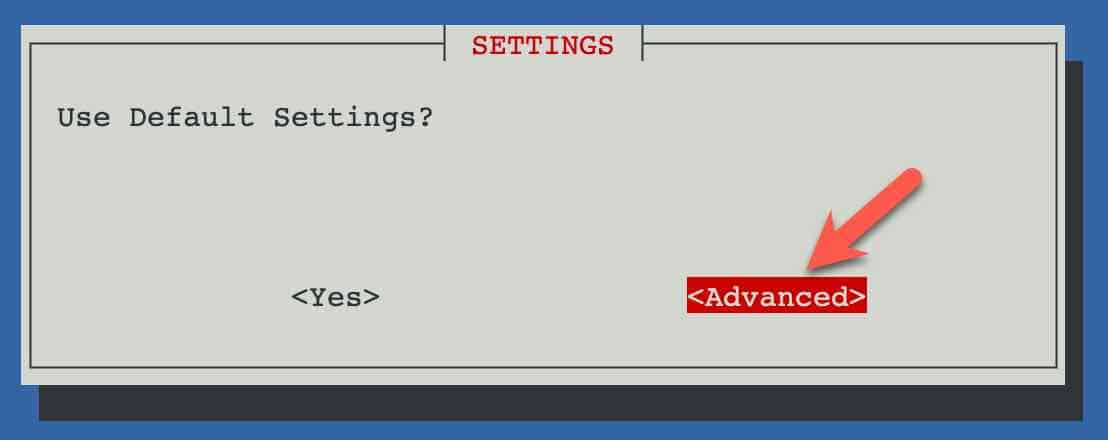
5. Select Advanced (NOT Yes).
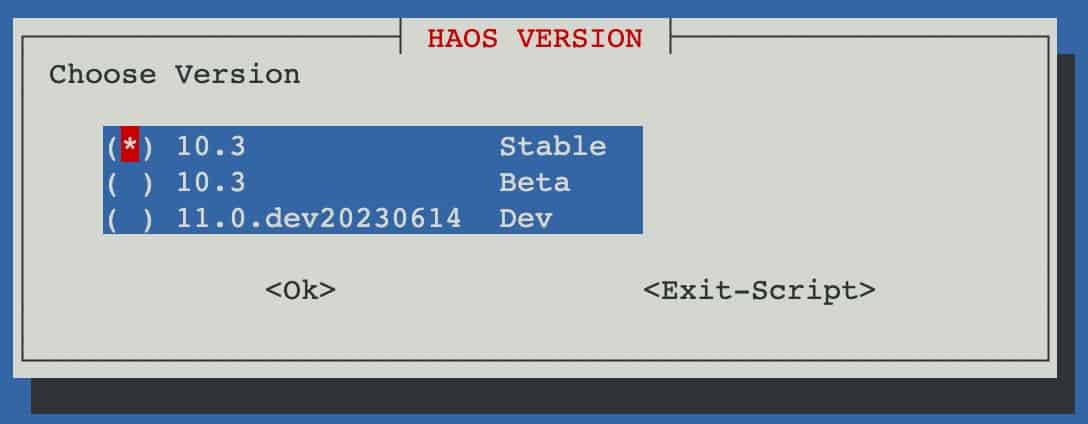
6. For the version chose latest stable version. HAOS is regularly updated, so the screenshot may not reflect what you see.
7. Leave the default Virtual Machine ID.
8. Leave the default Machine Type.
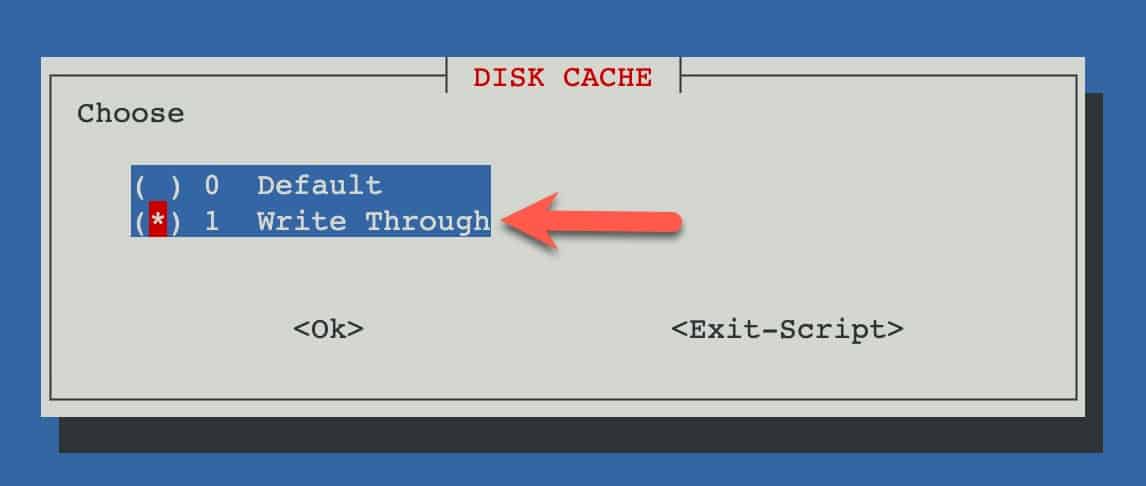
9. Chose the Write Through Disk Cache (SUPER IMPORTANT) (arrow down then press space and then tab to ok).
Explanation: If you leave this as Default (which is “none” within Proxmox) then the HAOS filesystem or database(s) within HAOS can be corrupted during unexpected power loss to your server. Write through causes an fsync for each write. It’s the more secure cache mode, as you can’t lose data but it is also slower. In fact, Proxmox documentation gives you a warning for “None” (which is the Default): Warning: like writeback, you can lose data in case of a power failure.
10. Set the VM’s Hostname.
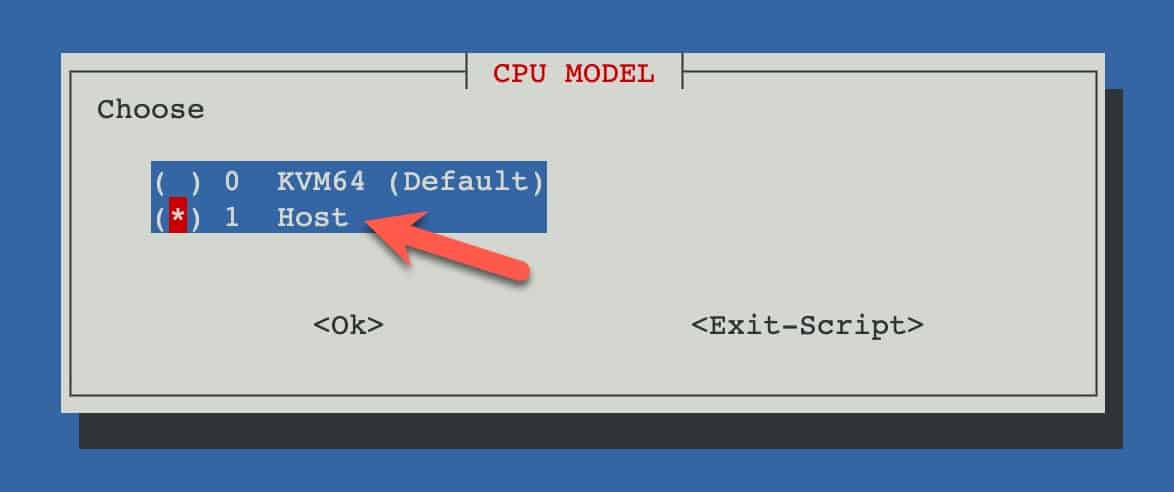
11. Change CPU Model to Host.
Explanation: If you have a standalone Proxmox host (i.e. no multi-node clustering with Live Migration), use Host mode for the CPU Model. The KVM64 model hides some instructions such as MMX, AVX or AES instructions. This can have a performance impact on the VM. Per QEMU documentation: This [Host mode] passes the host CPU model features, model, stepping, exactly to the guest. This is the recommended CPU to use, provided live migration is not required.
12. Chose your Core Count (2 is fine).
13. Chose your RAM (I’d recommend 4-6GB).
14. Leave the Bridge.
15. Leave the MAC Address.
16. Leave the VLAN.
17. Leave the MTU Size.
18. Select Yes to start VM after creation.
19. Select Yes on Advanced Settings Complete.
20. Select the storage (press the space bar on the desired selection then tab to Ok).
Note: I STRONGLY urge you to use local Proxmox storage (e.g., local-lvm), not storage backed by a NAS. If there’s a network hiccup or the NAS goes offline you could easily end up with a corrupted VM.
21. Wait for the installer to complete. This will take a few minutes.
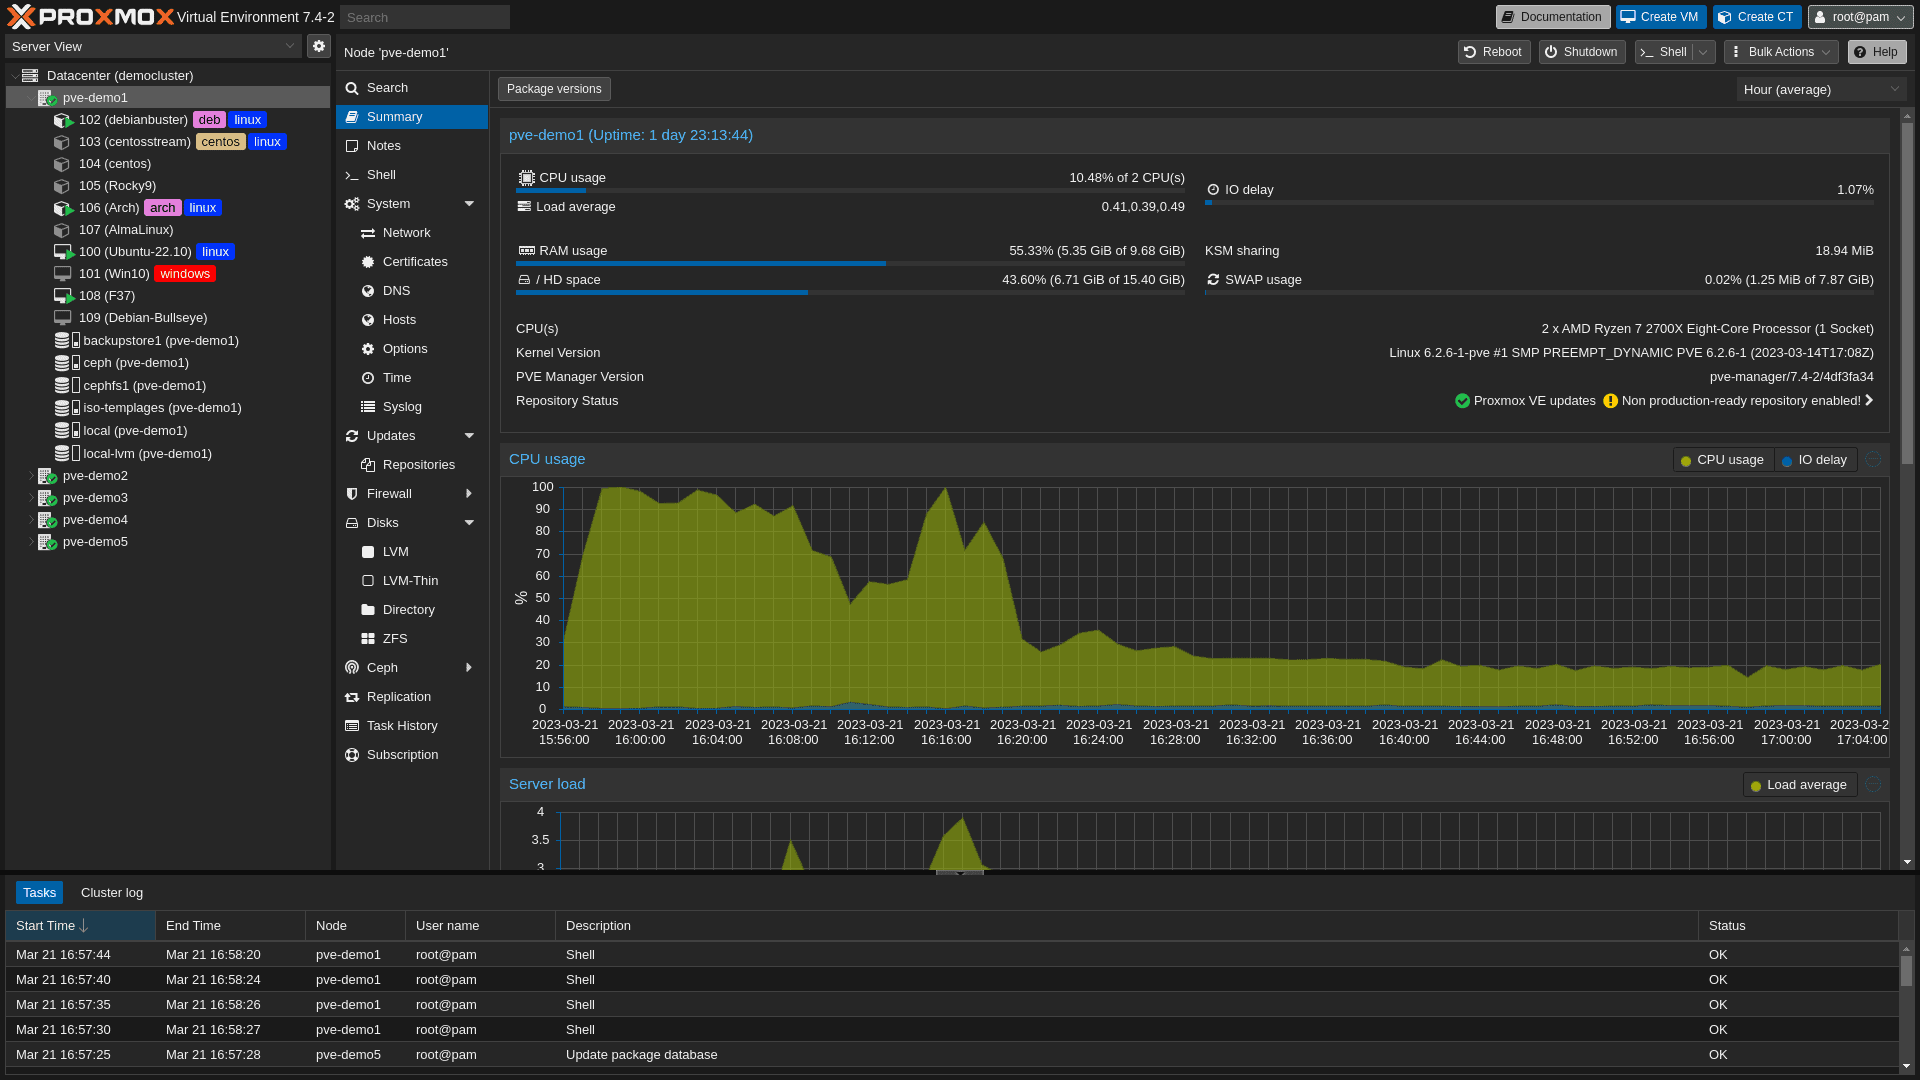
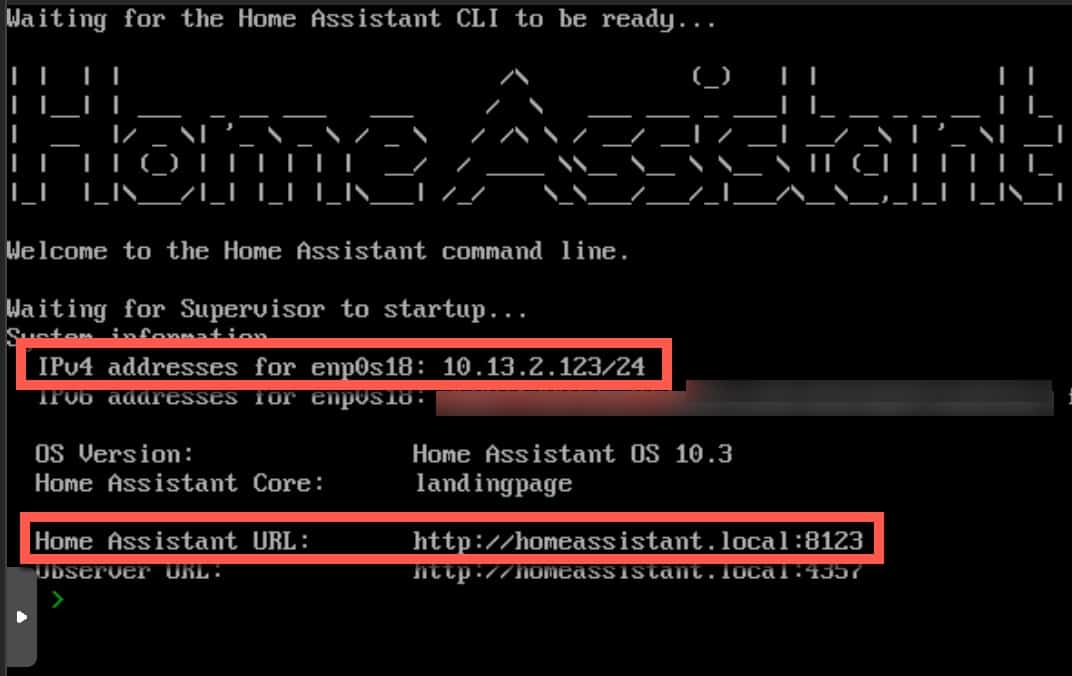
22. Once the VM is created, click on it in the left pane and then select console in the middle pane. Note the IP address and port number (8123) (see image below).
23. Open a browser and open a HTTP connection (http://IP:8123).
24. Depending on the speed of your server, you may see a Preparing Home Assistant screen for several minutes. Wait until you see Create Account screen.
25. On the Home Assistant account screen enter your name, username and password.
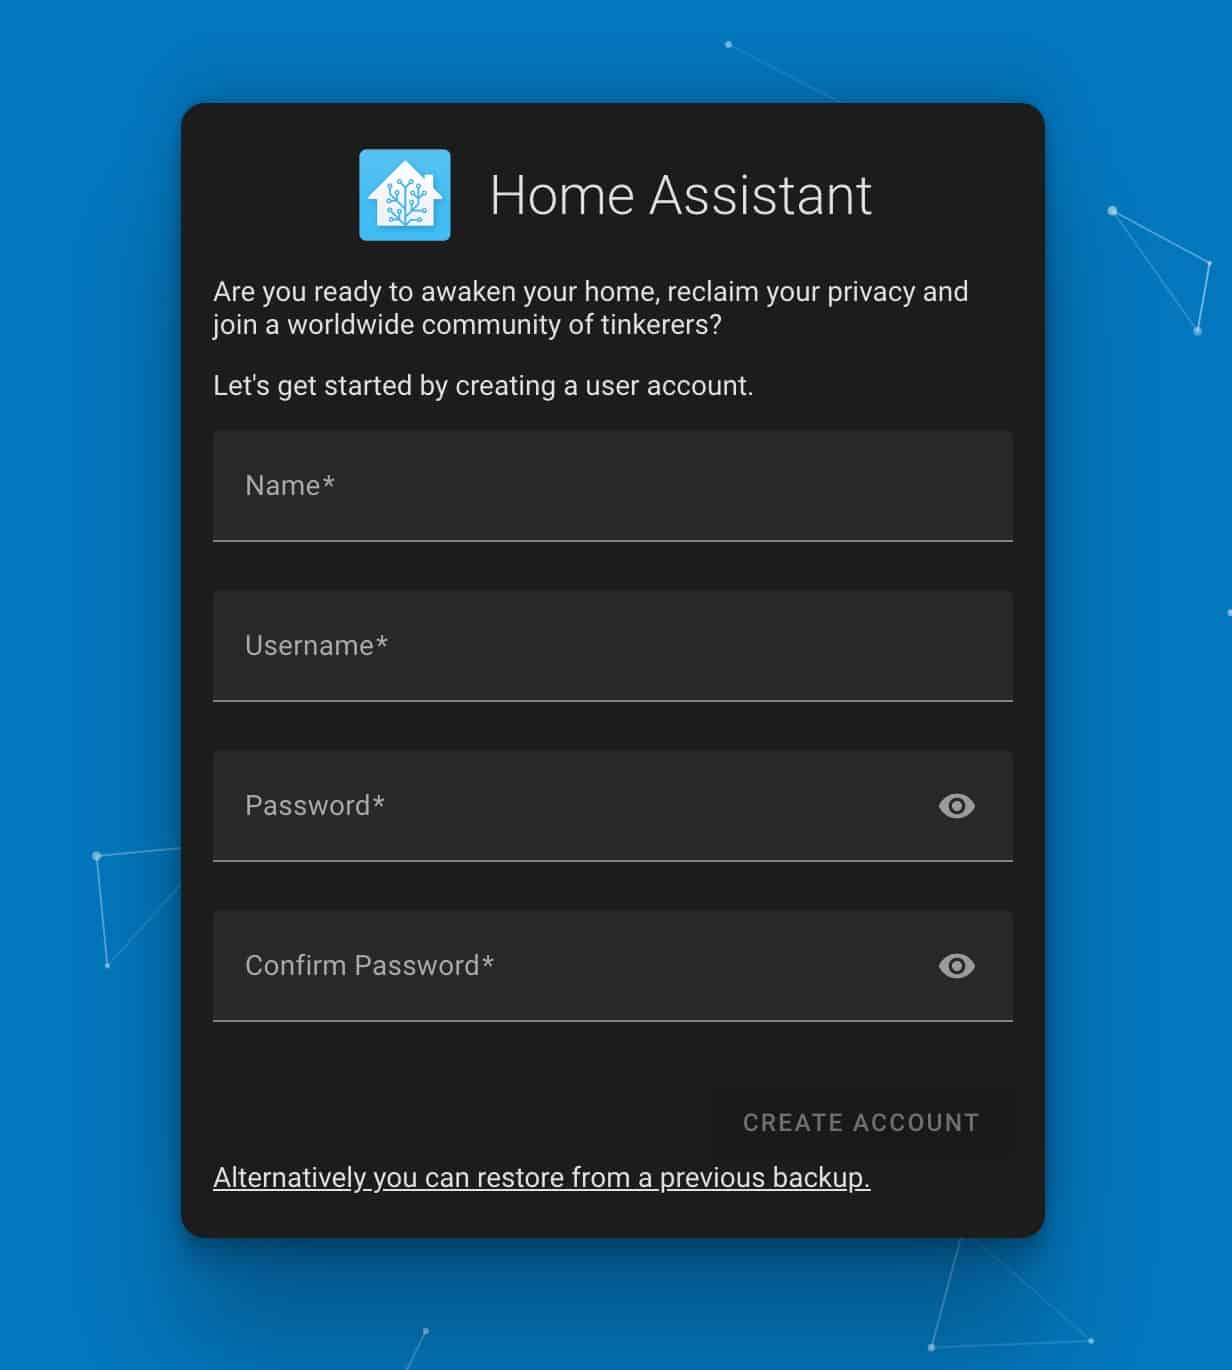
26. On the HA setup screen enter your name, username and password.
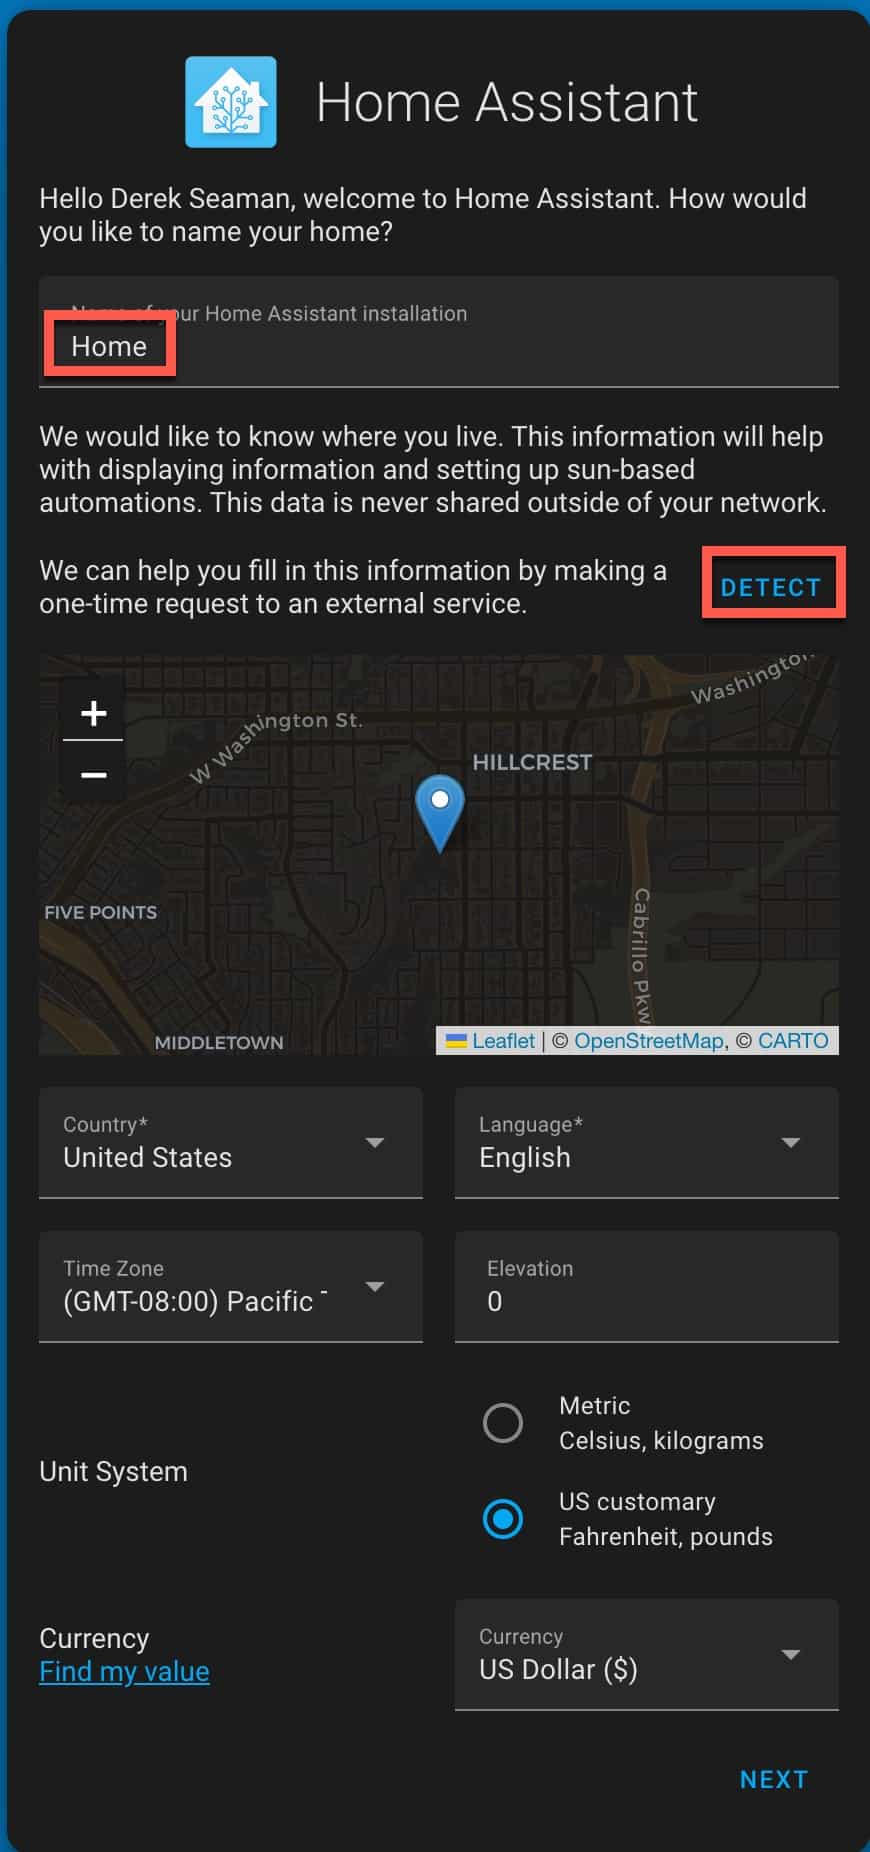
27. On the next screen click detect. The map should move to your approximate location. Use the +/1 and drag the map around until you locate your house. Getting this right is important for automations that depend on HA detecting if you are home or not.
28. Fill in the country, language, timezone, elevation and currency.
30. Click Next.
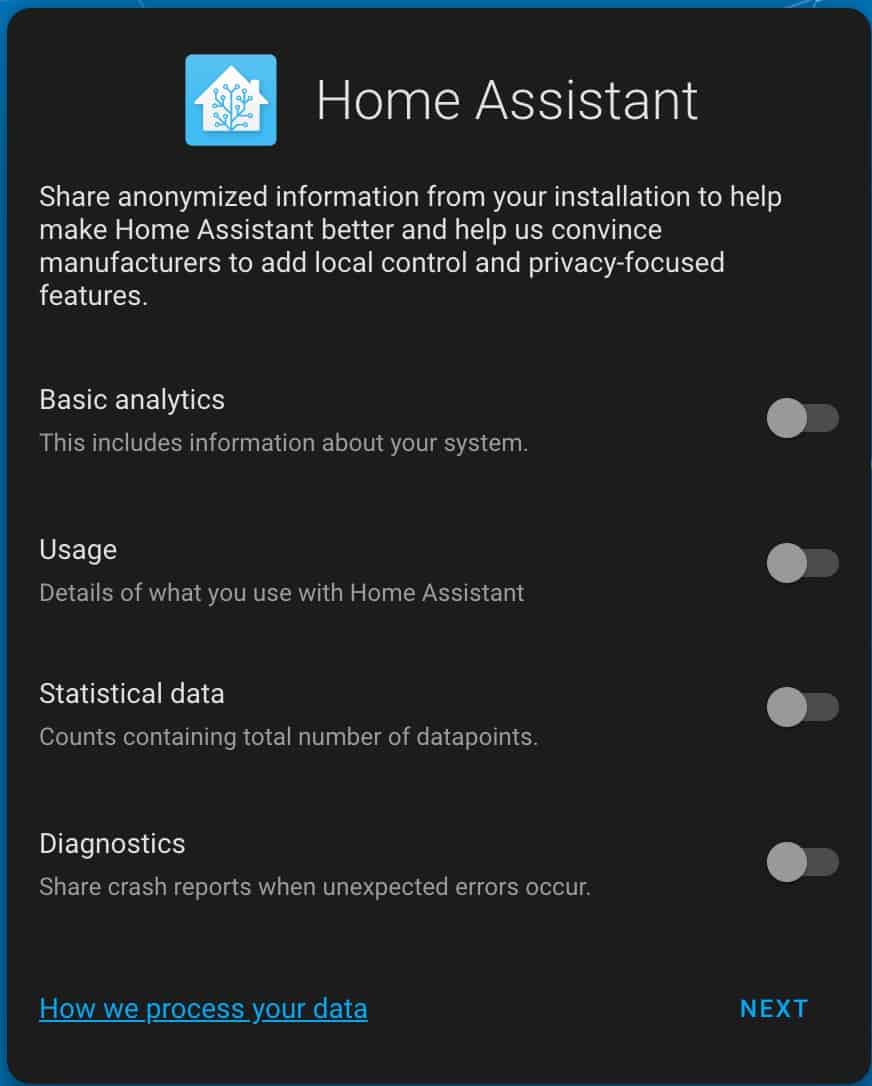
31. Select what, if any, analytics you went to send back to the Home Assistant mother ship. Click Next.
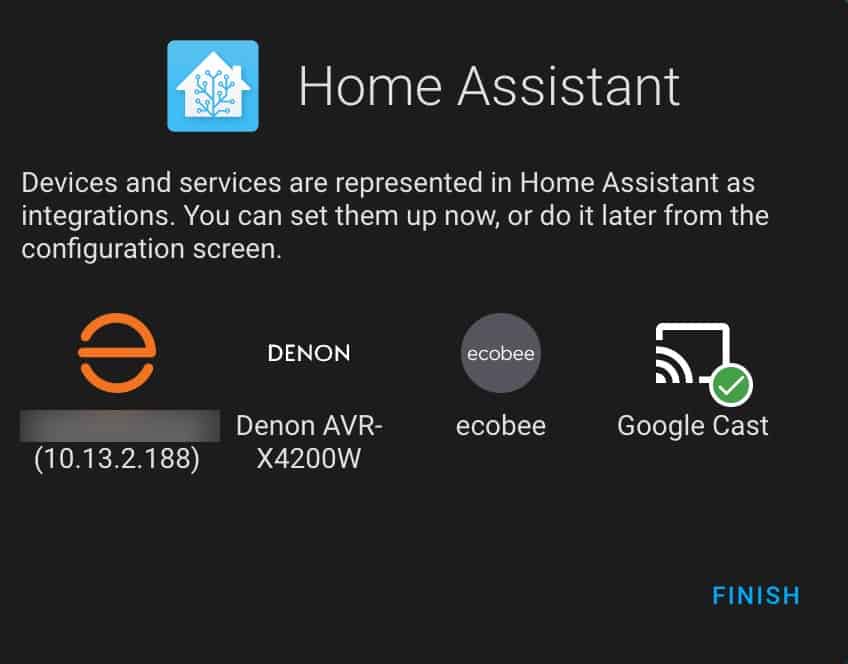
32. On the next screen HA will show you all of the devices and services that it found on your network. Do NOT set any of them up here. Just click Finish.
Setting Static IP Address (Recommended)
I would strongly recommend that HAOS be configured to use a static IP address. You can do this by either a DHCP reservation in your router, or set a static IP in the Home Assistant user interface.
- In the left pane click on Settings -> System -> Network. Click on IPv4.
- Change to Static and enter the details.
- Change the address you are connecting to in your bowser and verify HA is using the new IP.
Blocked DNS over HTTPS Workaround
If you are blocking OUTBOUND DNS over HTTPS, then you might run into a HA bug where HA floods your firewall with MILLIONS of DNS queries indefinitely. In order to work around this bug, we will install the SSH add-on and then modify the HA DNS configuration.
- Click on your name in the lower left panel.
- In the right pane enable Advanced Mode.
- Click on Settings in the left pane, then Add-ons.
- Click on Add-on store in the lower right
- Search for “ssh” and select the Advanced SSH & Web Terminal. Click on it.
- Click Install.
- After it installs, click on Show in sidebar.
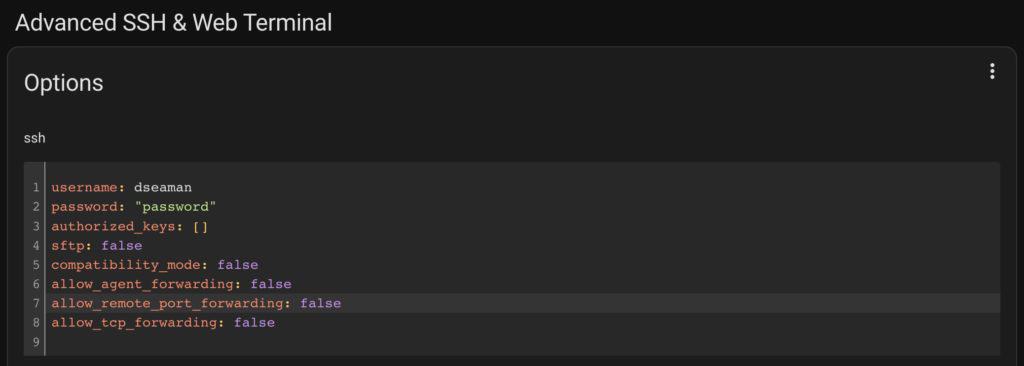
- Click on Configuration at the top of the screen.
- Enter the username and password that you configured on the initial HA setup screen. Click on Save.
10. Click on the Info tab at the top left of the screen.
11. Click on Start.
12. In the left pane in HA click on Terminal.
13. Run the following two commands:
					ha dns options --fallback=false
ha dns restart
14. Re-enable the DoH block rule on your firewall.
15. Monitor your network to verify your firewall is not being flooded with DNS requests.
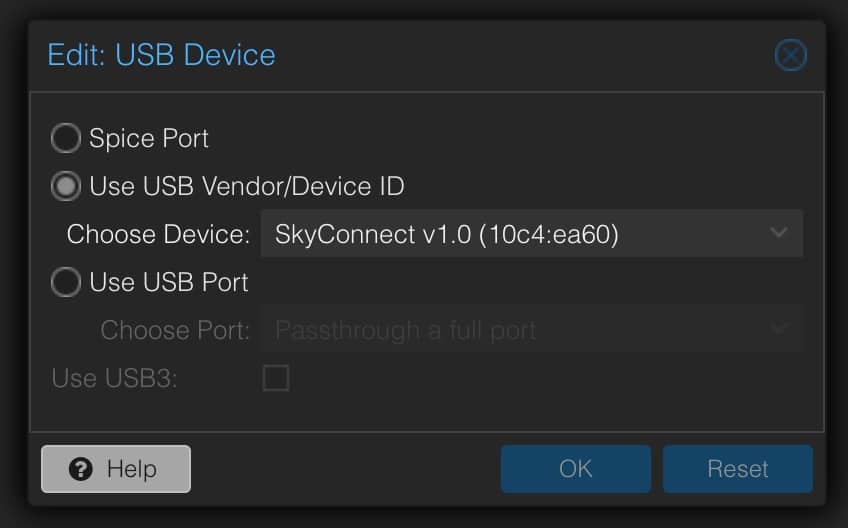
USB Passthrough to HAOS (Optional)
If you have any USB dongles for radios such as z-wave, Zigbee, Thread, etc, we need to pass it through to the HAOS VM. This is optional, and not needed if you have no USB devices to passthrough. I am using the Home Assistant SkyConnect Zigbee/Thread/Matter USB dongle.
- Connect your USB dongle to your server.
- In the left pane click on your HAOS VM.
- In the middle pane click Hardware.
- Click on Add then USB Device.
- Select Use USB Vendor/Device ID.
- Chose the USB device to passthrough.
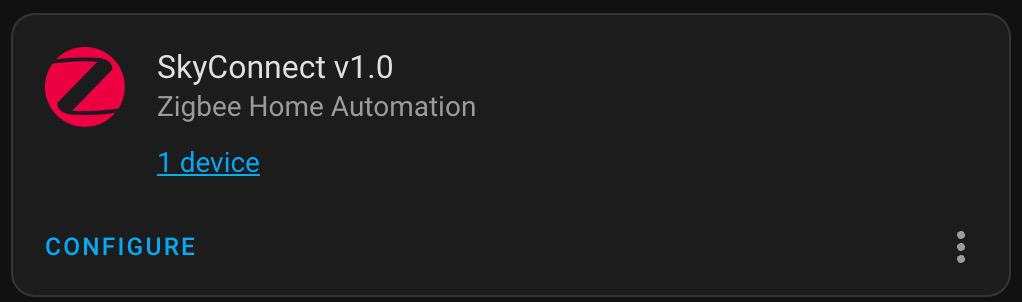
7. In the upper right hand corner of the VM pane click on the down arrow next to Shutdown and select Reboot.
8. Home Assistant will auto-discover the dongle after the reboot.
Optimize CPU Power (Optional)
Depending on your server hardware and how concerned you are about power consumption, you might want to tweak how Proxmox handles CPU scaling. I have a 12th Generation Alder Lake CPU (i5-1235U), which idles at 8w-9w according to a smart power plug.
Processors have different power governors, so run this command to see which ones are available to you:
cat /sys/devices/system/cpu/cpu0/cpufreq/scaling_available_governors

My processor lists performance and powersave options. Run the following commands to set the mode to powersave permanently. Change the GOVERNOR setting as needed for your processor and desired power mode.
					apt install cpufrequtils

cat << 'EOF' > /etc/default/cpufrequtils
GOVERNOR="powersave"
EOF
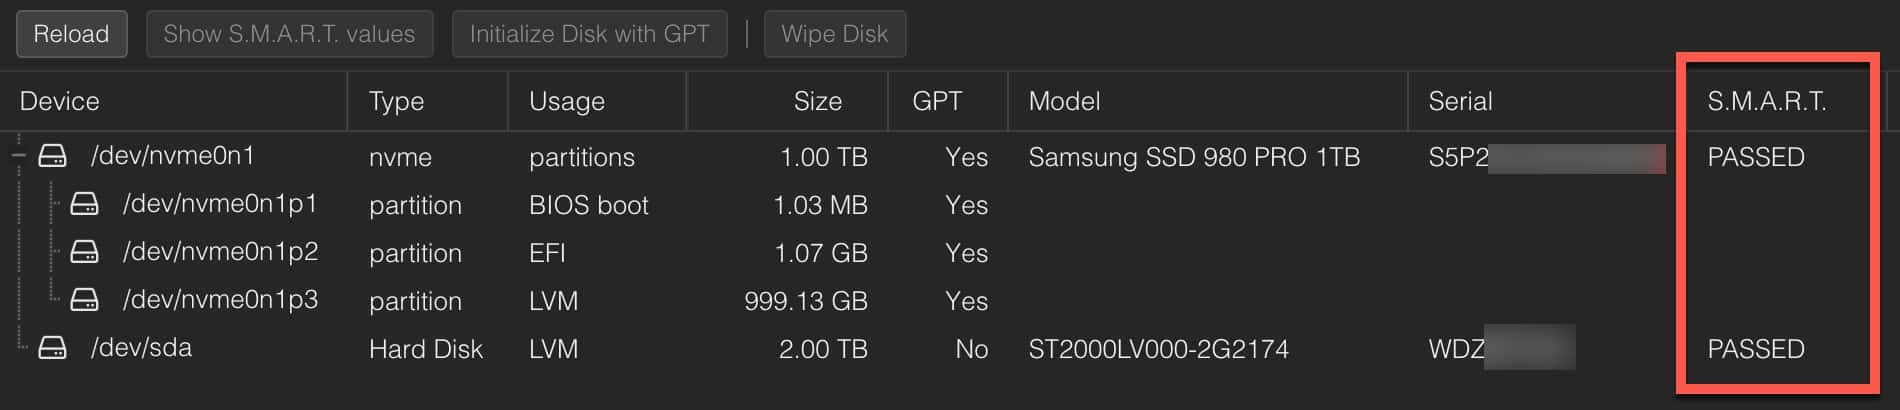
Check SMART Monitoring (Optional)
Proxmox should enable SMART disk monitoring by default. But it’s a good idea to check the SMART health stats to make sure your media isn’t having any issues. On rare occasions a motherboard may not support SMART, so it’s always best to check that it is working.
Check SMART Health:
- In the left pane change to Server View. Click on your Proxmox host.
- In the middle pane click on Disks.
- In the right pane you should see your disk(s) and SMART status. You can click on the main disk device then click Show SMART values to further inspect the health.
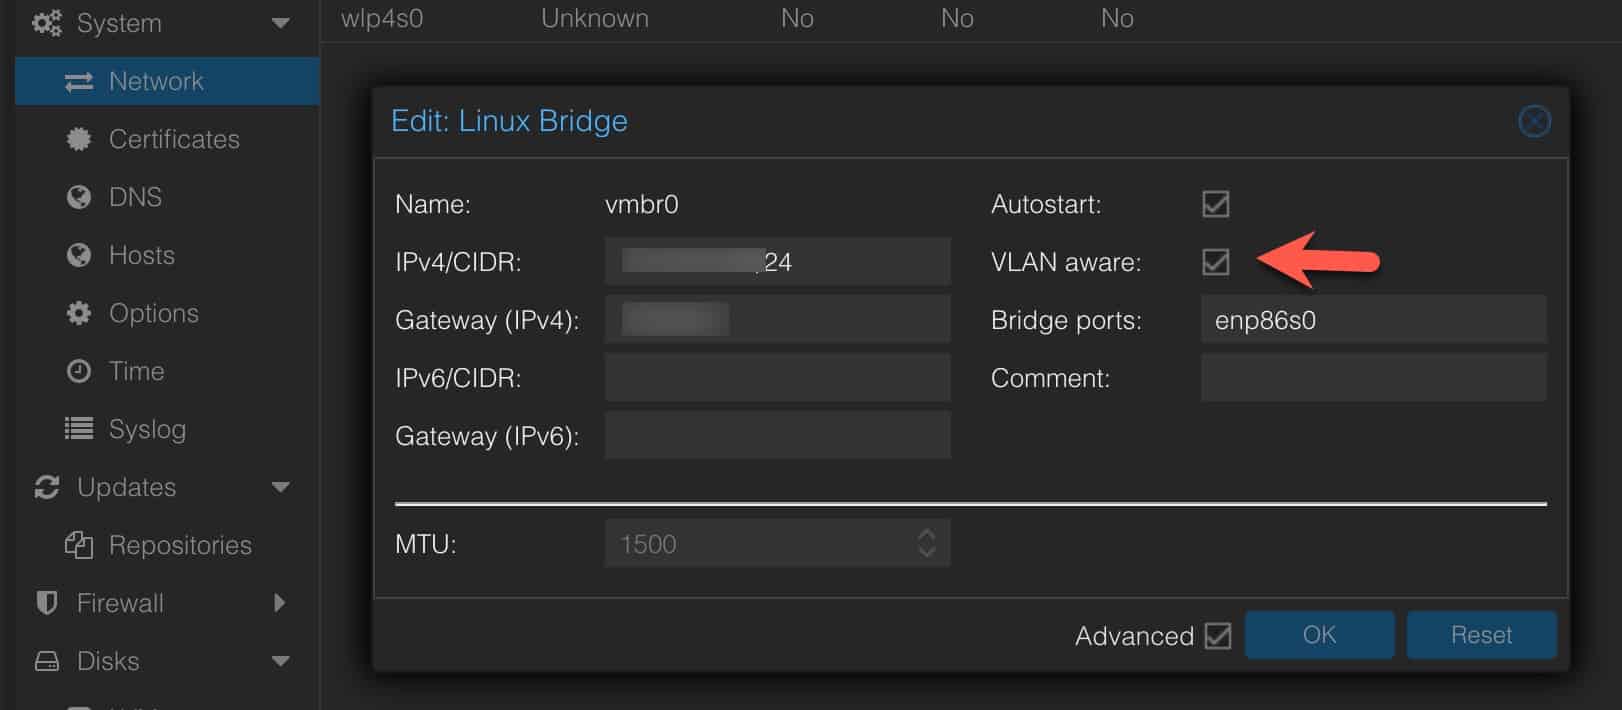
VLAN Enable Proxmox (Optional)
Out of the box Proxmox is not VLAN aware. Even if you don’t need VLANs right now, you can still enable a check box to make Proxmox VLAN aware. Then down the road when you want to setup VLANs, it’s one less thing to remember to do and VLANs will just work.
To enable VLANs:
- In the left pane change to Server View. Click on your Proxmox host.
- In the middle pane click on Network (under system).
- Click on Linux Bridge (vmbr0). Click on Edit.
- Tick the box next to VLAN aware and click OK.
Proxmox Let's Encrypt SSL Cert (Optional)
If you want to secure Proxmox with a trusted SSL certificate and even add Proxmox as an iFrame to Home Assistant follow my post Proxmox Let’s Encrypt SSL: The Easy Button
Summary
You now have Home Assistant OS (HAOS) running on Proxmox! The whole process is pretty easy and with the tteck scripts, makes creating the HAOS VM a snap. Tteck has a bunch of other Proxmox scripts to setup a variety of VMs and LXC containers.
I personally use his InfluxDB LXC (use v1), Grafana LXC, Scrypted LXC, and Heimdall LXC. If you want to use MariaDB with Home Assistant, I would personally install that inside the HAOS VM as an add-on vs. an external LXC container.


Thank you, worked perfectly on my new NUC
Planning on using a single m.2 500gb drive for everything on my proxmox server and implement a robust backup method. My question is … I see the local disk doesn’t take all space … from 500gb only 100 is available so I expanded this disk …. are there any downsides to this ?
I have a 500GB M.2 drive in my Proxmox server, and doing a default install it did use all of that 500GB. Look at LVM-thin and you might see all of your disk space.
Wow this write up is fantastic and works great! Thank you!
GREAT writeup. I was only looking for the 6.2 kernel install howto. I couldn’t find the part about the repository change elsewhere.
It worked, I installed proxmox 7.4 then installed the 6.2 kernel.
I do have a question. A day later I look at the updates section and it mentions an update to the 5.15 kernel. If I run the update, will it switch back to 5.15 kernel again? I thought updates would automatically get newer 6.2 kernels ?
Thanks.
After I installed the 6.2 kernel and rebooted, all future VE updates kept the 6.2 and even did minor updates to 6.2.
Proxmox VE 8.0 is now out, which defaults to the 6.2 kernel.
Im trying to setup igpu passthough on my new beelink sei12pro i7 1260p.
How did you get it to work ?
When I check this page: https://pve.proxmox.com/wiki/PCI_Passthrough#Introduction
root@beelinksei12:~# dmesg | grep -e DMAR -e IOMMU
[ 0.554434] pci 0000:00:02.0: DMAR: Skip IOMMU disabling for graphics
root@beelinksei12:~# dmesg | grep ‘remapping’
[ 0.108849] x2apic: IRQ remapping doesn’t support X2APIC mode
root@beelinksei12:~#
I applied:
Then rebooted. Still shows the same.
Which isn’t looking good…..?
Installed the 6.2 kernel.
Not sure what else to do?
I’ve never run Windows in a VM on Proxmox, so I can’t really comment on the process. Sorry.
I just spent today getting iGPU (SRVIO for Intel GPU) working on my N100 (12th gen) Proxmox 8 host with Windows 11 VM. I was successful! I’m writing up a post on how to do it. Will validate on my i5-1240P host when I have time.
That’s VERY VERY much appreciated !!!!
I noticed proxmox 8 just came out.