If you have a Synology NAS and want to use it with Proxmox Backup Server (PBS), you have two primary options for your datastore: NFS or an iSCSI LUN. If you want to use NFS storage, check out my previous article: How To: Setup Synology NFS for Proxmox Backup Server Datastore . However, the NFS datastore can be finicky and does not always have the best performance. I have now migrated all of my PBS datastores to use iSCSI LUNs. This article walks you through the entire process.
If you don’t have a Synology NAS, but have another NAS that supports sharing of iSCSI LUNs, 95% of the process will be the same. For reference I’m using DSM 7.2.2 and Proxmox Backup Server 4.0. However, this is a pretty generic configuration, so it should work across versions.
Warning:This procedure ONLY works if Proxmox Backup Server is running as a VM (or bare metal). It does NOT work if PBS is a LXC. Mounting LUNs in an LXC is very complex and error prone and I do NOT recommend it.
Related Synology Posts
As part of my Proxmox Backup Server 4.0 and Proxmox VE 9.0 series, check out these related posts:
Login to your Synology and open the SAN Manager application.
On the left click on iSCSI, then Create.
Give the iSCSI target a description a name then click Next.
Click Next on Create a new LUN.
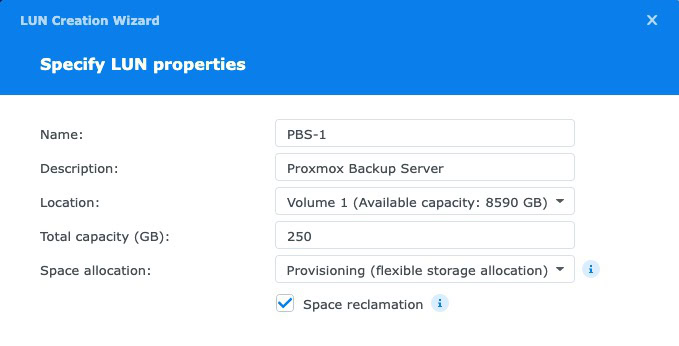
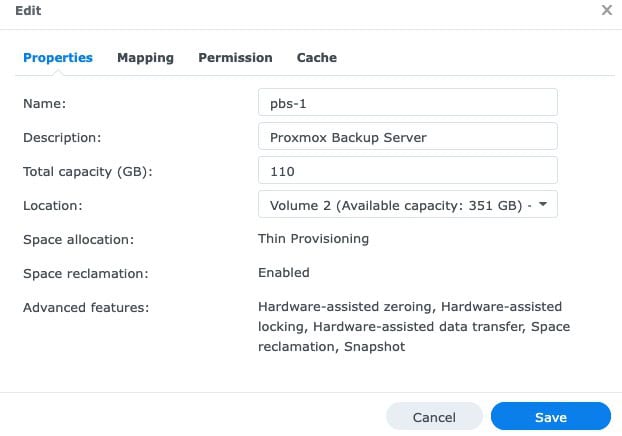
Enter a LUN name, description, location, and size. Select Thin Provisioning, and check the Space reclamation box.
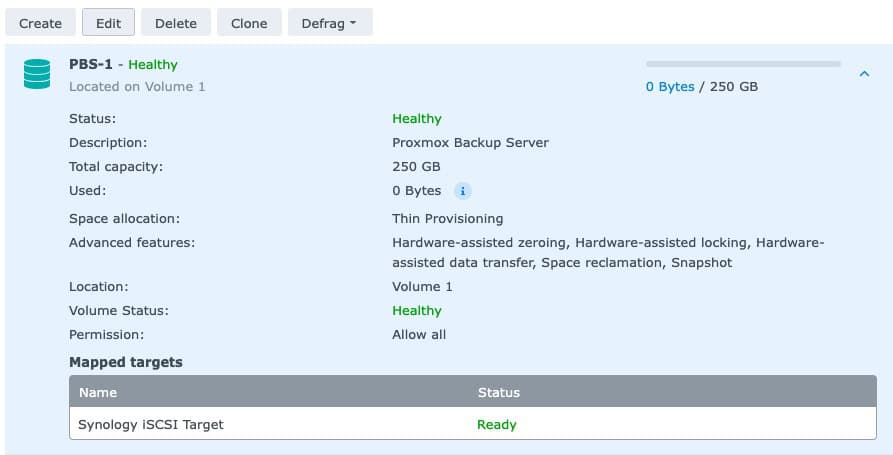
6. Click Next then click Done. 7. On the left click on LUN. Edit the LUN, click on the Cache tab, and check the FUA/Sync box. Click Save.
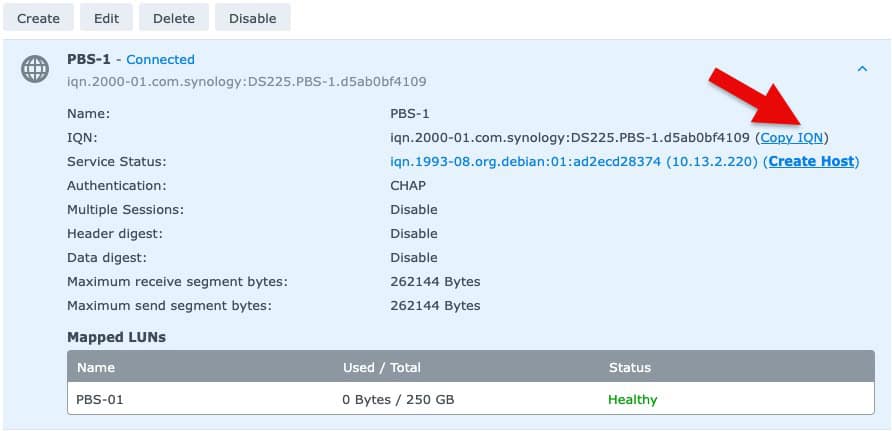
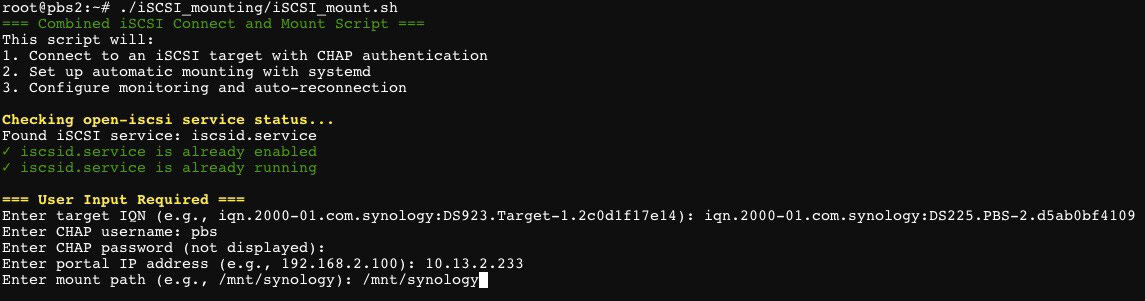
8. Click on iSCSI in the left pane. 9. Select the iSCSI target and click Edit. 10. On the General tab enable CHAP. 11. Enter a username and password (MUST be 12-16 characters). 12. Click Save. 13. While still in the iSCSI pane, click on Copy IQN to put it on your clipboard.
Install Open iSCSI
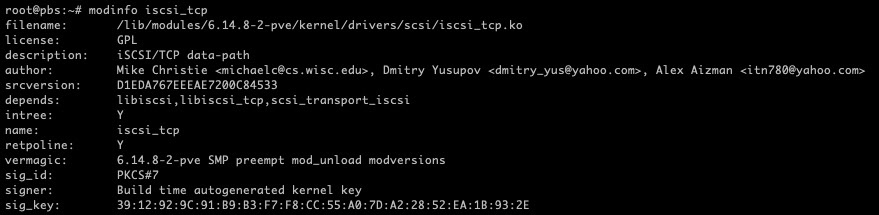
1. Open a shell via the GUI or SSH into your Proxmox Backup server VM. Run all three blocks of commands below.
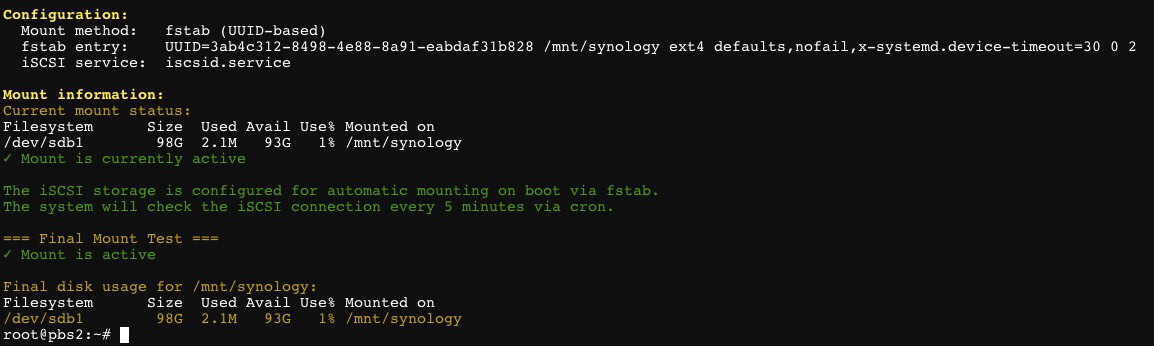
18. Reboot the PBS server, login, and verify the new datastore is online.
Extending the LUN
LUNs are a fixed size, so if your backup datastore gets low on space, you will need to either prune your backups more deeply, or extend the LUN. Here’s the procedure to do an on-line LUN extension:
Login to your Synology, open SAN Manager.
In the left pane click on LUN.
Locate your PBS LUN, click on Edit, then enter the new size.
Click Save.
5. Open a PBS shell and run the following commands. Enter the letter of the drive that needs to be expanded (e.g. for sdb, enter ‘b’). Do NOT enter the partition (e.g. sdb1).
lsblk -o NAME,TYPE,SIZE,FSTYPE,MOUNTPOINT
read -p "Enter the disk letter (e.g. b, c): " x && apt update && apt install -y cloud-guest-utils && echo 1 > /sys/block/sd${x}/device/rescan && growpart /dev/sd${x} 1 && resize2fs /dev/sd${x}1 && fdisk -l /dev/sd${x}
2. Very the LUN has expanded to the new size:
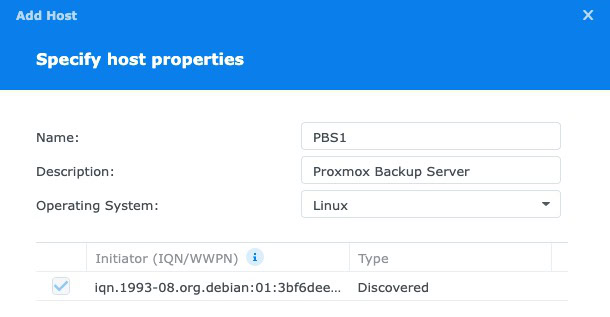
Create Synology Host
Once your Proxmox backup server has logged into the iSCSI portal and mounted the LUN, we can create a Synology “host”.
Login to your Synology and open the SAN Manager.
Click on iSCSI and find your PBS LUN.
Click on Create Host.
4. Click on Start. 5. Enter a host name, description, and change the OS to Linux. 6. Click Next on the permissions screen. 7. Click Done.
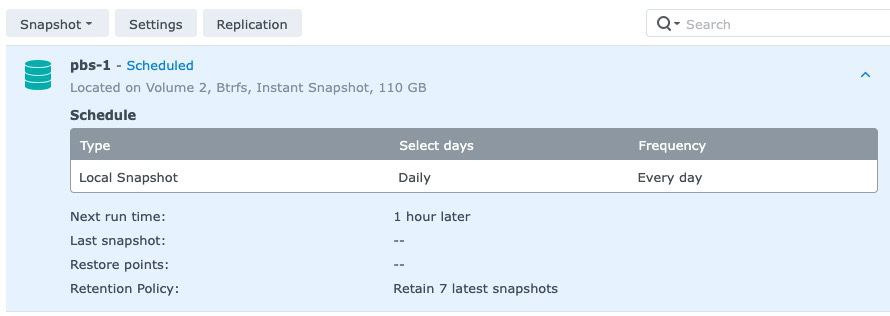
Synology LUN Snapshots
If you want periodic snapshots taken of your LUN, click on Snapshot in the left pane.
Click on Settings.
Tick the Enable box.
Setup the schedule as desired. If your Synology supports immutable snapshots, you can also enable them here too.
Click on Retention.
Select the retention policy that meets your needs.
Click OK.
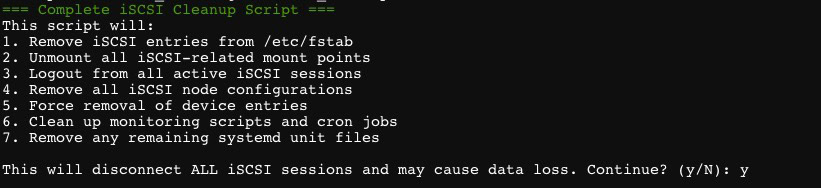
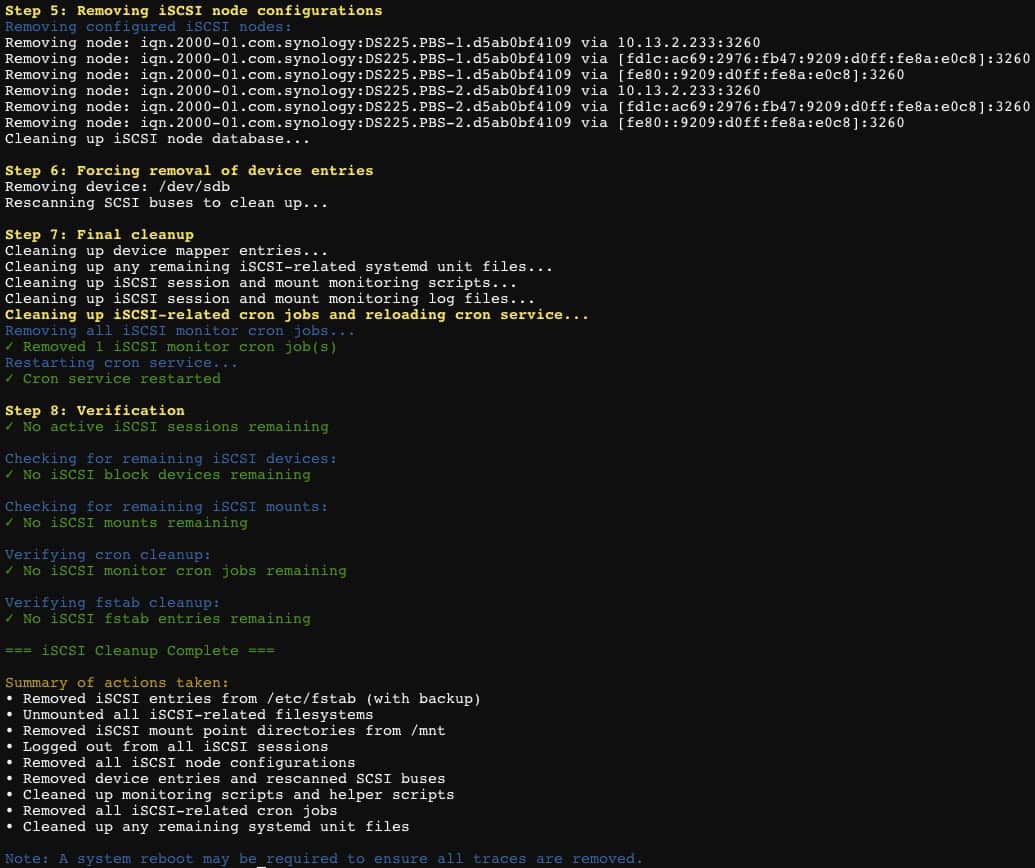
iSCSI Cleanup
In the event you want to completely remove your iSCSI LUN and all related configuration changes, you can execute my cleanup script. Reboot after the script runs to ensure a clean system.
./iSCSI_mounting/iSCSI_cleanup.sh
Summary
Configuring an iSCSI LUN on your Synology NAS for use by Proxmox Backup Server 4.0 is a reliable way to store backup data. This method does not introduce any of the nuances of directory/file permissions and ownership that using a NFS mount can run into. The LUN can also be easily re-attached to a new PBS server, for disaster recovery or migrations. My Github scripts automate most of the process and have good error checking.


Hi,
First of all, thank you for the great instructions :-).
I followed them and everything has been running perfectly for months.
But now I’m wondering why you didn’t just assign a new virtual hard disk to the VM?
Thanks,
Best regards, Markus
very helpful, thanks a lot