This installment of the XenDesktop installation series will show you how easy it is to install the XenDesktop 7 VDA (Virtual Delivery Agent). The VDA can be installed on client VMs, servers (for XenApp), or physical PCs if you want to remote high-powered 3D graphics. It contains the ‘secret HDX sauce’ that is used to deliver the HDX experience to the Citrix Receiver.
XenDesktop 7 Series
Part 1: Role Installation
Part 2: Configure Desktop Studio Site
Part 3: Install VDA
Part 4: Create Machine Catalog
Part 5: Configure StoreFront
Part 6: Create Delivery Group
Part 7: Receiver Configuration
Part 8: Install Server VDA
Part 9: Create Server Machine Catalog
Part 10: Create Application Delivery Group
XenDesktop 7 VDA Installation
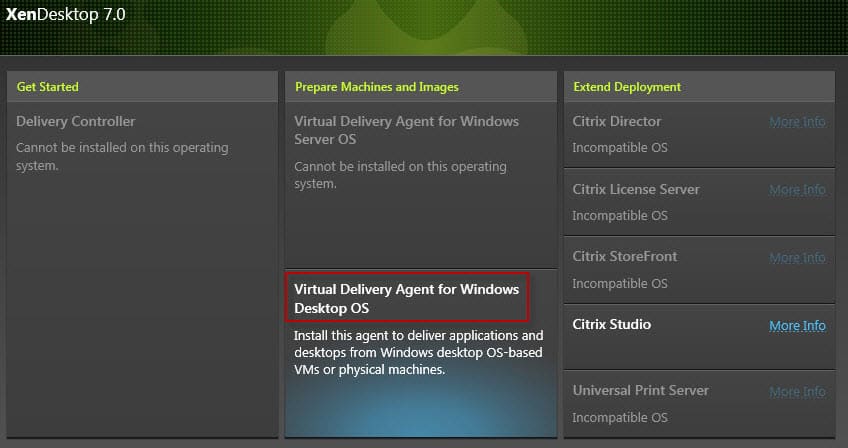
1. I logged into my Windows 7 master VM, mounted the XenDesktop ISO, and started the installer. This time we want to install the Desktop Delivery Agent. The installer also clearly shows you the OS I’m running the installer on is incompatible with the server roles, such as Citrix Director. Very nice to quickly see what I can and can’t install on a particular OS without having to refer to documentation. Very nice touch!
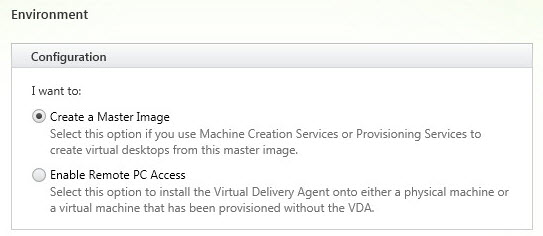
2. Now I have to decide if I want this VM to be a master image, or just provide remote access. Since we are doing VDI, I left the default option.
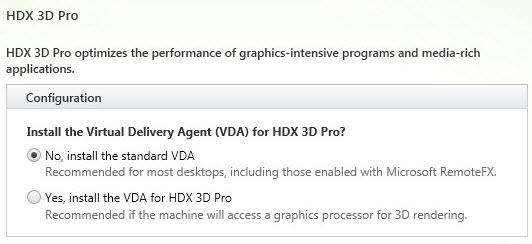
3. If I were installing the VDA on a high powered physical workstation and needed to remote 3D professional graphics, such as AutoCAD, then I would install HDX 3D Pro. Since this is a VM, I’ll choose the standard VDA.
4. I’ll let the installer install the Citrix Receiver into the image as well. That way I can access XenApp apps down the road, if I want.

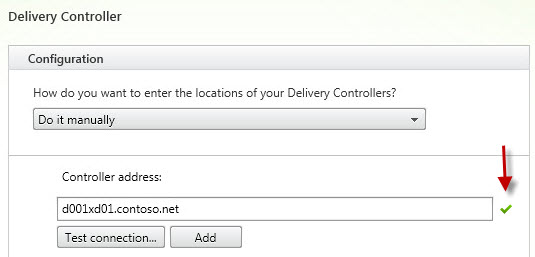
5. Here we have to enter the desktop delivery controller name(s). If you are using a NetScaler to load balance your controllers you could enter that FQDN here. In my case I’ll just enter the controller’s FQDN. A nice touch here is a Test button, to validate the server name is correct. Yet another way Citrix is help ensuring a successful deployment.
6. The VDA has a few features you can select from. I want the whole nine yards, so I chose all of them.
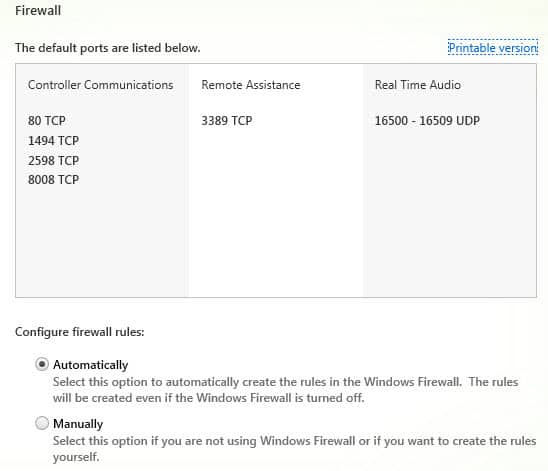
 7. Just like in the server role installation, Citrix provides you a full list of firewall ports that are needed.
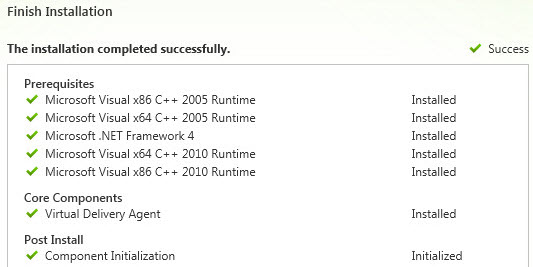
8. A summary screen is then displayed, and the VDA starts installing. At the end you should have a successful message.
Now that the VDA is installed, we can proceed to making a machine catalog and provision some VDI VMs. Stay tuned for Part 4!


You posts about vCenter 5.1 and now this one about XenDesktop 7 are fantastic! Keep up the good work.
In step 5 you can, as you are using Machine Creation Services, select the alternate option of "Allow Machine Creation Services to do this for me", saves typing the FQDN of the controller in.
HI Derek
I'm getting an error cannot start desktop and cannot start app. any ideas where i would of went wrong during the setup for a server