Now that we are pretty far into this series, we can finally install our Windows vCenter. This will leverage our external PSC, for maximum scalability. Depending on your environment size, you may need to scale up the VM’s hardware specs for optimal performance. Consult VMware documentation for sizing guidance. In this exercise we will configure 2 vCPUs and 12GB of RAM, which is enough for a small environment.
If you would rather use the VCSA vCenter instead of a Windows vCenter, don’t fear, that will be coming up in a future blog installment. So if you don’t want a Windows vCenter, then hold on and soon enough I’ll have those instructions published.
Blog Series
vSphere 6.0 Install Pt. 1: Introduction
vSphere 6.0 Install Pt. 2: Platform Services Controller
vSphere 6.0 Install Pt. 3: Certificate Management
vSphere 6.0 Install Pt. 4: vCenter Upgrade Best Practices
vSphere 6.0 Install Pt. 5: ESXi Upgrade Best Practices
vSphere 6.0 Install Pt. 6: Install Windows PSC
vSphere 6.0 Install Pt. 7: Config SQL DBs
vSphere 6.0 Install Pt. 8: Toolkit Configuration
vSphere 6.0 Install Pt. 9: SSL Templates
vSphere 6.0 Install Pt. 10: Install VCSA PSC
vSphere 6.0 Install Pt. 11: VMCA as Subordinate
vSphere 6.0 Install Pt. 12: PSC Machine Certificate
vSphere 6.0 Install Pt. 13: Directory Services Certificate
vSphere 6.0 Install Pt. 14: Windows vCenter Install
vSphere 6.0 Install Pt. 15: VCSA vCenter Install
Permalink to this series: vexpert.me/Derek60
Permalink to my Toolkit script: vexpert.me/toolkit60
Provision vCenter VM
Before we install vCenter, we need to provision the vCenter VM. Per VMware recommendations the VM needs at least 8GB of RAM for an embedded installation. Don’t skimp on memory as performance will likely take a beating, depending on the number of hosts and VMs you are managing. I’d recommend 12GB minimum. Also keep in mind:
- At least 2 vCPUs (hard minimum)
- At least 12GB of RAM (8GB hard minimum)
- At least 70GB D drive (more with VUM)
- Use VMXNET3 NIC
- Use any virtual hardware version. I recommend v10 or v11.
- Recommend Windows Server 2012 R2
- Enable hot add of memory/CPU (optional)
- Fully patched OS (important)
- Verify time sync between PSC and vCenter VM
If you want to use the web client on the vCenter server with IE, then you must install the Desktop Experience feature. Why? That’s the only way to get Flash player in IE with Windows Server 2012 and Windows Server 2012 R2. VMware really needs to dump the Flash interface and go HTML5. If you use a third party browser, make sure you get the very latest Flash player.
After you install the Desktop Experience make sure you patch it. Why? The stock Flash player version is not compatible with the web client and needs to be updated via Windows Update/WSUS/SCCM to the latest version.

If you will be using IE on the vCenter server you also need to turn off the IE enhanced security mode.

vCenter Install
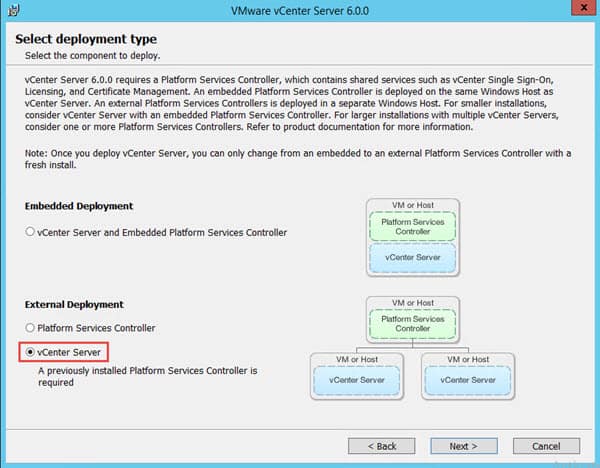
When installing vCenter you have two primary options. The first is an embedded option, where it will install the PSC and all the vCenter components in one fell swoop. This is akin to the “Simple” install in vSphere 5.5. The second option lets you deploy the PSC separately from vCenter. If you only install the PSC, when you run the installer the next time you only have an uninstall option and can’t install the rest of the vCenter services. So for this install we will go ahead and do a full vCenter install, using the external PSC that we have previously installed. You can use either a Windows external PSC or a VCSA-based PSC for this. Choice is yours!
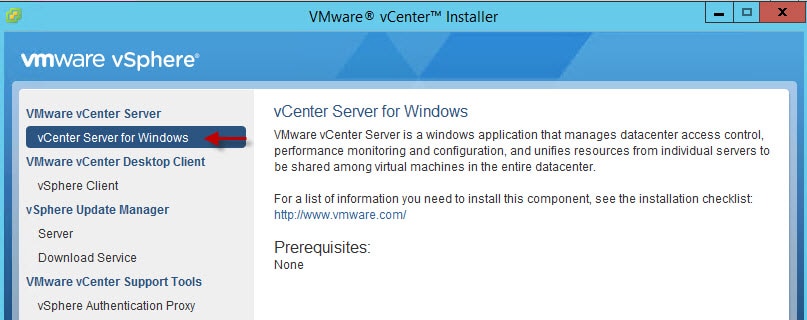
1. Launch the vSphere 6.0 autorun installer. On the main screen select vCenter Server for Windows.
2. Accept the license agreement and pause on the Deployment Type screen. Select vCenter Server.
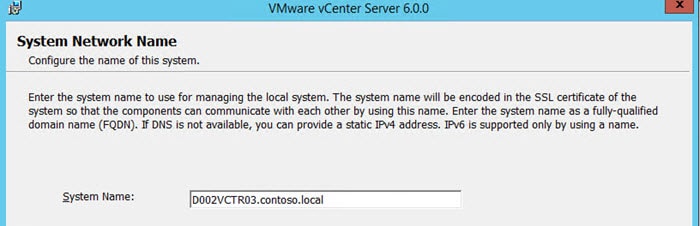
3. On the System Network Name screen verify the FQDN is that of your local server. It should be. Click Next. You may get a warning about IPv6, which you can ignore if you aren’t using it.
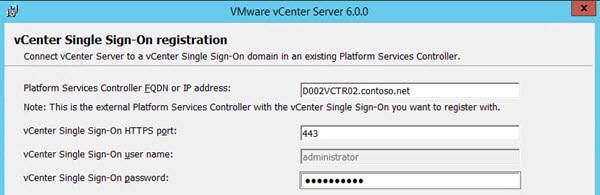
4. Next up you need to point the installer towards your PSC and enter the SSO password you used during the installation process.
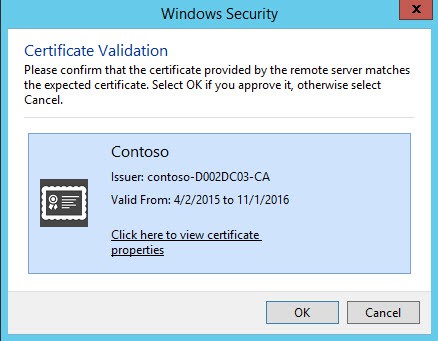
5. When you click next you may get a warning about a time differential. It’s off by just a minute or two I would not worry about it. I saw a warning about a 63 second time delta. After any time warnings you will then get a certificate validation prompt. At this point you will also get a certificate pop-up. Even if you replaced your VMCA and PSC machine SSL certificates, you will see an untrusted certificate here. This is because the VMware Directory Service certificate is used for this authentication. If you followed along in my blog and replaced the VMdir certificate, then it will show a trusted certificate.
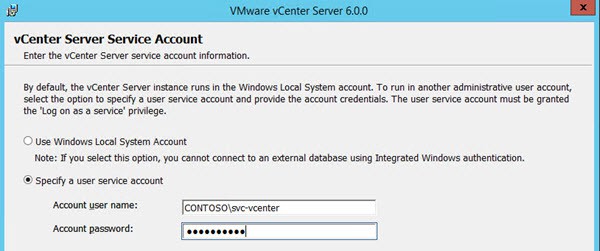
6. Next you need to select your vCenter service account. I always use a Windows service account, so I input those credentials here. I also made sure the service account was in the local administrator’s group on the vCenter server. It will also need the “Log on as a service” right. To do that launch the “Local Security Policy” editor, navigate to “Local Policies” then “User Rights Assignment”.

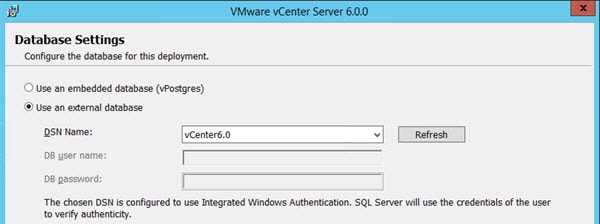
 7. Now you need to configure your database. For anything but a small home lab you should use an external database. If you do opt for the internal database, in vSphere 6.0 it is now vPostgres and NOT SQL Express. In the previous blog series article we configured SQL using my vCenter toolkit script. So now select that DSN from the drop down.
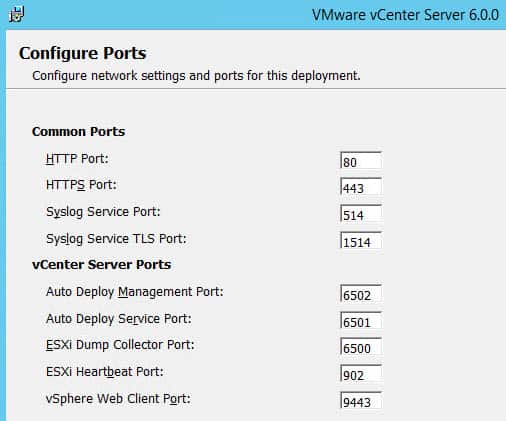
8. Next up are the default port numbers, which you shouldn’t change.
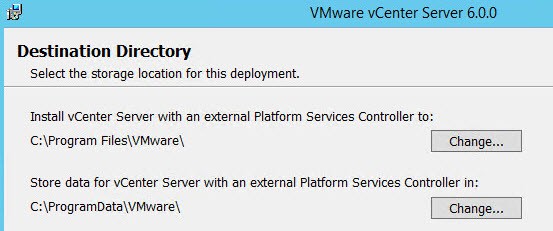
9. Now you can change the directory installation paths if you wish. I just took the defaults.
10. Now you can review your configuration and make sure that everything is good to go. Click Install.
Summary
With the external PSC already installed, doing the vCenter install is a piece of cake. If you are in a small lab, then you don’t even need to fuss with setting up an external database like SQL. For production instances I would always use a SQL or Oracle database. Its best to leave the default installation paths, as VMware instructions for certificate replacement use the default paths. I just don’t see any big reason to stray from the defaults here. KISS principle applies. If you have to choose between using SQL or Oracle for the back end, I would lean towards SQL. The VMware Fling to convert a Windows vCenter to the VCSA currently only works with SQL, so should you ever want to change your deployment model SQL makes it easier.
Next up is installing the VCSA vCenter, which you can find here.


I am currently testing deployment of a new fresh vCenter Server 6.0 install. The installation is an embedded deployment with PSC and vCenter Server on the same machine. In the lab I have a PKI setup with a MS root CA and an online MS subordinate CA. I will not use VMCA to issue VMware certificates. The online MS subordinate CA will issue all VMware certificates.
Using your script I have successfully signed a machine SSL certificate using my MS subordinate CA. When using the script to install the machine SSL certificate I receive the following error message:
2015-04-22T10:39:45.360Z Error waiting for service VMwareComponentManager start. Exit code: 1066 Current State: 1
ERROR:root:Unable to start service VMwareComponentManager, Exception:….
Any ideas what might be causing this error message. Thank you in advance.
No, I would contact VMware support. You could also try using the VMware certificate tool to install the machine cert and see what happens.