
Don’t stop here, and think all of your work is done. Yes the cluster will be up and running at the end of this post, but there’s still a lot of best practices left to configure such as email error alerts, Kerberos, SSL certificate, etc. Stay tuned for several more installments to make your SQL cluster more enterprise-grade.
Blog Series
SQL 2012 Failover Cluster Pt. 1: Introduction
SQL 2012 Failover Cluster Pt. 2: VM Deployment
SQL 2012 Failover Cluster Pt. 3: iSCSI Configuration
SQL 2012 Failover Cluster Pt. 4: Cluster Creation
SQL 2012 Failover Cluster Pt. 5: Service Accounts
SQL 2012 Failover Cluster Pt. 6: Node A SQL Install
SQL 2012 Failover Cluster Pt. 7: Node B SQL Install
SQL 2012 Failover Cluster Pt. 8: Windows Firewall
SQL 2012 Failover Cluster Pt. 9: TempDB
SQL 2012 Failover Cluster Pt. 11: Jobs n More
SQL 2012 Failover Cluster Pt. 12: Kerberos n SSL
Node B SQL Installation
1. Mount the SQL server ISO to your second VM. Launch the SQL installer page and select Add node to a SQL server failover cluster. After the installer bootstrap files install (download any updates from the internet if prompted), you should get to a Cluster Node Configuration screen. I actually did my first install on node B, so that’s why you see node A listed below as “Name of this node”. Your entries will likely be reversed. Do not panic.

2. It should automatically detect your network configuration and it won’t let you change it, so just click Next.

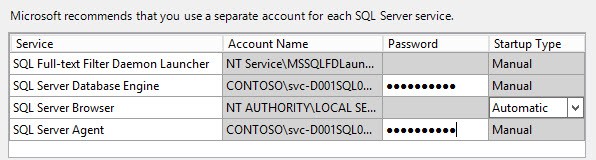
3. You will need to re-enter the service account passwords, so do that here.
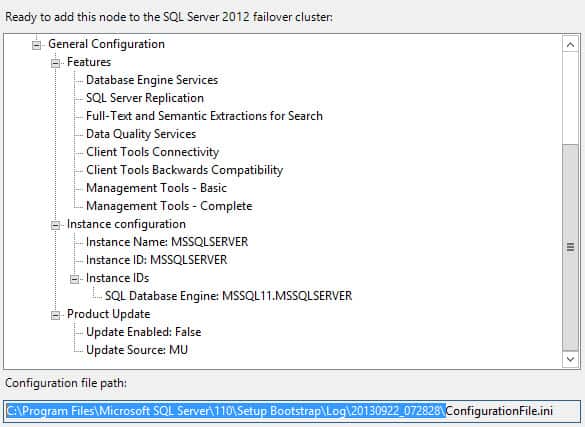
4. Click through the rest of the wizard and on the Ready to Add Node it will give you the path to the .INI configuration file. I would recommend you save that file to a safe place, such as your D: drive. It’s not required, but should you have a failure you can re-run the install with those settings. It can also help for DR purposes, to rebuild your cluster with the same config.
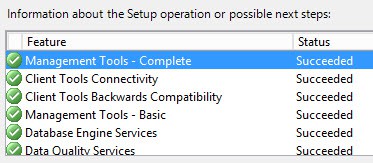
5. After a few nail biting minutes, you should get a screen with a long list of green checks. Your second node is now up!
Summary
Congratulations! However, we are far from done. So don’t just call it a day and think that your SQL server is done. We need to configure firewall rules, email alerting, database maintenance jobs, and do other tweaking along the way. Those steps and more will be covered in Part 8 and beyond.


I've been following along and I've just hit a snag. What to do when 1) the SQL Server agent account name is grayed out , after a few hacks and you get by that, 2) what if the SQL server agent is missing as a cluster resource? I've since removed the nodes and uninstalled sql, but If these issues pop up again…. I'd like to know what you've seen in your experience.