SQL 2012 AlwaysOn Availability Groups are much easier to configure, so I really hope VMware certifies AlwaysOn AGs for the vCenter database in the near future. I’ll have to amend this SQL series, but that’s a small price to pay for the support.
If you do run into problems with forming the cluster, carefully review all logs for clues to what is broken. Generally they will point you in the right direction.
Blog Series
SQL 2012 Failover Cluster Pt. 1: Introduction
SQL 2012 Failover Cluster Pt. 2: VM Deployment
SQL 2012 Failover Cluster Pt. 3: iSCSI Configuration
SQL 2012 Failover Cluster Pt. 4: Cluster Creation
SQL 2012 Failover Cluster Pt. 5: Service Accounts
SQL 2012 Failover Cluster Pt. 6: Node A SQL Install
SQL 2012 Failover Cluster Pt. 7: Node B SQL Install
SQL 2012 Failover Cluster Pt. 8: Windows Firewall
SQL 2012 Failover Cluster Pt. 9: TempDB
SQL 2012 Failover Cluster Pt. 10: Email & RAM
SQL 2012 Failover Cluster Pt. 11: Jobs n More
SQL 2012 Failover Cluster Pt. 12: Kerberos n SSL
Cluster Creation
1. Download the hotfix described in this Microsoft KB article. Install it on both nodes and reboot them. This prevents the cluster manager MMC from crashing on you. The comical error is: A weak event was created and it lives on the wrong object, there is a very high chance this will fail, please review and make changes on your code to prevent this issue.
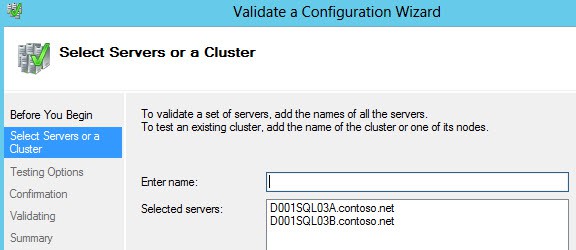
2. From the Server Manager dashboard launch the Failover Cluster Manager tool. Right click on the Failover Cluster Manager in the left pane and select Validate Configuration. Enter the hostnames of your two SQL servers and click through the rest of the wizard.
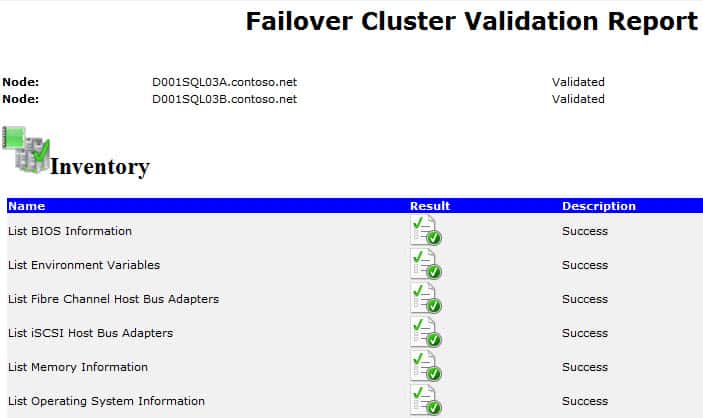
3. After a few minutes of your heart pounding and wondering if you did everything right you will get the validation results. A perfect score would be all green, in which case you win a gold star for the day.
Unfortunately my config had three warnings. Two were due to iSCSI IP addressing because I haven’t yet separated my iSCSI traffic on a dedicated VLAN so both VM NICs were on the same subnet. The last one was a MPIO warning stating that the LUNs had a single path. Yes, I knew that, thank you.
Those are not show stopper issues so I was pleased that everything else checked out. Review ALL warnings/errors and resolve them if they really apply to you.
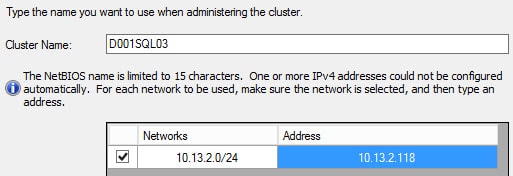
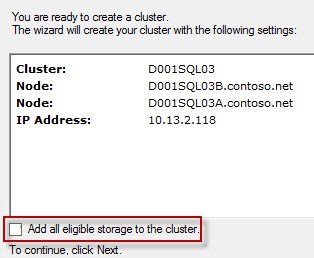
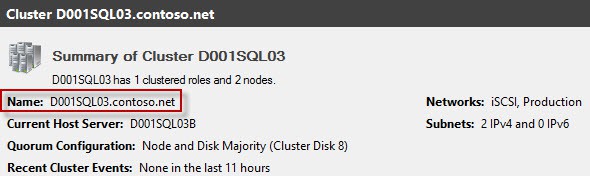
4. If all went well then the Create Cluster Wizard window will appear before your very eyes. You will need to configure a cluster name and an IP address. Here I choose D001SQL03 for my cluster name (see why I appended the “A” and “B” to my hostnames?).
5. In the final step you will see your configuration settings and a box that is checked which will add all applicable storage to the cluster resources. DO NOT check the box that automatically adds storage to the cluster. It will want to add the local D drive as a cluster storage resource, which clearly causes issues.
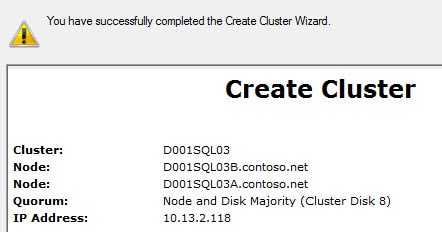
6. In a few minutes, if the stars are aligned, your cluster is now formed. I got two warnings, but that was due to checking the add storage box in the previous step, so don’t do it.
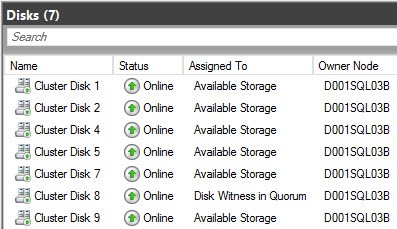
7. Expand the Storage node of the Failover Cluster Manager, click on Disks, then select Add Disk. Add all of your shared iSCSI volumes. If all goes well you should see an online status for all volumes.
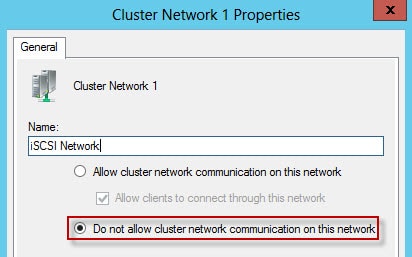
8. If you configured your VM with two NICs (that are on different subnets), then you should see TWO network resources in the left pane under Networks. This screenshot was taken after I did some reconfiguration.
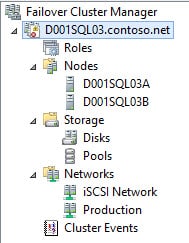
Open your first network, and if that is associated with your iSCSI network, then change the name and do not allow cluster network communications on that network.
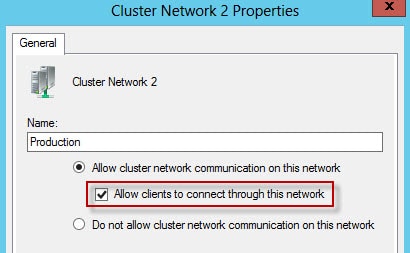
If the network is your routed production network then make sure the allow clients to connect option is chosen. Rename the network as well.
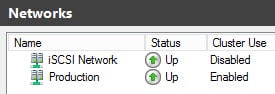
After your reconfiguration one network should be enabled for cluster use and the other one disabled.
8. Poke around in the various areas within the Failover Cluster Manager and validate that everything is healthy and looks OK. If the MMC crashes on you, you probably skipped step 1 in this post.
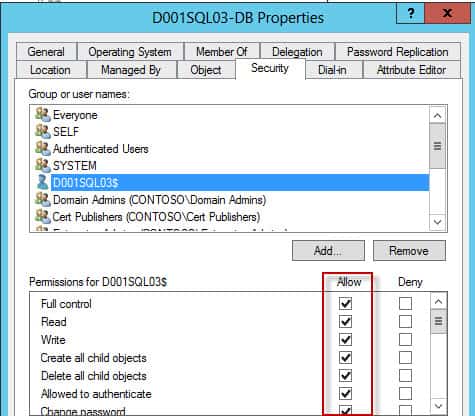
9. To help head off cluster problems when SQL is being installed I’ve found it most beneficial to pre-create the SQL server cluster computer object and set the proper permissions. Otherwise the MSCS computer object needs AD permissions such as creating computer objects, which can be forgotten or hard to delegate in the enterprise. This will most certainly cause your cluster to die.
In Active Directory create a new computer object. The name should be that of the SQL cluster name, which applications will be connecting to. For example, I called mine D001SQL03-DB. After you create the new computer object, you need to change the permissions on the computer and give the MSCS cluster name (e.g. D001SQL03) full control. The first screenshot shows the cluster name (which is the same as the cluster computer name) that needs to be delegated the permissions.
Now that the cluster is formed, and in a healthy state, it’s time to create the service accounts and then start the actual SQL installation. Want more? Check out Part 5.


HI, has anyone had trouble with Failover Cluster wiping all the Path/Volume information set prior to activating the Failover Cluster