Blog Series
SQL 2012 Failover Cluster Pt. 1: Introduction
SQL 2012 Failover Cluster Pt. 2: VM Deployment
SQL 2012 Failover Cluster Pt. 3: iSCSI Configuration
SQL 2012 Failover Cluster Pt. 4: Cluster Creation
SQL 2012 Failover Cluster Pt. 5: Service Accounts
SQL 2012 Failover Cluster Pt. 6: Node A SQL Install
SQL 2012 Failover Cluster Pt. 7: Node B SQL Install
SQL 2012 Failover Cluster Pt. 8: Windows Firewall
SQL 2012 Failover Cluster Pt. 9: TempDB
SQL 2012 Failover Cluster Pt. 10: Email & RAM
SQL 2012 Failover Cluster Pt. 11: Jobs n More
SQL 2012 Failover Cluster Pt. 12: Kerberos n SSL
Node A SQL Installation
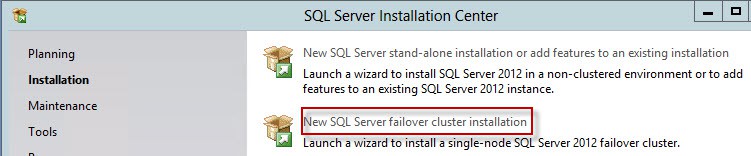
1. Mount the SQL Server SP1 ISO and start the installer process. Click on Installation in the left pane then select New SQL Server failover cluster installation.
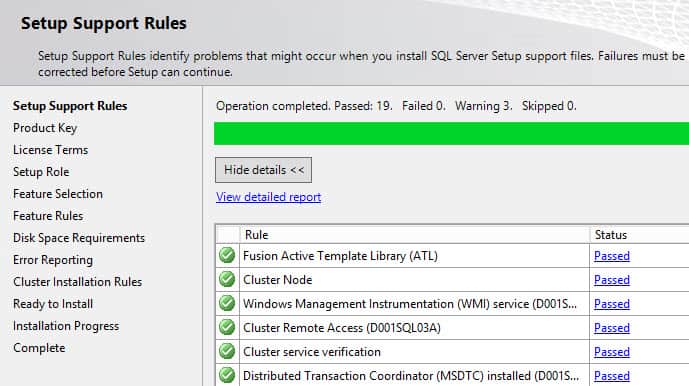
2. The SQL setup routine will install some files. It may also prompt you to download some product updates (which I would do). Once that completes you eventually get to the Setup Support Rules screen. Review all warnings and failures. Warnings for MSDTC appear to be normal, and if you had any cluster validation warnings that will trigger another warning message.
3. Enter/Accept the product key and thoroughly read the license terms. When you get to the Setup Role select SQL Sever Feature Installation.
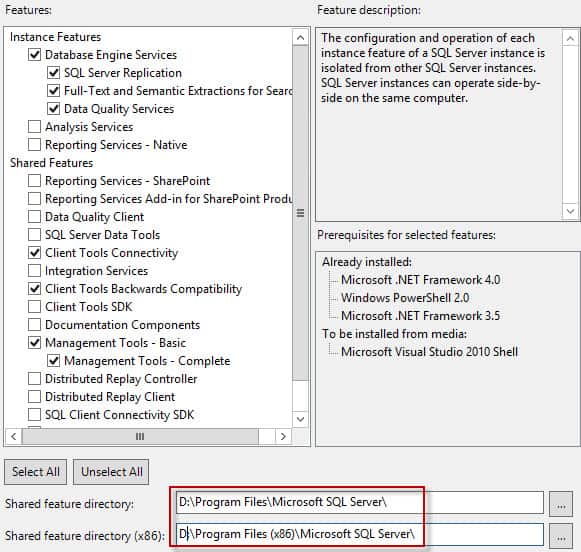
4. Select the SQL instance features that you want to install. Shown below I’ve selected the minimum feautures that I’ve found most applications need. YMMV, so add additional components as needed. Don’t just click everything, as that will waste disk space, increase attack surface area, and bloat your system. Remember to change the default drive path for the binaries. I always put them on the D drive, NOT your C drive. That’s for your OS.
5. Configure the SQL server network name and again change the instance root directory to the D drive. For the SQL server network name use the name of the computer object you created earlier in this series. It must be the exact same name, or the cluster build process will fail. Verify the SQL server directory is also on the D drive, which it will be if you configured it in the last step.
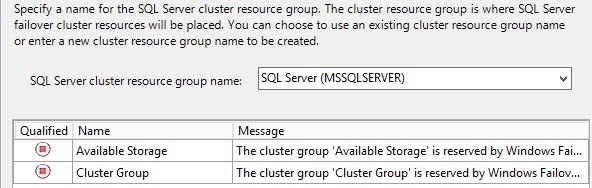
6. After the disk space validation screen you will see a resource group screen. Don’t panic if there are no qualified groups. In my experience this is normal. Click Next.
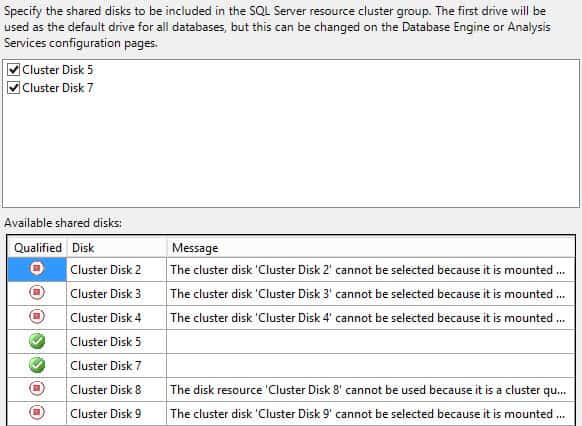
7. If you followed my disk layout exactly, then you should have two cluster disks available in the upper pane for selection. These should be the F and S drives. The other drives are mount points on the F drive, and thus you can’t select them. Check the two available disks.
8. Configure the network settings for the SQL network name. Enter an IP address and ensure the proper Network is listed. Make 100% sure the IP is not already in use.

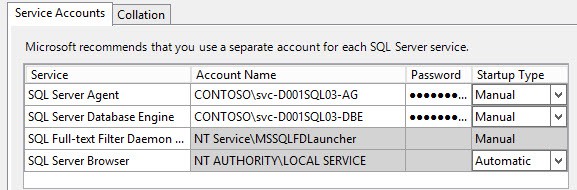
9. The service accounts as required for your environment. If you want to change the database collation (e.g. you don’t live in the US), you can do that on the second tab.
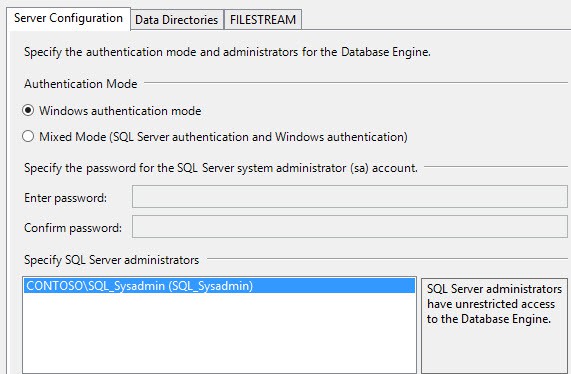
10. On the next screen you have to choose the SQL server administrators. Don’t be lazy and just select the current user option. Add your AD SQL group that we created earlier.
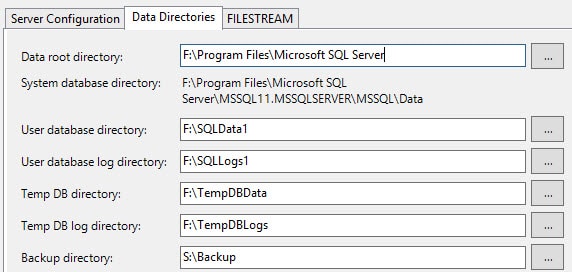
11. You need to configure the data directories as all of them must be located on your shared LUNs. Following my mount point design I setup the directories as shown in the screenshot below.
12. Click through the wizard until you get to the Ready to install summary screen. You will see a long path to an .INI file. This is essentially your answer file that captured all of your settings, minus passwords. Copy the .INI to a safe location in case you have an install failure, or for DR purposes. You can’t use it on the second node, since the config steps are very different. Click Install and wait a few minutes.

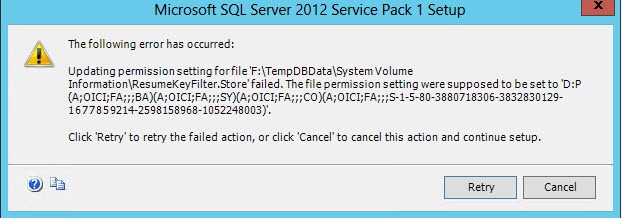
13. If you are following this guide exactly and using mount points, then you will likely run into an obscure permissions issue. A scary window should pop up with an error: updating permissions setting for the file resumekeyfilter.store failed. Do NOT, I repeat, do NOT click Cancel. We can fix this problem and the installer will resume.
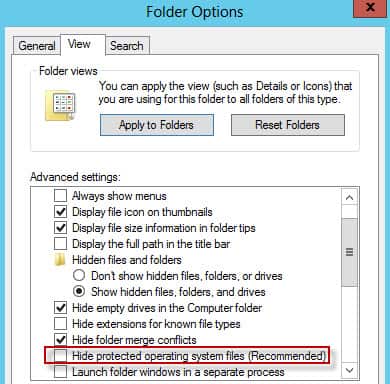
14. If the permissions problem does appear, then navigate to your mount path and change the folder options to show protected operating system files.
Not so magically you should now see the System Volume Information folder in each of your mount point folders. Open the properties of the file and seize ownership. In my lab I changed the owner to the domain administrator account. A less powerful account could possibly be used, so if you aren’t a domain admin then try a local administrator account.
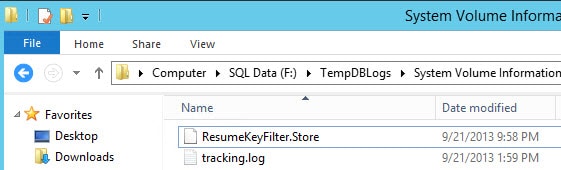
After you change the ownership then System was the only entry (ACE) in the access control list. Repeat this process for each of the System Volume Information mount point folders. Click Retry in the SQL dialog box. Pay careful attention to the path in the error, as you may have correctly fixed one file but botched up another, so don’t get frustrated “fixing” the wrong file permissions. I had to fix all four mount point files.

15. If all goes well the installation should complete with no further errors or warnings. You should now be able to launch the SQL Server Management Studio and login to your instance. If you get an access denied message, make sure your account is a member of the SQL administrator group you made in AD, and that you’ve logged off and back on the SQL server since that change to refresh your group membership.
Now that Node A is up and running, it’s time to install SQL server on node B to complete the cluster. That is covered in Part 7.


I had to give full control permission over AD object "network name account for SQL instance" to "failover cluster virtual network name account" to successfully install first node.
BTW, thanks for great job!
See https://connect.microsoft.com/SQLServer/feedback/…
This cocuments the requirement for a folder below the mountpoint to avoid issues applying permissions to the System Volume folder.
Thank You so much for great details on Steps 13 & 14. I was stumbling all over until I found your page. Wow. magic. Windows 2008 r2 was pretty straight forward. Wonder why it became complex now in Windows 2012 r2.
Thanks a lot !