If you enable SSH access on your OPNsense firewall, for the best security you should use SSH keys and disable username/password logins. This blog post will guide you through the quick and easy process of creating SSH keys, installing them, and then configuring OPNsense to only allow SSH key logins.
SSH Key Configuration
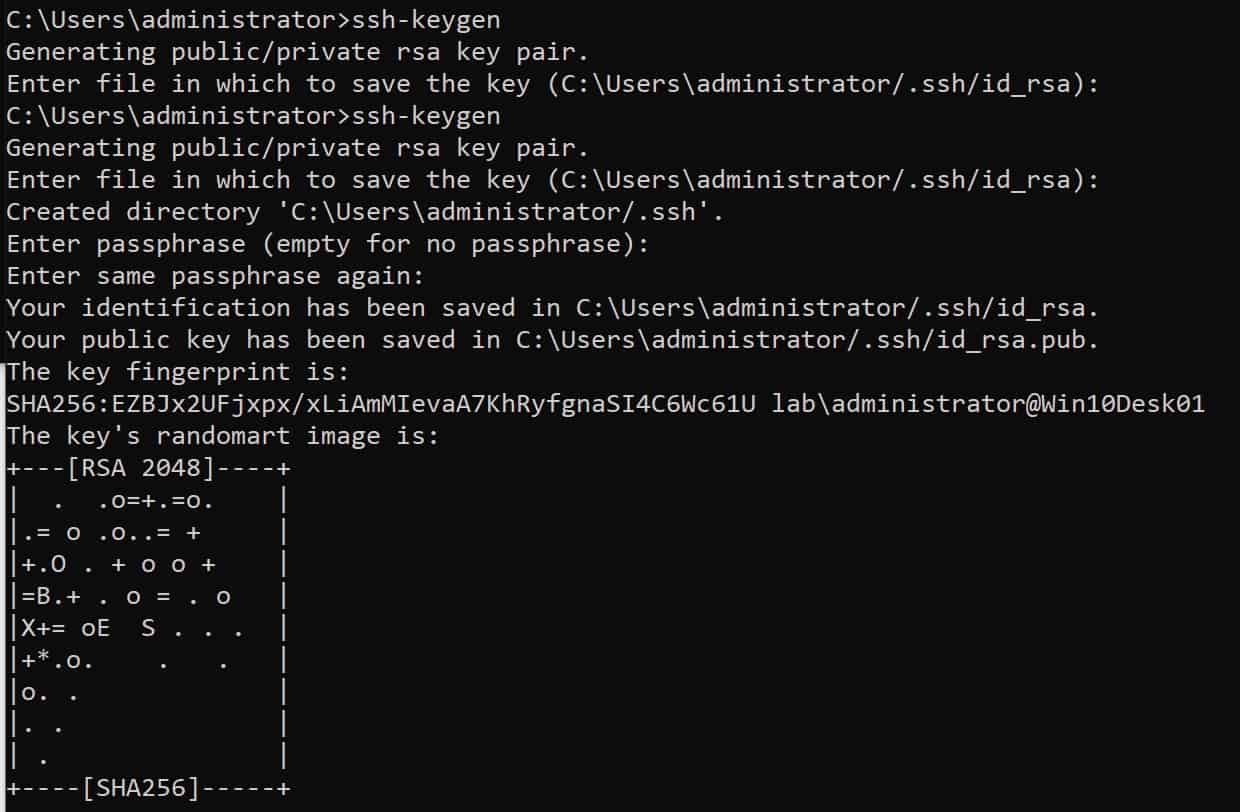
On your Mac/Windows client open a terminal window/PowerShell prompt.
Enter the following command, and just press enter for all of the parameters to accept the defaults.
ssh-keygen -t rsa
2. Enter the following commands to view your public key.
					cd .ssh
cat id_rsa.pub
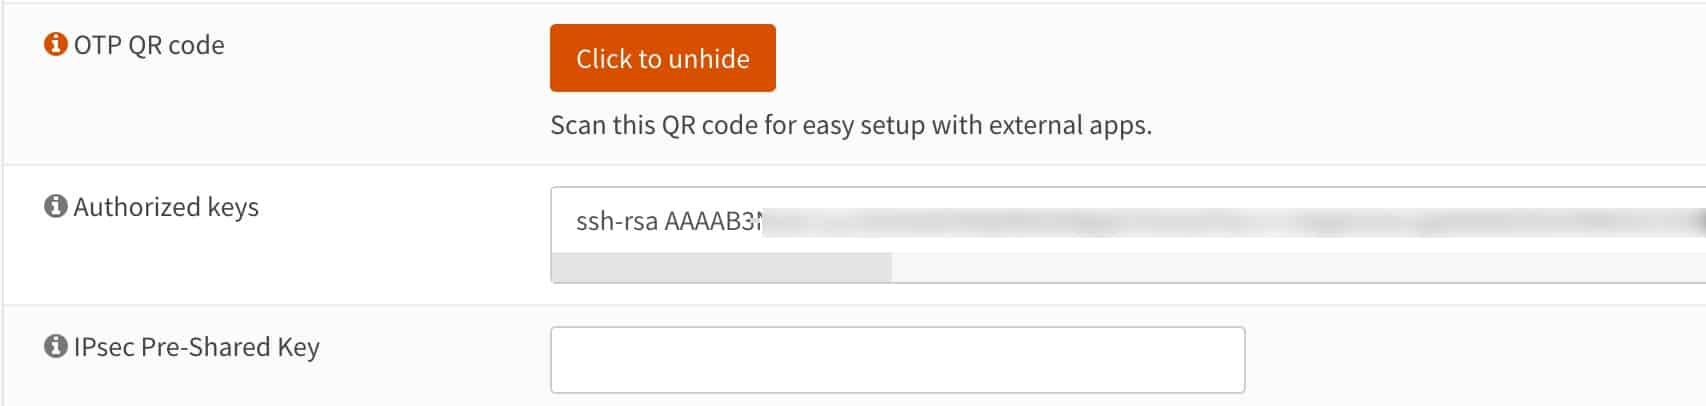
3. Copy the public key to your clipboard. 4. Browse to OPNsense and login. 5. Navigate to System, Access, Users. 6. Locate the user you want the SSH key for (e.g. root) and click the pencil icon to edit. 7. At the bottom of the page paste the public key into the Authorized Keys field.
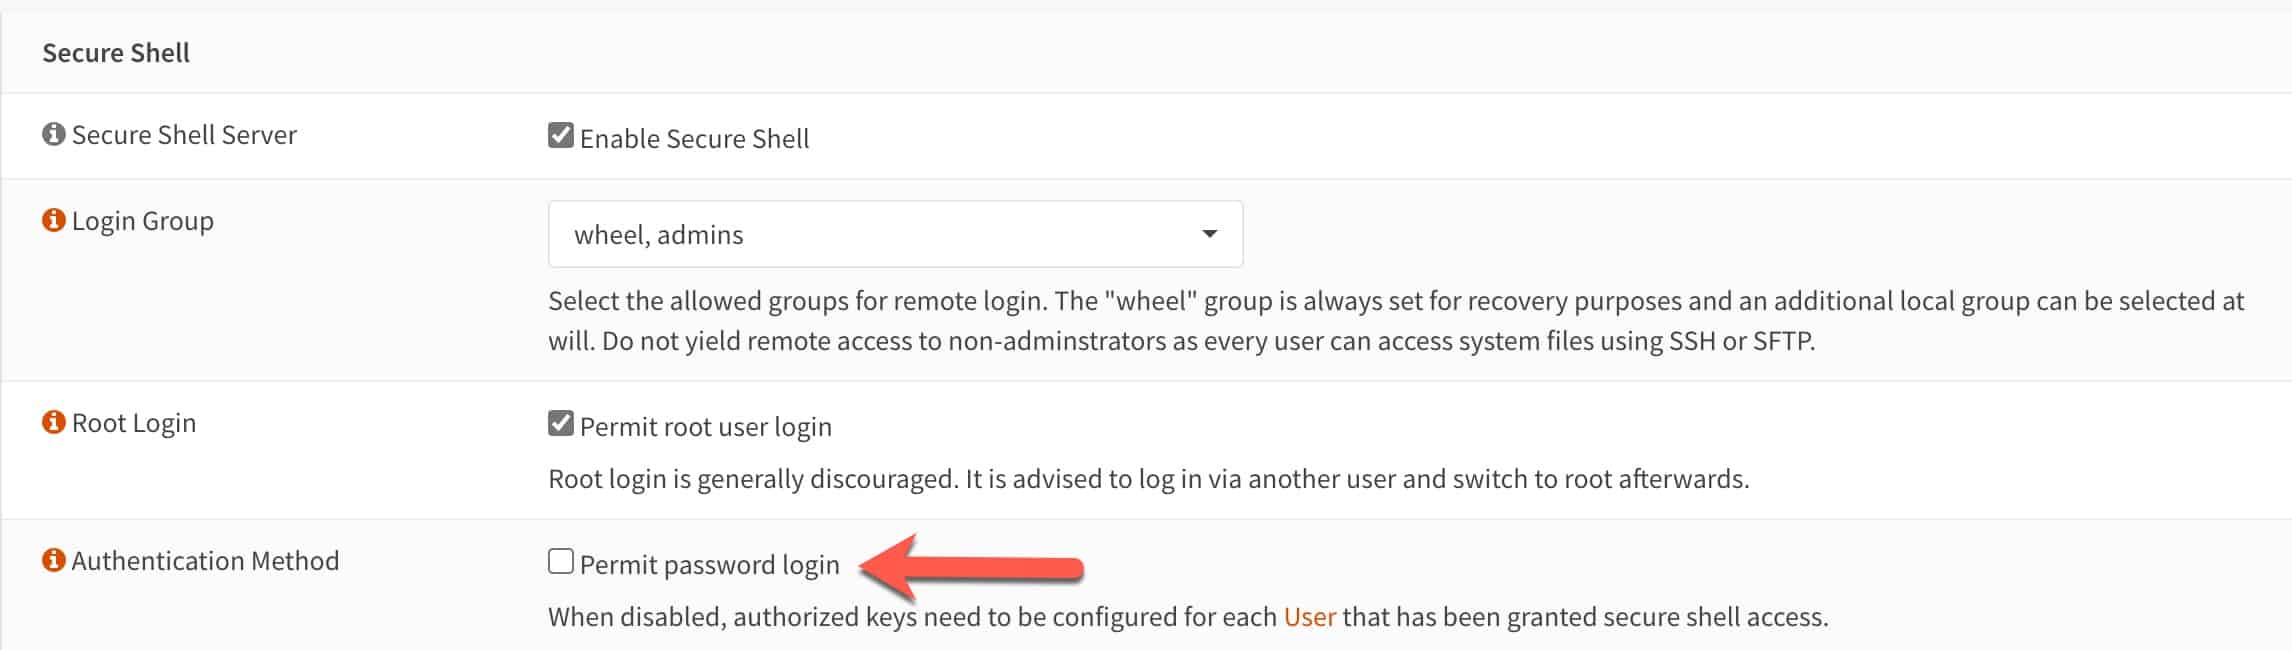
8. In OPNsense navigate to System, Settings, Administration. 9. Scroll down to the Secure Shell portion and untick the Permit Password login box. 10. If you haven’t already enabled SSH, you can do it here as well. 11. Scroll all the way down and click Save.
Client login using SSH Keys
Open a terminal window (Mac) or PowerShell command prompt (Windows).
Type the following command to use your SSH key, but substitute the IP of your OPNsense LAN.
ssh -i id_rsa root@10.13.2.1
3. If all goes well you should be logged in and see the OPNsense menu.
Summary
Configuring OPNsense to use only SSH keys is fairly straight forward and can be done in just a few minutes. SSH keys are much stronger than username/passwords, so it’s advised to use SSH keys and disable username/passwords.