Over the years I’ve written a number of blog posts about replacing the SSL certificates for vSphere. Back in the day it was exceedingly difficult and was very error prone (think 5.x and 6.x). However, VMware has made great strides with vSphere 7 in how you manage certificates. Yippee!
For enterprises that need fully trusted SSL certificates for the vSphere 7.0 environment you have two basic options:
- Full Custom Mode: Manually replace all certificates for vCenter and the ESXi hosts with your trusted certificates.
- Subordinate CA Mode: Use the built-in VMCA service as an official subordinate CA of your existing PKI infrastructure, which after the initial configuration, automates the issuing of SSL certs for your vSphere environment. This is the method covered in this blog post.
Enable SCP on the VCSA
We will be transferring files back and fourth from the VCSA, so we need to enable SCP. Run these steps if you don’t already have SCP enabled (it’s disabled by default).
1. SSH into your vCenter 7 appliance and run the following commands:
					shell.set --enable True
shell
chsh -s /bin/bash root
Generate the Certificate Signing Request (CSR)
1. SSH into your vCenter 7 appliance and run the following commands:
					shell
/usr/lib/vmware-vmca/bin/certificate-manager
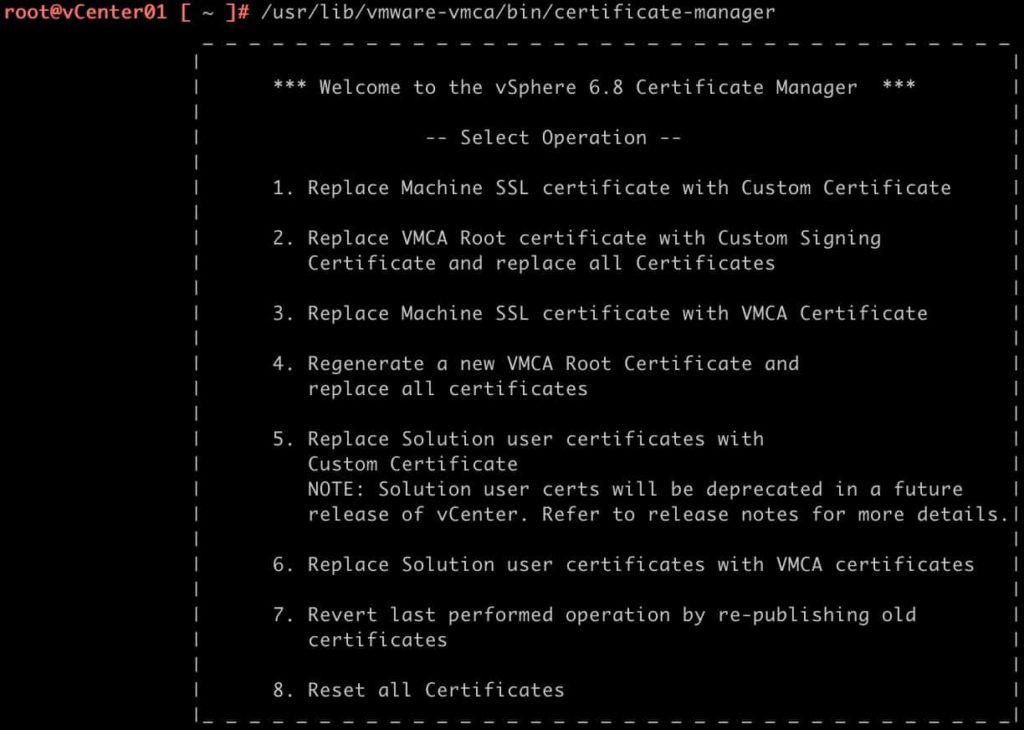
2. Select Option 2.
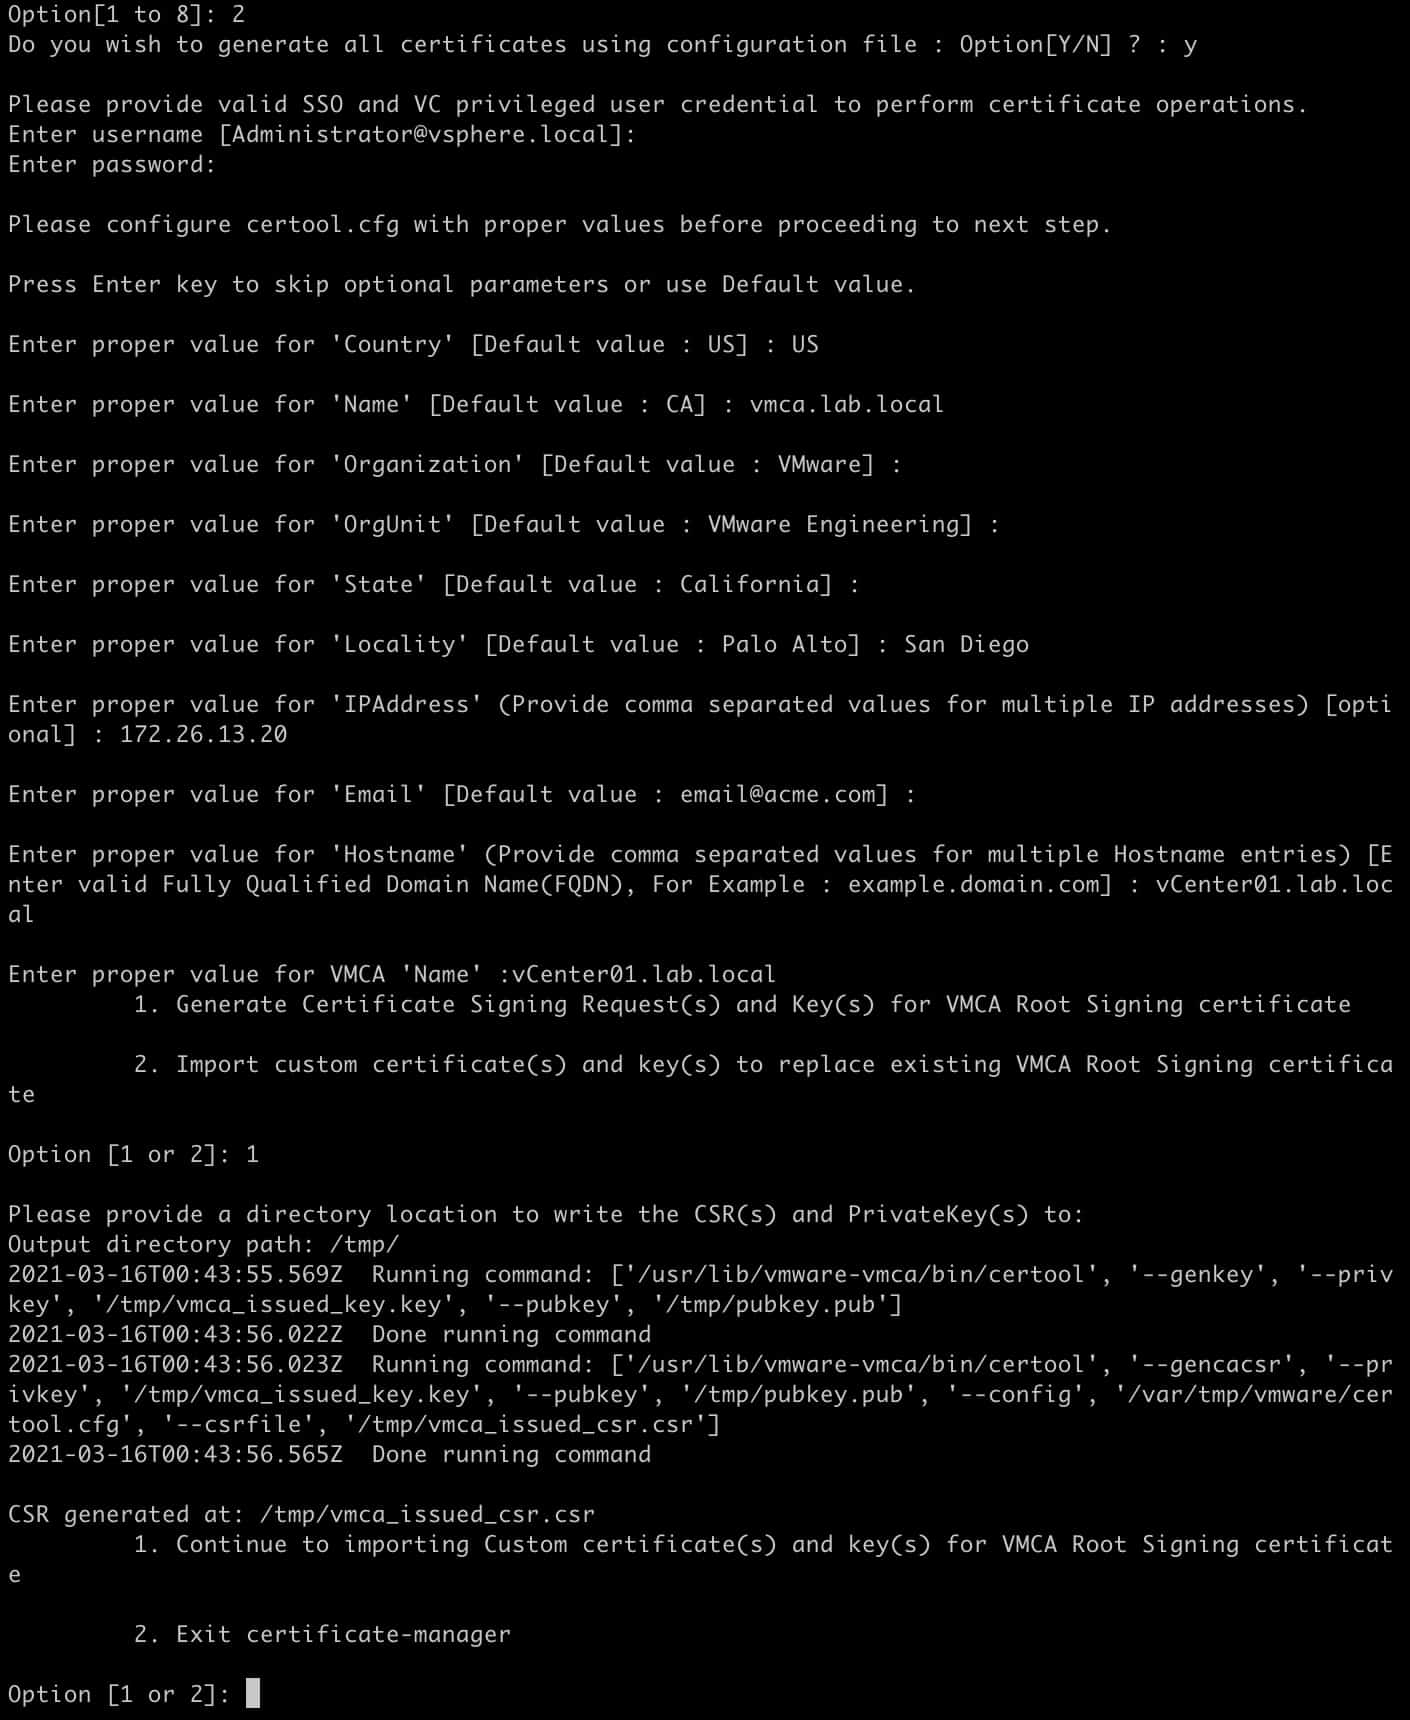
3. Type Y when prompted to generate the certificates using a configuration file.
4. Press Enter if using [email protected] is OK.
5. Input the administrator password when prompted.
6. Enter your country code, e.g. US.
7. For the Name value enter the FQDN of your VCSA
8. Input your Organization name
9. Input your OrgUnit
10. Input your State
11. Input your Locality
12. Input the IP address of your VCSA
13. Input a contact email address
14. Input the FQDN of your VCSA for the hostname
15. Input the VMCA Name (i.e. FQDN of your VCSA)
16. Select option 1 to generate the CSRs
17. Enter the path of your choice (e.g. /tmp/) for the resulting CSRs
18. Leave the SSH session open, as we will return to it once we get the certificates minted.
The Certificate manager created two files:
/tmp/vmca_issued_csr.csr
/tmp/vmca_issued_key.key
Download the VMCA Files
- Open your favorite SCP tool (e.g. WinSCP, Royal TSX, etc.).
- Navigate to /tmp/
- Download: vmca_issued_csr.csr
Minting the Subordinate Certificate
How you will be minting your certificate is highly dependent on your PKI infrastructure. In my case, I’m running a two-tier Windows Server 2019 CA. So I’ll walk you through that process. The 2019 CA is configured exactly like I’ve written about in my Windows Server 2019 Two-Tier PKI CA series. Go have a look at those three posts if you are in a lab and don’t already have a running CA.
Configuring the Subordinate Certificate Template
If you followed my Windows Server 2019 CA guide, you will need to authorize a new template type so that you can issue a subordinate CA certificate via the CA’s web interface.
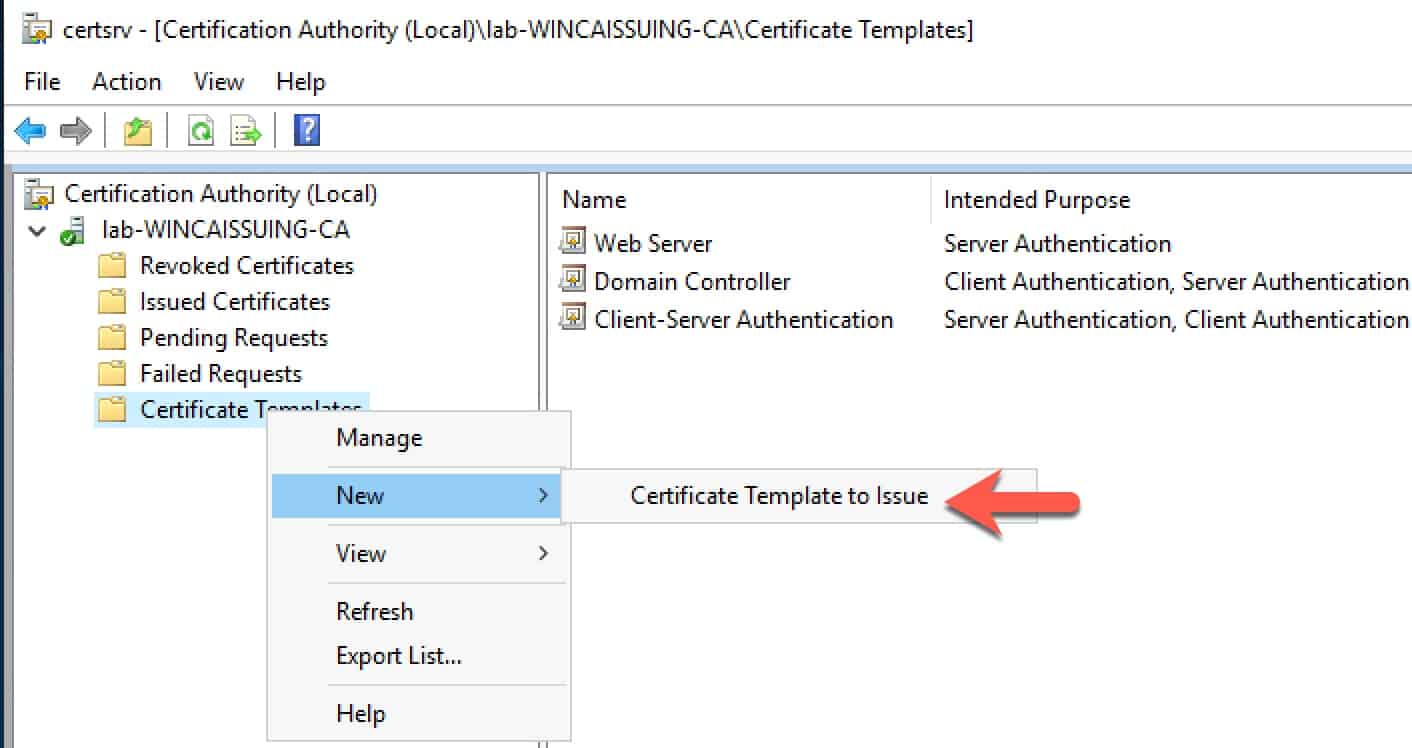
- Login to your issuing CA and launch the Certification Authority console.
- Expand the tree and click on Certificate Templates, then right click, select New, and then Certificate Template to Issue.
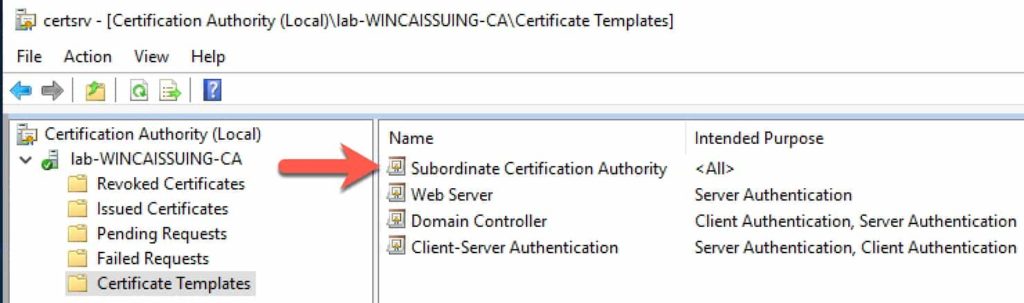
3. Scroll down to Subordinate Certification Authority and click on it.
4. Click OK. You should now have a new template type that the CA can issue.
Submit Certificate Request
- Open a browser and go to your Microsoft CA’s certificate page (e.g. https://wincaissuing.lab.local/certsrv/)
- Click Request a certificate.
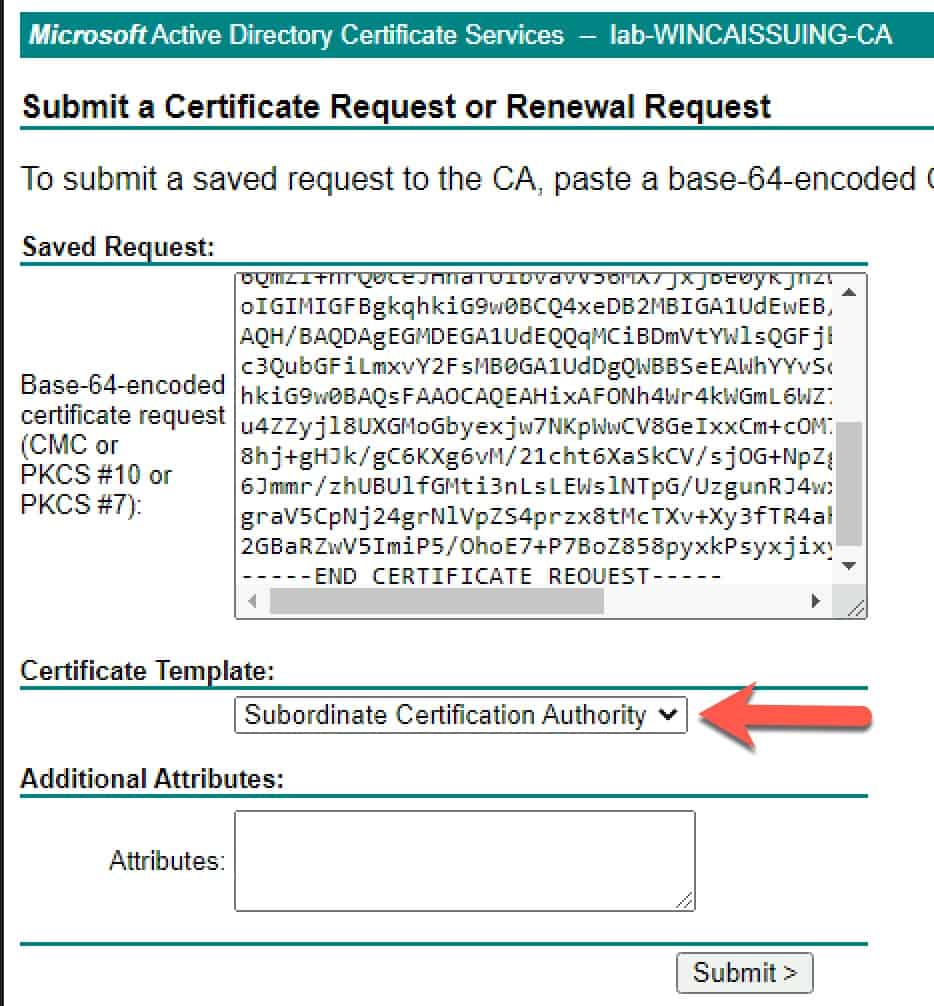
- Click Submit a certificate request by using...
- Open the vmca_issued_csr.csr file in your favorite text editor.
- Copy and paste the contents into the Saved Request field.
- Change the certificate template to Subordinate Certification Authority.
- Click Submit.
8. Select Base 64 encoded
9. Select Download Certificate. You will now have a certnew.cer file on your computer.
Validating the VMCA Certificate
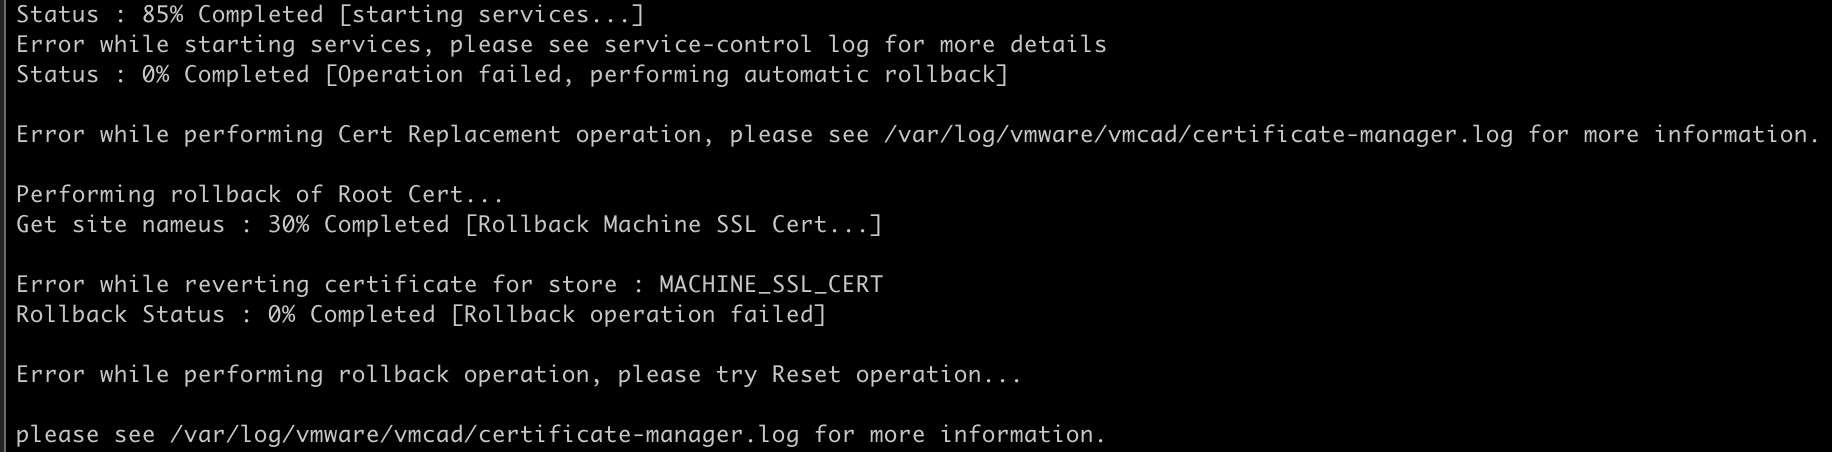
While going through this procedure in my lab, I ran into a certificate issue as described in VMware KB 71120: “ERROR certificate-manager ‘lstool get-site-id’ failed: 1” in the /log/vmware/vmcad/certificate-manager.log. The symptom of this was the VMCA replacement failing at 85% and unable to rollback. Quite a sticky situation.
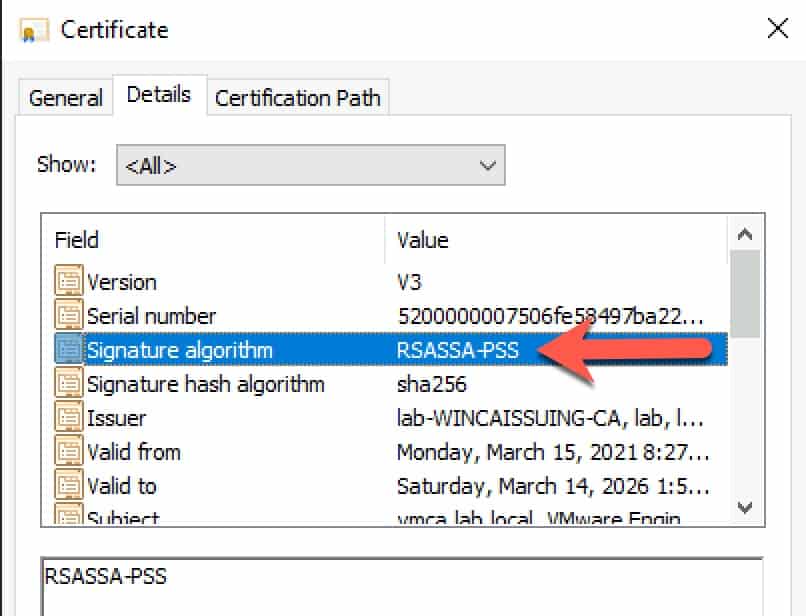
Per the KB, VMware does NOT support the Signature Algorithm RSASSA-PSS. I looked at my certificate, and sure enough, that was my problem. So open the certnew.cer file in Explorer and verify that you are using another signature algorithm, such as sha256RSA. If you do have a CA that is issuing certs with the RSASSA-PSS algorithm, check out my blog post here on how to change that setting for Microsoft CAs. DO NOT PROCEED if RSASSA-PSS is present. The replacement procedure WILL FAIL. It would be great if VMware validated the certificates better before installing them, to head off this issue.
Obtaining CA Certificate Chain
If you followed my Windows Server 2019 CA guide, you will know it’s a two-tier architect with an offline root and an online issuing CA. This will make constructing the certificate file that the VMCA needs a bit more tricky but not impossible!
- Login to the online issuing CA, launch a blank MMC console, and add the Certificates snap-in and select Computer Account.
- Expand the Intermediate Certification Authorities and click on Certificates.
- Find your offline root CA and Issuing CA certificates.
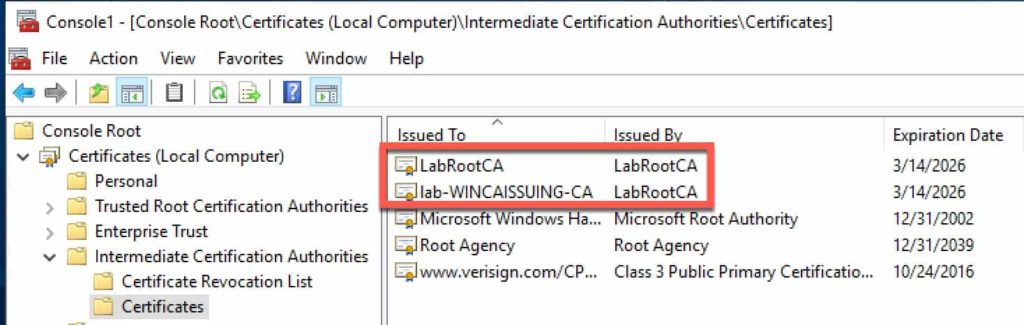
4. Right click on the offline root and select All Tasks, Export.
5. Select Base-64 encoded.
6. Browse to your Downloads directory, then enter a file name, e.g. root.cer.
7. Repeat for the Issuing CA and name it something like ‘issuing.cer‘.
8. Open a PowerShell command prompt and in the directory of your three files (certnew.cer, issuing.cer, root.cer) type this command. Note: The order of the parameters in the command are extremely important. Use the same order when running the command or the certificate file will fail to import.
get-content certnew.cer, issuing.cer, root.cer | set-content chain.cer
Configuring the VMCA
- Transfer chain.cer to the VMCA via SCP to /tmp/.
- Switch back to your SSH session on the VMCA and press 1.
- Enter /tmp/chain.cer for the Root certificate.
- Enter /tmp/vmca_issued_key.key for the custom key.
- Enter Y to replace all of the certificates.
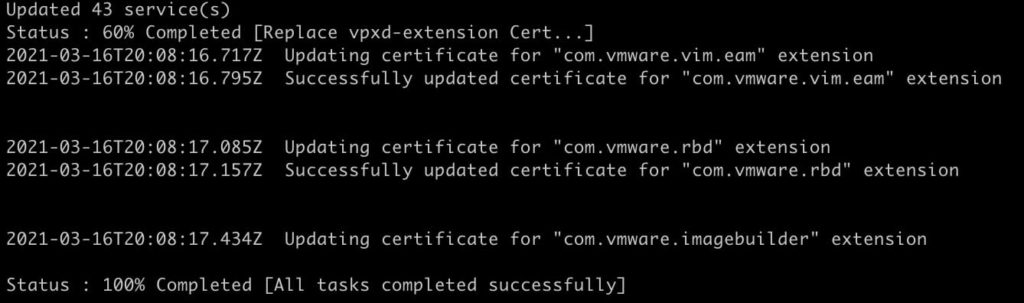
- Sit back and wait a few minutes for the change to complete.

If the change is successful, you will see a 100% completed status.
VMCA Certificate Validation
- Open your favorite browser and go to the VCSA login page using the FQDN.
- Click on the padlock icon in the URL bar, and view the SSL certificate properties.
- Verify that the certificate was issued by your VMCA and is fully trusted via your root CA.

4. Login to vCenter, go to the Administration page, then select Certificate Management.
5. Review all of the certificates listed to ensure they are issued by the VMCA.
Renewing ESXi Certificates
Unfortunately when you configure the VMCA to be a subordinate CA, the process does NOT automatically renew/replace the ESXi host certificates. And, there’s another little gotcha too. If you try and manually renew the ESXi host certificate within 24 hours of configuring your VMCA as a subordinate, it will fail with an error 70034: A general system error occurred: Unable to get signed certificate for host: esxi_hostname. Error: Start Time Error (70034)
To work around this issue, VMware wrote KB 2123386, which involves modifying an existing vCenter 7 advanced setting. To modify this setting:
- Open vCenter, click on your vCenter server in the tree pane, then click on Configure, then Advanced Settings.
- Click on Edit Settings.
- Click on the funnel in the name column and enter vpxd.certmgmt.certs.minutesBefore.
- Change the value from 1440 to 10 and click Save.
Updating ESXi Machine Certificate
- Login to vCenter and change to the hosts and clusters view.
- Find your target ESXi server, click Configure, then Certificate.
- Click on RENEW.
- Wait a couple of minutes, and verify the new certificate shown has the right properties.
- Repeat for all other ESXi hosts.
Summary
Replacing the vCenter 7.0 certificates is much easier than it has been in previous releases. This blog post focused on the ‘VMCA as subordinate’ certificate option, which is one of four certificate ‘modes’ that VMware offers. As always, test certificate replacement in the lab prior to deploying in production. Certificate errors can be hard to roll-back from, so testing is critical.


Just make sure your root certificate is published as well otherwise things will fail. If it’s already published then skip this but otherwise copy just the root cert to /tmp/ and then do:
/usr/lib/vmware-vmafd/bin/dir-cli trustedcert publish –chain –cert /tmp/root.cer
Also forgot to mention, make sure your time is in sync on the hosts otherwise renewing the certs on the ESXi hosts will fail 🙂
Great guide, thank you!
Hey, it’s a great guide, but I have a question. Can I extend my cert expiration from 2 years to for example 5 years? How can I do this?
Awesome guide! Wanted to add that if you close the SSH session after the CSR generation, or want to import the VMCA cert later, the next time you need to go with option 2, say “Y” to use a configuration file, enter admin password, and answer “N” to the option to reconfigure. Then you can press 2 and keep importing the certs. This is not immediately obvious.
I did such setups a couple of years ago, worked fine (with 6.5 at this time). Now, these subordinate CA certificate expire soon. To renew them, from what I read it looks like I simply have to repeat the entire process (now with 7.0, like described here)? Or do you know of a “shortcut” to just renew it?
For vCenter 8.0U2 there is a known bug where using /tmp/ will cause issues:
https://knowledge.broadcom.com/external/article?legacyId=96591
You absolute legend!!
This works well, however, if you’re doing the same thing on vCenter 8.0, don’t use /tmp as your directory, use /storage/core instead:
https://knowledge.broadcom.com/external/article?legacyId=96591