During installation of trusted SSL certificates for a VMware vSphere 7.0 lab environment, I ran into the following error when I was trying to replace the certificates:
ERROR certificate-manager ‘lstool get-site-id’ failed: 1
This error was logged on my VCSA, in the /storage/log/vmware/vmcad/certificate-manager.log file.
Some searching found VMware KB71120, which had a root cause for this very error. The bottom line of the KB is that VMware does not support the RSASSA-PSS signature algorithm. VMware does support the more common sha256RSA algorithm.
If your CA is configured to issue RSASSA-PSS signed certificates, they will NOT import into your vSphere environment. This problem is “easily” solved by re-issuing your CA certificates signed with sha256RSA instead. This blog post walks you through the process of changing your Microsoft Certificate authority signature algorithm.
This post assumes you have an offline root CA, and one online issuing CA, all running Windows server. I tested this on Windows Server 2019, but I don’t see anything that wouldn’t work on older CAs, such as Windows Server 2012 R2.
					2021-03-16T04:10:45.55Z ERROR certificate-manager 'lstool get-site-id' failed: 1
2021-03-16T04:10:45.56Z INFO certificate-manager Error while reverting certificate for store : MACHINE_SSL_CERT
2021-03-16T04:10:45.56Z ERROR certificate-manager Error while performing rollback operation, please try Reset operation...
2021-03-16T04:10:45.56Z ERROR certificate-manager please see /var/log/vmware/vmcad/certificate-manager.log for more information.
Reconfiguring your Root CA for SHA256RSA
- Login to your (offline) Microsoft root CA.
- Open Explorer and see if C:\Windows\CAPolicy.inf exists. If it does not, skip to step 5.
- If it does, open it in Notepad and review the contents. If there is a line like this (with a value of 1), modify it and change the AlternateSignatureAlgorithm value to 0.
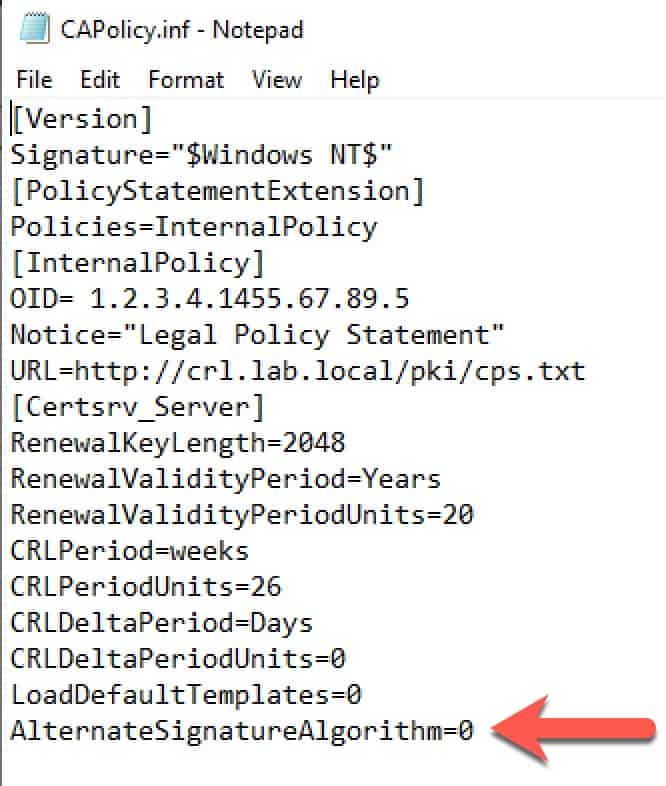
4. Save CAPolicy.inf.
5. Open Regedit and navigate to the following registry key, using the name of your CA:
\Computer\HKEY_LOCAL_MACHINE\SYSTEM\CurrentControlSet\Services\CertSvc\Configuration\<CA Name>\CSP
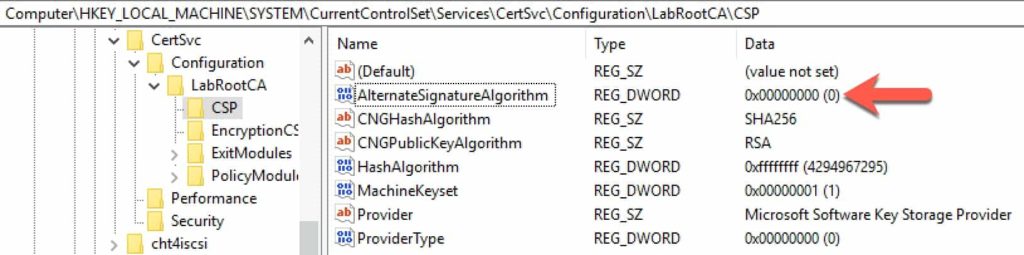
6. Modify the AlternateSignatureAlgorithm value and change it to 0.
7. Open an elevated command prompt and enter the following commands to restart the CA:

8. Open the Certificate Manager.
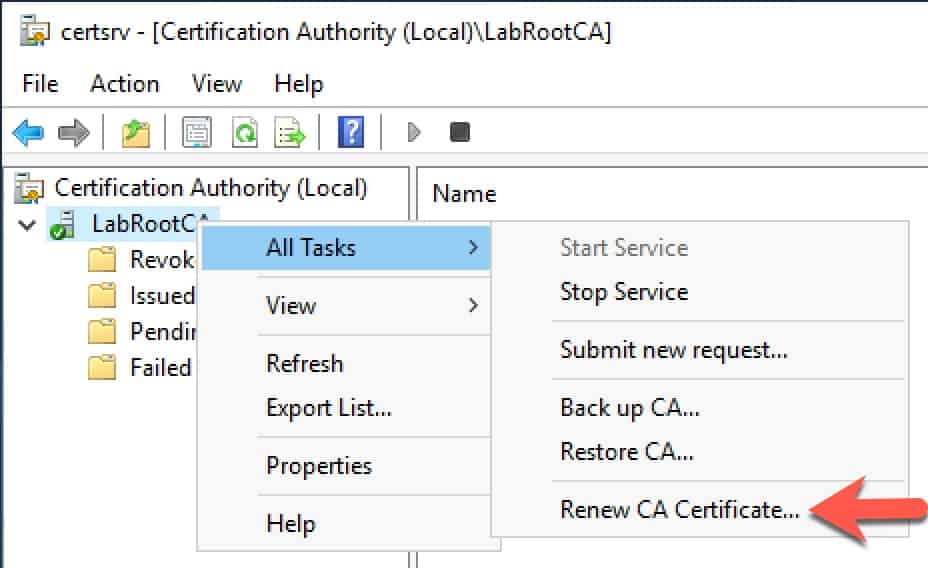
9. Right click on your CA’s name, select All Tasks, then Renew CA Certificate.
10. Click Yes to stop AD CS services.
11. Make sure Yes is selected to generate new keys and click OK.
12. After the certificate is re-generated, right click on the CA’s name and select Properties.
13. Go to the General tab and view the last certificate in the list. Take note of the Certificate Number, for future reference.
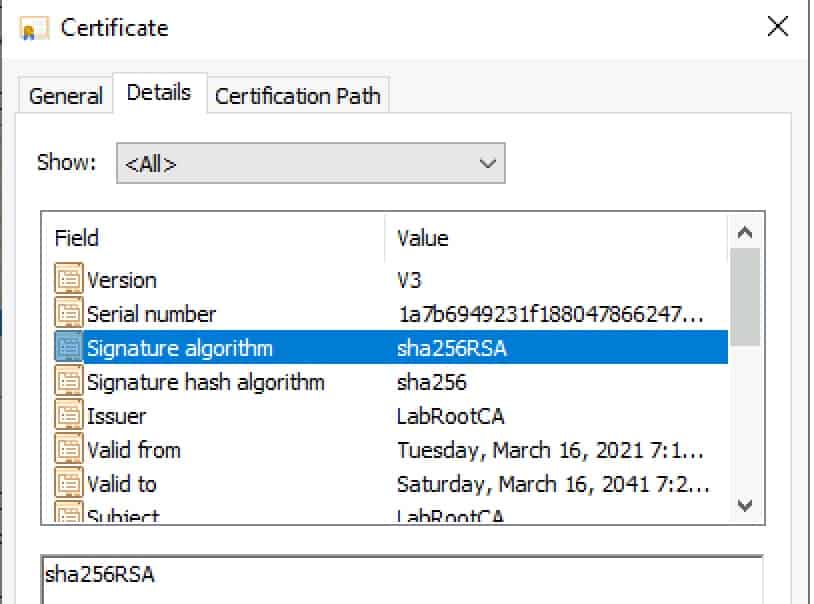
14. Click on the Details tab. Review the Signature Algorithm value and make sure it says sha256RSA and NOT RSASSA-PSS.
Publishing New Root CA Certificate
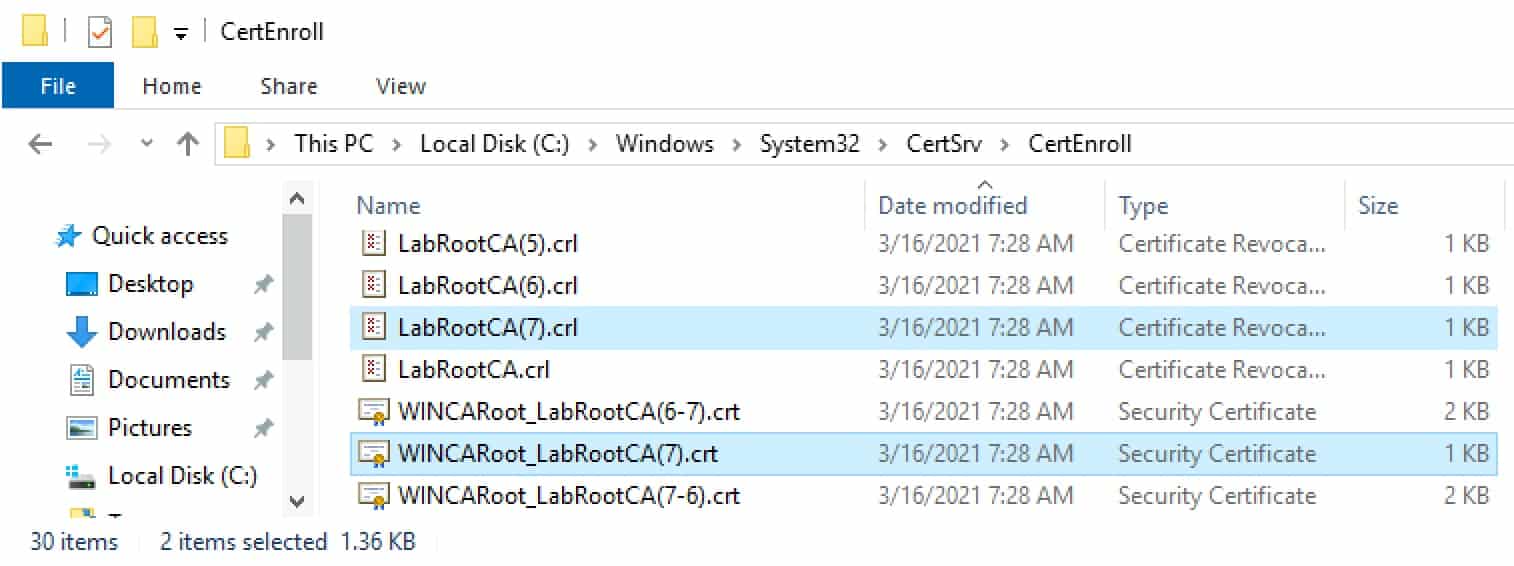
1. Navigate to C:\Windows\System32\CertSrv\CertEnroll. You should see several files, some ending in CRL and others ending in .CRT.
2. Remembering the certificate number from the previous section (#7 in my case, will be different for you). Look for the associated .crl file and .crt files for your latest certs. Note, for the .crt file do not use one with two numbers (e.g. 7-6), but rather use the one with the single number (e.g. (7)).
3. Copy the latest .crl and .crt files to your online subordinate CA.
4. Open an elevated shell and run the following commands, using your file names on your online subordinate CA.
					certutil -dspublish -f '.\WINCARoot_LabRootCA(7).crt' RootCA
certutil -addstore -f root '.\WINCARoot_LabRootCA(7).crt'
certutil -addstore -f root '.\LabRootCA(7).crl'
gpupdate /force
Renewing the Subordinate CA Certificate
- On your online subordinate CA, repeat the same steps you did on the root, in the section: Reconfiguring your Root CA for SHA256RSA. Stop at step 11 (generating a new request).
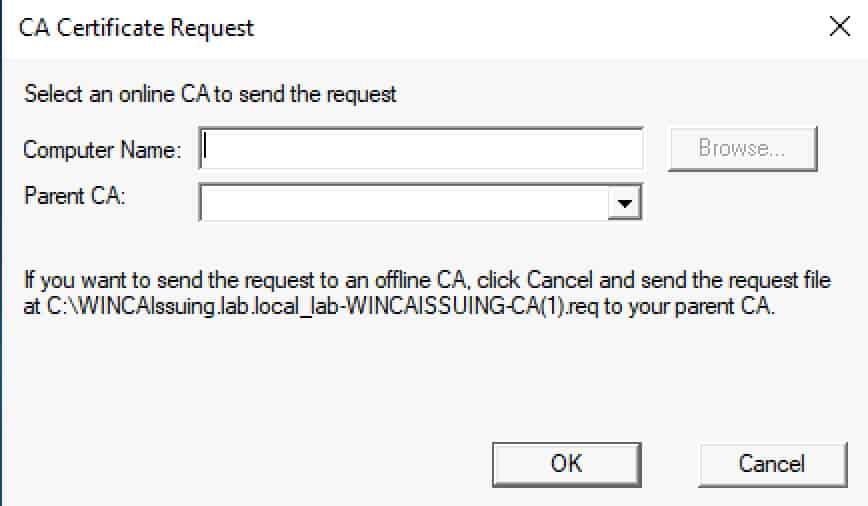
- On the CA Certificate Request prompt take note of the file name, and click cancel.
3. Navigate to where the certificate request is located, and copy it to your offline root CA.
4. Login to your offline root CA, and open an elevated command prompt.
5. Type the following command:
certreq -submit YourRequestName.req
6. You will now see that the request is pending. Take note of the RequestId, as it will be unique to you.
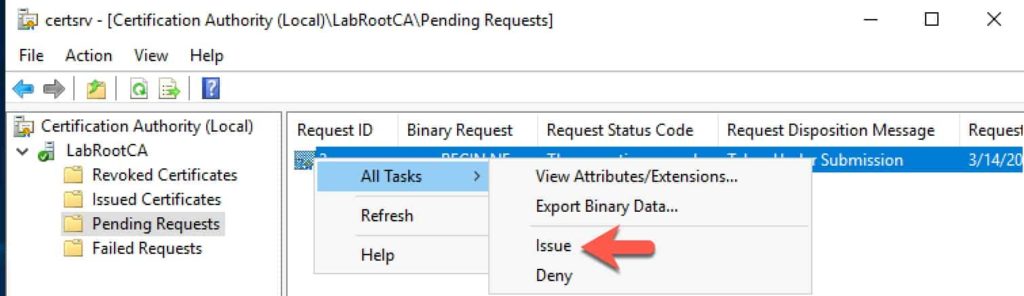
7. Open the CA Manager snap-in on your offline root and issue the pending certificate.
8. While still on the offline CA, enter the following command to download the new certificate. Replace “2” with your request ID, and change the filename as you see fit.
certreq -retrieve 2 c:\LabRootCA.crt
9. Copy the certificate file to the online subordinate CA. Note: Do NOT place it in the pki directory. Run the commands below (on the subordinate CA) to install the new certificate. Once the certificate is installed, delete the file and empty the trashcan.
					Certutil –installcert c:\LabRootCA.crt
start-service certsvc
copy c:\Windows\system32\certsrv\certenroll\*.cr* c:\pki\
Validating Published Certificates
- Login to any Windows server in the domain.
- Open an elevated command prompt and type: gpupdate /force
- Open a blank MMC and add the Certificates plugin and manage the Computer account.
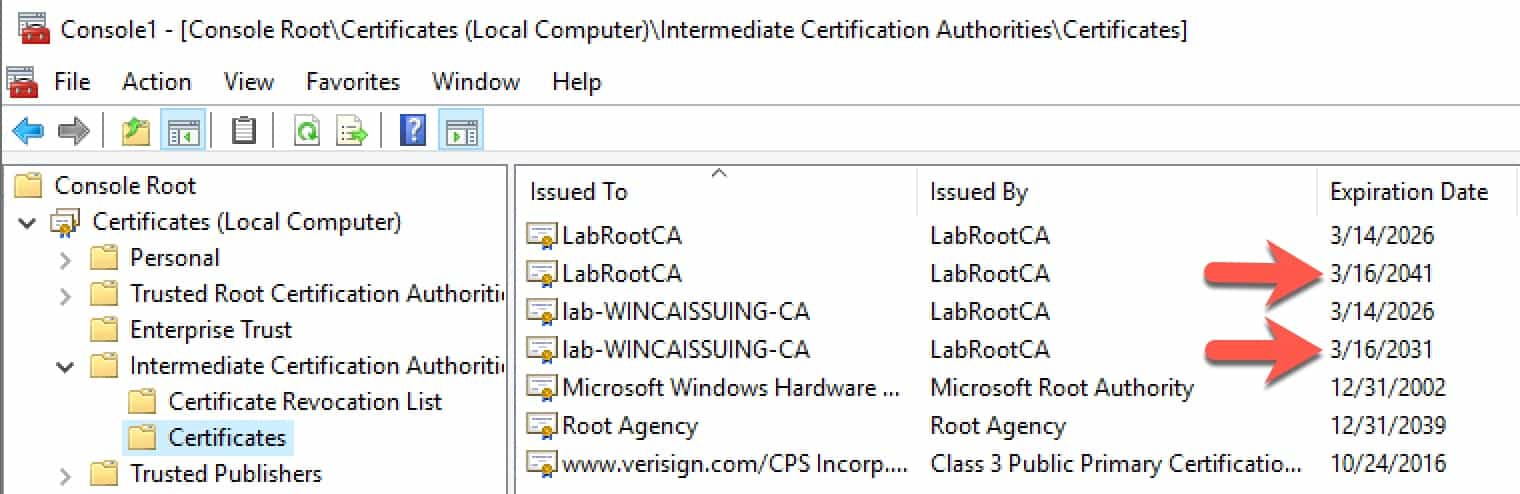
- Expand the Intermediate Certification Authority folder, then expand Certificates.
- Look for new root and intermediate CA certificates.
- Open the properties of each new certificate, open the Details tab, and verify that the Signature algorithm is sha256RSA.

Summary
As you can see, it’s not the end of the world if your Microsoft CA was initially setup to use the RSASSA-PSS signature algorithm. With a little effort you can re-issue the root and intermediate certificates using the sha256RSA algorithm for wider compatibility with certain vendors, such as VMware. As long as you leave the old RSASSA-PSS root and intermediate certificates alone, all previously issued certificates will still be trusted in your organization. Do NOT “cleanup” the “old” certificates, or you will invalidate all issued certificates.


Thank you for this post. It’s perfect. I only wish I had come across it before hours of troubleshooting followed by a five and a half hour Zoom session with GSS.
Is there any way to test which kind of CA encryption is used and compatible or do i have to change the paramenter anyway and re-request all certificates?