What has been literally years in the making, Microsoft has just now enabled Microsoft 365 users to send email as a proxy (alias) address. Why is this news? Well Gmail Suite and other business email services have had this feature forever, and some businesses have a hard requirement for such a feature and were forced to non-Microsoft solutions as a result.
Why would you want to use a proxy address (alias)? Well one use case is where an organization has multiple domains (e.g. contoso.com, acme.com, etc.), and you want to send/receive email from all domains in a single mailbox.
With the prior implementation of aliases with Microsoft 365, you could only receive email as the alias, but not send FROM an alias and have the FROM address be the alias. All that changed today, April 29, 2021.
However, the feature is not enabled by default and required a Microsoft 365 administrator to turn it on via PowerShell. Once enabled for the organization, all users should be able to send emails FROM their assigned aliases.
Enabling Send as Alias using PowerShell
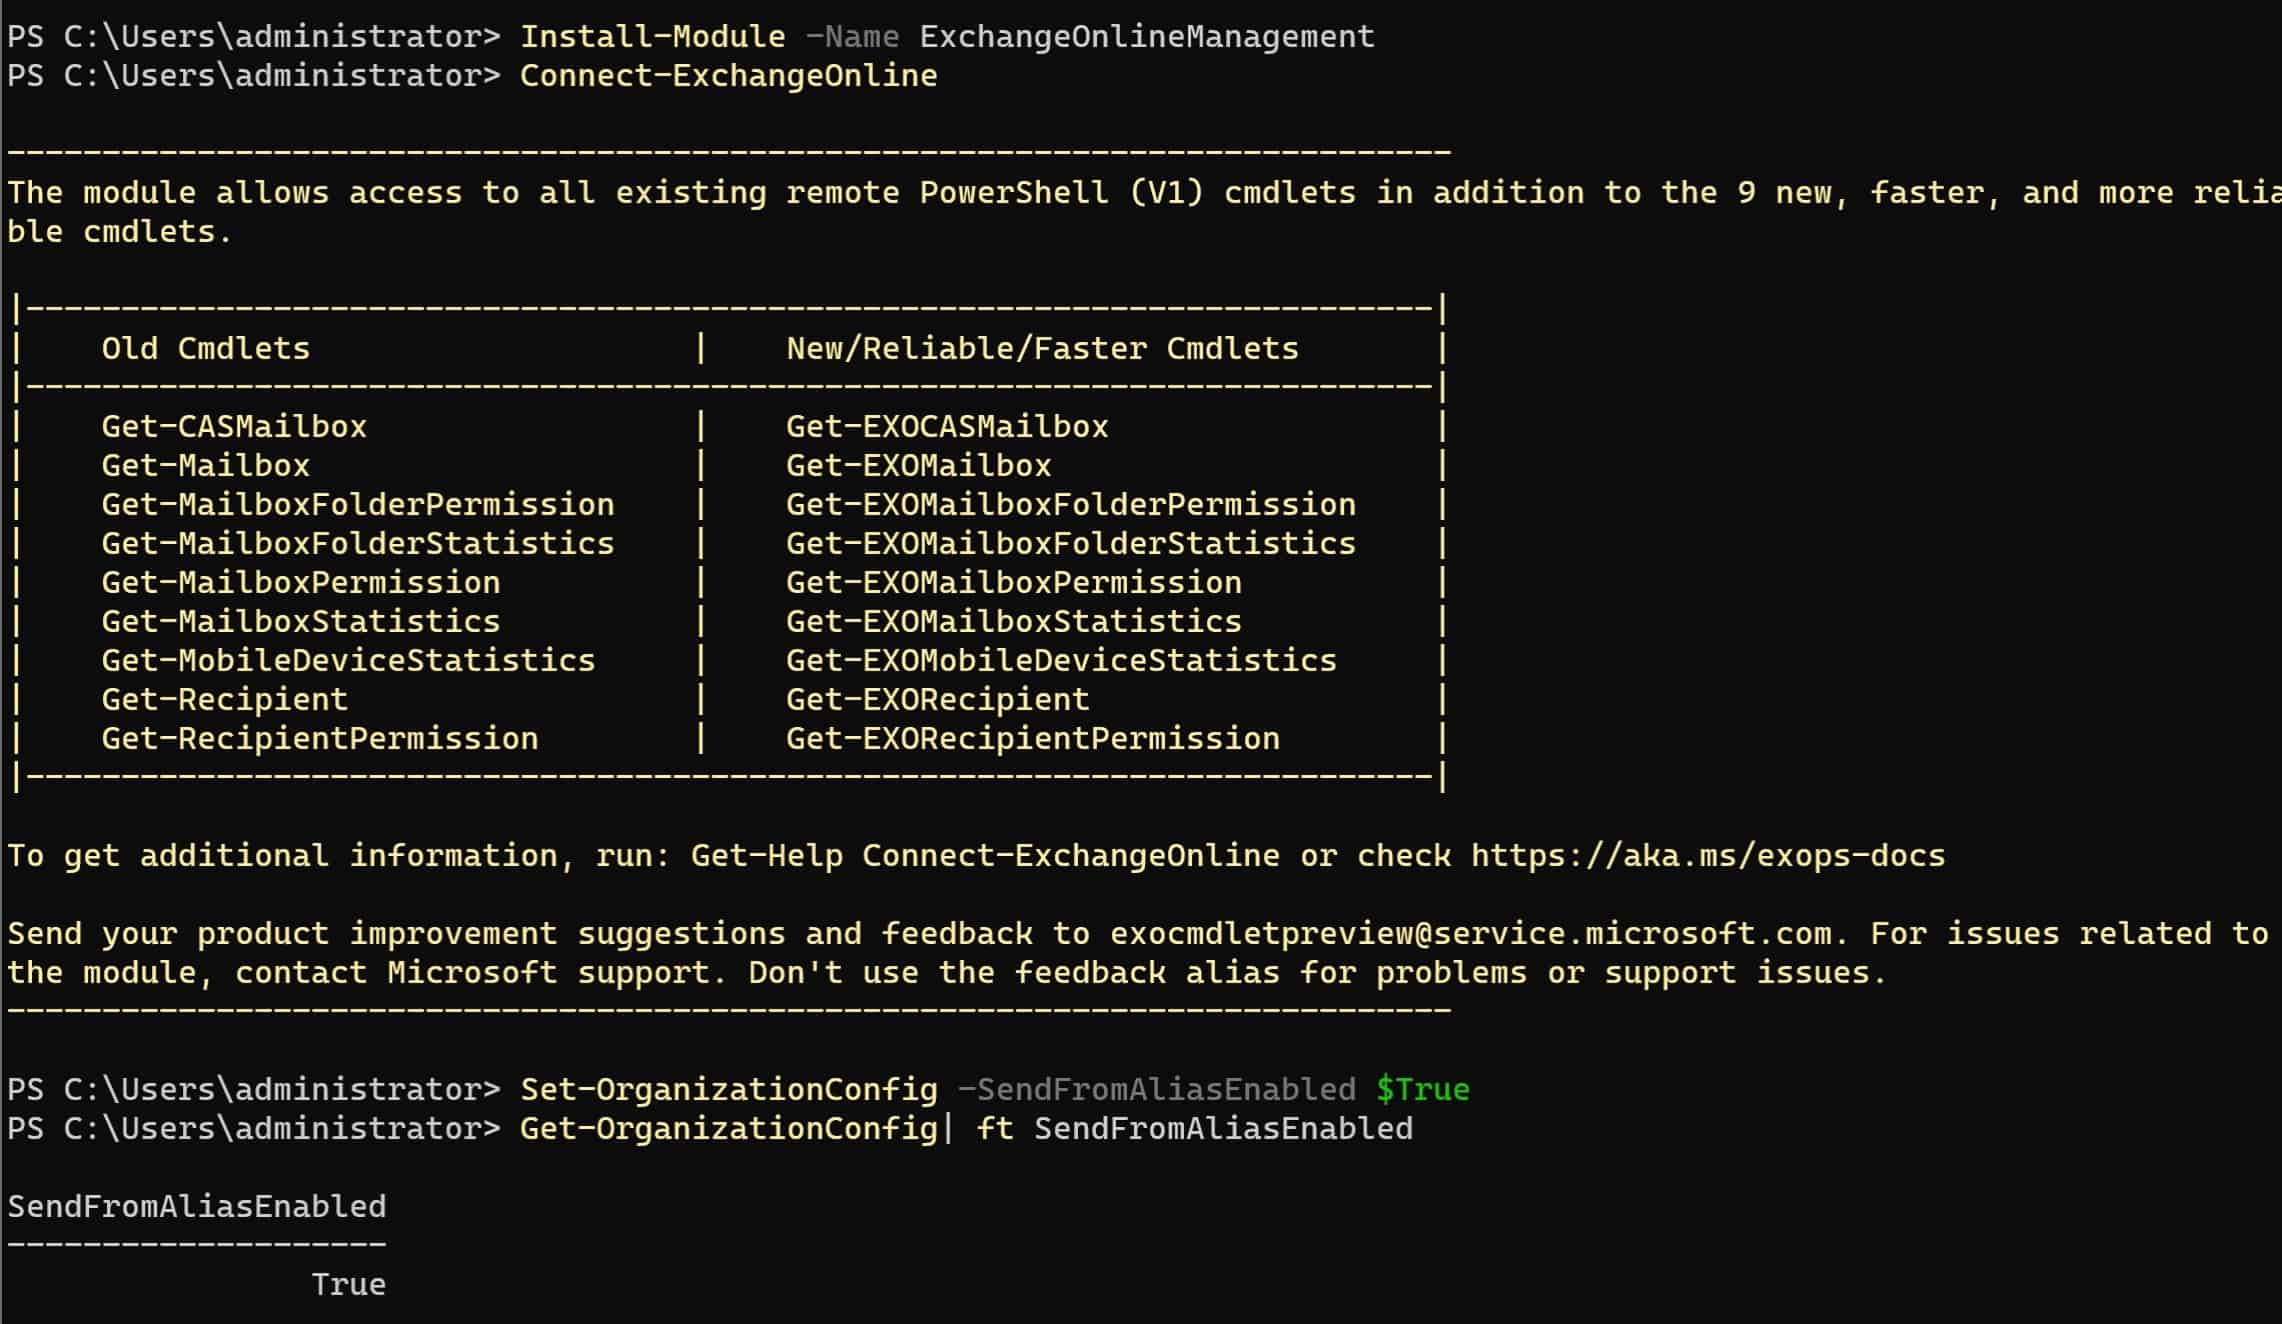
- You need to have the ExchangeOnlineManagement PowerShell module installed. If it is not already installed, run the following command from a PowerShell command prompt.
Install-Module -Name ExchangeOnlineManagement
2. Connect to your ExchangeOnline instance. When the browser opens, login with your Microsoft 365 administrator credentials.
Connect-ExchangeOnline
3. Run the following command to enable the SendFromAliasEnabled property.
Set-OrganizationConfig -SendFromAliasEnabled $True
4. Validate that the SendFromAliasEnabled property is set to True.
Get-OrganizationConfig| ft SendFromAliasEnabled
Sending as an Alias in Microsoft 365
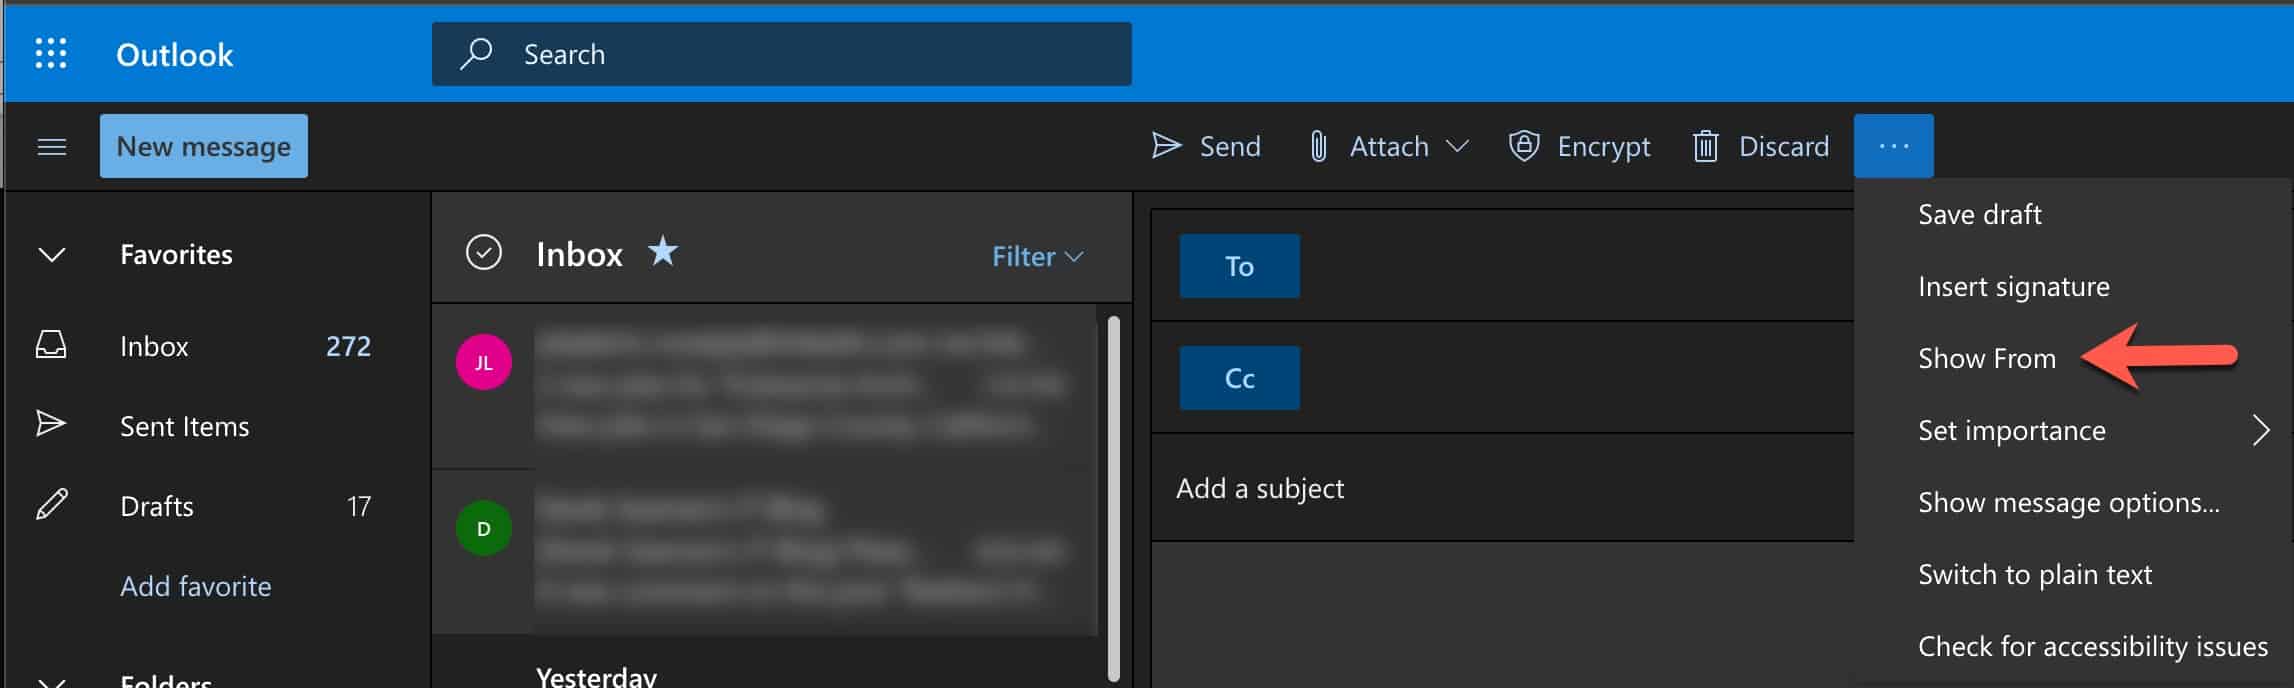
- Login to the Microsoft 365 Outlook web application.
- Start a New Message, then click the three dots next to Discard.
- Select Show From.
- In the new From field, enter your alias/proxy address.
- Compose an email as your normally would and send to a test email address.
- View the From address in the destination account, and see that it’s from the account alias, not the user’s primary email address.
Note: As far as I can tell this feature is not available in the New Outlook client on MacOS, as of version 16.48.21041102. Hopefully it is on the feature Road map.
Summary
After literally years of waiting, Microsoft has finally allowed Microsoft 365 customers to send email FROM an alias/proxy address via the Outlook web application. It requires a Microsoft 365 administrator to enable the feature via PowerShell. As of the date of this blog post, the feature has not made its way into the MacOS new Outlook client.


How do you do this on MS 365 Outlook desktop?
I have aliases on my MS accounts that don’t show up in the From: dropdown box when sending a message.
Thx
Tom
Type the alias address manually once and it will appear in the list.