In my article, Derek's 2019 NAS Selection, I discussed why I bought a Synology DS918+ for my home NAS needs. Now, I will cover the software configuration and some of the neat features of DSM (Disk Station Manager) 6.2.2. Topics that I will cover include security, snaphots, replication, Docker containers, VMs, VPN, and more. This is not a comprehensive configuration guide, so I can't cover everything I did to setup my NAS. Plus, your configuration would likely be quite different. However, it does touch on many of the critical areas that you want to review and configure during the installation process.

Storage Manager
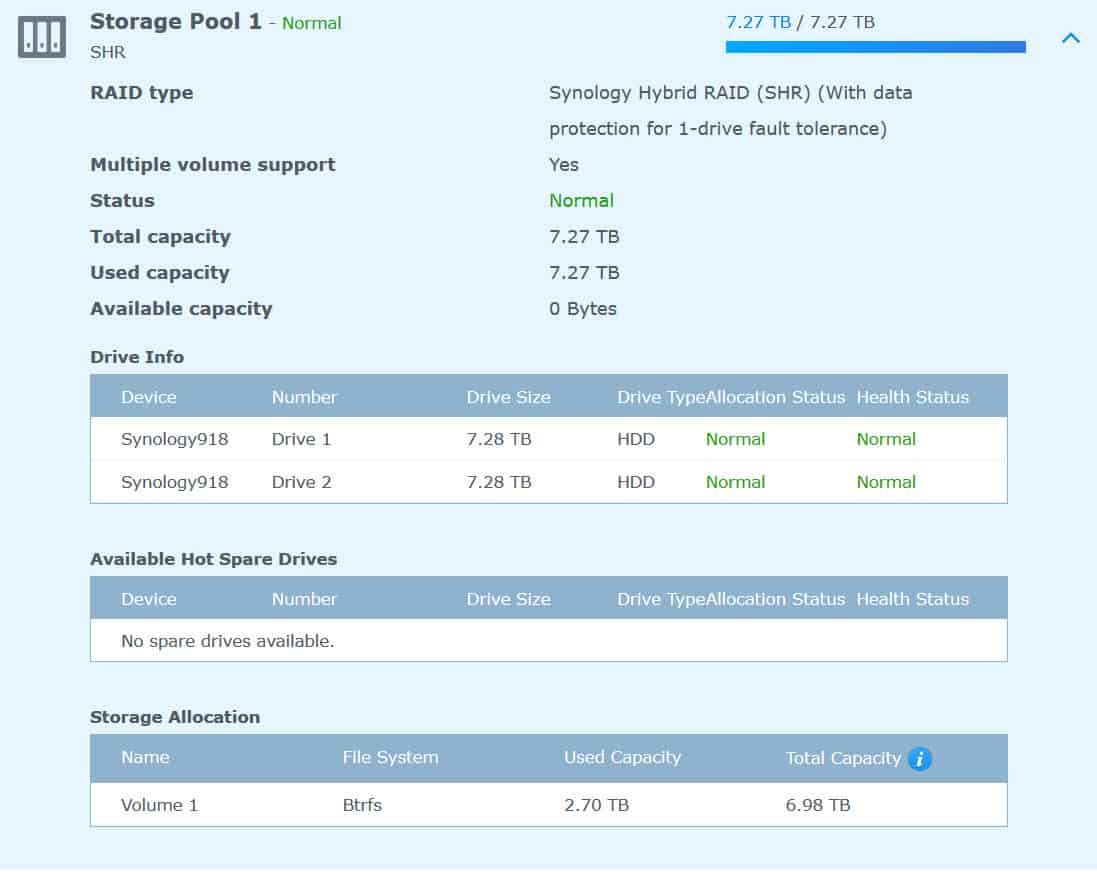
I won't step through the initial DSM setup wizard, as it's very straight forward and easy to use. But you will have to make a couple of decisions and I'll cover those here. First, one of the decisions will be what type of RAID do you want. I strongly recommend using SHR, which is Synology Hybrid RAID. This allows you to mix and match drive sizes and automatically configures data redundancy. In my case with two drives it's using one drive for fault tolerance. You can add a hot spare disk, but I chose not to. The other option is traditional RAID 1/5/6, which is very limiting in terms of drive sizes and future expansion options.
The second major choice you need to make is the file system DSM will use. Here, I strongly recommend using Btrfs. This is an advanced filesystem that allows quotas, snapshots, data integrity checks, and more. This is in contrast with EXT4 which is extremely basic and feature limited.

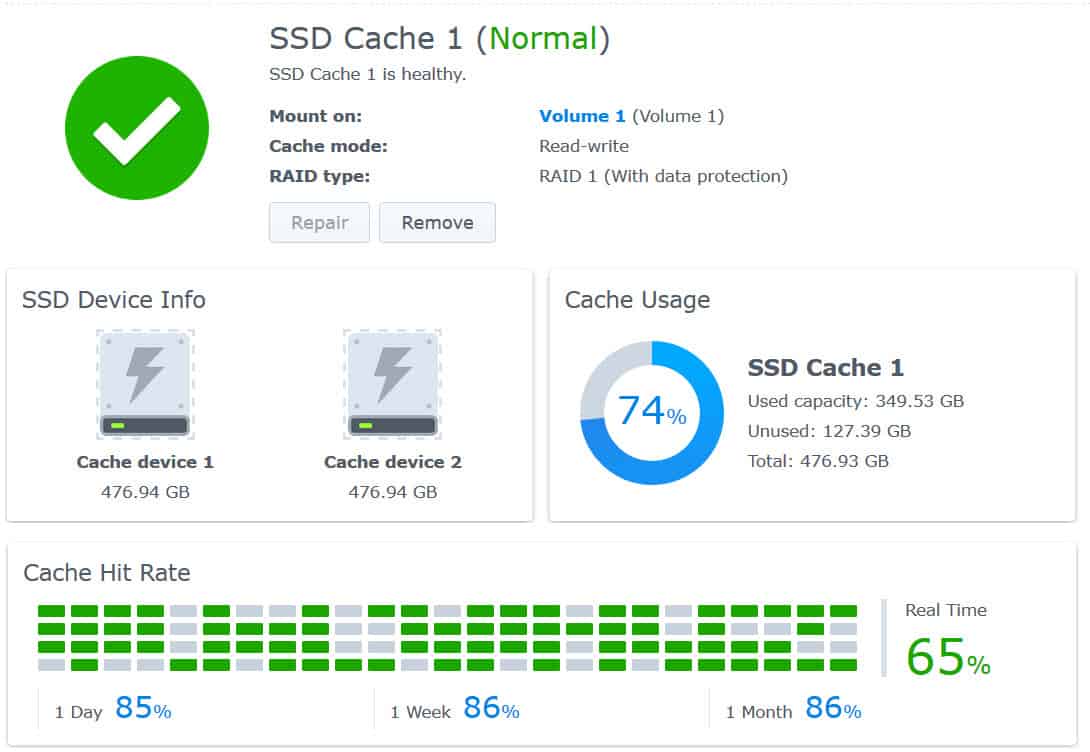
Now you need to configure the SSD Cache, assuming you bought two NVMe SSDs. Dual NVMe SSDs will enable a RAID-1 read/write cache.

Finally, let's configure the Seagate IronWolf check. In Storage Manager click on HDD/SSD on the left. Then select the Task Scheduler pane. Create a new task to do a daily Ironwolf check.
Networking
All of these settings are in the Control Panel under Network. Configuring networking in DSM is straight forward, but you do have a few options. Underneath the covers it uses OpenVSwitch. So if you are a Nutanix customer, the options presented will seem familiar. I have a single Netgear GS116E, which is a managed but very entry level switch. It supports LAG, but not dynamic load balancing. So for my situation I configured DSM networking for "Active/Backup", and connected both NICs to my switch. Don't bother with trying LACP (IEEE 802.3ad) with the GS116E, as it will NOT work. Balance-SLB was acting weird in my environment (some hosts randomly lost connectivity to the NAS), but Active/Backup has been rock solid. Configuring this option creates Bond 1 in the network interface GUI.
If you want your NAS to connect to the internet via a VPN, you can also configure that here as well. However, it does not have a 'kill' switch option, which prevents traffic leaks in case the VPN goes down. So be careful whether you want to use this VPN, or possibly a Docker Container with a VPN that is more robust (which I'll cover later). I chose not to configure a VPN here.
Finally, if you have slow SMB share access via a Windows client, check out this thread on the Synology forums. The solution is to disable IPv6. I disabled IPv6 for other reasons, so I personally didn't see the slow share access issue pop up.
File Services
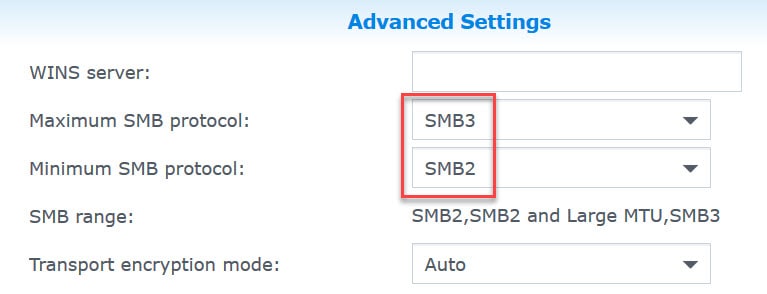
All of these settings are in the Control Panel under File Services. DSM supports a variety of server protocols such as SMB/AFP/NFS/FTP/TFTP/rsync. Depending on your needs, only enable what your clients will use. If you are using a Mac, I've read the preferred protocol is actually SMB vs. the aging AFP. If you do enable SMB, BE SURE to disable SMB1 as it is very insecure. Change the minimum to SMB2 and raise the maximum to SMB3. If you do want to use AFP for your Mac, I had to check the advanced box to "Release resources immediately after disconnect" or TimeMachine was not a happy camper. If you are a Mac user, be sure to click on the Advanced tab at the top and enable the Bonjour service for SMB (or less preferred, AFP) if you want to use TimeMachine.

Security
All of these settings are in the Control Panel under Security. The security section has a number of interesting settings, which you may want to take advantage of. There's a built in firewall, DoS protection, account protection, certificates, TLS/SSL levels, and Spectre and Meltdown protection. By default the firewall is not enabled. I haven't researched the repercussions of turning it on (such as how it behaves with VMs and containers running locally on the NAS), so for now it's off. For the best security, turn it on.

One setting I would urge you to configure is under Account. Setup the Auto Block for thresholds you feel are appropriate. In my case I used 10 login attempts over 5 minutes, and unblocked after 2 days.

File Share Security
On another security note, let's briefly talk about user accounts and file share access. Ransomware or a virus could be quite cleaver and look for network file shares to encrypt. In my case (described more below) I have shares for cloud storage backups (e.g. OneDrive and Dropbox) being sync'd locally to my Synology, as a backup measure. The last thing I want is for those shares to be writable by my client computers. I also have a couple of backup shares for Acronis that DO need write access, but only for Acronis and not by clients.
So what I did was create two users, one for read/write access to only those couple of shares that clients need (general purpose file shares). The other user is for Acronis (backup software), so it can write to a couple of backup shares on my Synology. In each case I used DSM to explicitly deny access to shares that each account should not have permissions to. The result is I use a "NAS" account on my PC and Mac to access the general purpose file shares read/write, and an "Acronis" account that can read/write to only the backup shares. The Acronis credentials are only stored in Acronis, and those shares are NOT mounted to my clients. This means unless ransomware could dig SMB credentials out of Acronis, the file shares with my backups are inaccessible to the client or ransomware.
And to be clear, I never access the NAS file shares via any Synology elevated admin accounts, as then all shares would be exposed in a read/write manner (in the default configuration).
Two-Factor Authentication
Securing your Synology account is very important. If you use the Synology C2 backup service, it's even more important to lock down your Synology account. Immediately go your your Synology web account and modify your profile to use 2FA. I personally use 1Password to store all my account information, and it has a built-in 2FA app that I vastly prefer over the standalone Google Authenticator app.
Notification
All of these settings are in the Control Panel under Notification. One important aspect to configure of DSM are notifications. You can configure Email, SMS, and push services. I just configured email. I use a @outlook.com address, and that happened to be one of the few pre-configured providers. Gmail is another pre-configure provider, or you can select custom and enter all the SMTP parameters yourself. SMS notifications unfortunately need a third-party provider setup, so I didn't do that. If you want push notifications on your mobile device, you can install a Synology App (DS Finder) on your phone, register your NAS with it, and get push notifications that way.
Hardware & Power
All of these settings are in the Control Panel under Hardware & Power. Notable settings here include memory compression (I enabled it), power recovery, beep control, fan speed, LED brightness, HDD hibernation, and UPS. If you connect a compatible UPS then be sure to enable the UPS support option and an appropriate timeout number. With some UPSes DSM can sense low battery levels and automatically shutdown. For example, I'm told the Cyber Power CST135LXU is compatible with low batter shutdown. My Cyber Power CP1350PFCLCD only allows me to set a fixed timeout period in DSM. I configured the Synology timeout threshold to be well below the estimate runtime of my UPS, obtained from the front panel of the UPS.

One topic of interest in HDD hibernation. At first might think this is a good idea, and enable the feature. After all, why not spin down disks to save some power if you aren't using them? Well spinning up and down a disk stresses the disk more than just leaving it run 24x7x365. Since you hopefully bought "NAS" grade disks (such as Seagate IronWolf Pro, Western Digital Red Pro, etc.) they are designed for continuous operation for their entire warranty period. Therefore, I would urge you to NOT enable hibernation to just save a few cents a year on your electric bill.

Finally for hardware and power is the fan speed. For the longest possible life of your Synology, use the full-speed mode. Yes, it does produce more noise but the device will run cooler, possibly extending it's life. If the NAS is in a very noise sensitive environment (such as a home theater) 'cool mode' might make more sense and is nearly silent.

Update & Restore
All of these settings are in the Control Panel under Update & Restore. Here you can check your current DSM version and do a manual software update. You can also do a configuration backup, which I strongly suggest. However, we have not yet configured everything so don't jump the gun and do a backup just quite yet.
Terminal & SNMP
All of these settings are in the Control Panel under Terminal & SNMP. There's not much to configure here, but I would call out one semi-security related item. Although security through obscurity is not always the best idea, you might want to change the SSH port here. It is a security check built in to DSM and will bark at you if it's left at the default of port 22.
Packages
Synology has an "App" store which included many, many dozens of packages. These range from Docker, to Apache, PHP, snapshots, log analysis, and a lot more. So I will go through some of the packages I use, and some basic tips on each one.
Package - Snapshot Replication
This is a vital package which will enable you to take scheduled snapshots of your file shares and iSCSI LUNs. These snapshots are enabled via the Btrfs filesystem we chose earlier in the setup. I strongly recommend configuring snapshots on nearly all shares, in case you get hit by ransomware, accidentally delete a file, etc. Don't go overboard as snapshots do have overhead. For most of my shares I configured a few days' worth of retention. If you have a second Synology, this is the app where you can do remote replication for DR purposes.
Package - Virtual Machine Manager
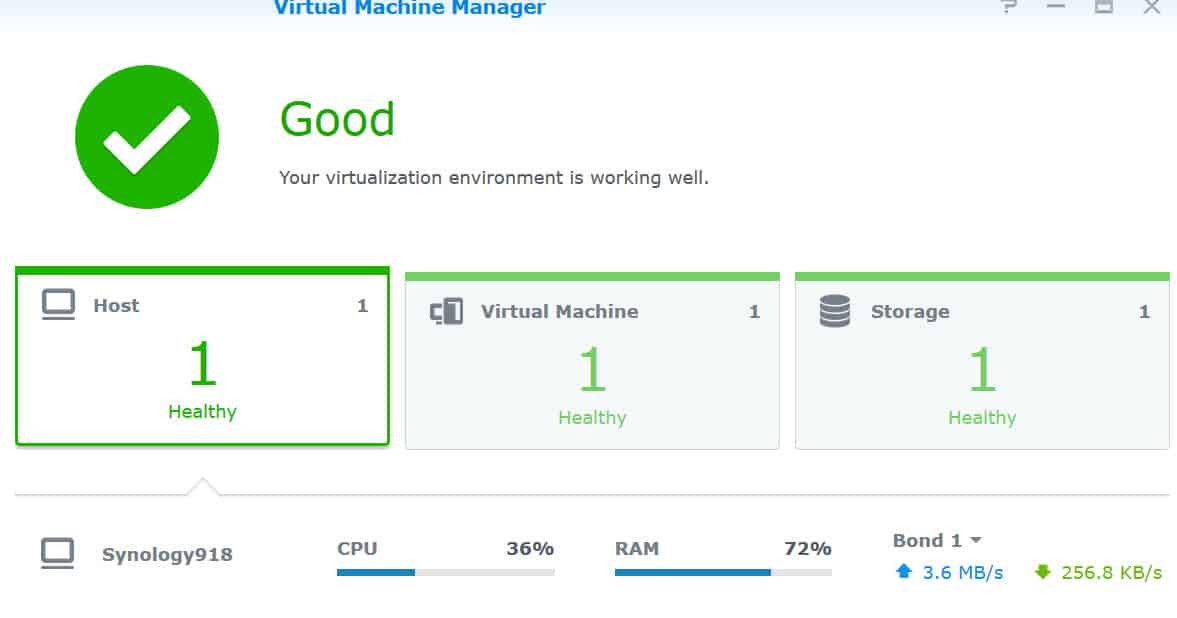
Yes, it's' true, you can run full blown VMs physically on your Synology NAS. Obviously the NAS has very limited hardware resources, so you can't go overboard here. But I did create a limited size (1.5GB RAM, 1 vCPU) Windows Server 2019 server (Domain Controller, DNS, and root CA). This allows me to provide AD/DNS services to my other home labs, such as vSphere and Nutanix Community Edition. Under the cover it uses QEMU. I will admit the VM does not have screaming performance, but it does do the job. If you don't need a full blown VM, we can do containers (coming up).
If you want to run a Windows VM on your Synology, take note that some recent versions of Windows will run slowly on the version of QEMU that Synology ships as of the date of this post. You can find a matrix and discussion on that issue here. I'm running the latest Windows Server 2019 Enterprise build on my Synology, and while it is pokey, it still works for simple AD/DNS/CA functionality.

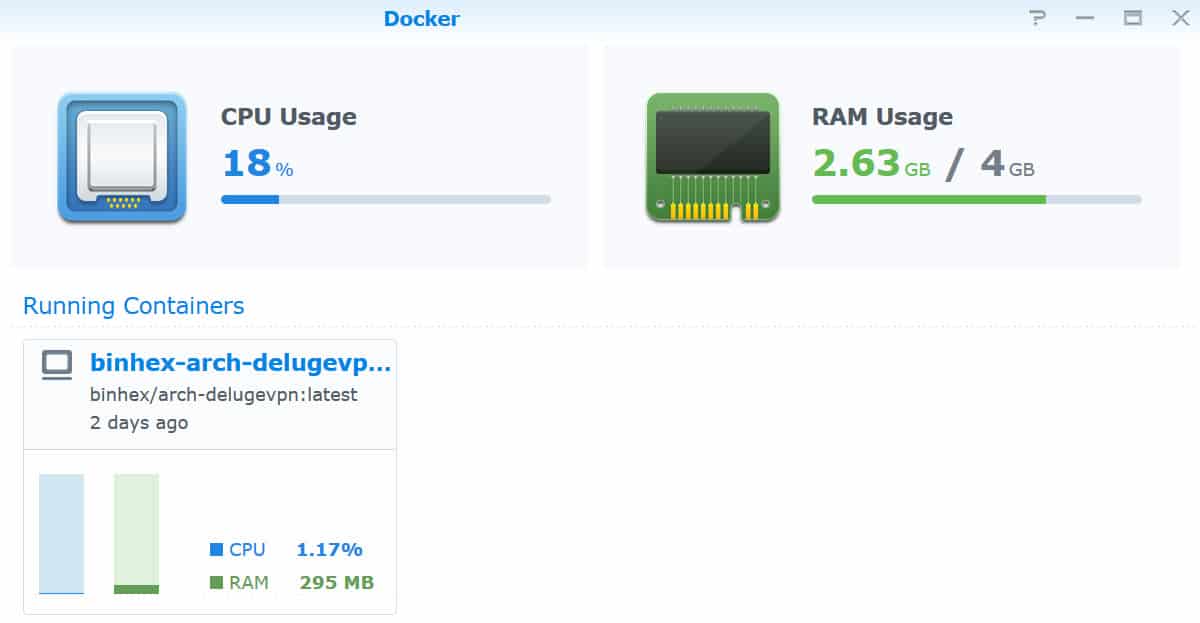
Package - Docker
If you know what containers are, and have a use for them, then this package is very handy. I'm running one container so far, binhex/arch-delugevpn. This container has Deluge (Torrent client), and a built-in OpenVPN client with kill switch. If you want to configure this package, check out this blog post. It works exceptionally well with the PIA VPN service, but flat out won't work with ExpressVPN (due to the lack of port forwarding). If you follow Tom's configuration guide, skip the OPENVPN_OPTS setting. That container setting no longer applies.
Deluge has a great web interface, and works very well. I like the fact it runs in a container, you can leave it running 24/7, and barely takes up any resources on the Synology. You can check out the binhex/arch-delugevpn support forum here.

If you want an OpenVPN server running on your Synology NAS in a container, I wrote a detailed blog post: How-to: Synology OpenVPN Server in a Docker Container. Some people prefer the perceived security of running OpenVPN in a container vs. using the built-in Synology OpenVPN server. This also frees you up to use the latest OpenVPN version, rather than waiting on Synology to provide updates.

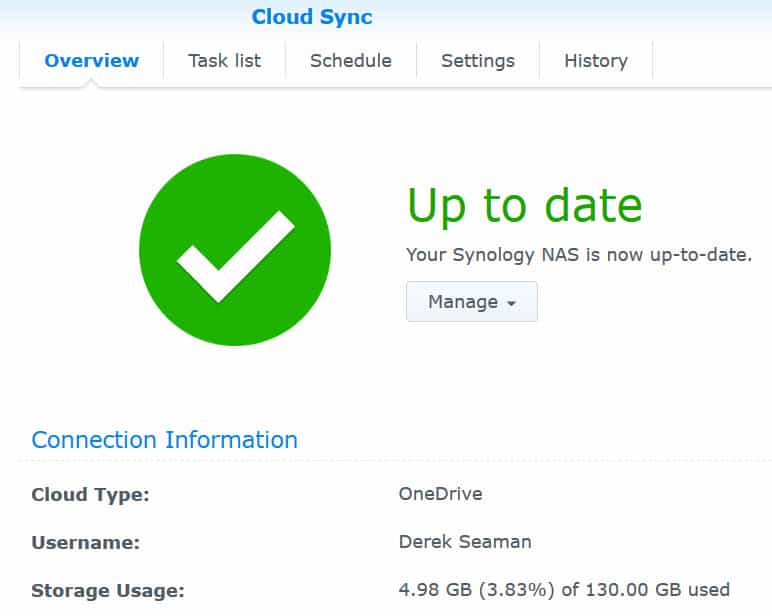
Package - Cloud Sync
This is an outstanding package that will allow you to sync data to and from the cloud. A number of cloud providers are supported, such as Microsoft OneDrive, Google Drive, Box, Dropbox, Amazon Drive, and more. This is not a true backup package, as it doesn't do versioning control. It merely shuttles files between the cloud and a locally shared folder. However, it is exceptionally useful.
I've employed Cloud Sync as a uni-directional sync FROM my Microsoft OneDrive TO a locally shared folder. This in essence creates a local backup copy of my entire OneDrive content. I then use the snapshot package to take snapshots every 4 hours. So, should I delete a file, get hit by ransomware, or another disaster, I have a full copy and 25 previous snapshots. Pretty cool? I do the same for my Dropbox contents.

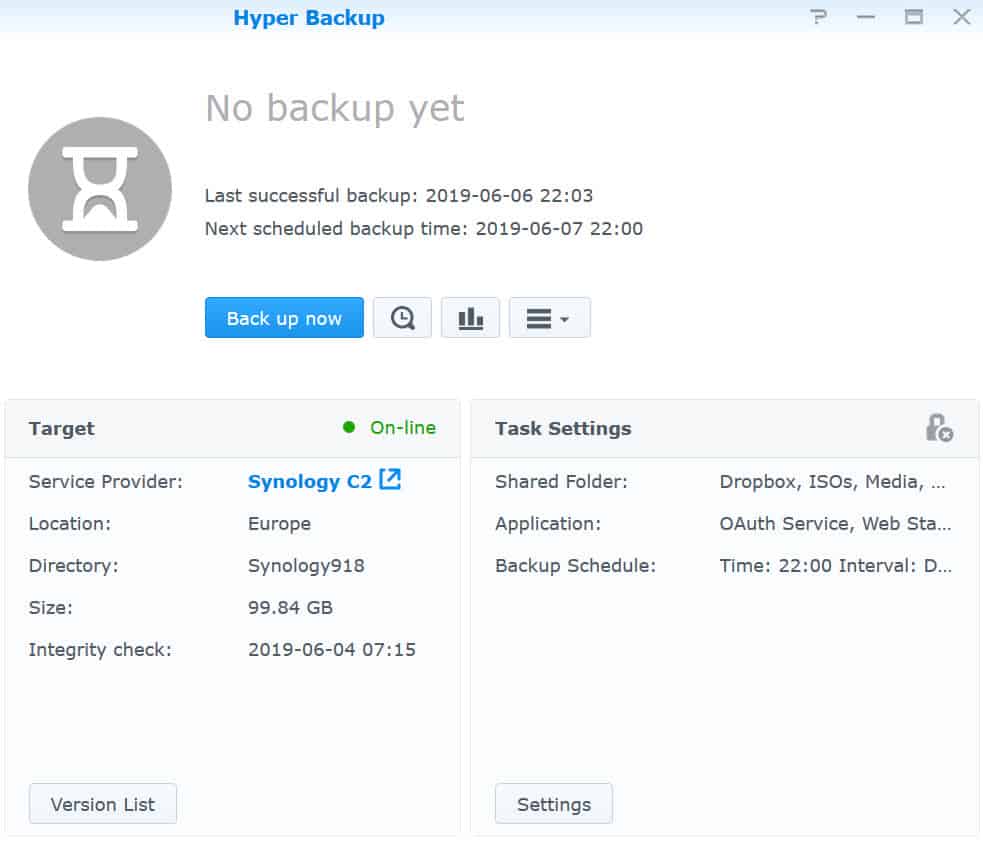
Package - Hyper Backup
Hyper Backup is a true backup package with cloud support and supports previous file versions. I use the Synology C2 cloud as the backup target. I have about 100GB of non-photo data that gets backed up to Synology C2. I can then browse my data in the cloud, and do file-level restores as needed. You can check out Synology C2 here for pricing and technical details. I think it's great for doing easy backups. Hyper Backup also supports LUN-level backups if you use iSCSI. There are a variety of cloud targets too, such as Dropbox, Amazon S3, Amazon Drive, Rackspace, etc. I backup nearly all non-photo shares to C2, including my OneDrive and DropBox data. This provides triple protection for my cloud data (one copy on the NAS, one in the native cloud, one in C2).

The Synology C2 service does not have a "Snowball" type of drive shipping service to seed large amounts of data. It's also not the cheapest cloud storage out there. So, I chose IDrive (below) for storing my 2.5TB of digital photos. I really like the file-level restore from the clould of Synology C2, but need the bulk import/export of IDrive for multiple TBs of data.
Package - IDrive (Cloud Backup)
IDrive is a cloud storage provider that has really good reviews, "snowball" type service (IDrive Express), and is pretty darn cheap. For the first year 5TB of personal data is $6.95. Yes, there's no decimal missing there. Use this link (working as of this writing) to get the special 90% off deal. Otherwise it's around $70/yr for 5TB which is still cheap. What I really like is the once-yearly free IDrive express service. I have 2.4TB of photos, and I don't want to wait weeks on that to upload or download in the case of a disaster. So they ship you for free (once a year) an external disk that you dump a backup on to, and they upload it directly into the cloud. Subsequent backups via the Synology IDrive app are then just deltas. If you have a major disaster and need all your data in a hurry, they can ship you a drive with your content. Pretty slick.
Do note that the IDrive package is a bit of a pain to install and get working, so be sure to follow the full set of instructions here. It requires a few other Synology packages and some minor tinkering to get it running (under the prerequisites). You can download the IDrive package for Synology here.
Uploading data into the IDrive cloud is not the fastest operation. So I would strongly recommend taking advantage of the free IDrive express service to kickstart your backup. Then, as previously mentioned, subsequent backups are all deltas and much faster.
Package Center
Within the Synology Package Center you have a few configuration options that you need to check out. Go into the Synology Package Center, click on Settings, then review each of the tabs. Most importantly is the auto-update feature. I prefer auto-updating all package, for both security and stability reasons. Configure these settings as you see fit.
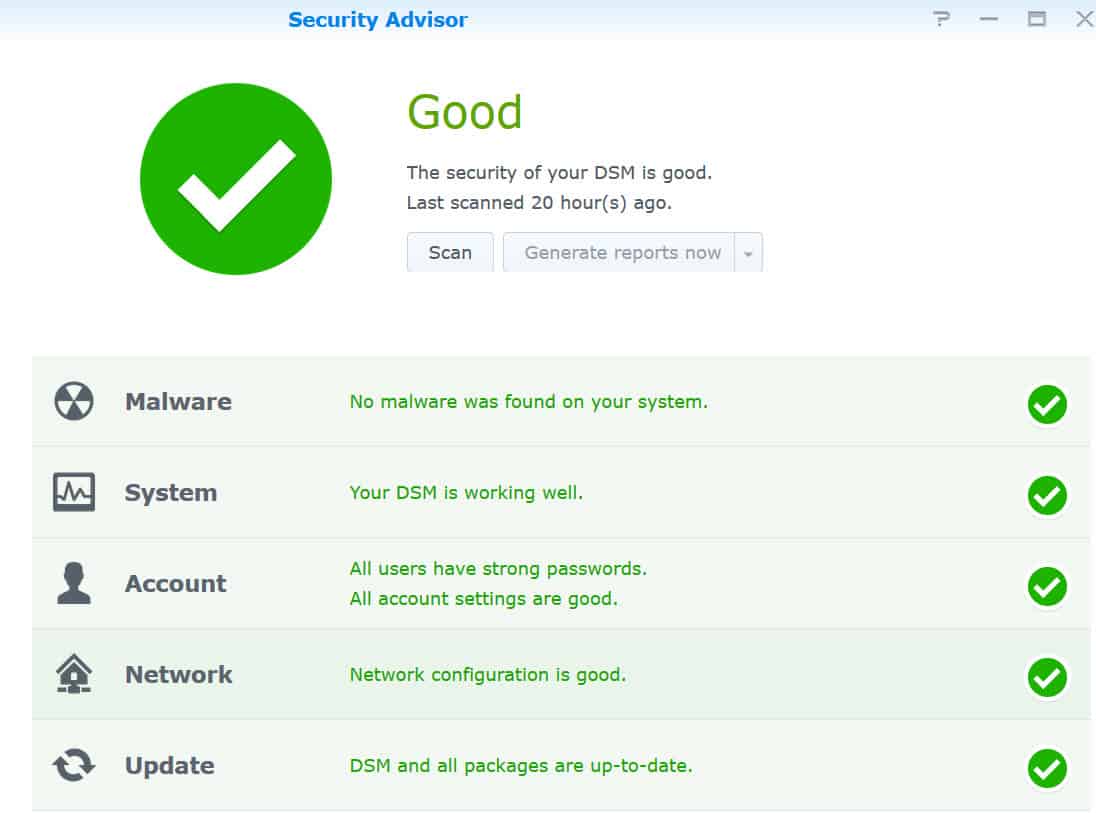
Security Advisor
In the Main Menu of Synology DSM you can find the Security Advisor app. I strongly suggest you run through the full security configuration. You can also schedule weekly/month reports, and have them sent via email.

Dynamic DNS
Synology DSM has the ability to work with a variety of DDNS services, so you can publish your public IP address to the world. This is useful if you want to allow inbound access, such as to an OpenVPN server. However, in my case, I use Cloudflare DNS (free!) and it wasn't on the list of supported providers.
Some Googling let to a few Github scripts that add Cloudflare DNS to the DSM DDNS GUI. The one I chose, and worked with no tweaks, can be found here. It uses the new Cloudflare v4 API, and was easy to install via SSH on my Synology.

Summary
As you can see from this fairly long post, the Synology DSM platform is very powerful. It has a wide range of functionality, and will easily serve as the digital hub in your house. There are a wide variety of package available that I didn't cover (such as Plex), which you can download and install. Plus, with the Docker container feature, you have access to a huge variety of software. DSM also has stellar cloud connectivity and backup options, so your data can be stored in multiple locations, both physically and virtually. I am extremely happy with my purchase and strongly recommend IT enthusiasts to look at Synology.
Finally, after you fully configure your Synolog NAS, do a configuration backup and store that config file in a safe place where you can access should the NAS die (e.g. OneDrive, Google Drive, dropbox, box, etc.).


…also, the Synology app called “Active Backup for Business” is great for those with dedicated VMware servers (or any other type of VM server). Active Backup for Business connects directly to the vSphere Client (ESXi) and backups up the VM’s, without needing an agent on each VM. Then, in an emergency, the backed up VM’s on the NAS can be spun up instantly in the app you mentioned called Virtual Machine Manager. An amazing free VMware backup solution!