One of the most popular posts of all time on my blog has been Create Trusted Remote Desktop Services (RDP) SSL Certificates for Windows 2008R2/2012/Win7. That article is a few years old, so I thought I would update it for Windows Server 2019 and Windows 10. The fundamentals have not changed, but I had a few requests for an updated post...so here it is!
When you install Windows it installs self-signed certificates for use with RDP. As we all know self-signed certificates are not good, and represent a security risk. Even if you install a Microsoft CA in your environment the RDP certificates are not automatically trusted. This post will show you to to automate the process of distributing trusted SSL certificates to the RDP service. As a result of this post you will no longer see the warning below when you RDP into your servers.
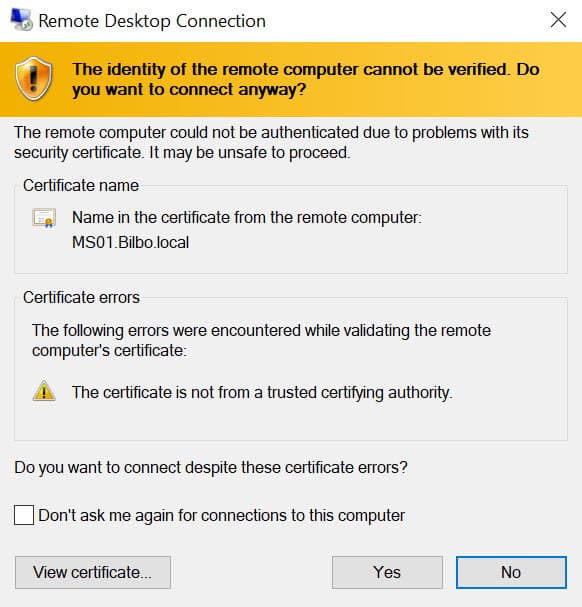
The high level process is creating a new certificate authority template that's unique to RDP certificates. Next you setup a GPO to request these new certificate types, and finally on all servers covered by the GPO you now have a trusted RDP certificate. Fairly easy and once you configure it, you can forget about it. This blog post is based on Windows Server 2019, but the same steps work for Windows Server 2016 as well. The certificates are also good for Windows 10, if you need to RDP into a client OS (such as for VDI).
RDP Certificate Template
1. On your Microsoft certificate authority server open the Certificate Templates console.
2. Expand the CA and right click on Certificate Templates, then select Manage.
3. Right click on the Computer template and select Duplicate.
4. Change the template display name to RemoteDesktopComputer (no spaces). Verify the Template Name is exactly the same (no spaces). You can use a different name if you want, but both fields must match exactly. Change the validity period to match your company policy.
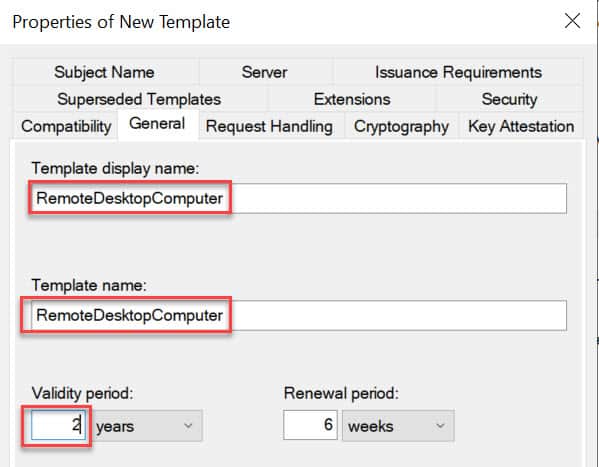
5. Now we need to create an application policy to limit the usage to RDS authentication, then remove the other application uses for the certificate. On the Extensions tab click on Application Policies then click on Edit.
6. Click on Add, then click on New. Set the value of Name to Remote Desktop Authentication. Change the object identifier (OID) to 1.3.6.1.4.1.311.54.1.2.
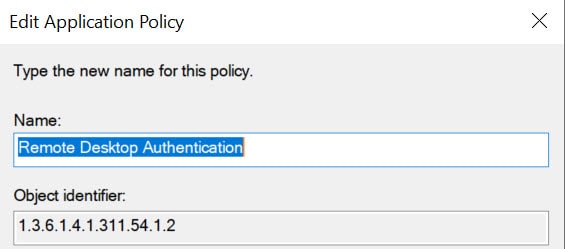
7. From the Application Policies list, select Remote Desktop Authentication and click OK.
8. Back on the certificate template properties, remove all other entries. Only Remote Desktop Authentication should be present.
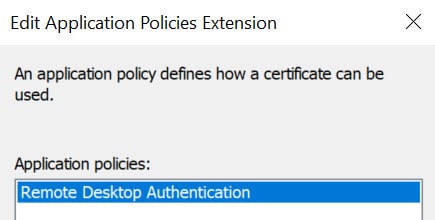
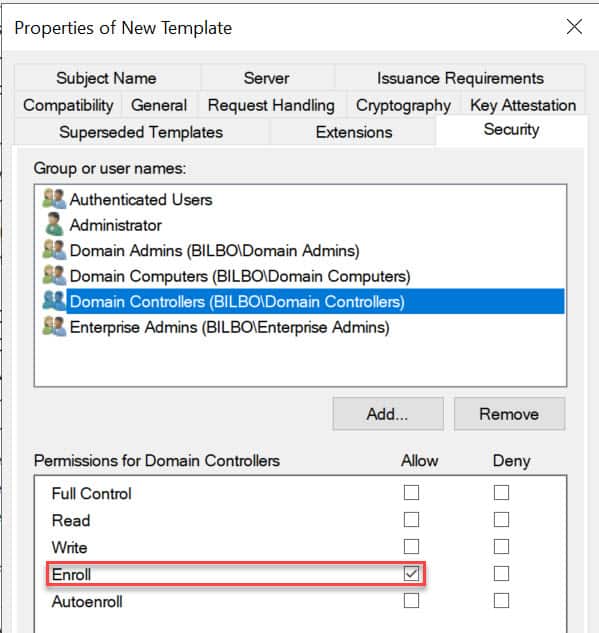
9. You probably want to secure your domain controllers as well, so for that we need to modify the security setting on the template. Open the Security tab and add the group Domain Controllers and give the group Enroll (not Autoenroll). Close out the certificate.
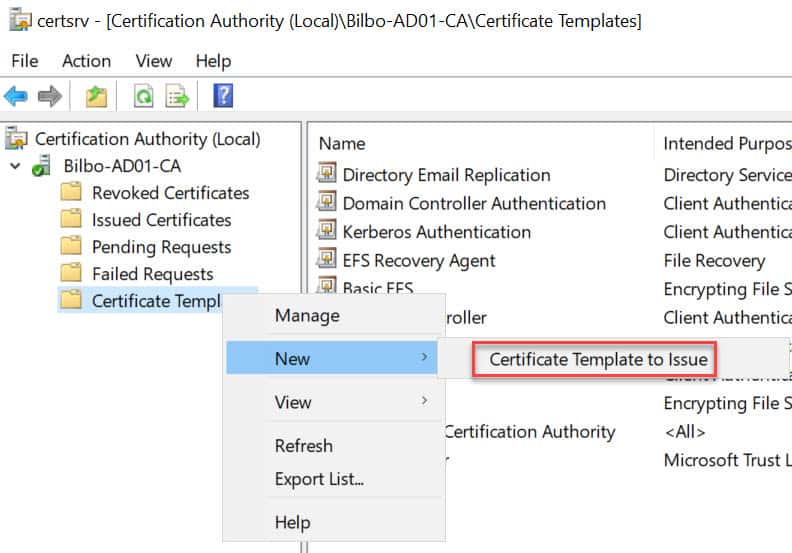
10. Open the MMC snap-in for managing your Certificate Authority and locate the Certificate Templates node. Right click, select New, then Certificate Template to Issue. Choose the RemoteDesktopComputer template.
Group Policy Configuration
1. Next up is configuring the GPO to utilize the new template. You can modify any GPO you wish, or create a new one. Obviously the scope of the GPO should cover any servers that you want to secure with TLS.
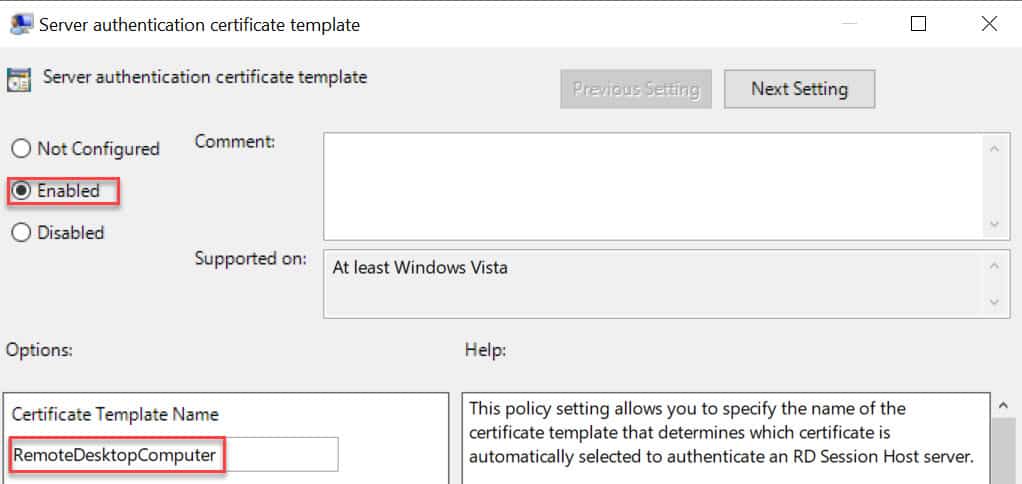
2. In the GPO editor locate the node Computer Configuration\Policies\Administrative Templates\Windows Components\Remote Desktop Services\Remote Desktop Session Host\Security. Modify the Server Authentication Certificate Template setting. Enable the policy and enter the certificate template name that exactly matches what you created in your CA.
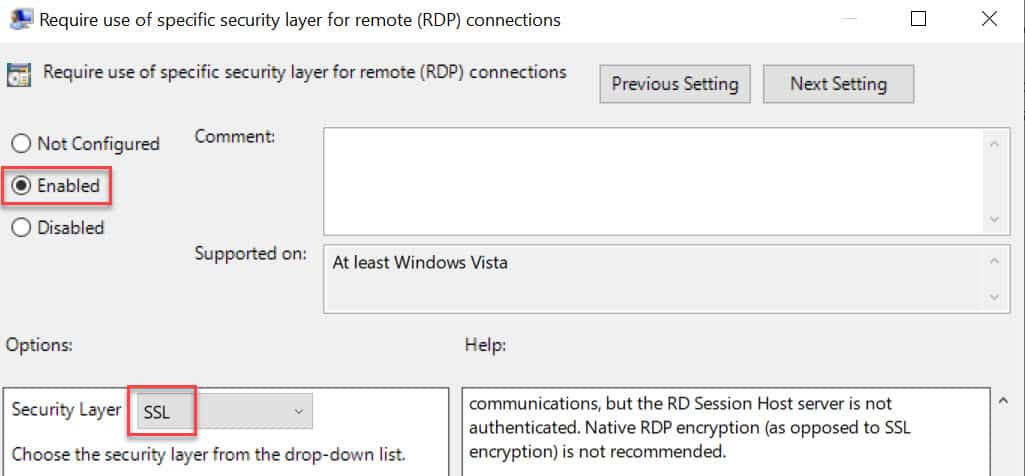
3. In the same GPO node, configure the Require use of specific security layer for remote (RDP) connections to use SSL.
4. Wait for the GPO to replicate, then refresh the GPO on a test server. Wait a minute, then open the Certificates MMC snap-in for the computer account. Look in the PersonalCertificates store for a certificate that has the Intended Purposes of Remote Desktop Authentication. If it’s not there, wait a minute, and refresh. If it never appears, something is wrong. Look at the gpresult to make sure your GPO is being applied to the server.

5. To use the new certificate restart the Remote Desktop Services service (or reboot).
6. Open the Certificate and look at the Thumbprint value. Remember the first few characters.
7. Open an elevated PowerShell prompt and run this command:
Get-WmiObject -class “Win32_TSGeneralSetting” -Namespace root\cimv2\terminalservices
Validate that the Security Layer value is 2 and that the thumbprint matches the certificate. If both of those settings are correct, then you are good to go!

8. From another computer (domain joined) now RDP into this server and verify that you no longer get the certificate warning. In fact, it should just sail right through to your desktop.
Summary
The procedure for Windows Server 2019 and Windows 10 is basically the same as 5+ years ago when I documented it for Windows Server 2008 R2/2012/Win7. But it's good to validate that the procedure still works, and give the audience a fresh post. You can check out my 2013 post titled: Create Trusted Remote Desktop Services (RDP) SSL Certificate if you want it for 2008 R2/2012 servers.



I wonder if you’ve run into the issue where you see the error message “An internal error has occurred” and the RDP connection fails? This occurs with trusted certificates but not self-signed certificates when the RDP client and server are both some combination of Windows 10 1809, Windows Server 1809, or Windows Server 2019. More info at https://www.reddit.com/r/sysadmin/comments/9kze8h/windows_10_1809_update_rdp_connections_failing/
This appears to be fixed by cumulative update KB4482887 (https://support.microsoft.com/en-us/help/4482887/windows-10-update-kb4482887) released March 1. Among the key changes: Addresses an issue that causes Termservice to stop working when Remote Desktop is configured to use a hardware encoder for Advanced Video Coding (AVC).
Does the RDP cert the machine requests need to show up in the “Remote Desktop” cert store for this to work? If not, I wonder why Microsoft even bothers to classify cert stores?
I’m not sure….blew away my test environment.
No, based on my testing this evening, it can be in the Personal store.
Can you please explain how to create this RemoteDesktopComputer template certificate that includes extra SAN names?
Hello Derek, thank you. Was there a specific reason on to enable AutoEnrollment for the RDP Authentication certificate template? Or was this simply to limit the impact of the new changes? Do you specifically advise against letting all domain computers get these GPOs and certificates?
Thanks again!
Is this even still needed? If you have an internal CA and you’re issuing “computer” certificates, why do you also need one for RDP? If both machines already have a computer certificate and they already trust each other, is this extra RDP cert still needed when connecting with RDP?
most likely do to the purpose of the cert template, I had the same thought but the Computer certs serve a different purpose
I am working with a domain system, but have some CPA’s who use the corporate VPN to get on the network then RD in to a server for their work.
As their PC’s are not joined to the network, can we save the cert on their PC’s somehow so they do not get the pop up for the cert also?
You can manually export the signing certificate from the local CA and have people install it on their PCs as a new Trusted Root pretty easily. A copy can be dl’ed directly from the certsrv web interface, there should be a link on the main page, but there are about a million other ways to get it.
From a security perspective, that may not be ideal though? The problem is that in the event your CA was compromised, an attacker could then impersonate any website or other TLS-supporting service for those users, at least until you got the word out to the users that the cert was compromised/revoked, along with instructions on how to remove it.
Now, that is kind of an unlikely scenario, just in that it would have to be very specifically targeted at those users. But it would not be particularly complex or difficult for a motivated attacker to carry out, especially if that attacker is someone already inside your network.
So, it’s a bit of a judgment call, but in this case it might actually be preferable for external users to just trust the individual server certificates (click “don’t ask me again…” when connecting) and *not* the CA, just to avoid that worst-case scenario. They’ll have to do this again every time the certs renew of course, so you may want to keep them advised as to the schedule there to avoid mass panic or whatever your users typically do when confronted with the unexpected.
There may be better solutions involving setting up an in-house OCSP or automating CRL updates on those clients, but again you’d have to weigh whether that effort is worth what is effectively just saving a few clicks every year or two.
On the first screenshot, did you do anything to make your client warn about a non-trusted CA?
My clients seem to accept the default self-signed certificate without warning, if I just type the FQDN.
Normally you would expect it to warn about this, but it doesn’t.
Thank you so much for the guided steps. These worked like a charm.
However, I have a question. I tried generating certificates for 5 years, but the certificate I see in the server is valid only for 2 years. SO how I can renew them, do you have a blogpost on that as well?
Should I delete the current certificate template and repeat the process?
Please advise.
How would this work if I purchased the ssl since we don’t have a ca server in house? Or would it be easier to just install a ca server and follow the above tutorial?
fwiw the template display name can contain spaces. it works fine in our environments. only the template name is used in the gpo setting and this one is always without spaces.
Does this work with RemoteApps?
Thank you for the very good tutorial. It works. I have one question: all certificates issued with the copied template have no subject. A SAN with the correct DNS name is included in the certificate, but the Subject is empty. What do I have to set in the template?
I followed this successfully, but the server still generates a self-signed certificate under Remote Desktop/Certificates on every reboot.
Is there a way to prevent the server from doing this?
I am having this same issue. Is there a way to stop RDP from generating a new self-signed certificate after every reboot?
Sorry to be dense, but I have not figured out how to “10. Open the MMC snap-in for managing your Certificate Authority” and get to the screen shown below that step. I have tried several things in the task bar search box (certim, certmgr, certsrv), but none of them get me to “Certificate Authority (Local)”. What am I missing?