There are a variety of ways to create a trusted SSL certificate in the Windows world, but this article will focus on an internal network that has a Windows Server 2008 R2 Certificate Authority and member servers. This guide will show you how to create a custom Microsoft CA SSL certificate template. This can be very useful for VMware environments, where you may need to tweak certificate template properties.
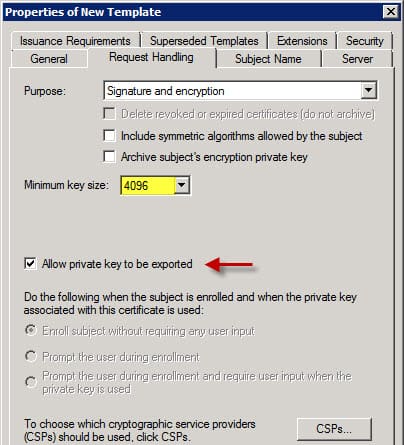
IIS has a built-in domain certificate request wizard, but you can’t specify a custom web server certificate template to use. The built-in Web server template in the Microsoft CA is fine and dandy, but you might want to customize the certificate to extend the validity period, increase the key length, allow private key exporting, or a variety of features. Or you may have other enterprise services that can use certificates stored in the Microsoft computer certificate store, such as VMware View 5.1 connection server.
Whatever the case may be, the steps below will show you how to create a custom Microsoft CA SSL certificate template in your Microsoft CA, then perform a certificate request using that custom template.
Create the Microsoft CA SSL Certificate Template
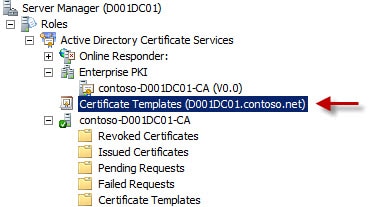
1. Logon to your Microsoft Root CA and open the Certificate Services MMC. Expand the first Certificate Templates tree, which should reveal more than 30 Certificate Templates.
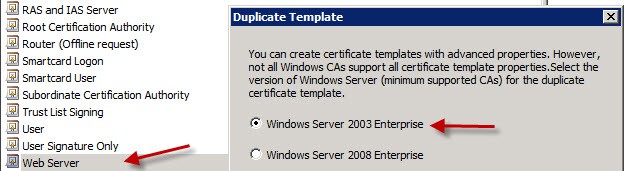
2. Right click on Web Server, duplicate the template, and then select either template type, but I choose Windows Server 2003 Enterprise. The 2008 template gives you more options, and is required if you want to use Suite-B encryption algorithms like elliptical curve. However, the Windows Server 2008 certificate template will NOT work with VMware View 5.1 connection server, so use 2003 instead.
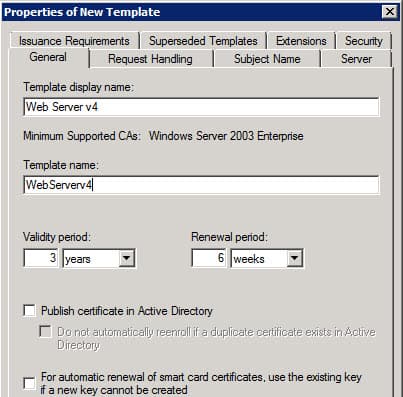
3. Modify the template display name and validity period to suit your needs.
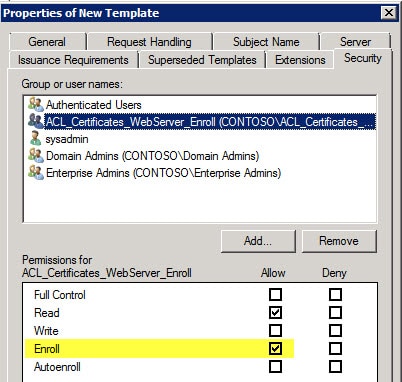
6. Click OK to close the template properties and create the new template.
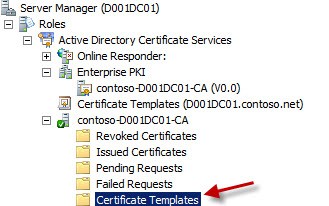
7. Next, we need to make the certificate available to computers. To do this, right click on the second Certificate Templates container, as shown below. Select New -> Certificate Template to Issue. In the next window select the template that you just created.
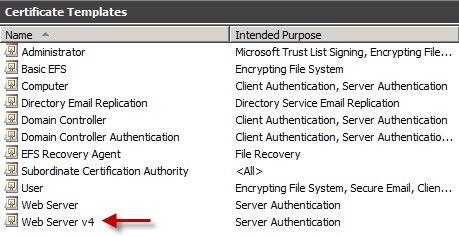
You should now see your custom certificate template listed, as shown below. At this point you can stop, as the certificate authority is now properly configured to issue a web server certificate template.
8. If you created a group that can enroll in this certificate type, then place the computer object into the group and reboot the server, so it gets the new group membership. If you went the easy route of adding Domain Computers to the enroll permission, no reboot is needed.
Request New Certificate
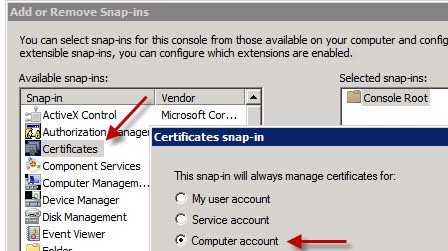
1. To request a new certificate using the freshly created template, logon to the server that needs the SSL certificate and open a blank MMC then add the Certificates snap-in for the Computer account.
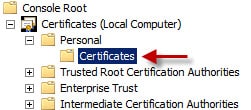
2. Once the MMC console is added, expand down to the personal certificates store and right click on Certificates. Select All Tasks then Request New Certificate.
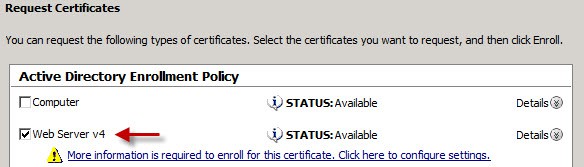
3. Click through the wizard until you get to the Active Directory Enrollment Policy. Select the new web server template that you just created. Then click on More information is required…
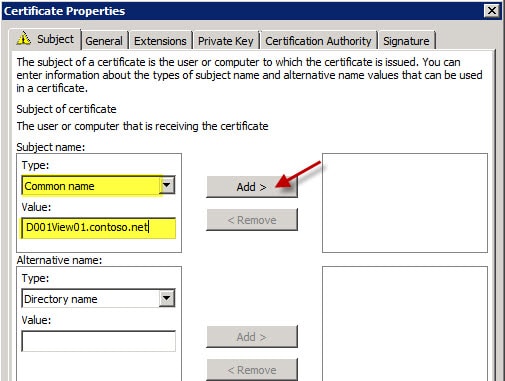
4. In the Certificate Properties page you need at a minimum the Common name, which should be the FQDN of your web server. When I configured an alternative name using the server’s short name, I got some weird certificate issues in IE and View, so I’d just stick with configuring the common name with the FQDN and no other fields. Click Add to add the properties to the certificate request.
5. Close out the certificate window and click on Enroll. If all goes well, you should now have a new certificate listed in the MMC.


I have been searching for this since weeks.
Great!
Thanks
The only step I’m confused on is Step 8. Is this stating I need to add the view connection server to the security group that I gave privileges to enroll in step 5. on the CA server itself?
This comment has been removed by the author.
Hi D,
I followed everything you have above until step 11.
The Web Server v4 did not show up on the View Connection Server where I need to request a new certificate.
When I clicked on show all templates, I saw the Web Server 4 template status in unavailable with explanation:
The requested certificate template is not supported by this CA.
A valid certification authority (CA) configured to issue certificates based on this template cannot be located, or the CA does not support this operation, or the CA is not trusted.
So I decided to test the Web Server template and added the user group on Step #5 above and bam, after rebooting the View Connection server, it shows up when I requested new certificate.
I wonder if there’s anything else I need to do to “enable” that duplicate template.
Do you have any idea?
Much appreciated.
Thank you for such a great blog.