Windows Server 2012 is Microsoft’s biggest server OS release since Windows 2000. The number of features, enhancements, and optimizations is mind boggling. One major area of focus was SMB, which is Server Message Block. SMB is the protocol used to access file shares across the network. SMB 3.0 was introduced with Windows 8 and Windows Server 2012, which is an extreme make over in every sense from prior releases. Windows Server 2012 SMB transparent failover is a great feature, which I’ll cover now.
New features include certificate-less encryption, multi-channel, SMB transparent failover, scale-out file servers, SMB over RDMA, SMB direct, and continuous availability. Basically throw out everything you knew (or hated) about SMB 2.1 and earlier. Microsoft has a great blog article here that lists dozens of links to articles and videos about SMB 3.0. Check’em out!
This is the first post in a short series about some of the enhancements Microsoft has made to file shares in Windows Server 2012 and Windows 8. First I will cover a new feature called transparent failover, and according to Microsoft is a key SMB feature. The SMB extreme makeover was so radical, that Microsoft now supports server applications using SMB for accessing their data, such as SQL Server and Hyper-V for virtual machines. SMB 3.0 can operate a near line-speed, pushing over 5.7GBps (Bytes, not bits) over a 54Gbps Infiniband fabric. Check out a great post on that here.
Should the underlying storage become unavailable these applications will not handle it gracefully and would crash. So SMB transparent failover enables continuously available file shares using Microsoft clustering and scale-out file shares. Should there be a hardware or software issue that prevents access to a particular node the application will transparently fail-over to another cluster node without interruption.
Like most new features, there are a few requirements in order to implement and take advantage of SMB transparent failover:
- A failover cluster running Windows Server 2012 with at least two nodes. The configuration of servers, storage and networking must pass the all tests performed in the Validate a Configuration wizard.
- File Server role is installed on all cluster nodes.
- Clustered file server configured with one or more file shares created with the continuously available property. This is the default setting.
- SMB client computers running the Windows 8 client or Windows Server 2012
“Legacy” operating systems such as Windows 7 can access file shares which are configured for transparent failover, but won’t be able to take advantage of that feature since Windows 7 ships with SMB 2.1, not 3.0.
My series for configuring a transparent failover SMB share is broken down into two parts. First, we will use the vSphere 5.1 Web Client to configure two RDMs that will be shared across two Windows Server 2012 cluster nodes. One is for the quorum disk, and the other is the data disk. The second installment is configuring a cluster on Windows Server 2012 using the RDMs to create a transparent failover SMB share, and finally testing it with Windows 8 to see how it performs.
VMware has a great KB article on the supported Microsoft Clustering configurations. When running a Microsoft cluster in production you should strictly follow the supported deployments so you don’t run into problems. In short, you can ONLY use Fibre Channel SANs or in-guest iSCSI for accessing the shared disks. You CANNOT use native iSCSI (like I’m doing in my lab) at the ESXi host layer. In addition, the VMs must reside on a VMFS datastore (not NFS) and the VM disks must be Eager Zero thick provisioned.
Configuration:
Node 1: D001FS01 Windows Server 2012
Node 2: D001FS02 Windows Server 2012
Quorum LUN: 3GB
Data LUN: 30GB
Let’s get started!
1. The first step is configuring your storage array to present one or more LUNs which can be used as RDMs for the cluster. As you can see below in the vSphere 5.1 web client, I have two LUNs on my QNAP, one of which is 3GB and the other is 20GB. Those two LUNs are NOT mounted as VMware datastores, since we need to use them as RDMs. Again, please note the officially supported MSCS configurations, as you should NOT use native iSCSI like I’m doing here. But let’s pretend the QNAP is a fiber channel array. 🙂

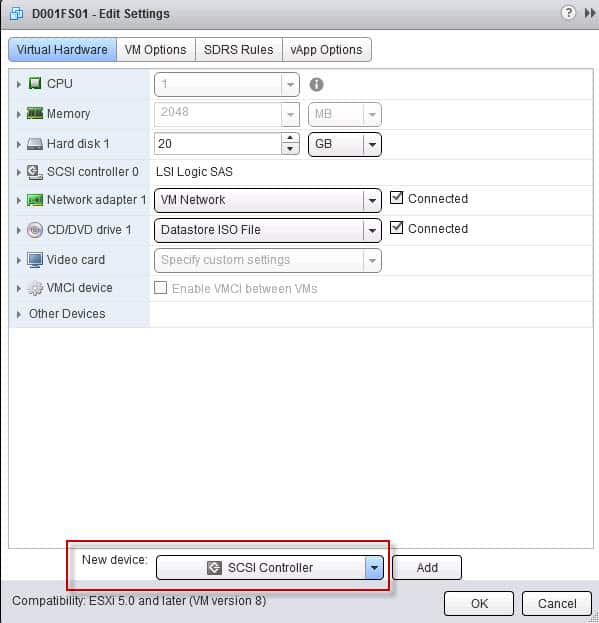
2. Now that we have two LUNs discovered by vCenter, we need to add a second SCSI controller to the VMs, so we can enable SCSI bus sharing and let both VMs access the RDMs.
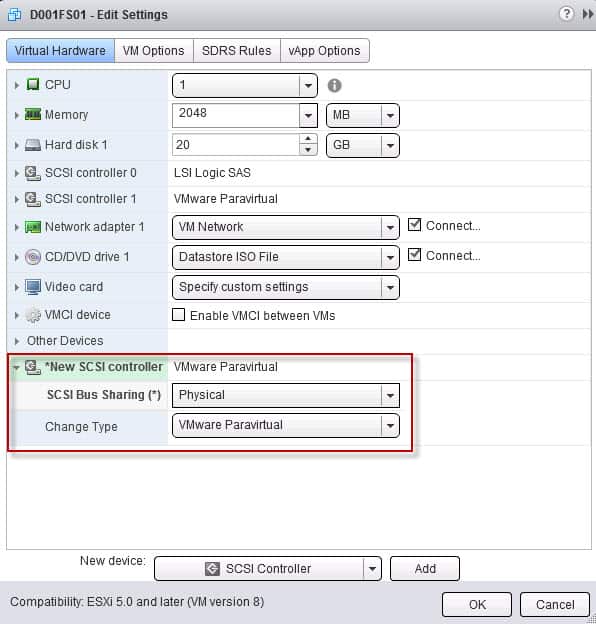
I like the VMware Paravirtual controller, since it’s more optimized for virtualized environments. Be sure to select Physical SCSI Bus Sharing. If the SCSI Bus sharing option is greyed out, then the VM is running and you need to power it down and try again.
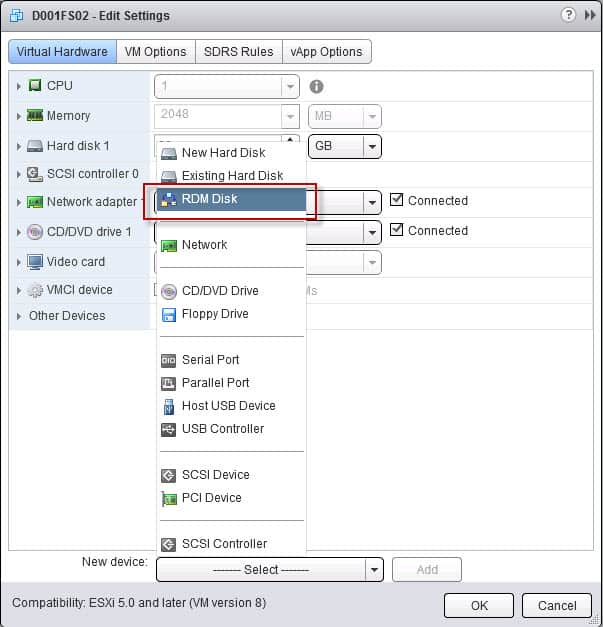
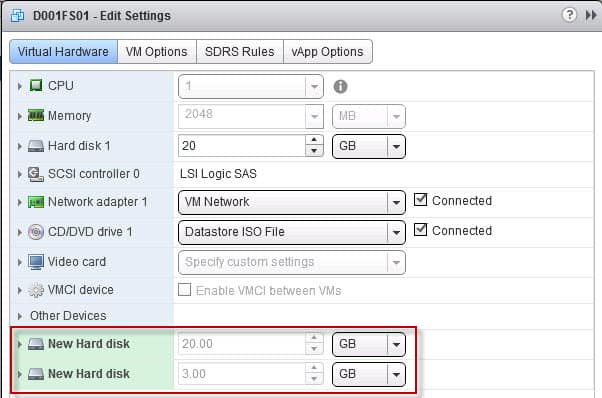
3. Next we need to add the RDMs to the first server. Add a New Device then select the RDM option.
4. When we use the RDM wizard it should show the two LUNs which are not currently claimed.

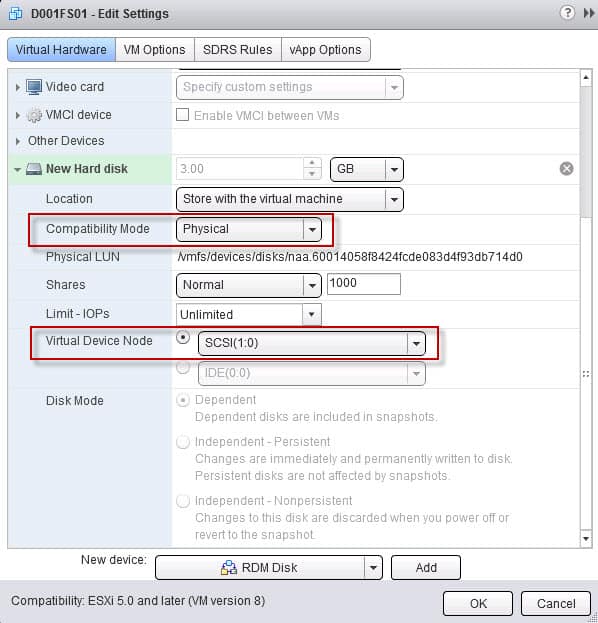
5. What’s important when adding the RDM is attaching it to the new SCSI adapter, so I assign it to SCSI ID 1:0. Depending on your situation you can use physical or virtual compatibility mode, for this configuration I selected physical.
Both RDMs should now be shown, and each configured to use the second SCSI adapter.
6. On the second file server VM, which is also powered off, add a second SCSI controller and enable the same sharing mode you use on the first file server.
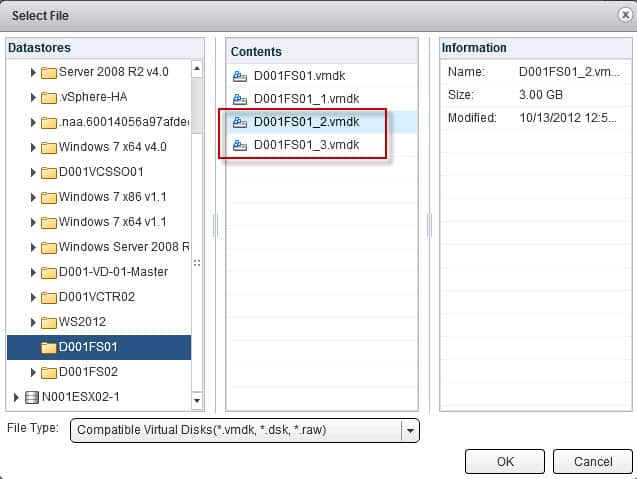
7. Adding the RDMs to the second file server is a different process, since they were already “claimed” by the first VM. For this VM we need to add an “Existing Hard Disk”.

Browse to where the first VM is, then locate the associated RDM VMDKs.
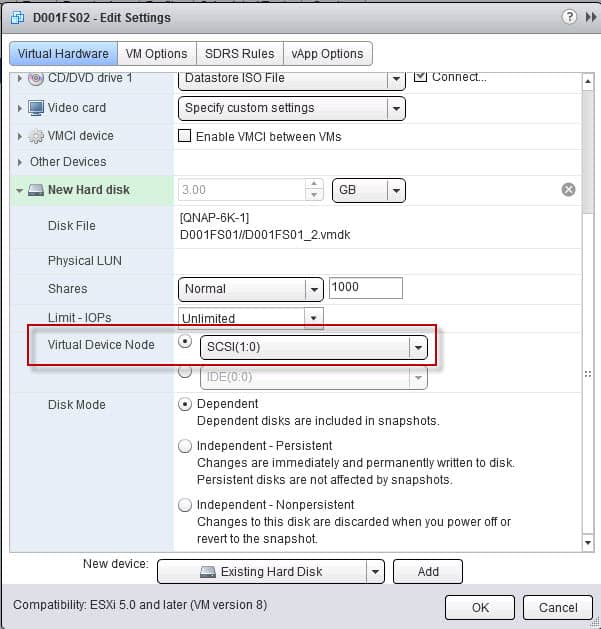
After you add the VMDK, be sure to change the SCSI address to the second controller:
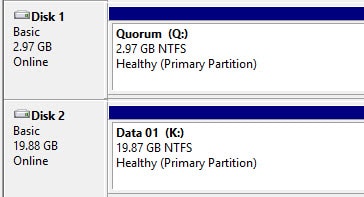
8. Power on both VMs and login to one of the servers. Open the Disk Management tool and verify you see the RDM disk(s).

9. On the first file server initialize both disks, bring them online, and I would suggest using GPT partition type for the data disk(s). This will allow you to expand the disk beyond 2TB in the future. Create a simple volume on both disks, and use whatever letters and descriptions that make sense to you. Do NOT configure the disks on the second node at this time. Per Microsoft best practices, if you want to use shadow copies of shared folders, use a NTFS allocation size of 16KB, not the default of 4KB.
Now that we have the RDMs configured on both nodes, and formatted them on the first node, we are now ready to install and configure Microsoft cluster services. The remainder of the cluster configuration is covered in Part 2.