In Part 1 of this short series of configuring Windows Server 2012 SMB transparent failover we configured two VMs using the vSphere 5.1 web client to access shared RDMs. Then mounted and formatted on one node with a 16KB allocation size, to better optimize shadow copies for share folder performance. Now that the storage is configured we can start the cluster configuration.
1. Login to the first server that will be part of this cluster. I recommend creating a server group for the file server cluster. This is a new concept in Windows Server 2012, and makes management easier. Completely optional though.
2. Add both servers to the server group, which I called File Share Cluster.
3. Now we need to configure various roles and features to enable a File Share cluster. Click on Add roles and features.
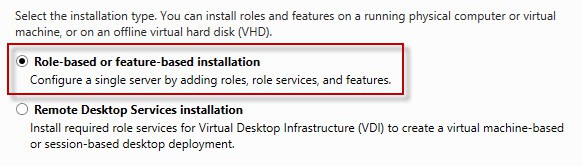
4. Leave the default option selected on the next screen.
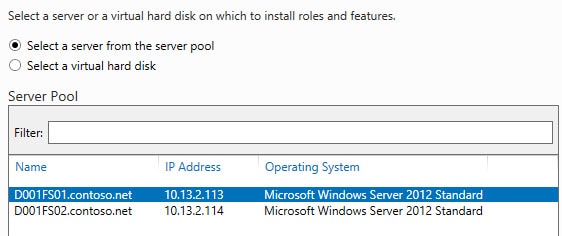
5. Both of the servers should be listed in the pool so select the first one.
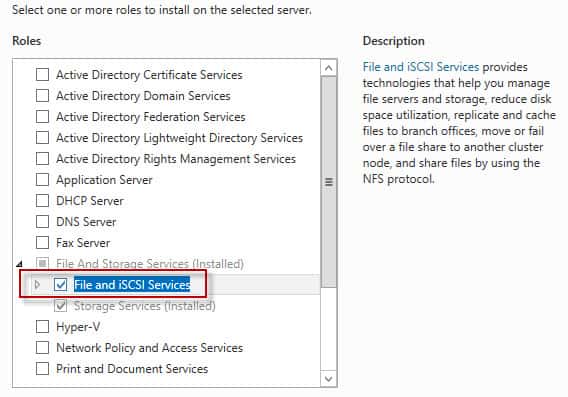
6. Locate File and iSCSI Services and check the box.
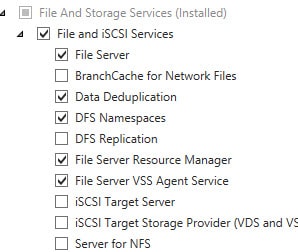
7. Under File and iSCSI Services check the options shown below. Some are optional, such as Data Deduplication, DFS Namespaces and the VSS agent service. For a fully pimped out file server I would suggest you enable them.
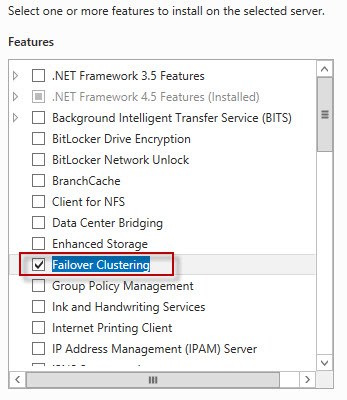
8. Next up enable the Failover Clustering feature.
9. Verify all of the roles and features are appropriately listed and wait for the installation to complete.
10. Repeat steps 2-8 for the second file server. Remember you can do all the configuration from the first server, since the management tools are now multi-server aware. Pretty cool!
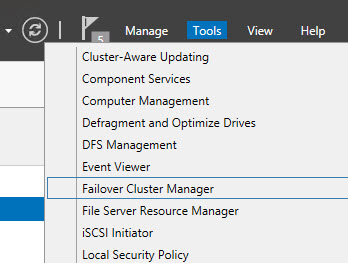
11. Launch the Failover Cluster Manager.
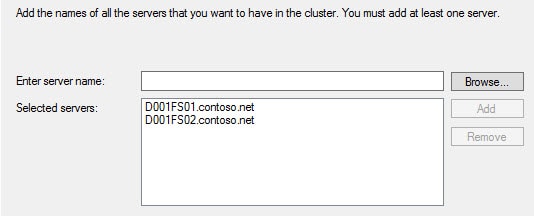
12. Start the Create Cluster Wizard and add both of your file servers.
13. Choose a cluster name that makes sense for your organization and enter a valid IP address.
14. Review all of the configuration settings then create the cluster. I left the option checked to add eligible storage to the cluster, since we created the volumes in Part 1.
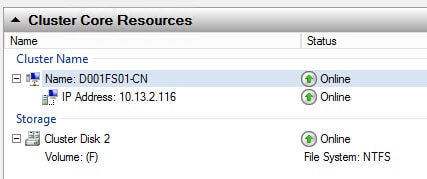
15. After the cluster is created you should see your Cluster Core Resources online.
16. If you drill deeper into the storage configuration you should see the two RDM disks added.
17. Depending on the security configuration of your domain, you may run into a permission issue when you try and bring your File Server cluster online, after you complete the next few steps. To head off running into problems, you need to make sure the cluster computer object (D001FS01-CN in my case) has Create Computer Objects permissions on the OU where the cluster objects reside.
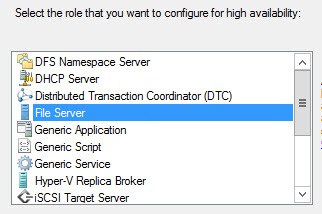
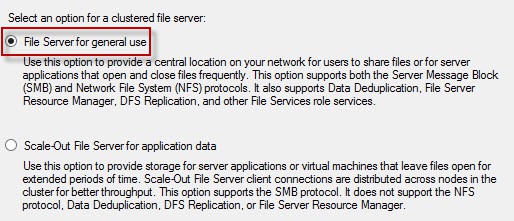
18. In the Failover Cluster Manager click on the Roles node select Configure Role. Select the File Server role, then select File Server for general use.
19. New to Windows Server 2012 and Windows 8 is the concept of a Client Access Point. This is the hostname/IP address the SMB 3.0 protocol will use to access the file shares.
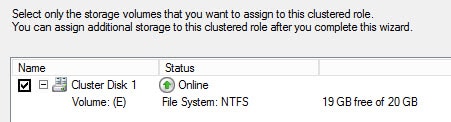
20. Verify the disk(s) you want to use for the file shares are listed as a cluster resource.
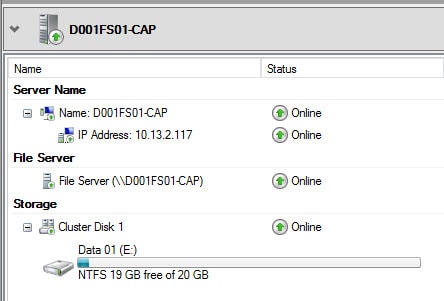
After the wizard completes, you should see a happy server with Online resources.
21. Now that the cluster is configure and the File Share role is happy, we need to create a clustered File share resource. In the left pane click on Roles, then in the middle pane click on the File Share resource and Add File Share.
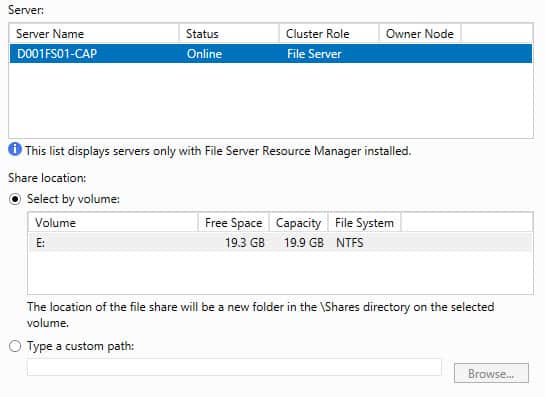
22. Since this file share is for user data, not applications like SQL Server or Hyper-V, select SMB Share – Quick or SMB Share – Advanced. I like Advanced better.
23. On the next screen you can select which volume to create the share on (if you have several) and you can also enter a custom path for the share, if you don’t want it created under a “Shares” folder on the drive. I left all the defaults.
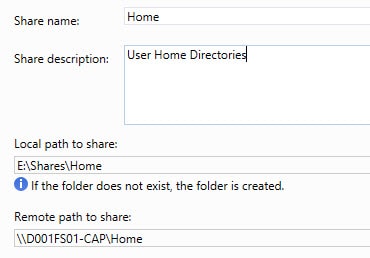
24. Enter the share name and description that suites your needs.
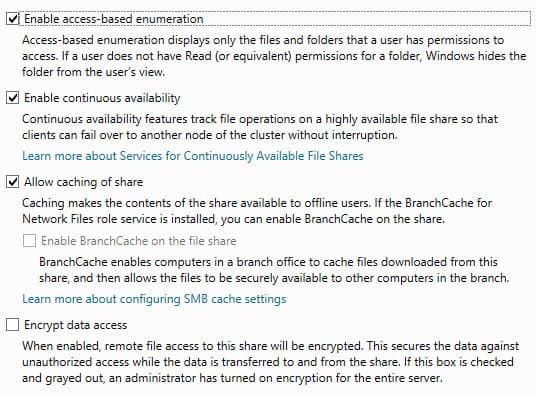
25. Next up are several options you can configure for the share. Personally I like access-based enumeration, as users will only see directories they have access to. You can also enable SMB encryption, although that only works with Windows Server 2012 and Windows 8 computers (not Windows 7). This does NOT require IPsec or certificates to work. If your CPU supports the AES-NI instruction set all of the AES encryption is done in hardware, for virtually no CPU overhead. So if you are in a Windows 8 environment, by all means turn on encryption.
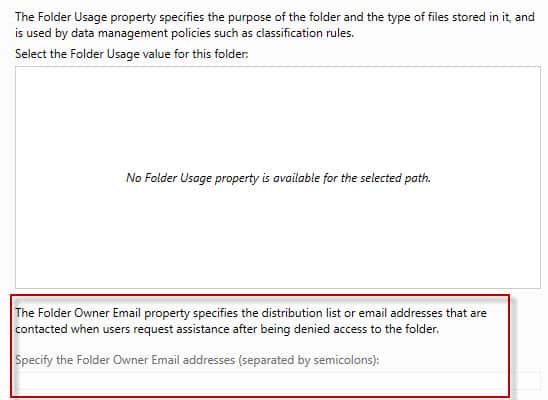
26. I left all the permissions at their default settings, but you will probably need to customize them based on your requirements. One very cool in Windows Server 2008 R2 is the ability for the server to email a pre-defined user/group if a user is denied access and they think they should have access. Configuring that is out of the scope of this article, but could be very handy.
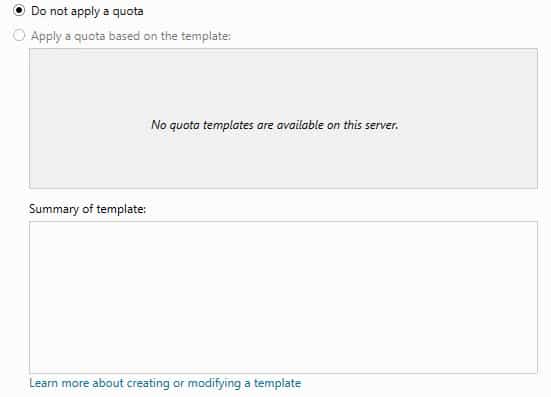
27. You are also able to configure Quotas on the volume as well, using a Quota template. I don’t have any defined, so the list is empty.
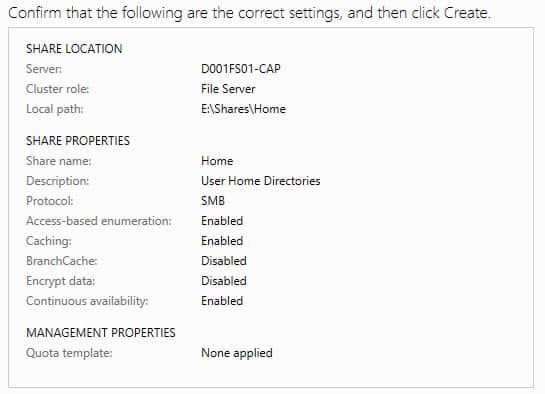
28. On the final page of the wizard you will see a summary of the configuration. Verify everything is setup correctly.
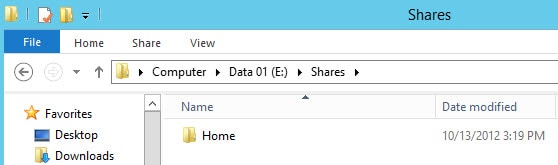
29. After the share is created, you can look on the clustered volume and see the share.
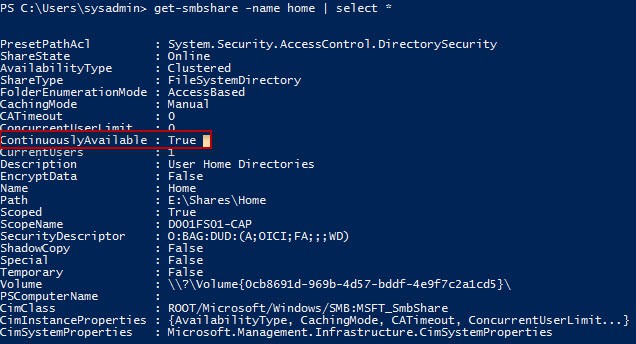
30. To look at the detailed properties of the file share you can use the following PowerShell command. Here you are able to confirm that the transparent failover option is set, ContinuouslyAvailable.
get-smbshare -name ShareName | select *
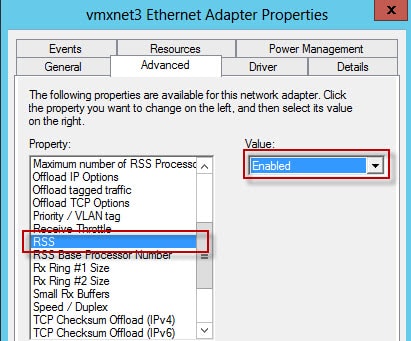
31. To increase file server performance, Microsoft recommends you disable legacy 8.3 filename creation. To do that, you perform the registry change described in this
KB article. You can also enable RSS (receiver side scaling) on the NIC to increase performance as well. In Device Manager open the properties for the VMware NIC and enable RSS.
32. Built in to Windows Server 2012 is a set of BPA (Best Practice Analyzer) rules. In the Server Manger you can click on your server pool, then scroll down in the middle pane and analyze the pool.
33. At this point your file share is now highly available, and if you are using Windows 8 clients, you can take advantage of transparent failover. To gracefully failover between nodes you can use the following PowerShell command:
move-clustergroup -name ScopeName -node StandByNode
To test transparent failover I copied a 1080P MP4 video to the file share and started playing it back on a Windows 8 computer. Next I shutdown the primary node that was serving the data (unplanned failover). Windows Media player paused for about 15-20 seconds, then automatically resumed playing the video. Graceful failover over between nodes using the PowerShell command resulted in a shorter stall, about five seconds.
If you were using an office application such as Word, you would not even know what happened unless you were saving right when the failover occurred. Even then, the save operation would just take a few seconds longer but would not be interrupted. Pretty cool!


Does File Share Cluster require a quorum ? As I don't see you add the quorum drive into the File Share Cluster ?