This is an updated guide for a complete soup-to-nuts installation of Home Assistant 2026.8 on Proxmox VE 9.x. I walk you through the full installation process, assuming that you have a bare metal mini PC that you want to use as the Proxmox host. I’ve also included a number of optional steps, such as CPU microcode updates, SMART monitoring, and more.
The process is fairly straightforward, and this setup gives you a lot of future flexibility. For example, you could deploy additional VMs and LXC containers for other projects. Starting off with just Home Assistant is a great way to get started. As you go down the smart home rabbit hole, you can add more VMs and containers as needed.

More Home Assistant Related Posts
I’ve written a number of posts related to Home Assistant which you might find useful. The easiest way to find them is to click on Smart Home in the menu bar of my website.
What's covered in this guide?
This guide walks you through a bare metal installation of Proxmox, followed by deploying a Home Assistant OS (HAOS) VM. To be more specific I cover:
- Why Proxmox VE for Home Assistant?
- Proxmox Server Hardware Recommendations
- Proxmox Storage Recommendations
- Creating Proxmox USB Boot Media
- Installing Proxmox VE 9.x
- Proxmox Post Install Configuration
- Installing Home Assistant OS (HAOS) VM
- Home Assistant Initial Configuration
- Setting Static IP Address (Recommended)
- Intel Microcode Update (Optional)
- USB Passthrough to HAOS (Optional)
- Optimize CPU Power (Optional)
- Check SMART Monitoring (Optional)
- VLAN Enable Proxmox (Optional)
- Proxmox Let’s Encrypt SSL Cert (Optional)
- Proxmox Two Factor Setup (Optional)
- Proxmox Notifications (Optional)
- Glances Configuration (Optional)
- Proxmox UPS Shutdown (Optional)
Why Proxmox VE for Home Assistant?
First, why would you run Home Assistant OS as a VM on Proxmox VE? Well, Home Assistant is typically not very resource hungry and even old mini-PCs from several years ago would have a lot of left over computing resources that you can run other services. Running Proxmox VE, which is a free hypervisor based on KVM, has a nice management UI and is pretty easy to use. It allows you to run HAOS in a VM, and you can then run other VMs or LXC containers on the same hardware.
If you are new to Home Assistant, not very nerdy, and just want a super reliable and easy to use “appliance”, then don’t go the Proxmox VE route. Just grab a cheap used mini/ultra-mini PC and run Home Assistant OS on it “bare metal” and be done with it. But if you know you want HAOS as a VM, potentially do LXC containers down the road, Proxmox VE is a great (and free) option. Even though Home Assistant can do backups, being able to do a whole HAOS VM snapshot at the hypervisor level can be great for roll-back from failed upgrades or “oh crap” mistakes.
The process covered in this post uses the awesome Proxmox VE community scripts. This makes the process super easy, grabs the latest version of HAOS, and enables GUI-driven advanced customizations.
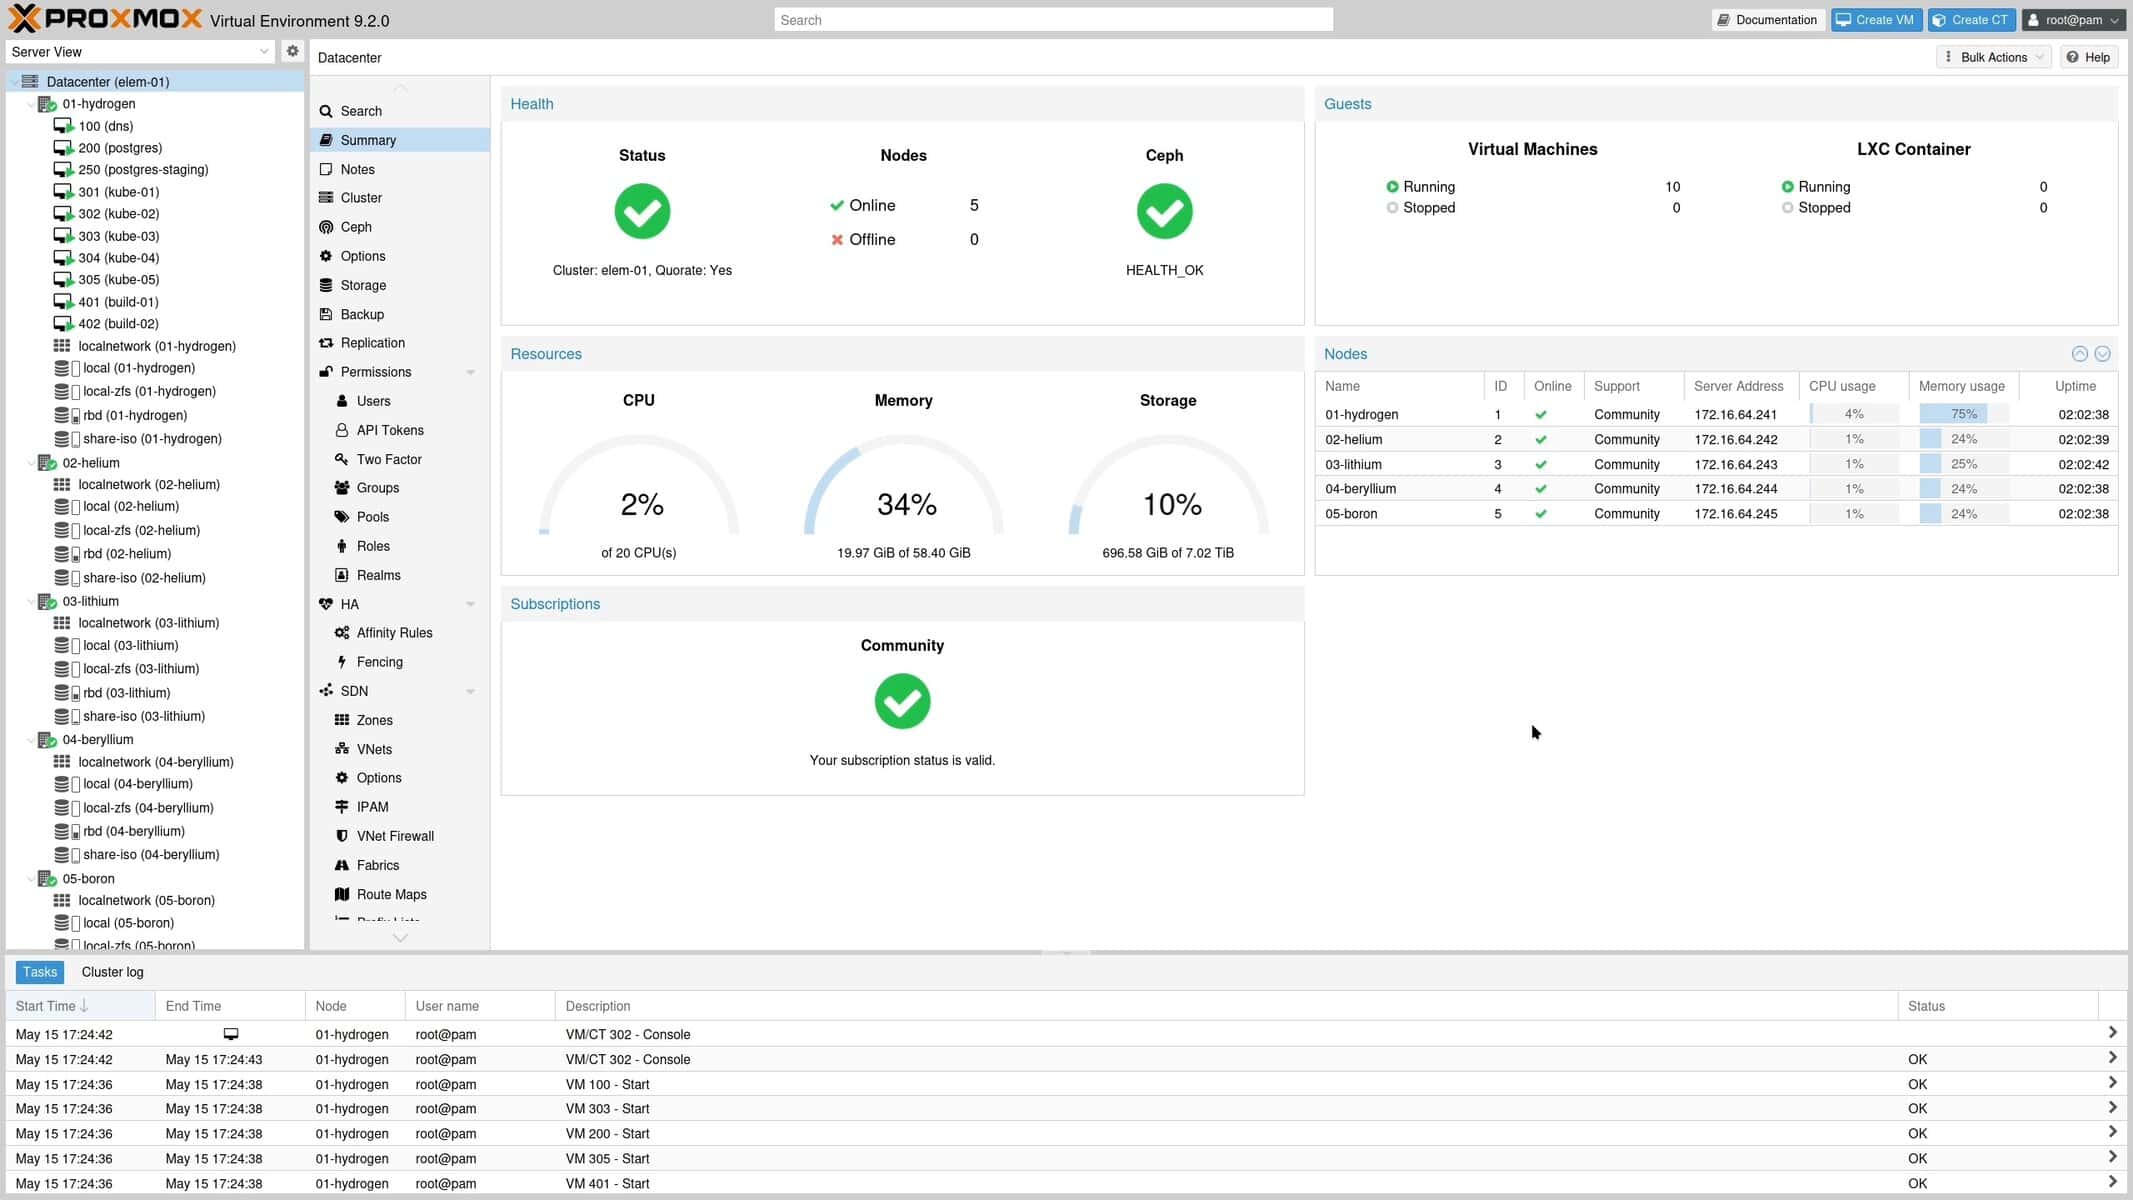
Proxmox Server Hardware Recommendations
Proxmox is designed to run on a wide variety of hardware, everything from older desktop PCs, mini PCs, or on servers. Home Assistant is pretty lightweight, so you can run it in a VM with minimal hardware specs. For example, a mini PC (like Beelink) with an Intel N95 processor and 8-16GB of RAM would be fine. These used to be available on Amazon for easily under $200, but with the AI boom they are now much more expensive. As of August 2026 a Beelink mini S12 PRO with an Intel N100, 512GB SSD and 16GB of RAM is $339. This is about double the normal price.
Ebay has a lot of options for used mini PCs which could be a lot cheaper. As I stated, Home Assistant is very lightweight so if your budget is tight you can get away with a used 4 year old mini PC.
Proxmox Storage Recommendations
Proxmox is designed to be used on everything from an old PC to high-end enterprise production environments. Unless you are extremely nerdy and know what ZFS is (don’t worry if you’ve never heard of it), then the basic EXT4 filesystem is fine. This is the Proxmox default, so the configuration is super easy.
For a home environment where you have a NAS (such as Synology, QNAP, etc.) I would suggest:
- Use a single SSD/NVMe drive in your Proxmox server. Make sure it’s large enough for all of your VMs and LXCs. I know SSDs are now super expensive, but prior to the massive cost increases I would suggest 1TB minimum. Smaller is fine for a HAOS plus a few small VMs.
- Use the default EXT4 filesystem with LVM-thin partitioning.
- Use Home Assistant’s native backup to do nightly backups to the Nabu Casa cloud.
- Use your NAS as a secondary backup target.
Do NOT map NAS storage to the Proxmox host (via NFS or iSCSI) and use that for VM or LXC storage. Always build your VMs or LXCs on local Proxmox storage, or you risk running into significant issues.
Creating Proxmox USB Boot Media
In order to install Proxmox on your server, we need to create a bootable USB drive. This is super easy and you can use your favorite tool like Balena Etcher (Mac/PC/Linux). The Proxmox VE installer ISO is very small, at just a bit over 1GB, so your boot media need not be large.
- Download the latest “Proxmox VE ISO Installer” (do not select ARM).
- Download and install Balena Etcher on your Mac or PC.
- Insert your USB boot media into your PC.
- Launch Balena Etcher and select Flash from file.
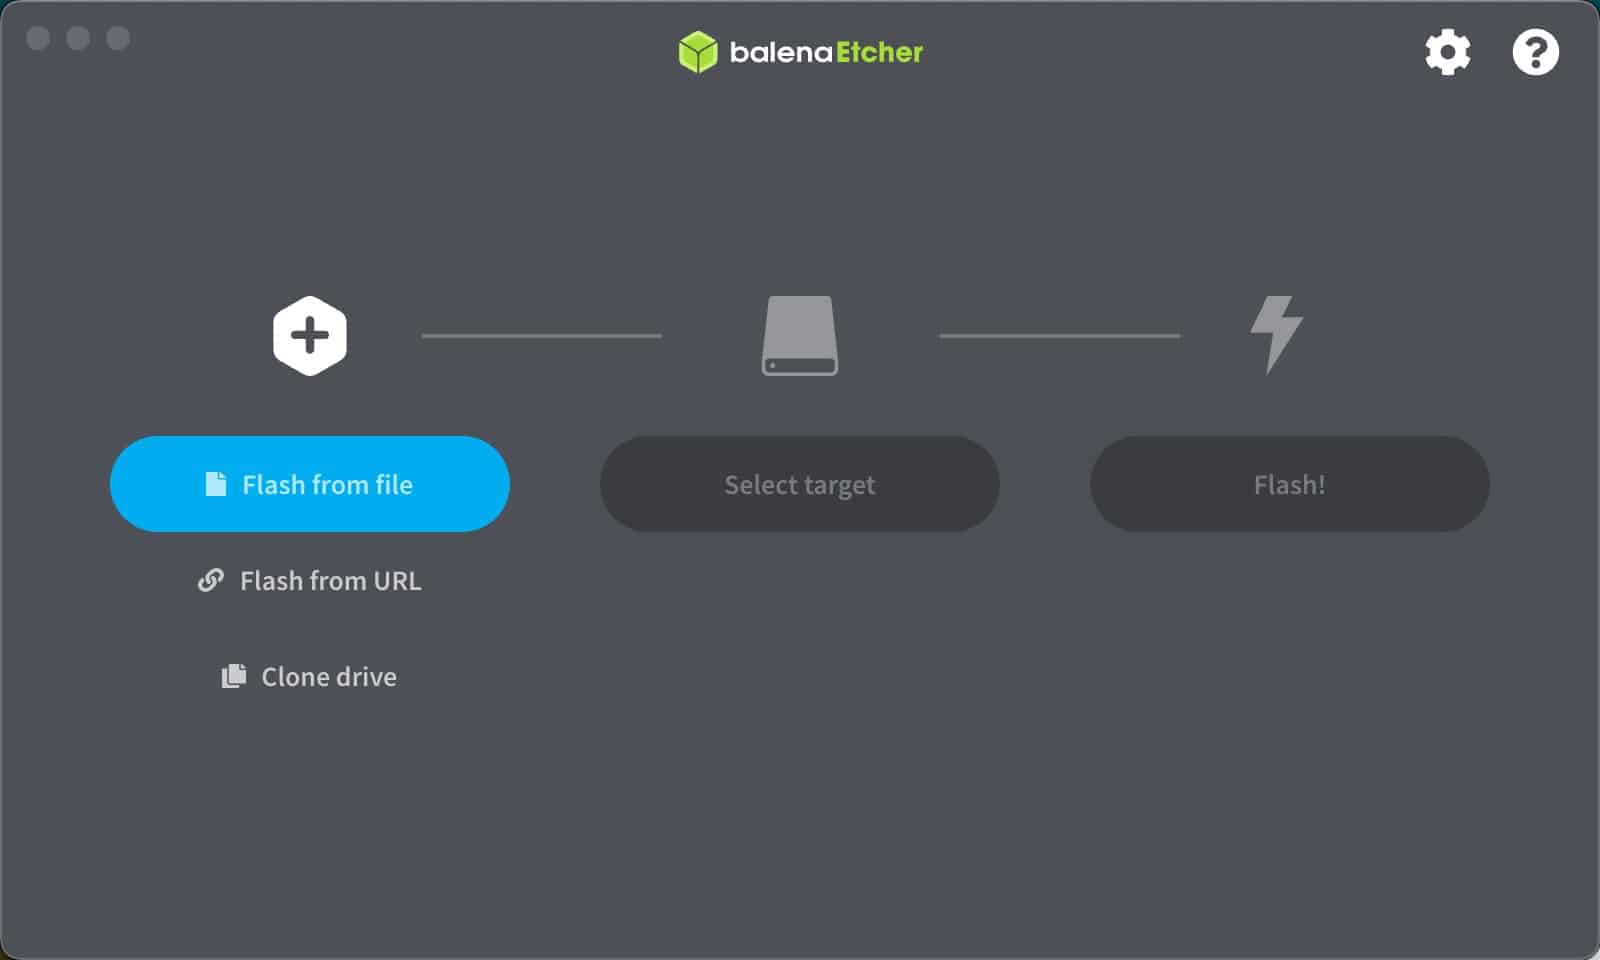
5. Locate the Proxmox VE ISO you downloaded.
6. Click on Select target and select your USB boot media.
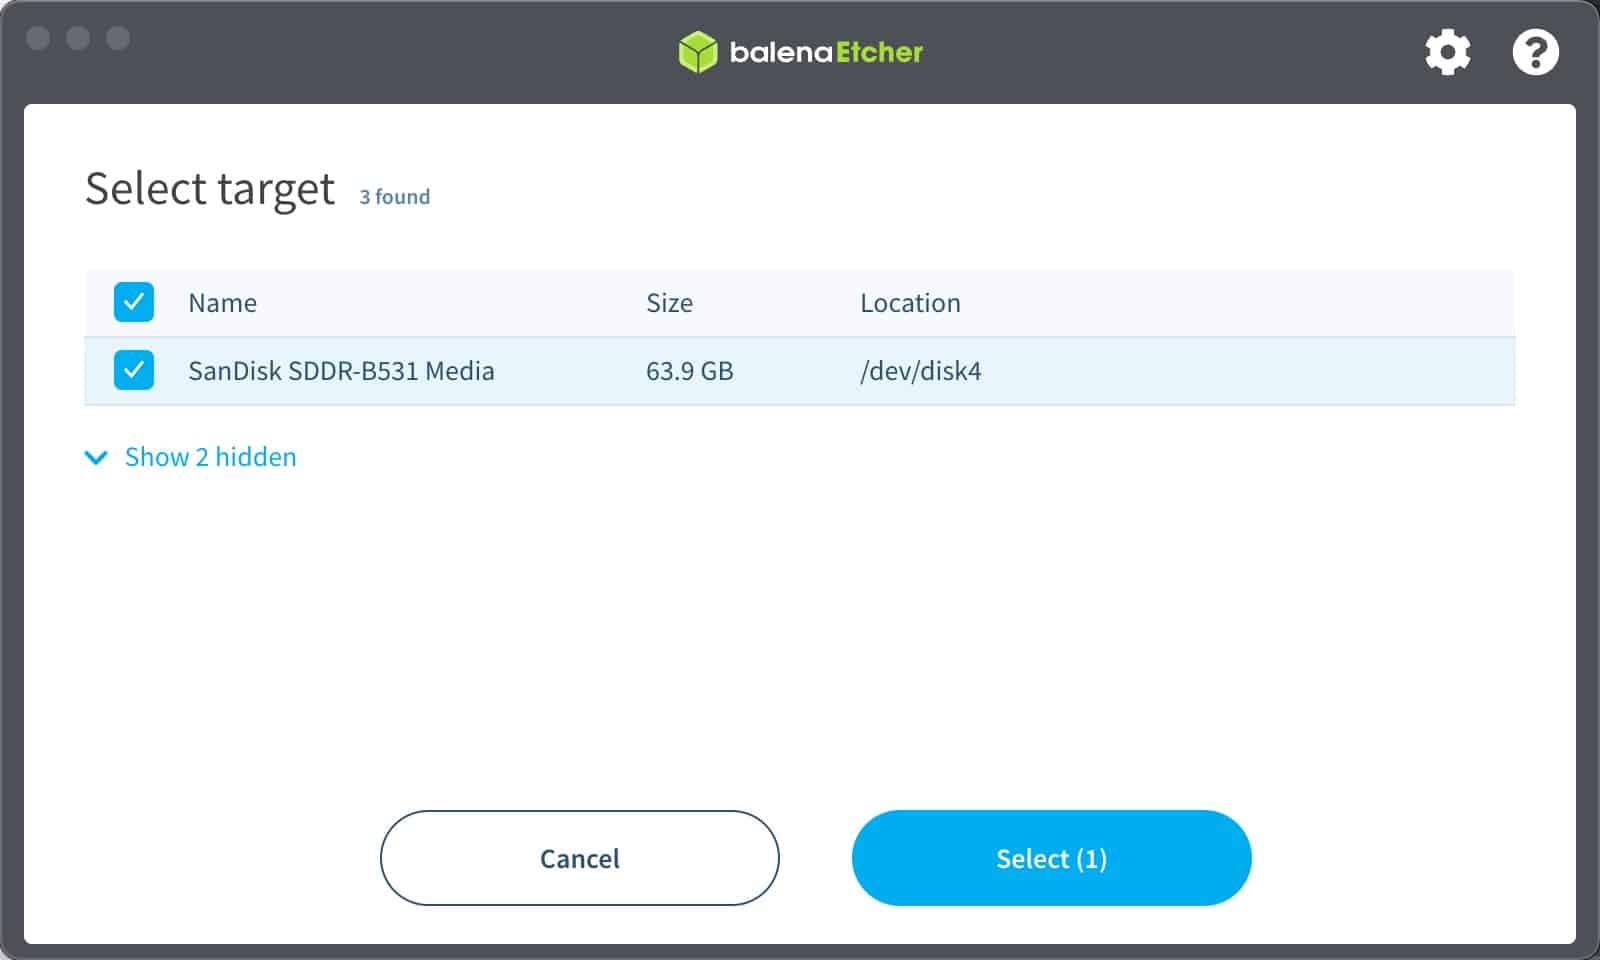
7. Click on Flash to write the image to the boot media. On a Mac you may be prompted for your password.
8. Wait a minute or so for the image to be written and verified.
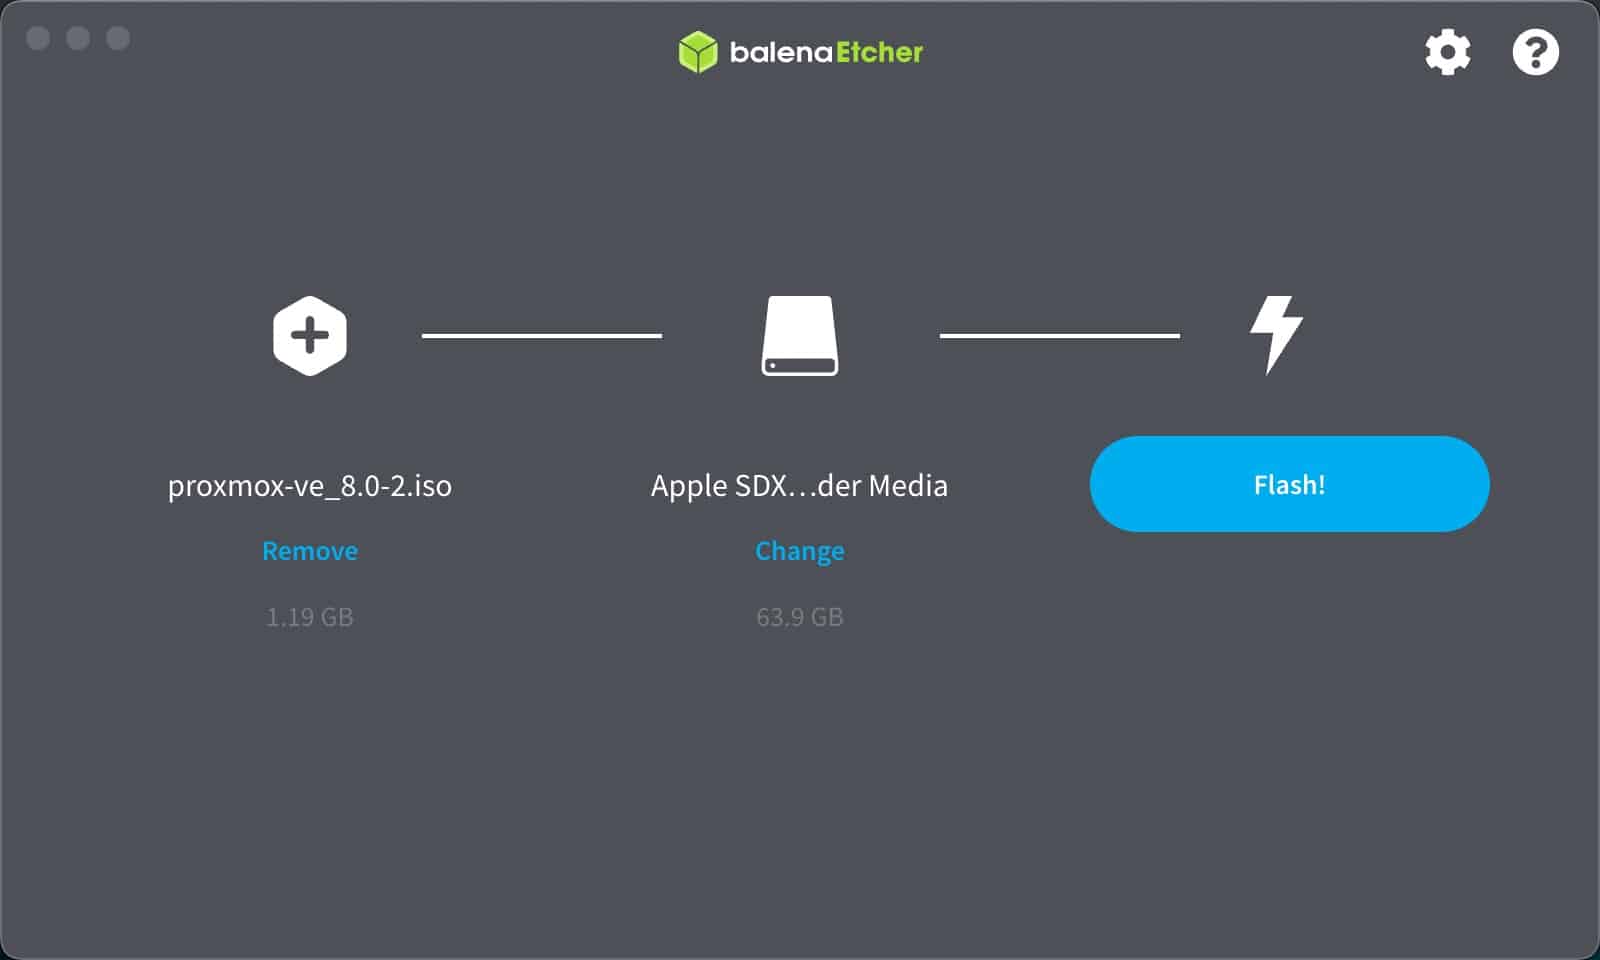
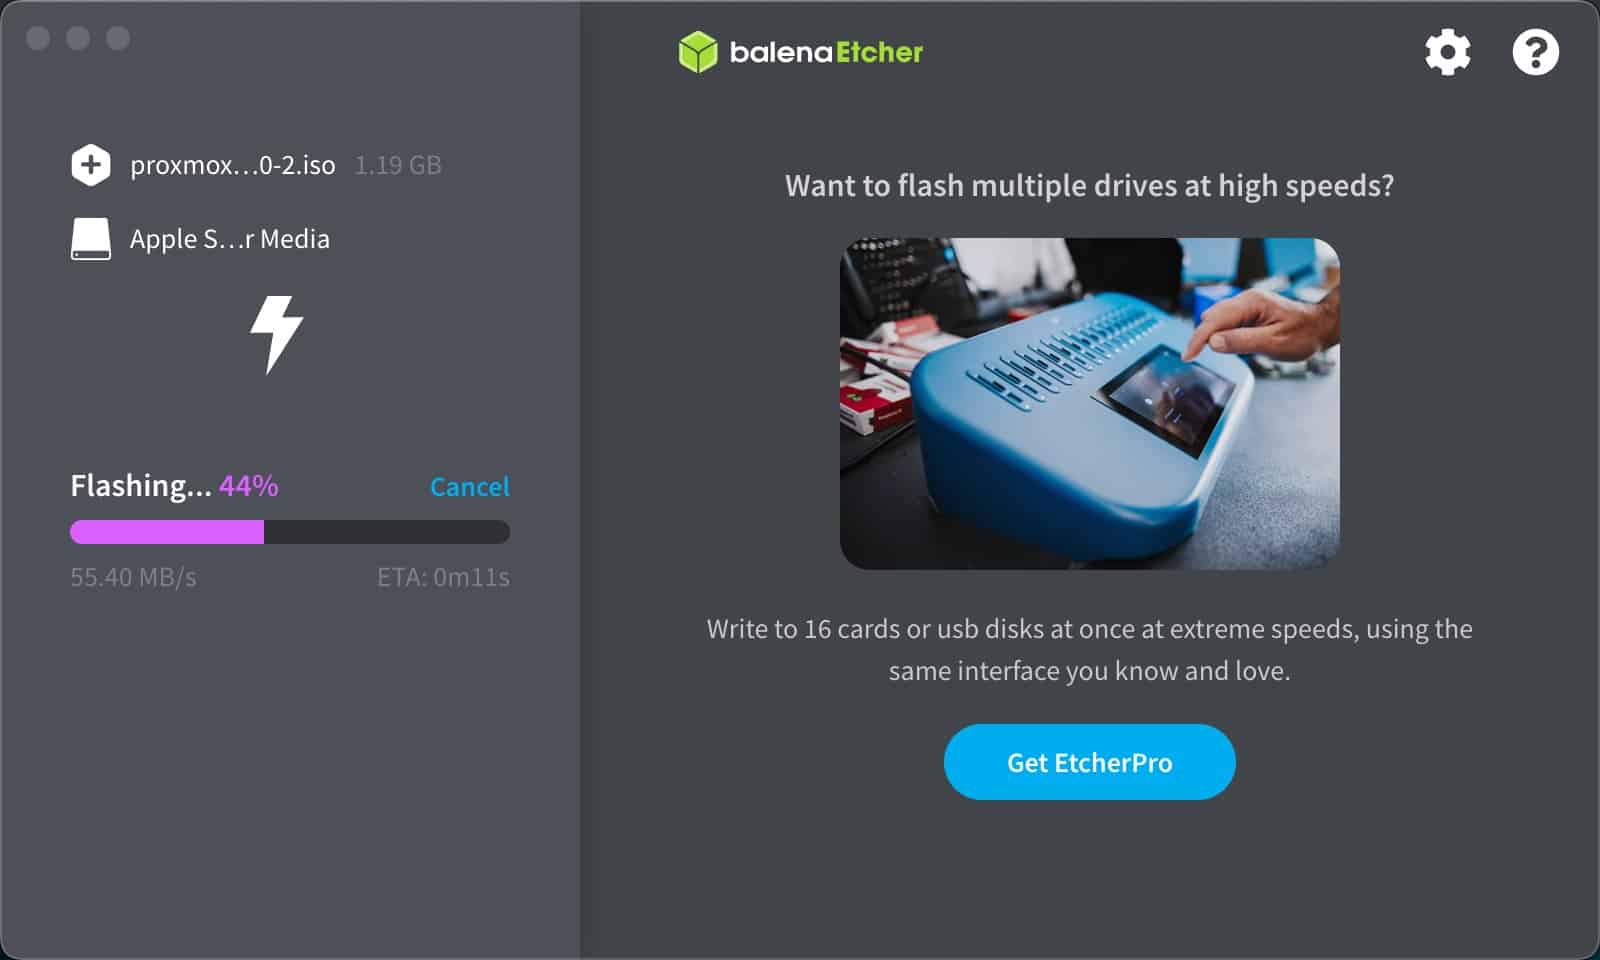
9. After the image is written close Balena Etcher and remove your USB boot media. On a Mac it is automatically safely dismounted so just pull it out.
Installing Proxmox VE 9.x
- Connect a keyboard and monitor to your Proxmox server/mini-pc/NUC/etc. Plug in an ethernet cable. Do not use Wi-Fi.
- Power off your server and insert the USB boot media.
- Power on your server and press the right key to enter your BIOS setup (varies by manufacturer).
- Depending on what OS you were previously running, a few settings might need to be tweaked. The name of these settings and menu location varies by BIOS manufacturer. Review the following settings:
- Enable Virtualization (may be called VT-x, AMD-V, SVM, etc.).
- Enable Intel VT-d or AMD IOMMU. This future proofs you for PCIe/GPU passthrough.
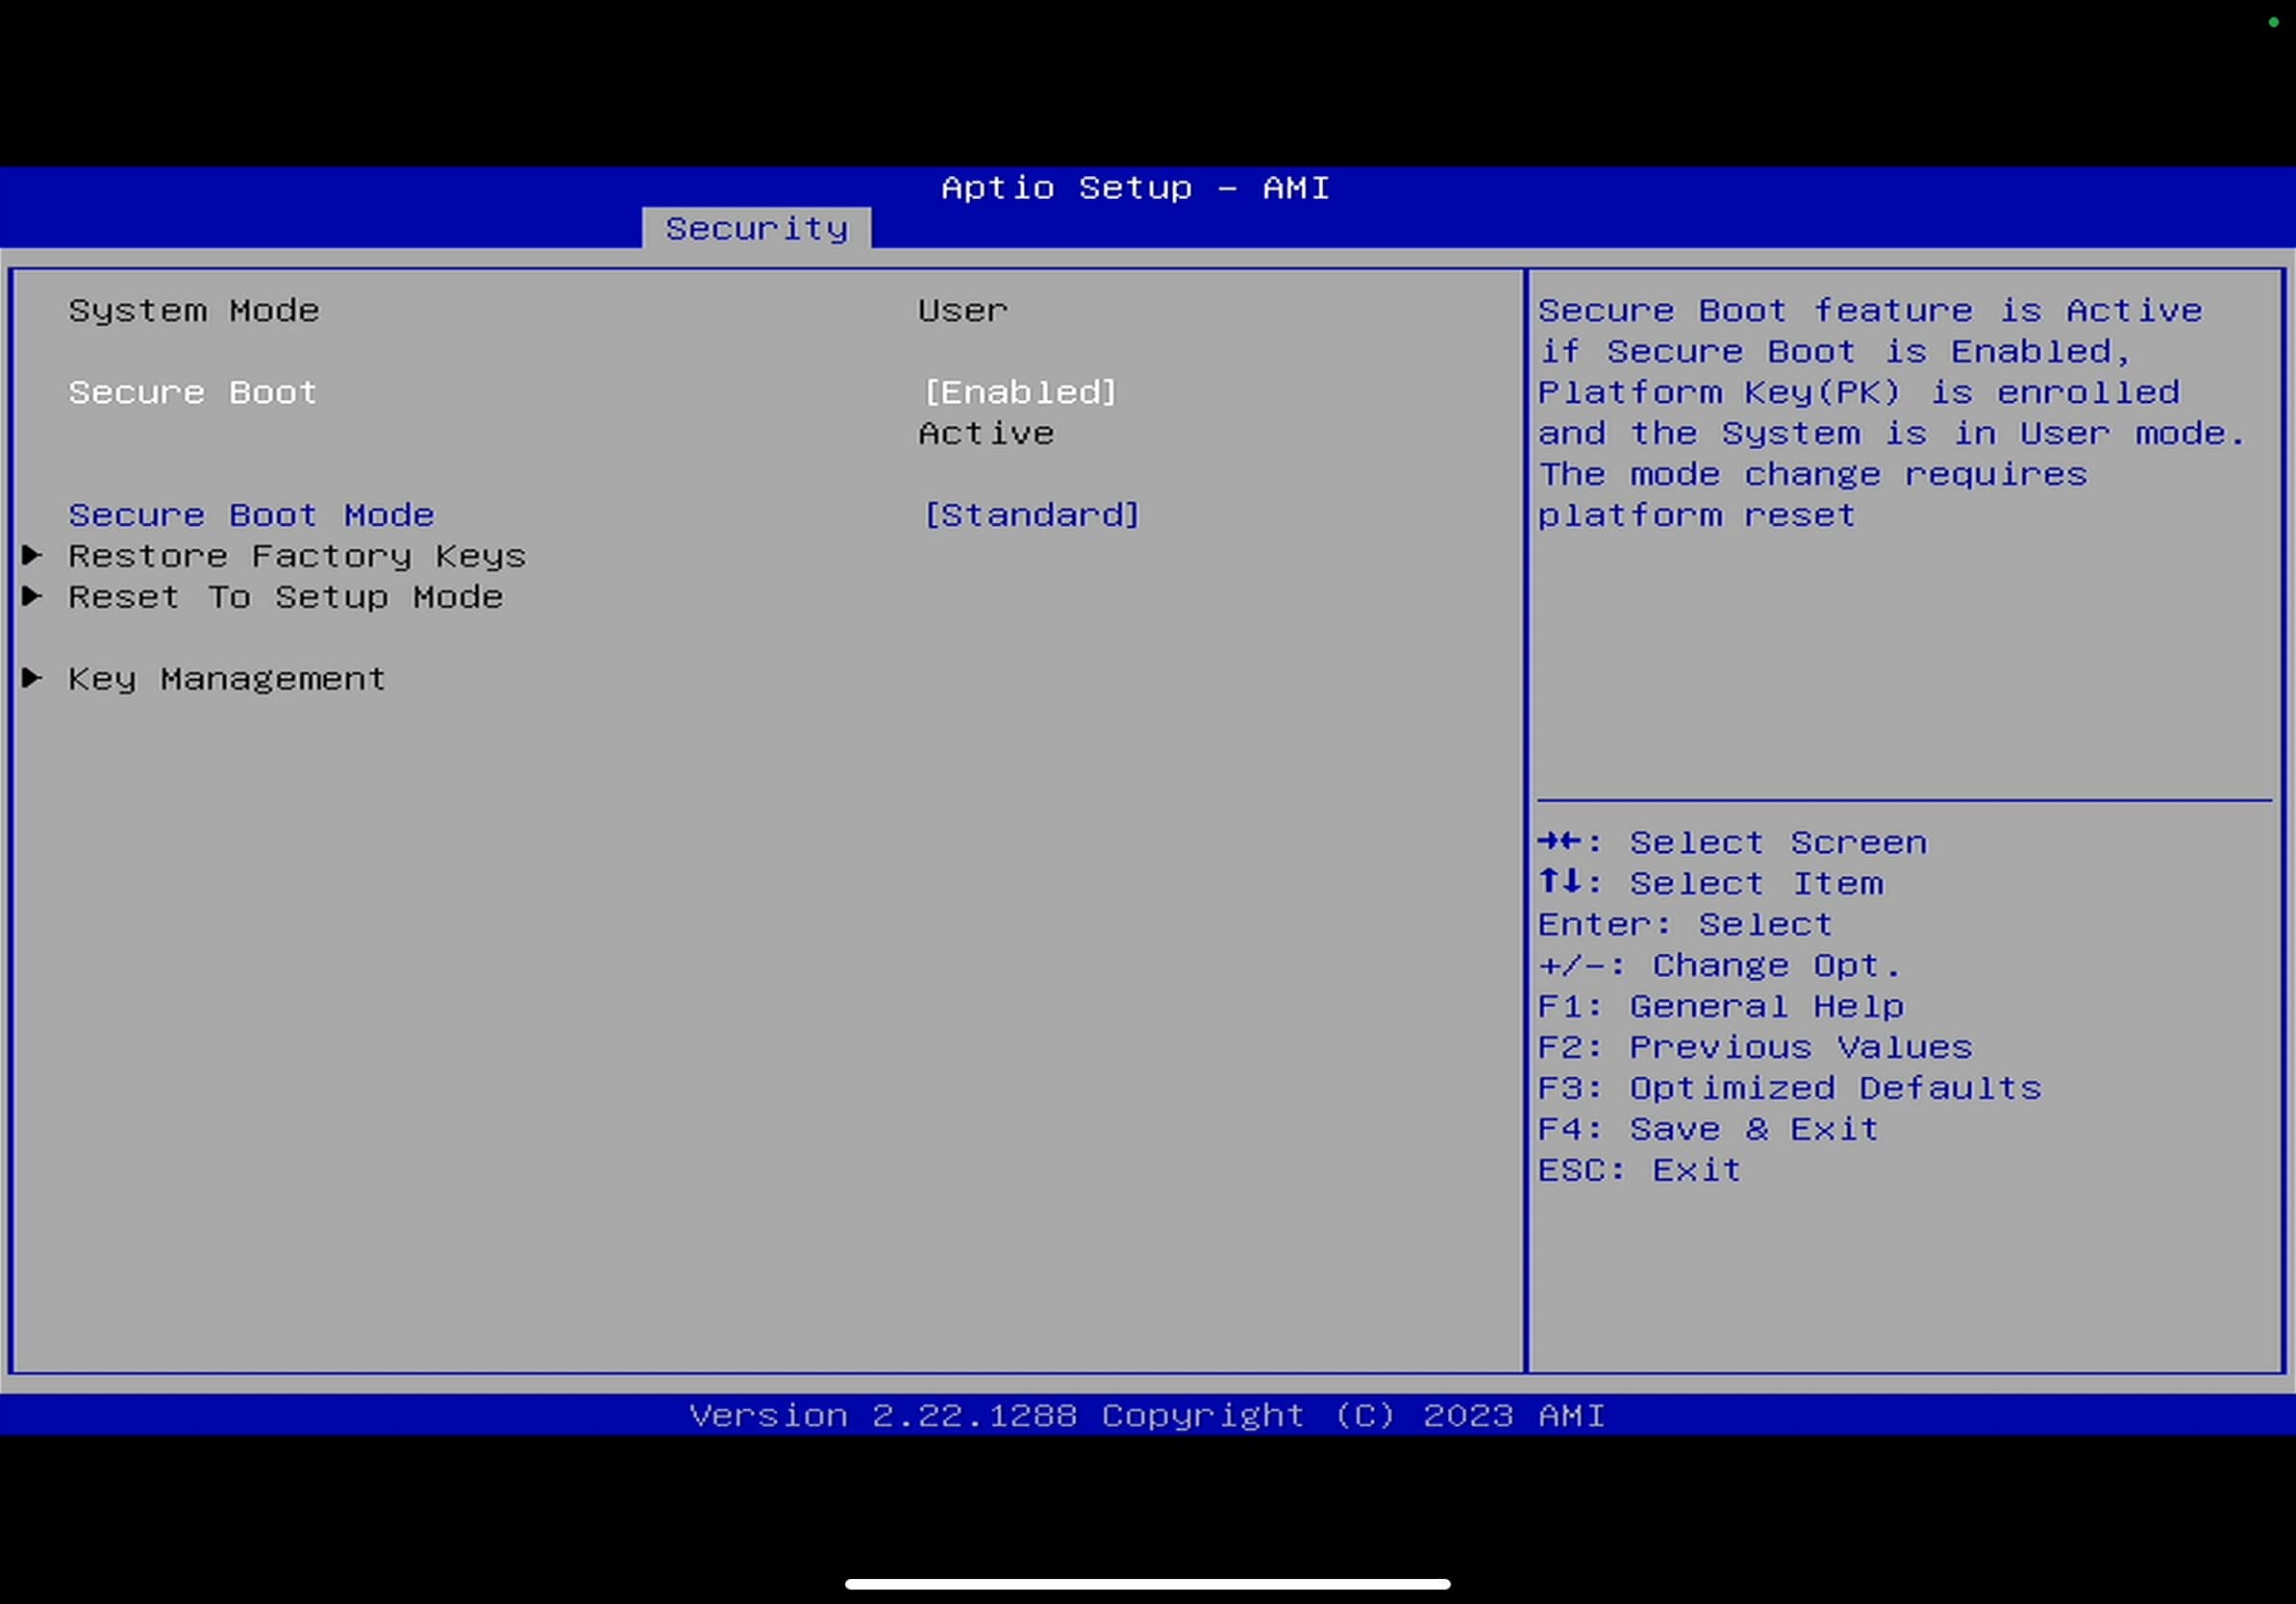
- Leave UEFI boot enabled. Enable secure boot.
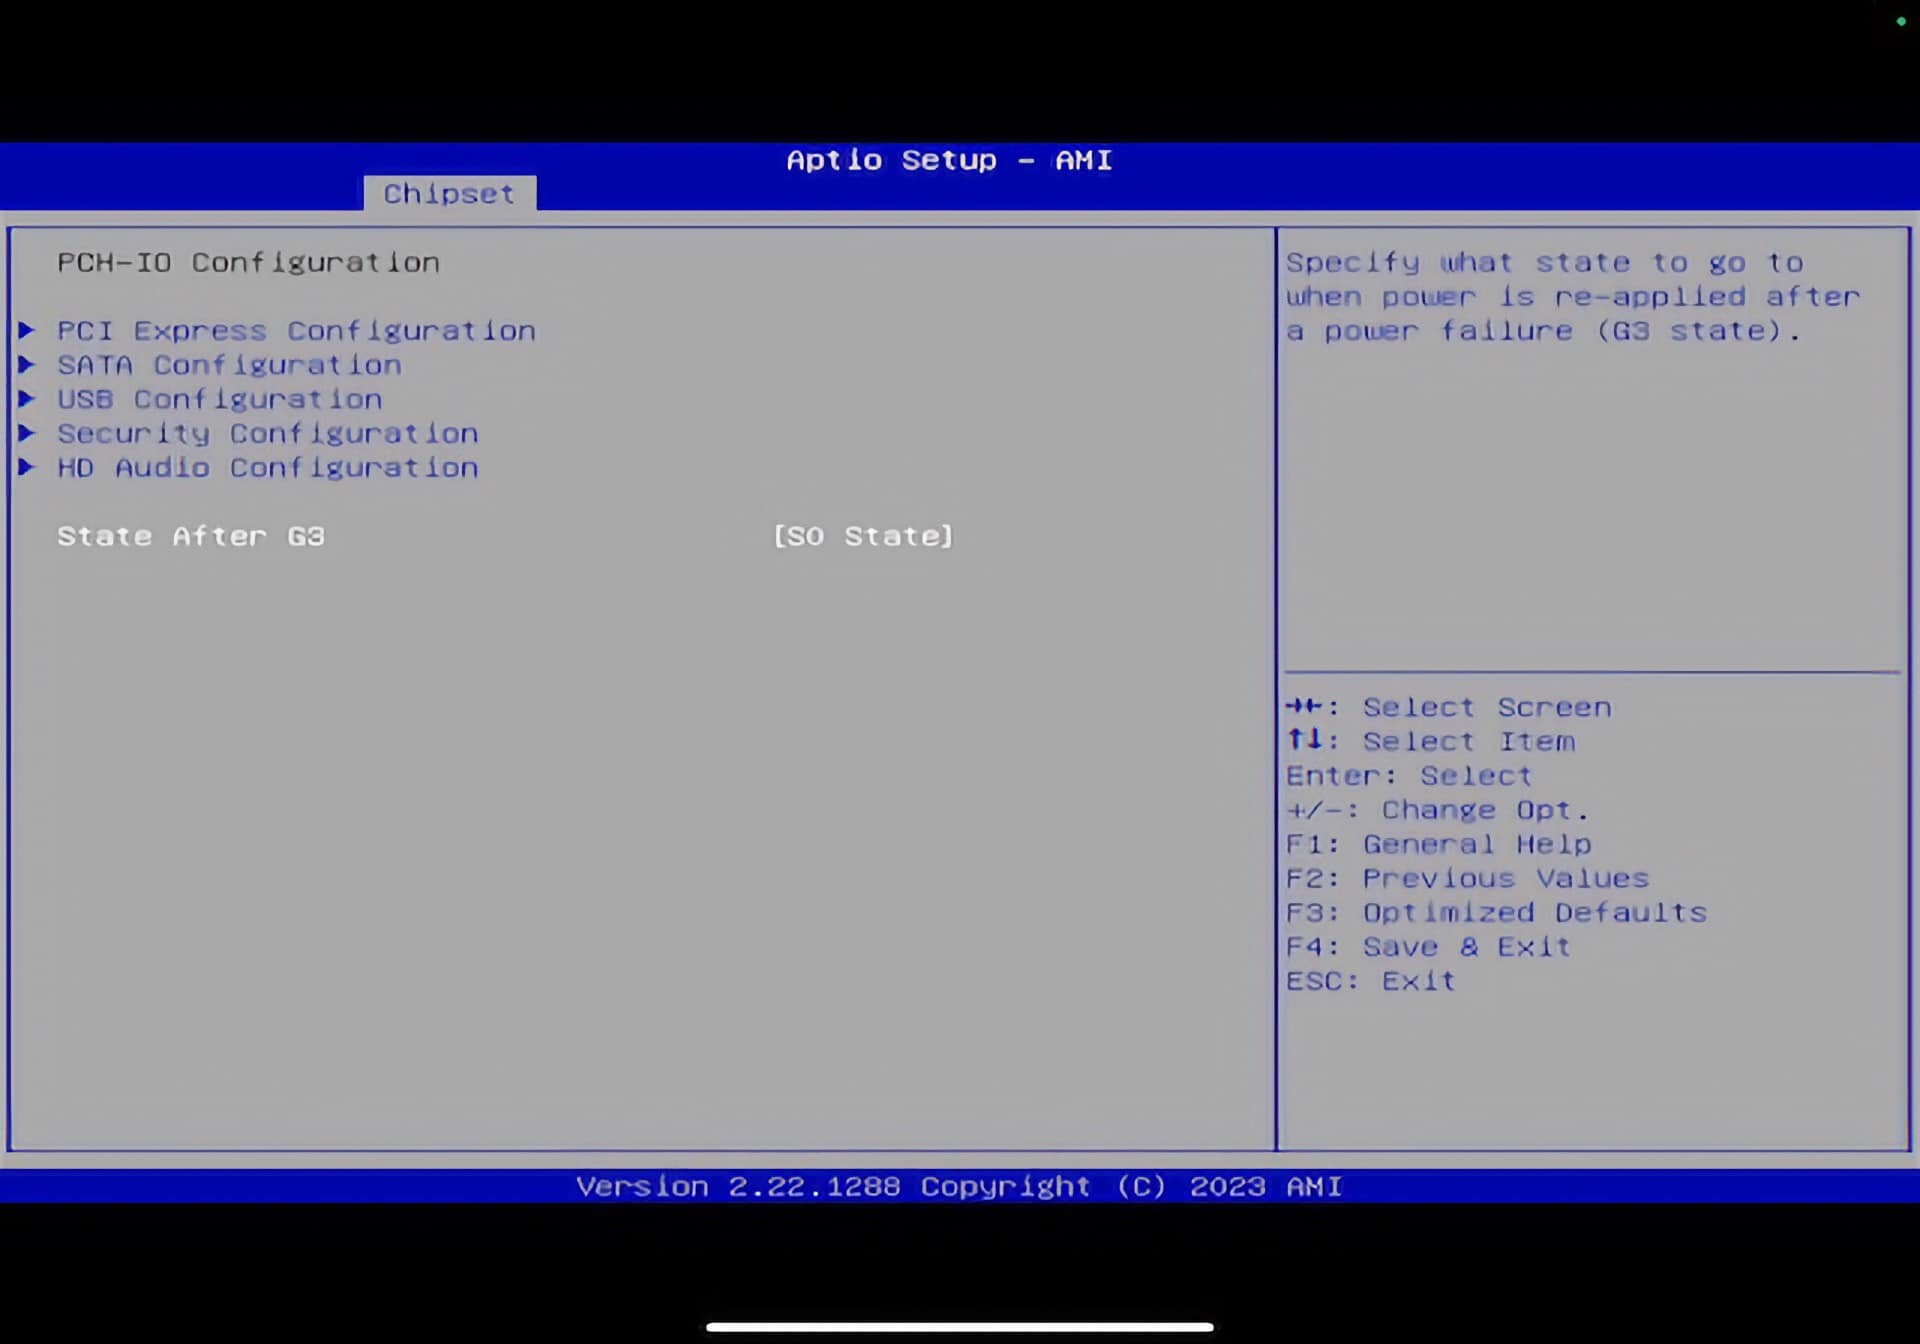
- Enable auto-power on. This ensures host will power on after a power interruption.
- This setting can be hard to find, have non-obvious names (e.g. setting State after G3 to S0 State), or not exist at all. Varies by manufacturer. See screenshot below.
- Change the boot order to set your USB boot media at the top.
Note: If your system is capable of secure boot, I suggest making sure it is enabled. Depending on your BIOS settings, you want the settings to look similar to those below. The key settings are “Enabled” (Active) and Standard boot mode. It may take some fiddling with BIOS settings and reboots to get secure boot properly enabled. The screenshot below is from a Beelink mini PC.
5. Save the BIOS settings and reboot. If all goes well, the Proxmox VE installer will start up.
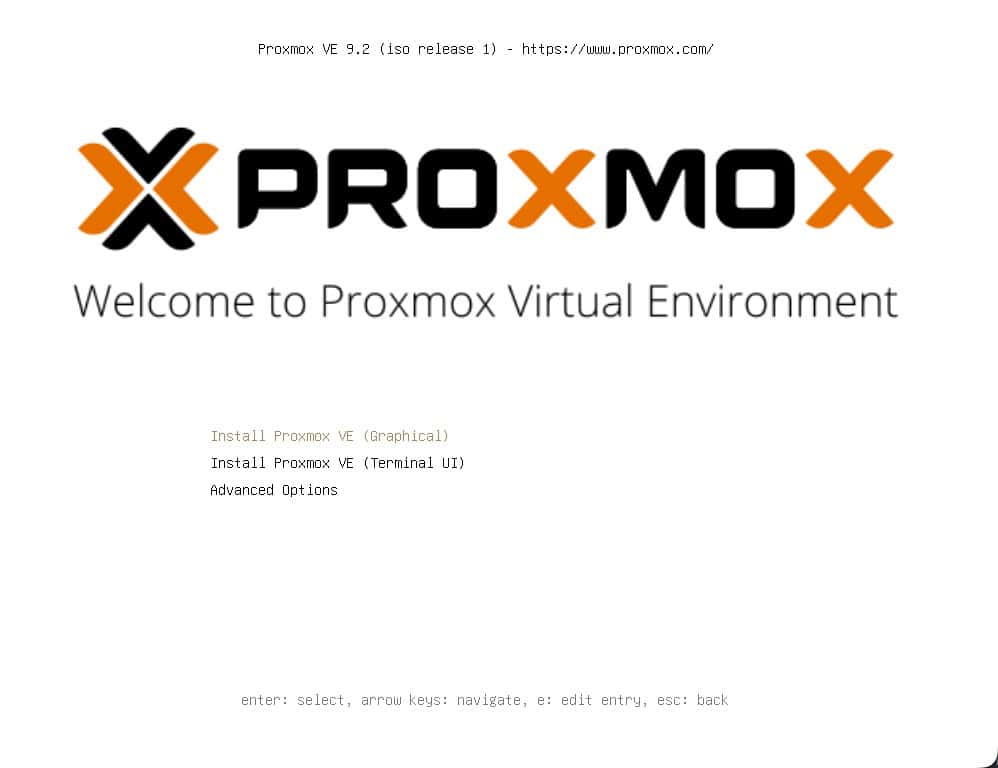
Note: New to Proxmox VE 8.0 and later is a Terminal UI installation option. This will gather all the required information for the install, except without using the graphics card. Why can this be helpful? Sometimes the Proxmox installer has compatibility issues with the graphics card. I would suggest trying the Graphical method, and if that fails, switch back to Terminal UI.
6. Press Enter to select Install Proxmox VE (Graphical).
7. Scroll through the EULA and click on I agree.
8. On the Proxmox VE Installer screen verify the Target harddisk is correct and click Next.
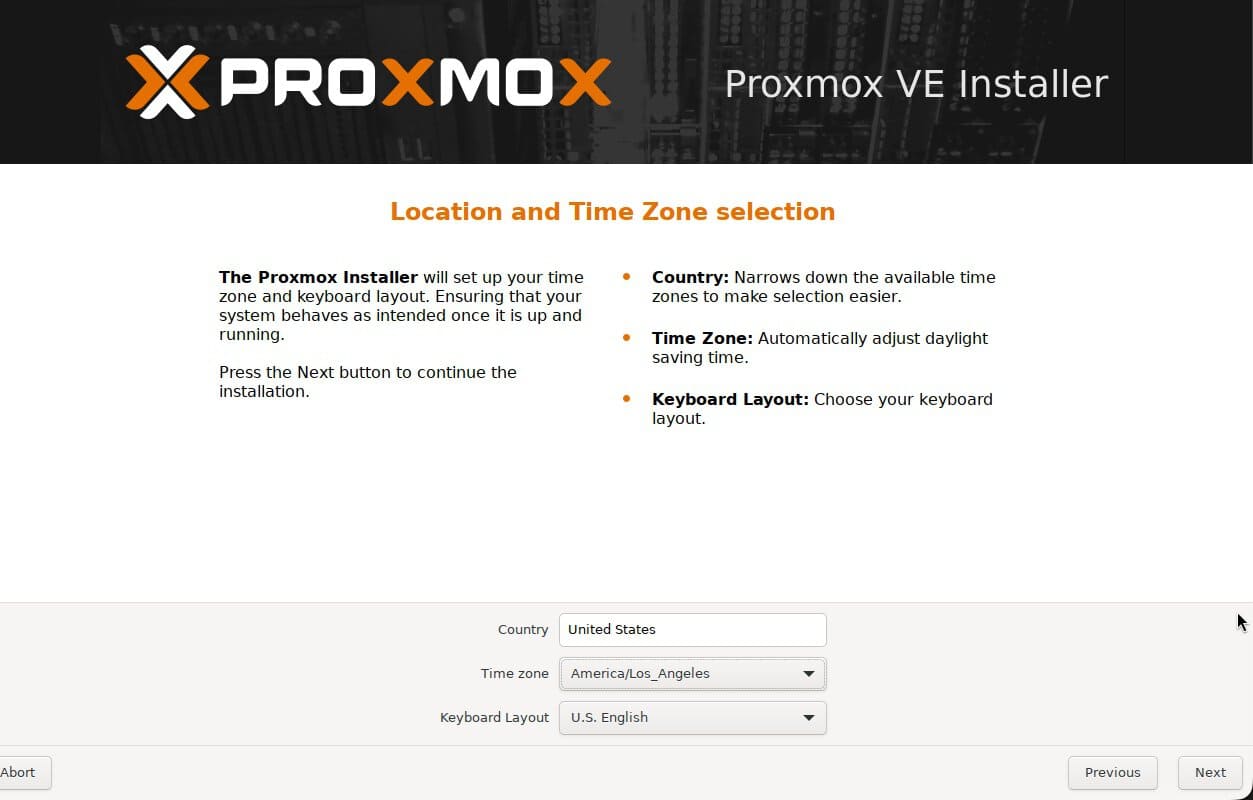
9. Select your Country, Time zone and Keyboard Layout. Click Next.
10. Enter a strong root password and an email address. Click Next.
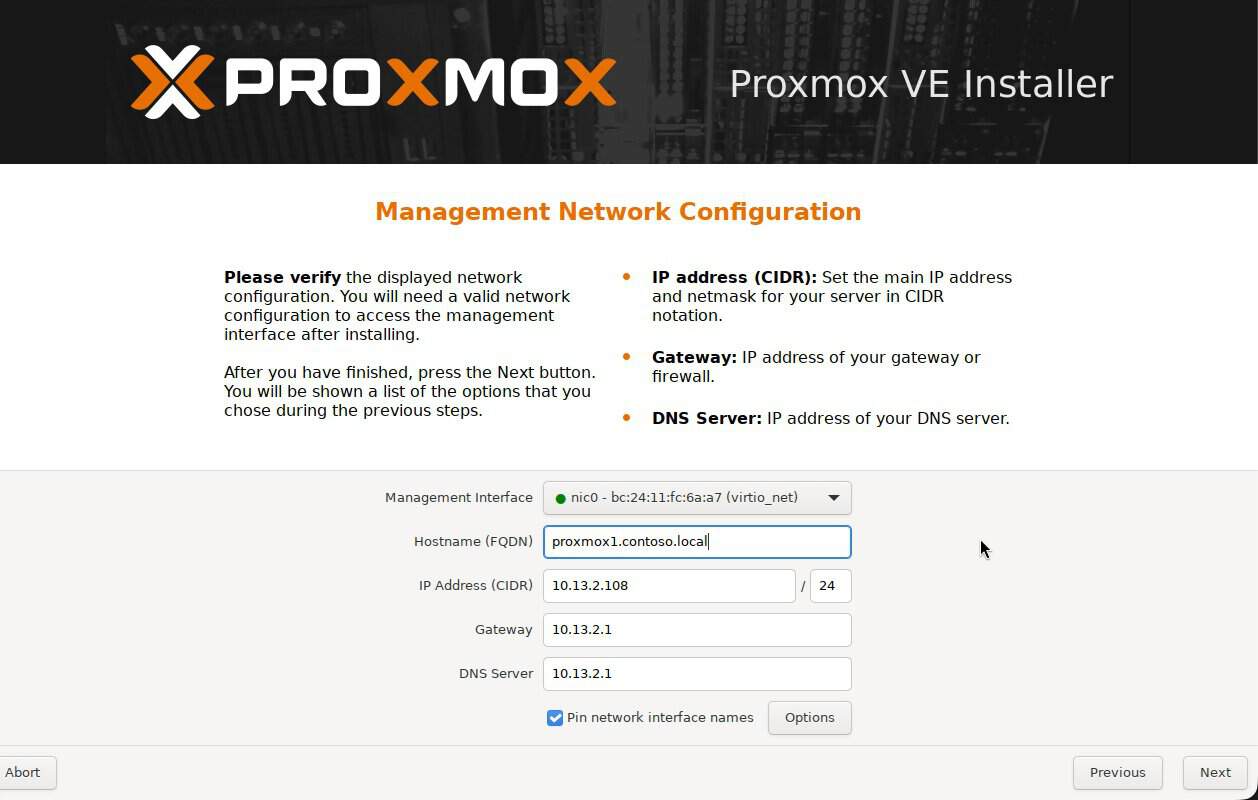
11. Select your Management Interface, Hostname, IP address, Gateway and DNS Server.
Note 1: If your server is plugged into the network it should grab a DHCP address and populate the other information. I strongly recommend either using a static IP, or create a DHCP reservation for this server. You don’t want the IP to change on you.
Note 2: Put some thought into the Proxmox hostname you want to use. YOU CAN’T easily change this later or Proxmox will have serious (likely unrecoverable) problems.
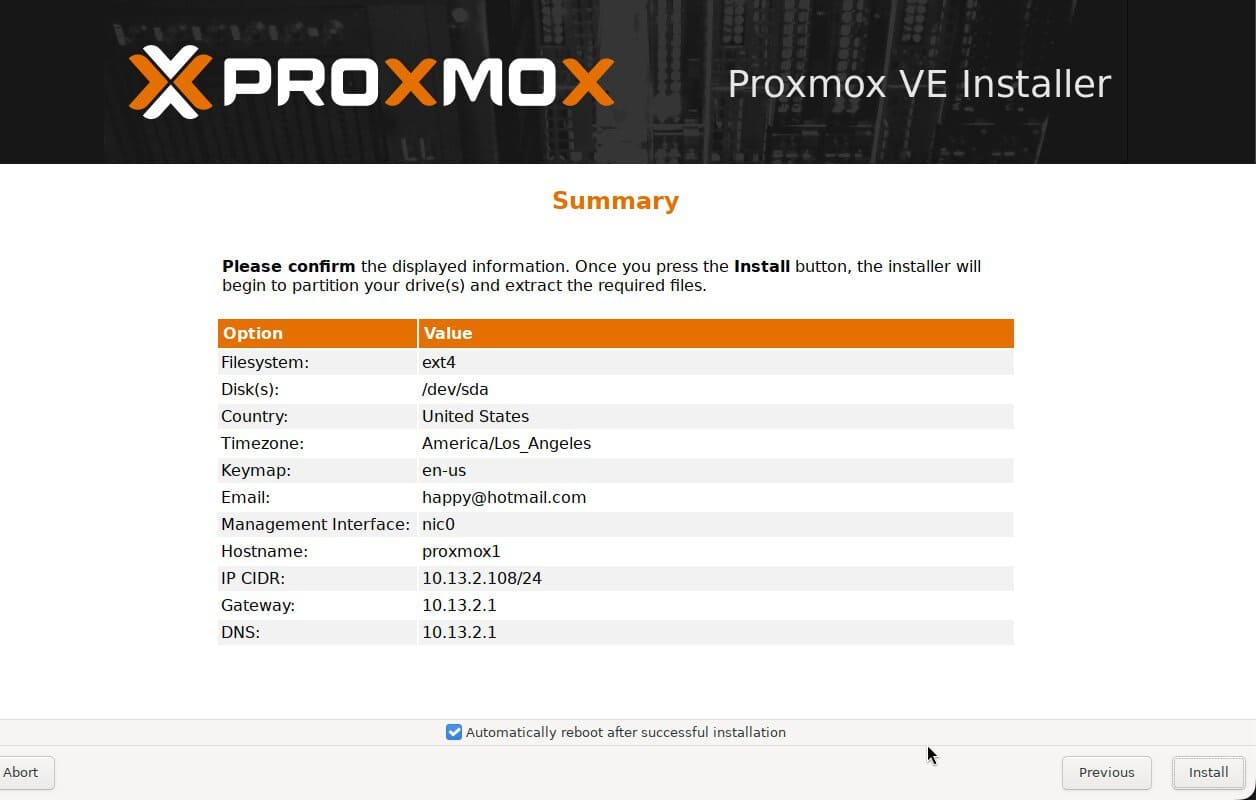
12. Triple check everything on the Summary screen is correct then click Install.
Proxmox Post Install Configuration
Before we install Home Assistant, we need to do a couple of configuration tasks. First, we need to update Proxmox with the latest packages. Please note you MUST run the post-configuration script before you do any Proxmox updates or deploy HAOS. If not, you will likely see 401 errors with the enterprise repositories since you (likely) don’t have a Proxmox paid license.
- Open a browser and navigate to the IP address and port 8006 (e.g. https://10.13.2.200:8006). Click through all your browser warnings and connect anyway.
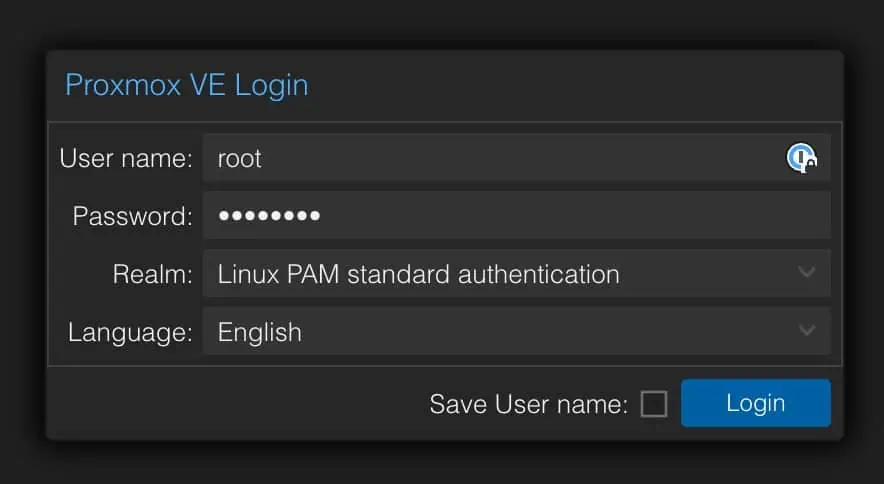
- Login with the root username the password you selected during the install process.
Note: You will get a subscription warning. We will fix that in a second. Acknowledge the warning.
3. In the left pane click on the hostname of your Proxmox server.
4. Click on Shell in the middle pane and paste in the following command to run the awesome Proxmox helper script:
bash -c "$(curl -fsSL https://raw.githubusercontent.com/community-scripts/ProxmoxVE/main/tools/pve/post-pve-install.sh)"
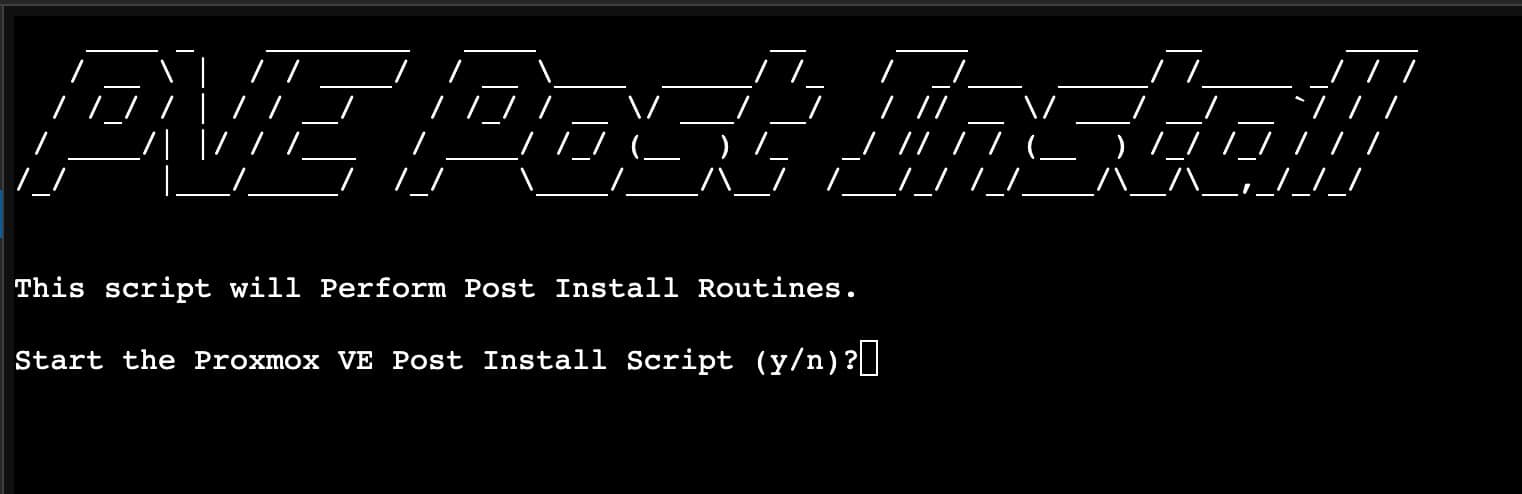
5. The script will ask you a series of questions:
- Press ENTER on the Deb822 sources detected screen
- DISABLE the pve-enterprise repository. Tab to OK and press ENTER
- DISABLE the ‘ceph enterprise’ repository
- KEEP the pve-no-subscription repository
- Do NOT add the pvetest repository
- Disable the subscription nag
- Disable high availability (unless you know you want it)
- Disable Corosync (unless you know you want it)
- DO update Proxmox VE (can take a while)
- Press ENTER on the Post-Install Reminder screen
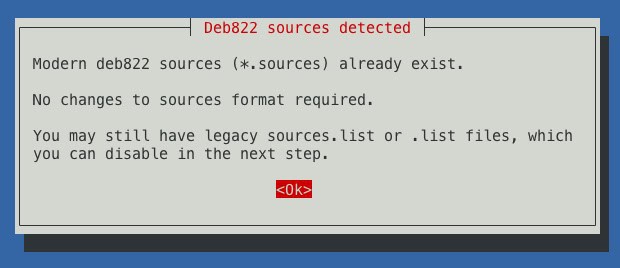
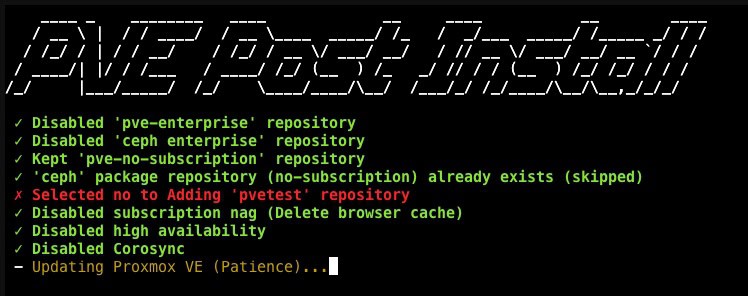
6. When asked if you wish to reboot press enter on yes.
Installing Home Assistant OS (HAOS) VM
For the HAOS installation we will be using the awesome Proxmox Helper Scripts.
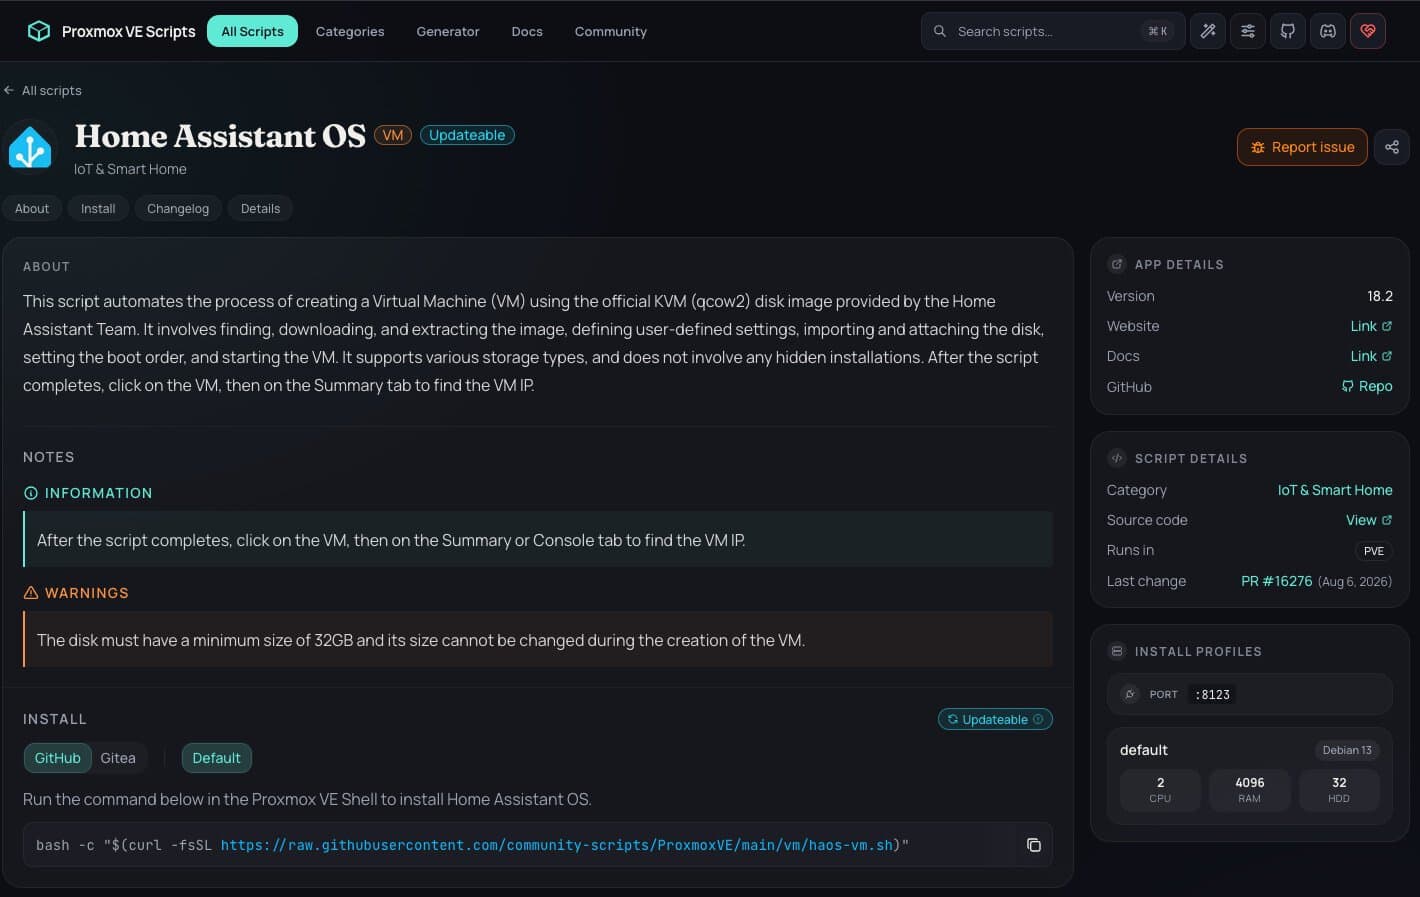
- Login to Proxmox and select your server in the left pane.
- Click on Shell in the middle pane.
- Enter the following command to start the HAOS install via the Proxmox VE helper script.
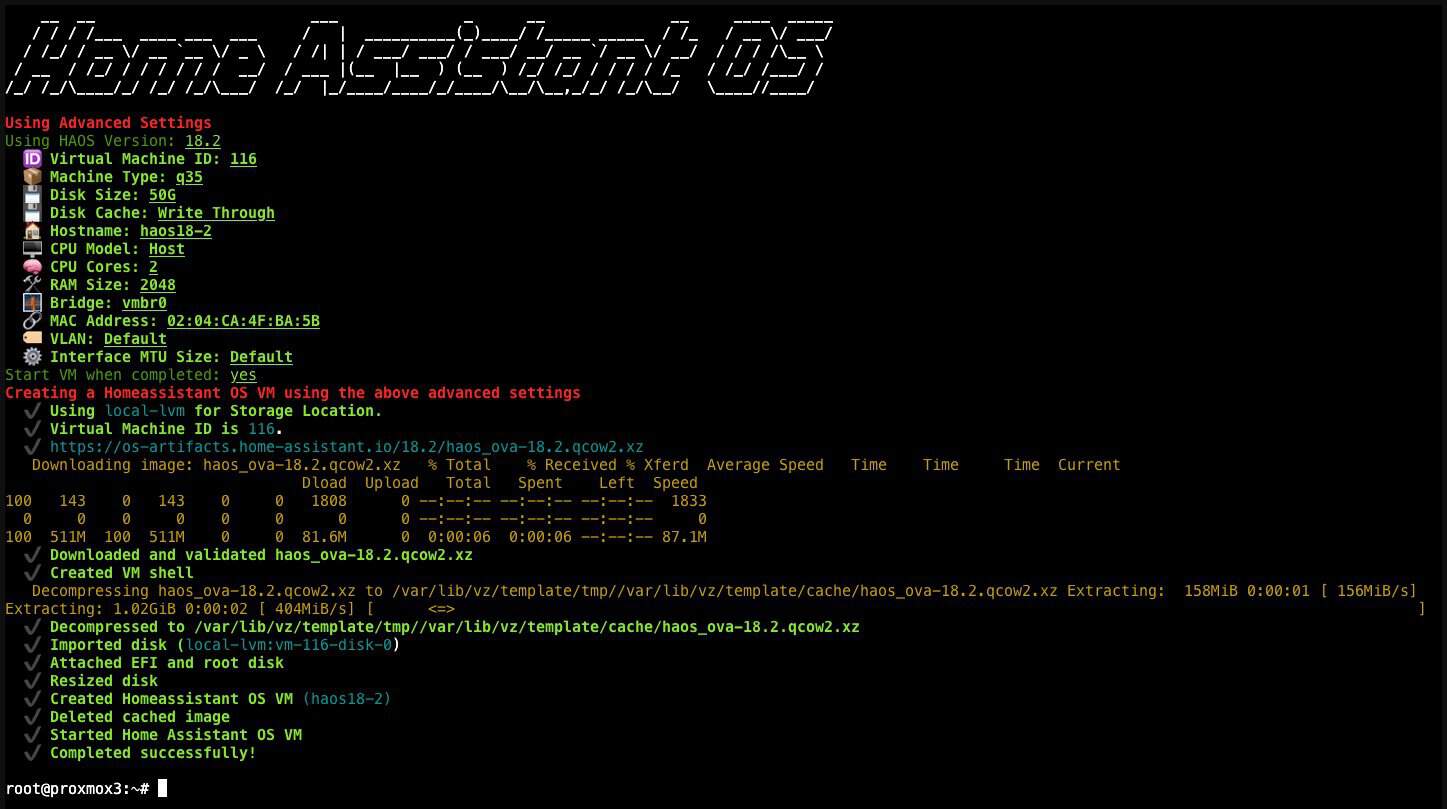
Note: We will be using the advanced settings to optimize the configuration. The script automatically downloads the latest HAOS stable image, creates the Proxmox VM, and will configure the hardware and networking.
bash -c "$(curl -fsSL https://raw.githubusercontent.com/community-scripts/ProxmoxVE/main/vm/haos-vm.sh)"
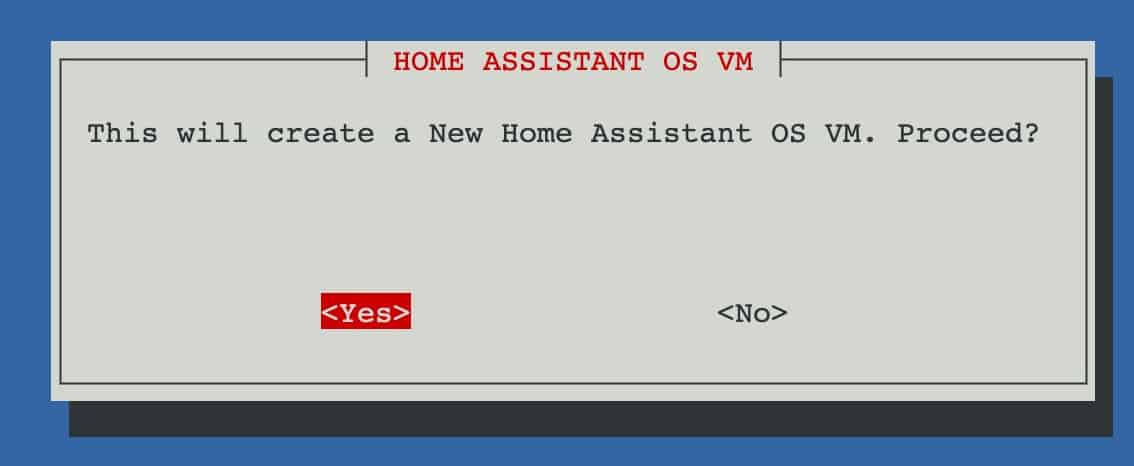
4. Press Enter to proceed. If you get a warning about SSH being detected, and you are using the web interface, you can ignore it. Just select Yes to continue.
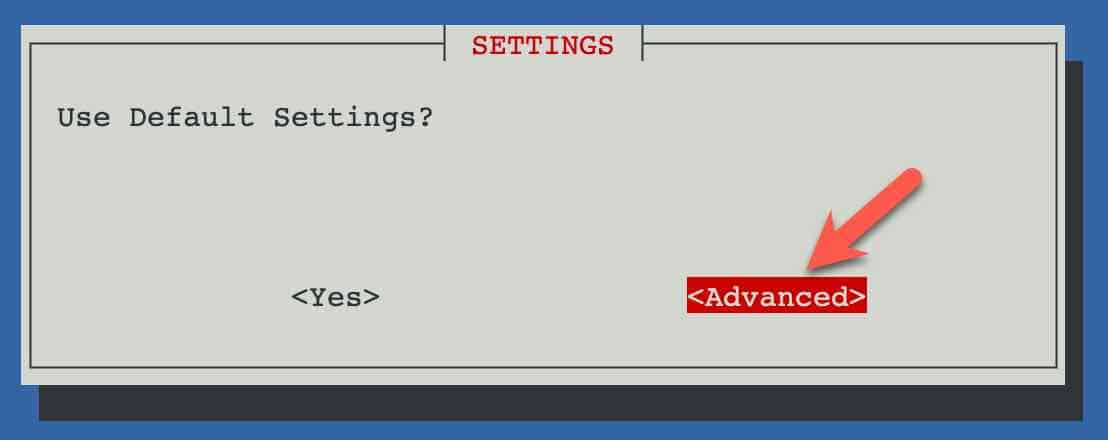
5. Select Advanced (NOT Yes).
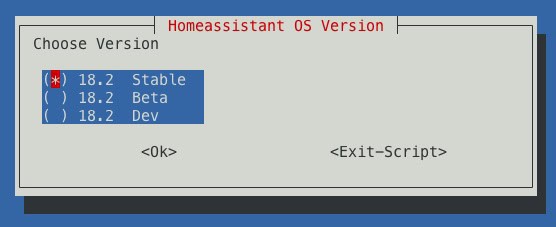
6. For the version chose latest stable version. HAOS is regularly updated, so the screenshot may not reflect what you see.
7. Leave the default Virtual Machine ID.
8. Leave the default Machine Type (q35).
9. Set the disk size to at least 32GB. I suggest 50GB or more.
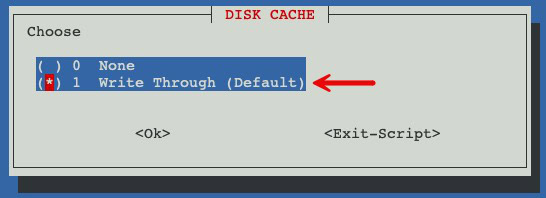
10. Verify Write Through Disk Cache is selected.
Explanation: If you use “none” then the HAOS filesystem or database(s) within HAOS can be corrupted during unexpected power loss to your server. Write through causes an fsync for each write. It’s the more secure cache mode, as you can’t lose data but it is also slower. In fact, Proxmox documentation gives you a warning for “None”: Warning: like writeback, you can lose data in case of a power failure.
11. Set the VM’s Hostname.
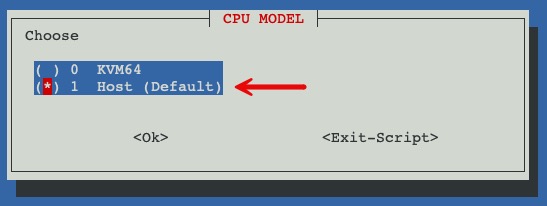
12. Change the CPU Model to Host.
Explanation: If you have a standalone Proxmox host (i.e. no multi-node clustering with Live Migration), use Host mode for the CPU Model. This allows Home Assistant OS to use all of the host’s CPU features.
13. Chose your Core Count (2 is fine).
14. Chose your RAM (I’d recommend 4-6GB).
15. Leave the Bridge.
16. Leave the MAC Address.
17. Leave the VLAN.
18. Leave the MTU Size.
19. Select Yes to start VM after creation.
20. When prompted to select the storage use the space bar to select the desired disk (likely local-lvm) then tab to Ok.
Note: I STRONGLY urge you to use local Proxmox storage (e.g., local-lvm), not storage backed by a NAS. If there’s a network hiccup or the NAS goes offline you could easily end up with a corrupted VM.
21. Wait for the installer to complete. This will take a few minutes. If prompted about the Image Cache, I suggest to NOT keep it to save space.
Home Assistant Initial Configuration
Note: As of Home Assistant 2026.8, a fresh install will now default to port 80, NOT 8123. This means you no longer need to specify the port number in the URL.
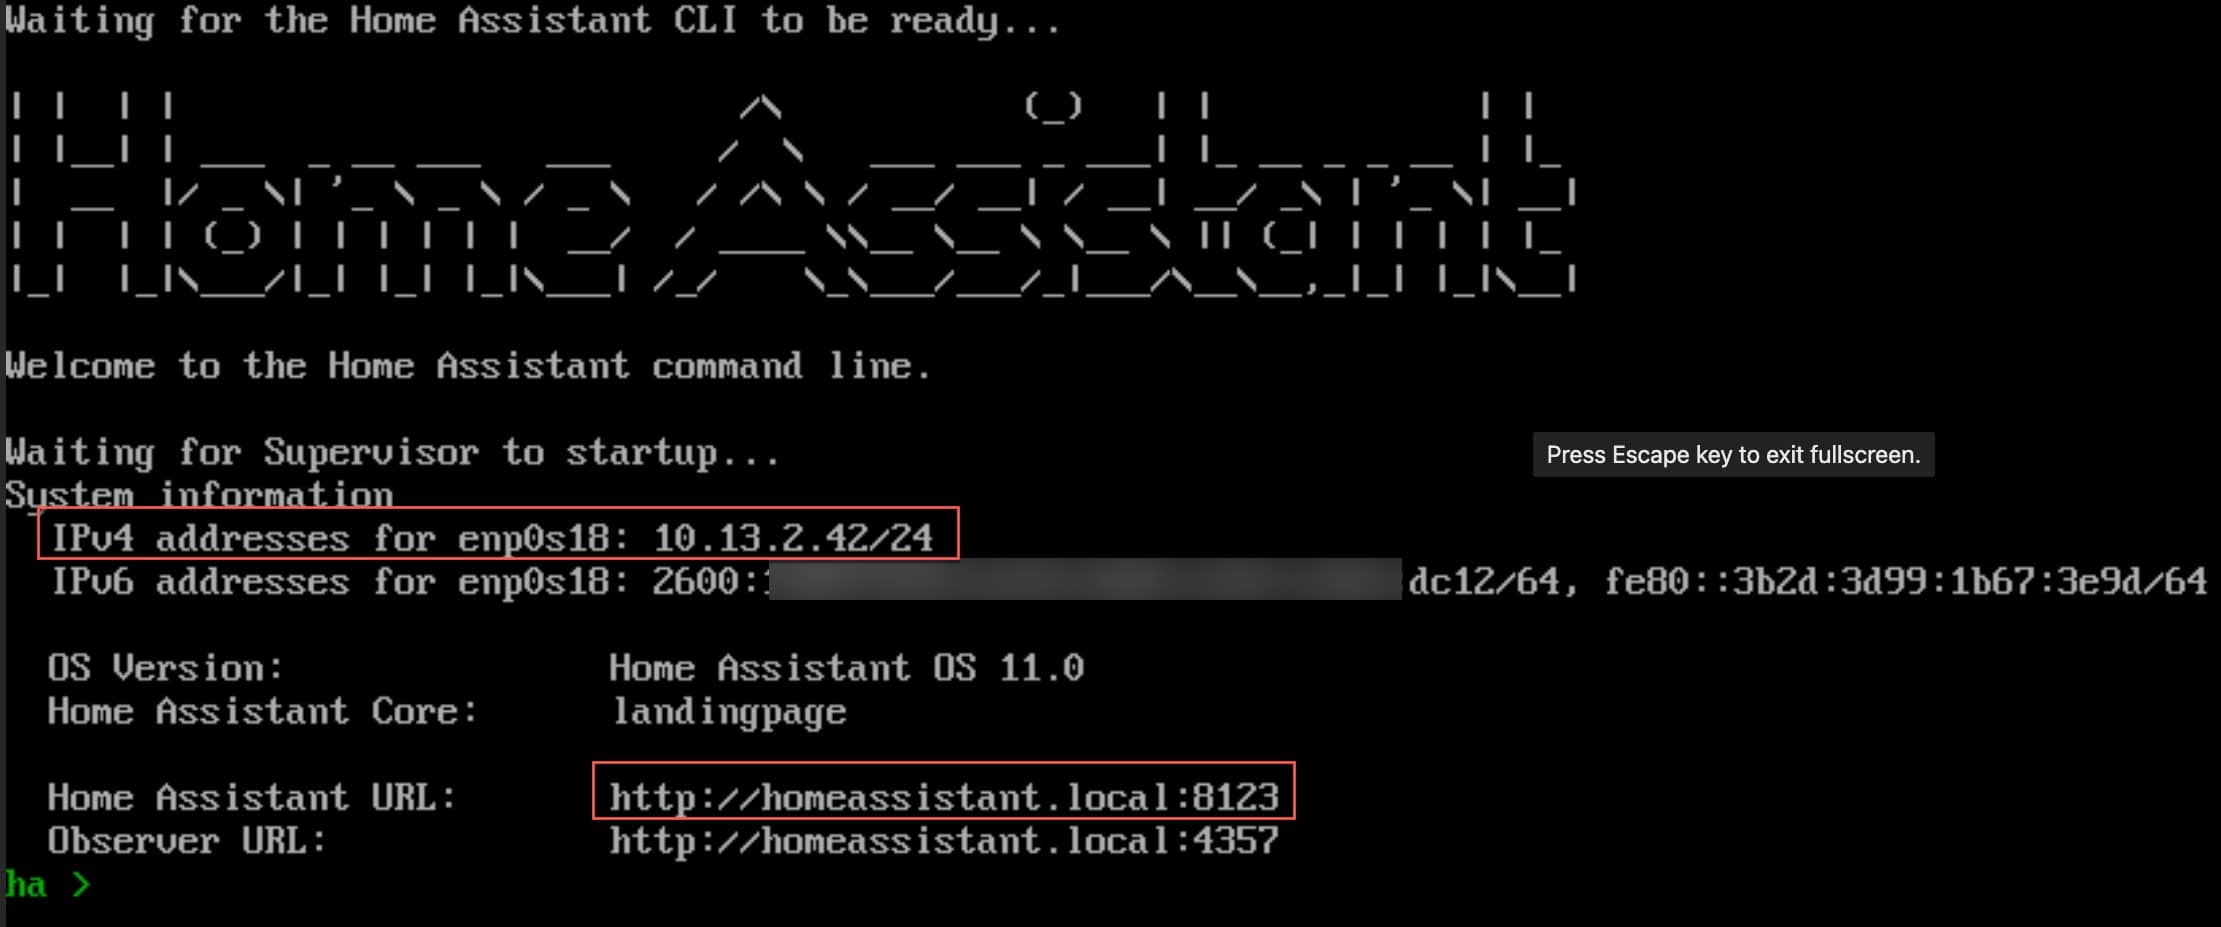
1. Once the VM is created, click on it in the left pane and then select console in the middle pane. Note the IP address and port number (if any). By default HAOS uses DHCP, but you can assign a static IP if you prefer (covered below).
2. Open a browser and enter the HAOS IP address. Only specify port 8123 if the HAOS console page lists it.
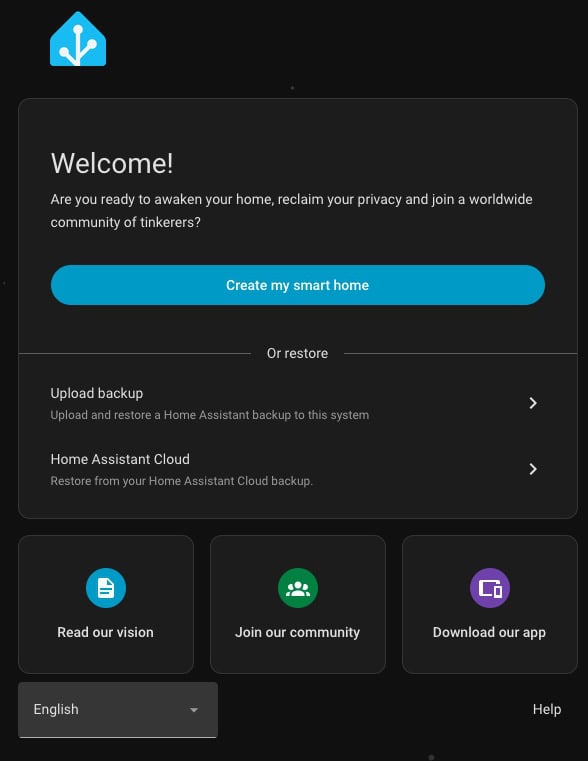
3. Depending on the speed of your server, you may see a Preparing Home Assistant screen for several minutes. Wait until you see Welcome!.
4. Click on Create my smart home.
26. On the Create User screen enter your name, username and password. Click Create Account.
27. On the Home Location screen enter your home address. The map should now show your home neighborhood. Click Next.
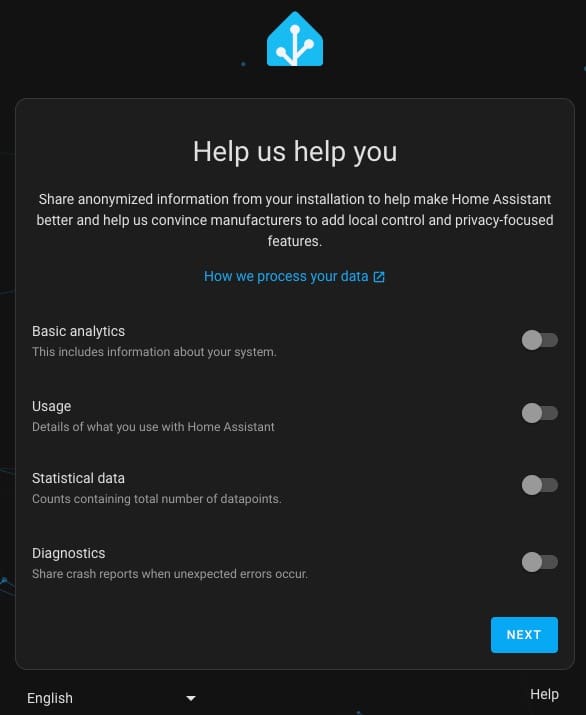
28. Select what, if any, analytics you went to send back to the Home Assistant mother ship. Click Next.
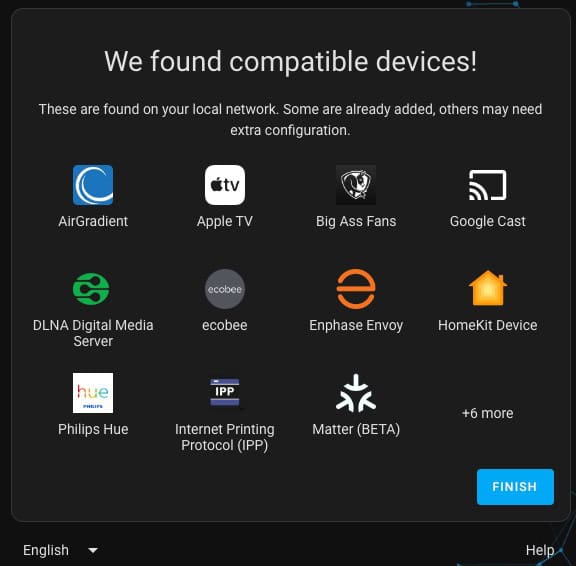
29. On the next screen HA will show you all of the devices and services that it found on your network. Click Finish.
Setting Static IP Address (Recommended)
I would strongly recommend that HAOS be configured to use a static IPv4 address. You can do this by either a DHCP reservation in your router, or set a static IP in the Home Assistant user interface.
- In the left pane click on Settings -> System -> Network. Click on IPv4.
- Change to Static and enter the details. Click Save.
- Change the address you are connecting to in your browser and verify HA is using the new IP.
Note: Some protocols such as Matter rely on IPv6. However, you do NOT need an IPv6 address space from your ISP. Leaving the IPv6 set to Automatic is fine and should NOT be disabled.
Intel Microcode Update (Optional)
Intel releases new microcode for their processors from time to time. This is different from BIOS firmware, as the Intel microcode runs inside the processor. It can fix CPU bugs or make other changes, as needed. If you are running on an Intel system you can use the following script to download the latest Intel microcode and install it. A reboot will be needed for the microcode to take effect.
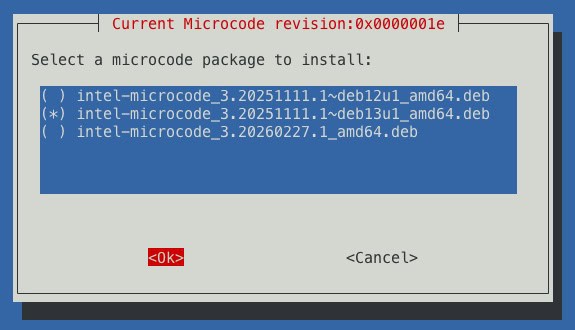
Note: The firmware list can be confusing, listing several options. Proxmox 9.2 is based on Debian 13 (Trixie). In my case I would then select the middle option (3.20251111.1~deb13u1). If you are presented with options, pick the one for deb13 if available.
bash -c "$(curl -fsSL https://raw.githubusercontent.com/community-scripts/ProxmoxVE/main/tools/pve/microcode.sh)"
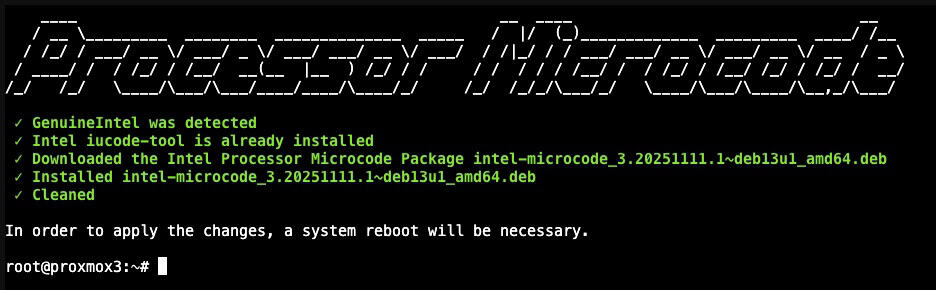
After the Proxmox host reboots you can run the following command to see if any microcode update is active. Not all CPUs need microcode updates, so you may well not see anything listed.
journalctl -k | grep -E "microcode" | head -n 1

USB Passthrough to HAOS (Optional)
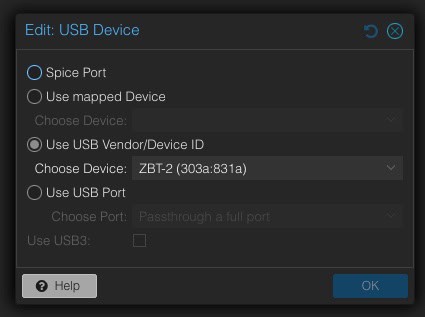
If you have any USB dongles for radios such as z-wave, Zigbee, Thread, etc, we need to pass it through to the HAOS VM. This is optional, and not needed if you have no USB devices to passthrough. I am using the Nabu Casa ZBT-2 USB dongle for Zigbee (or Thread).
- Connect your USB dongle to your server.
- In the left pane click on your HAOS VM.
- In the middle pane click Hardware.
- Click on Add then USB Device.
- Select Use USB Vendor/Device ID.
- Chose the USB device to passthrough.
7. In the upper right hand corner of the VM pane click on the down arrow next to Shutdown and select Reboot.
8. Home Assistant will auto-discover the dongle after the reboot. It should appear in Settings -> Devices.
Optimize CPU Power (Optional)
Depending on your server hardware and how concerned you are about power consumption, you might want to tweak how Proxmox handles CPU scaling. I have a 12th Generation Alder Lake CPU (i5-1240P), which idles at 8w-10w according to a smart power plug.
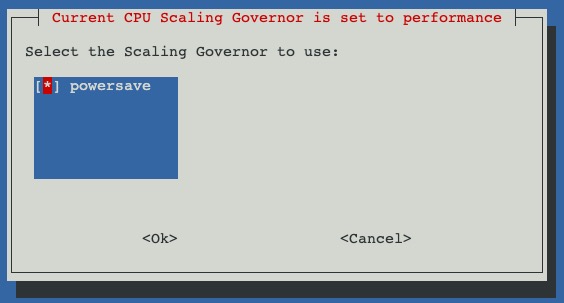
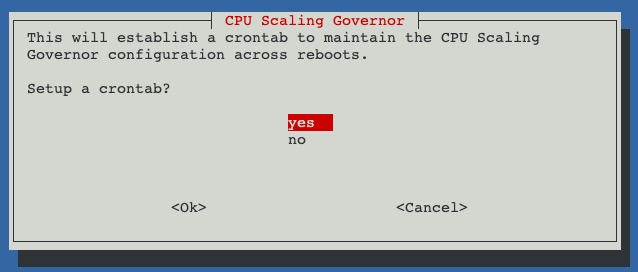
Switch back to the Proxmox interface, open a shell, and run the helper script below. It will show you what your current scaling governor is, and you can elect to change it. Make sure you select the enable cron job to make it persist across reboots.
bash -c "$(curl -fsSL https://raw.githubusercontent.com/community-scripts/ProxmoxVE/main/tools/pve/scaling-governor.sh)"
Check SMART Monitoring (Optional)
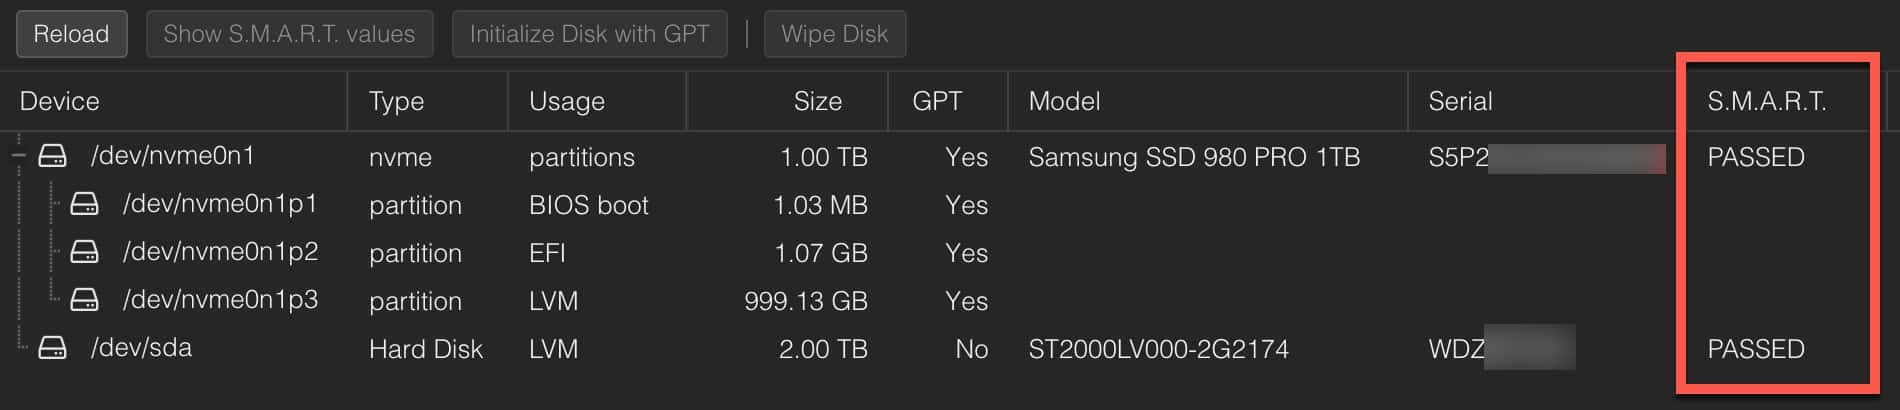
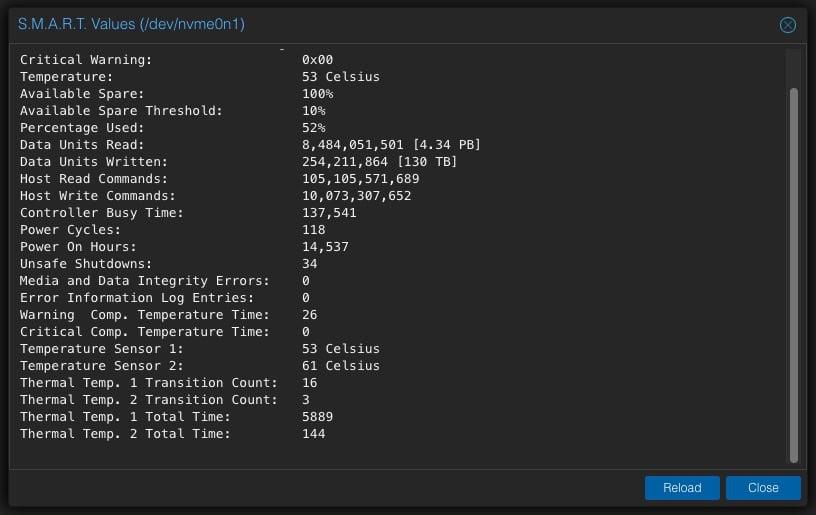
Proxmox should enable SMART disk monitoring by default. But it’s a good idea to check the SMART health stats to make sure your media isn’t having any issues. On rare occasions a motherboard may not support SMART, so it’s always best to check that it is working.
Check SMART Health:
- In the left pane change to Server View. Click on your Proxmox host.
- In the middle pane click on Disks.
- In the right pane you should see your disk(s) and SMART status. You can click on the main disk device to further inspect the health.
VLAN Enable Proxmox (Optional)
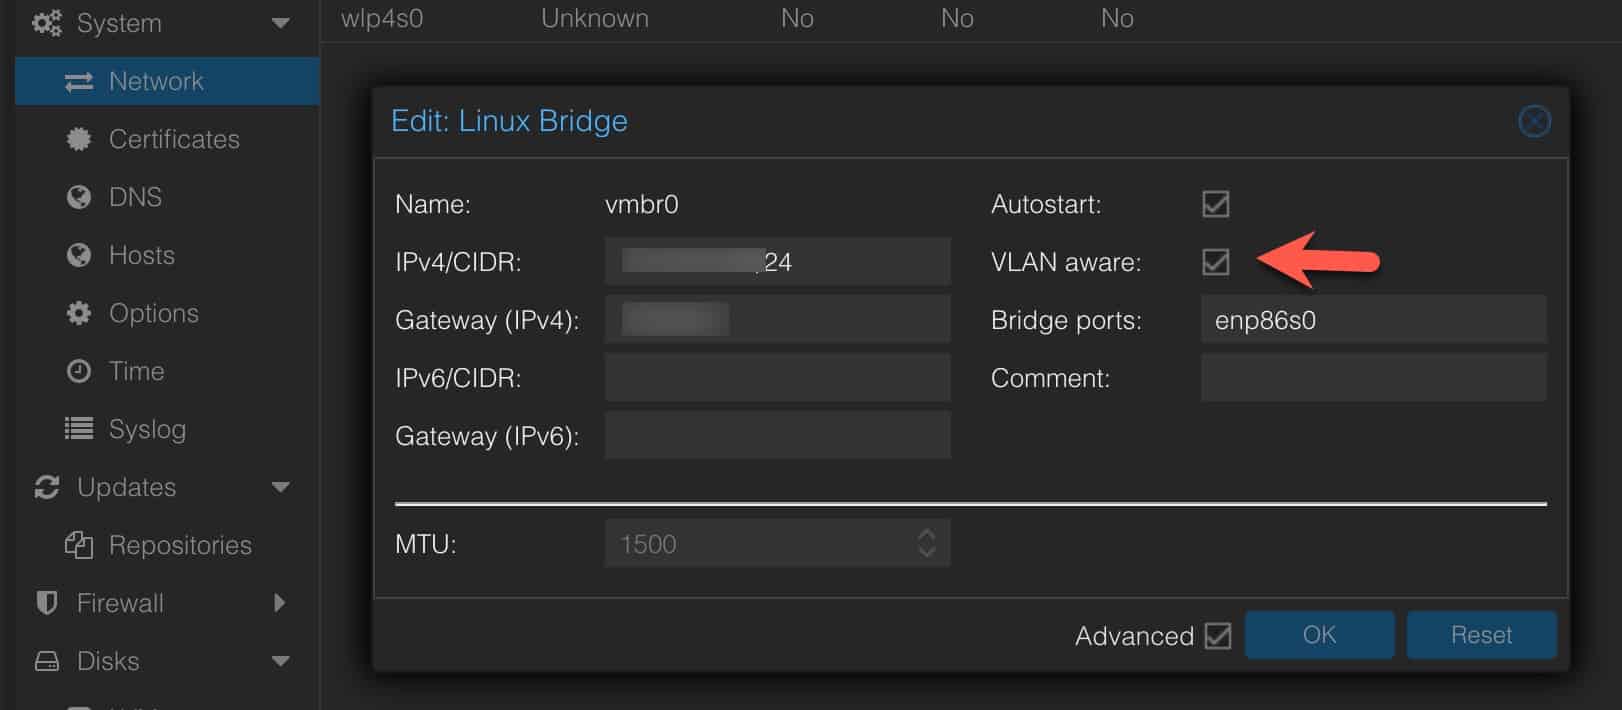
Out of the box Proxmox is not VLAN aware. Even if you don’t need VLANs right now, you can still enable a check box to make Proxmox VLAN aware. Then down the road when you want to setup VLANs, it’s one less thing to remember to do and VLANs will just work.
To enable VLANs:
- In the left pane change to Server View. Click on your Proxmox host.
- In the middle pane click on Network (under system).
- Click on Linux Bridge (vmbr0). Click on Edit.
- Tick the box next to VLAN aware and click OK.
Proxmox Let's Encrypt SSL Cert (Optional)
If you want to secure Proxmox with a trusted SSL certificate and even add Proxmox as a web page to Home Assistant follow my post Proxmox Let’s Encrypt SSL: The Easy Button
Proxmox Two Factor Setup (Optional)
Enhancing the security for your Proxmox accounts should be a priority. Thankfully Proxmox makes it easy to add two factor authentication.
- In the left Pane click on Datacenter.
- In the middle pane under Permissions click Two Factor.
- Click on Add -> TOTP.
- Add a description at the top, then scan the QR code with your password manager (1Password recommended). At the bottom of the window enter the validation number.
- Click Add again. Click Recovery Keys.
- Click Add.
- Copy the recovery keys to your password manager.
Proxmox Notifications (Optional)
New to Proxmox 8.1 and later is centralized notification configuration. You now have one place to setup SMTP, Sendmail and Gotify notifications.
- In the left pane click on Datacenter.
- In the middle pane at the bottom click on Notifications.
- In the right pane under Notification Targets click on Add.
- Chose the notification method you want to configure. I used SMTP.
- Configure the parameters as needed, and test.
- In the lower pane under Notification Matcher click on Add.
- Enter the matcher name (e.g., SMTP).
- Click on the Targets to notify box. Select your notification target. Click OK.
Proxmox Monitoring (Optional)
If you want to monitor the Proxmox server status (uptime, CPU usage, package updates, etc.), then use the HACS Proxmox add-on. This compliments the Glances Monitoring section below. Be sure to use a “PVE” Realm user for Home Assistant and don’t enable 2FA on the account.
Glances Monitoring (Optional)
If you want to monitor the hardware health and performance of your Proxmox hosts in Home Assistant, you can use Glances. It’s a free tool that can be easily setup in just a few minutes. Follow my guide: Home Assistant: Monitor Proxmox with Glances. This will surface a lot of hardware sensor information such as temperature for each of your CPU cores, and many other stats. This compliments the Proxmox monitoring discussed in the previous section.
Proxmox UPS Shutdown (Optional)
If your Proxmox server has a UPS, then there’s a great new project called PVE-UPS which can automate the shutdown of your Proxmox VE servers. Check out my full guide: PVE-UPS: A Proxmox UPS Shutdown Service
Summary
This refreshed guide walks you through the process of setting up Home Assistant as a VM on a new Proxmox VE 9.x host. This is a great way to deploy a new Home Assistant instance, as you can easily add future VMs or LXC containers to your Proxmox host for new projects or services. Proxmox VE also enables you to easily backup and restore your Home Assistant VM at any time. Have fun going down the smart home rabbit hole!