If you are running Home Assistant and wish to increase its security by using a FREE trusted SSL certificate from Let’s Encrypt, then you are in luck! This post will walk you through the entire process. The process is quick and easy, assuming you already have a public domain via a registrar and a supported public DNS server.
You might think that installing the HA Let’s Encrypt add-on also handles automatic certificate renewal. THIS IS FALSE. There is extra work to setup checking of the expiry date and renewing the certificate. If you only rely on the Let’s Encrypt add-on, after 90 days your certificate will be invalid. This post shows you how to fully automate this process so that is completely hands free for all future renewals.
For the purposes of this post I’ll be using Cloudflare DNS, but 99% of this post is the same regardless of which supported DNS service you use.
Let's Encrypt Requirements
In order for Let’s Encrypt to issue you a trusted SSL certificate for the FQDN of your Home Assistant server you need a couple of things:
You need to own a public domain via a registrar (any registrar)
You need to be using a DNS provider supported by the Home Assistant Let’s Encrypt add-on
For this post we will be using the Cloudflare DNS provider. But you can substitute any supported provider. The Let’s Encrypt add-on for Home Assistant has a large list of supported DNS providers so chances are yours is available. As of the date of this publication, the following DNS providers are available:
Please note that this tutorial does NOT require exposing any ports to the internet. This post is NOT for configuring inbound HTTPS access to Home Assistant from the internet. It merely installs a trusted certificate on your Home Assistant server so local access is over a trusted TLS connection.
DNS Redirect
Since we are configuring the Home Assistant server for a trusted SSL certificate you will want to access your Home Assistant server via FQDN from inside your home network. This will prevent any browser warnings. It also keeps all traffic (including DNS queries) within your home network. To do this you need to configure a DNS redirect rule on your router, firewall, Pi-hole, AdGuard server, NextDNS, etc.
What is a DNS redirect rule? Basically when your home computer does a DNS query for homeassistant.mydomain.com we want the private internal IP address of your Home Assistant server returned. This means your router/firewall will intercept that request to the public DNS server and respond with the private (internal) IP of your Home Assistant server. See the diagram below for the traffic flow.
Before proceeding create a DNS direct rule that points the FQDN of your Home Assistant server to the private (internal) IP address of your Home Assistant server. You should not create a record in your public DNS Cloudflare zone that has the private IP of Home Assistant. Do the redirect on an internal device, or use a service like NextDNS that has a feature for this purpose. For example, with NextDNS you can use their Rewrites feature.
DNS Redirect Network Flow
Cloudflare API Tokens & ID
Assuming you are using CloudFlare as your DNS provider, we need to obtain an API token for a DNS zone. If you don’t already have the API token (NOT a global token) for your DNS zone then go through this post and save the information in a safe place:
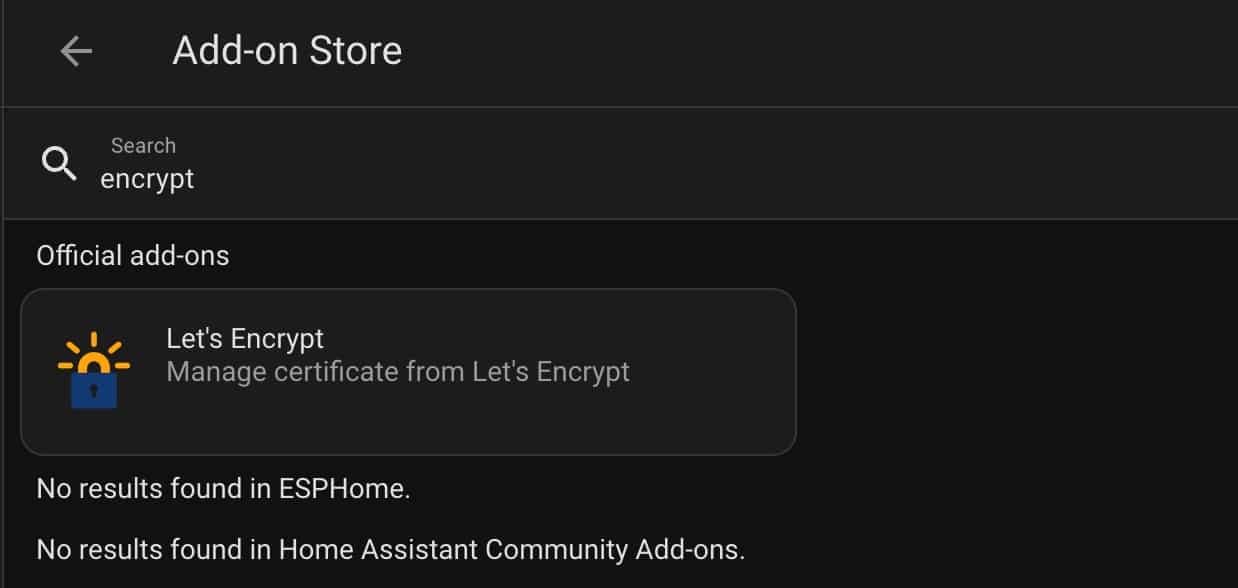
Logon to your Home Assistant server. Go to Settings -> Add-ons. In the lower right click on ADD-ON STORE.
Search for encrypt and click on Let’s Encrypt. Click on INSTALL.
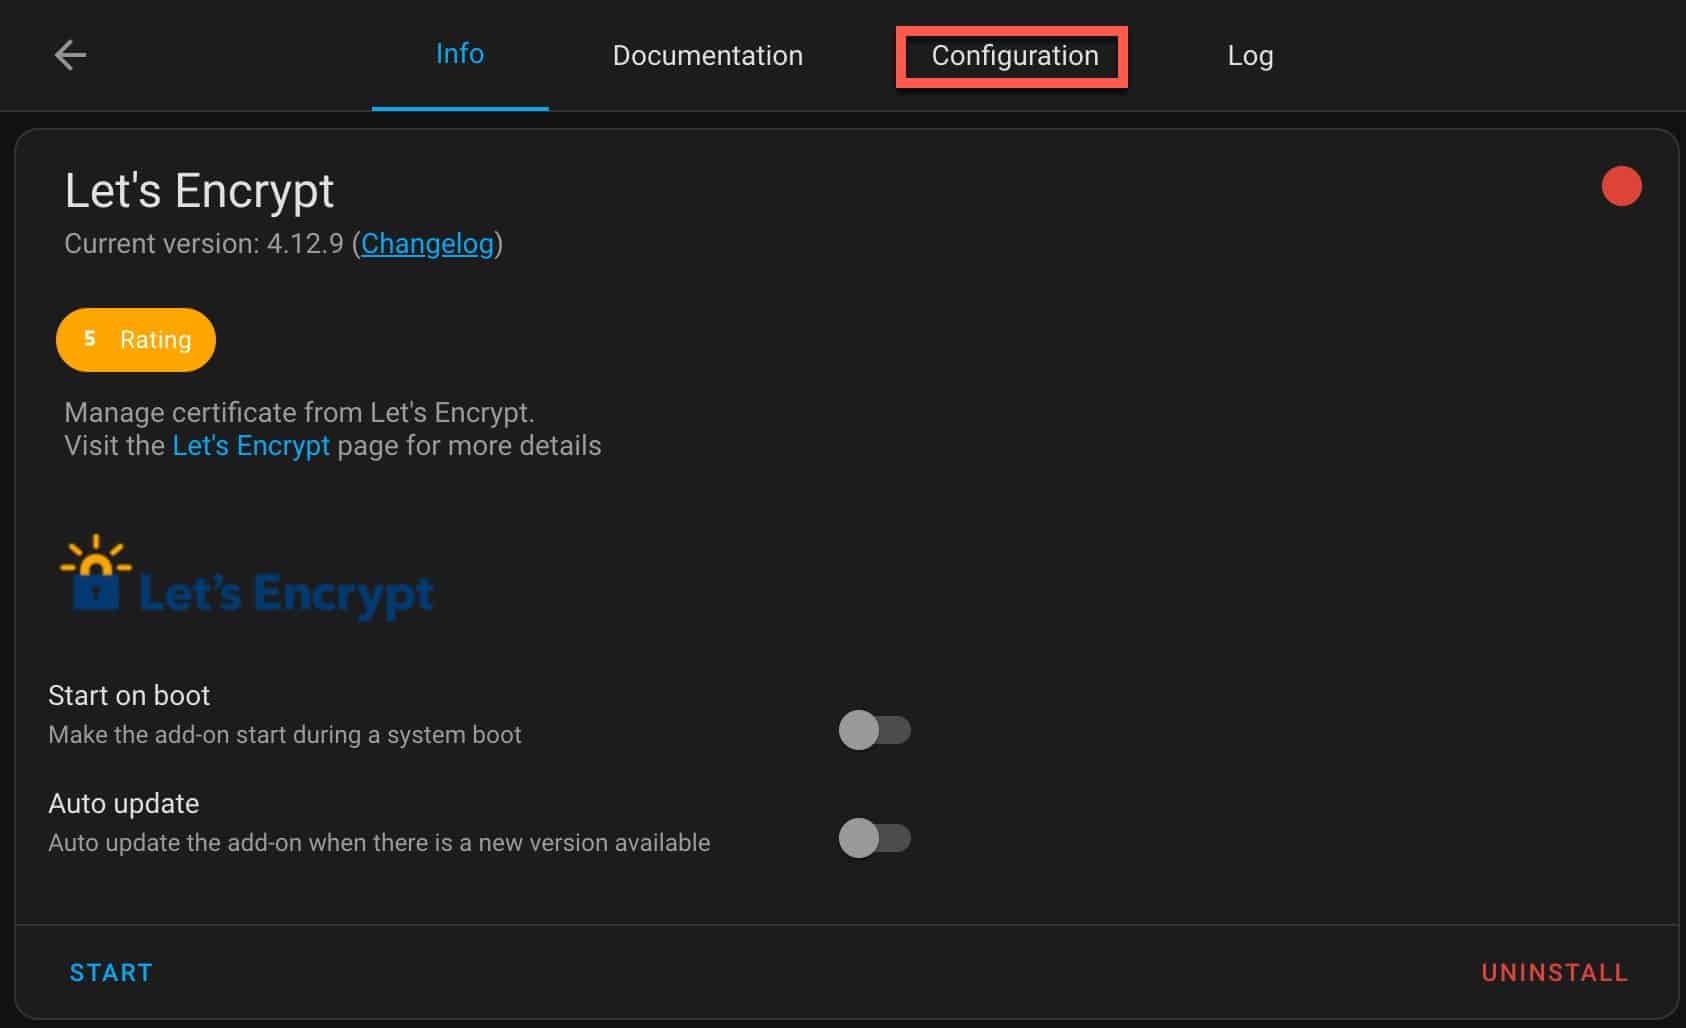
3. After Let’s Encrypt is installed, click on the Configuration tab.
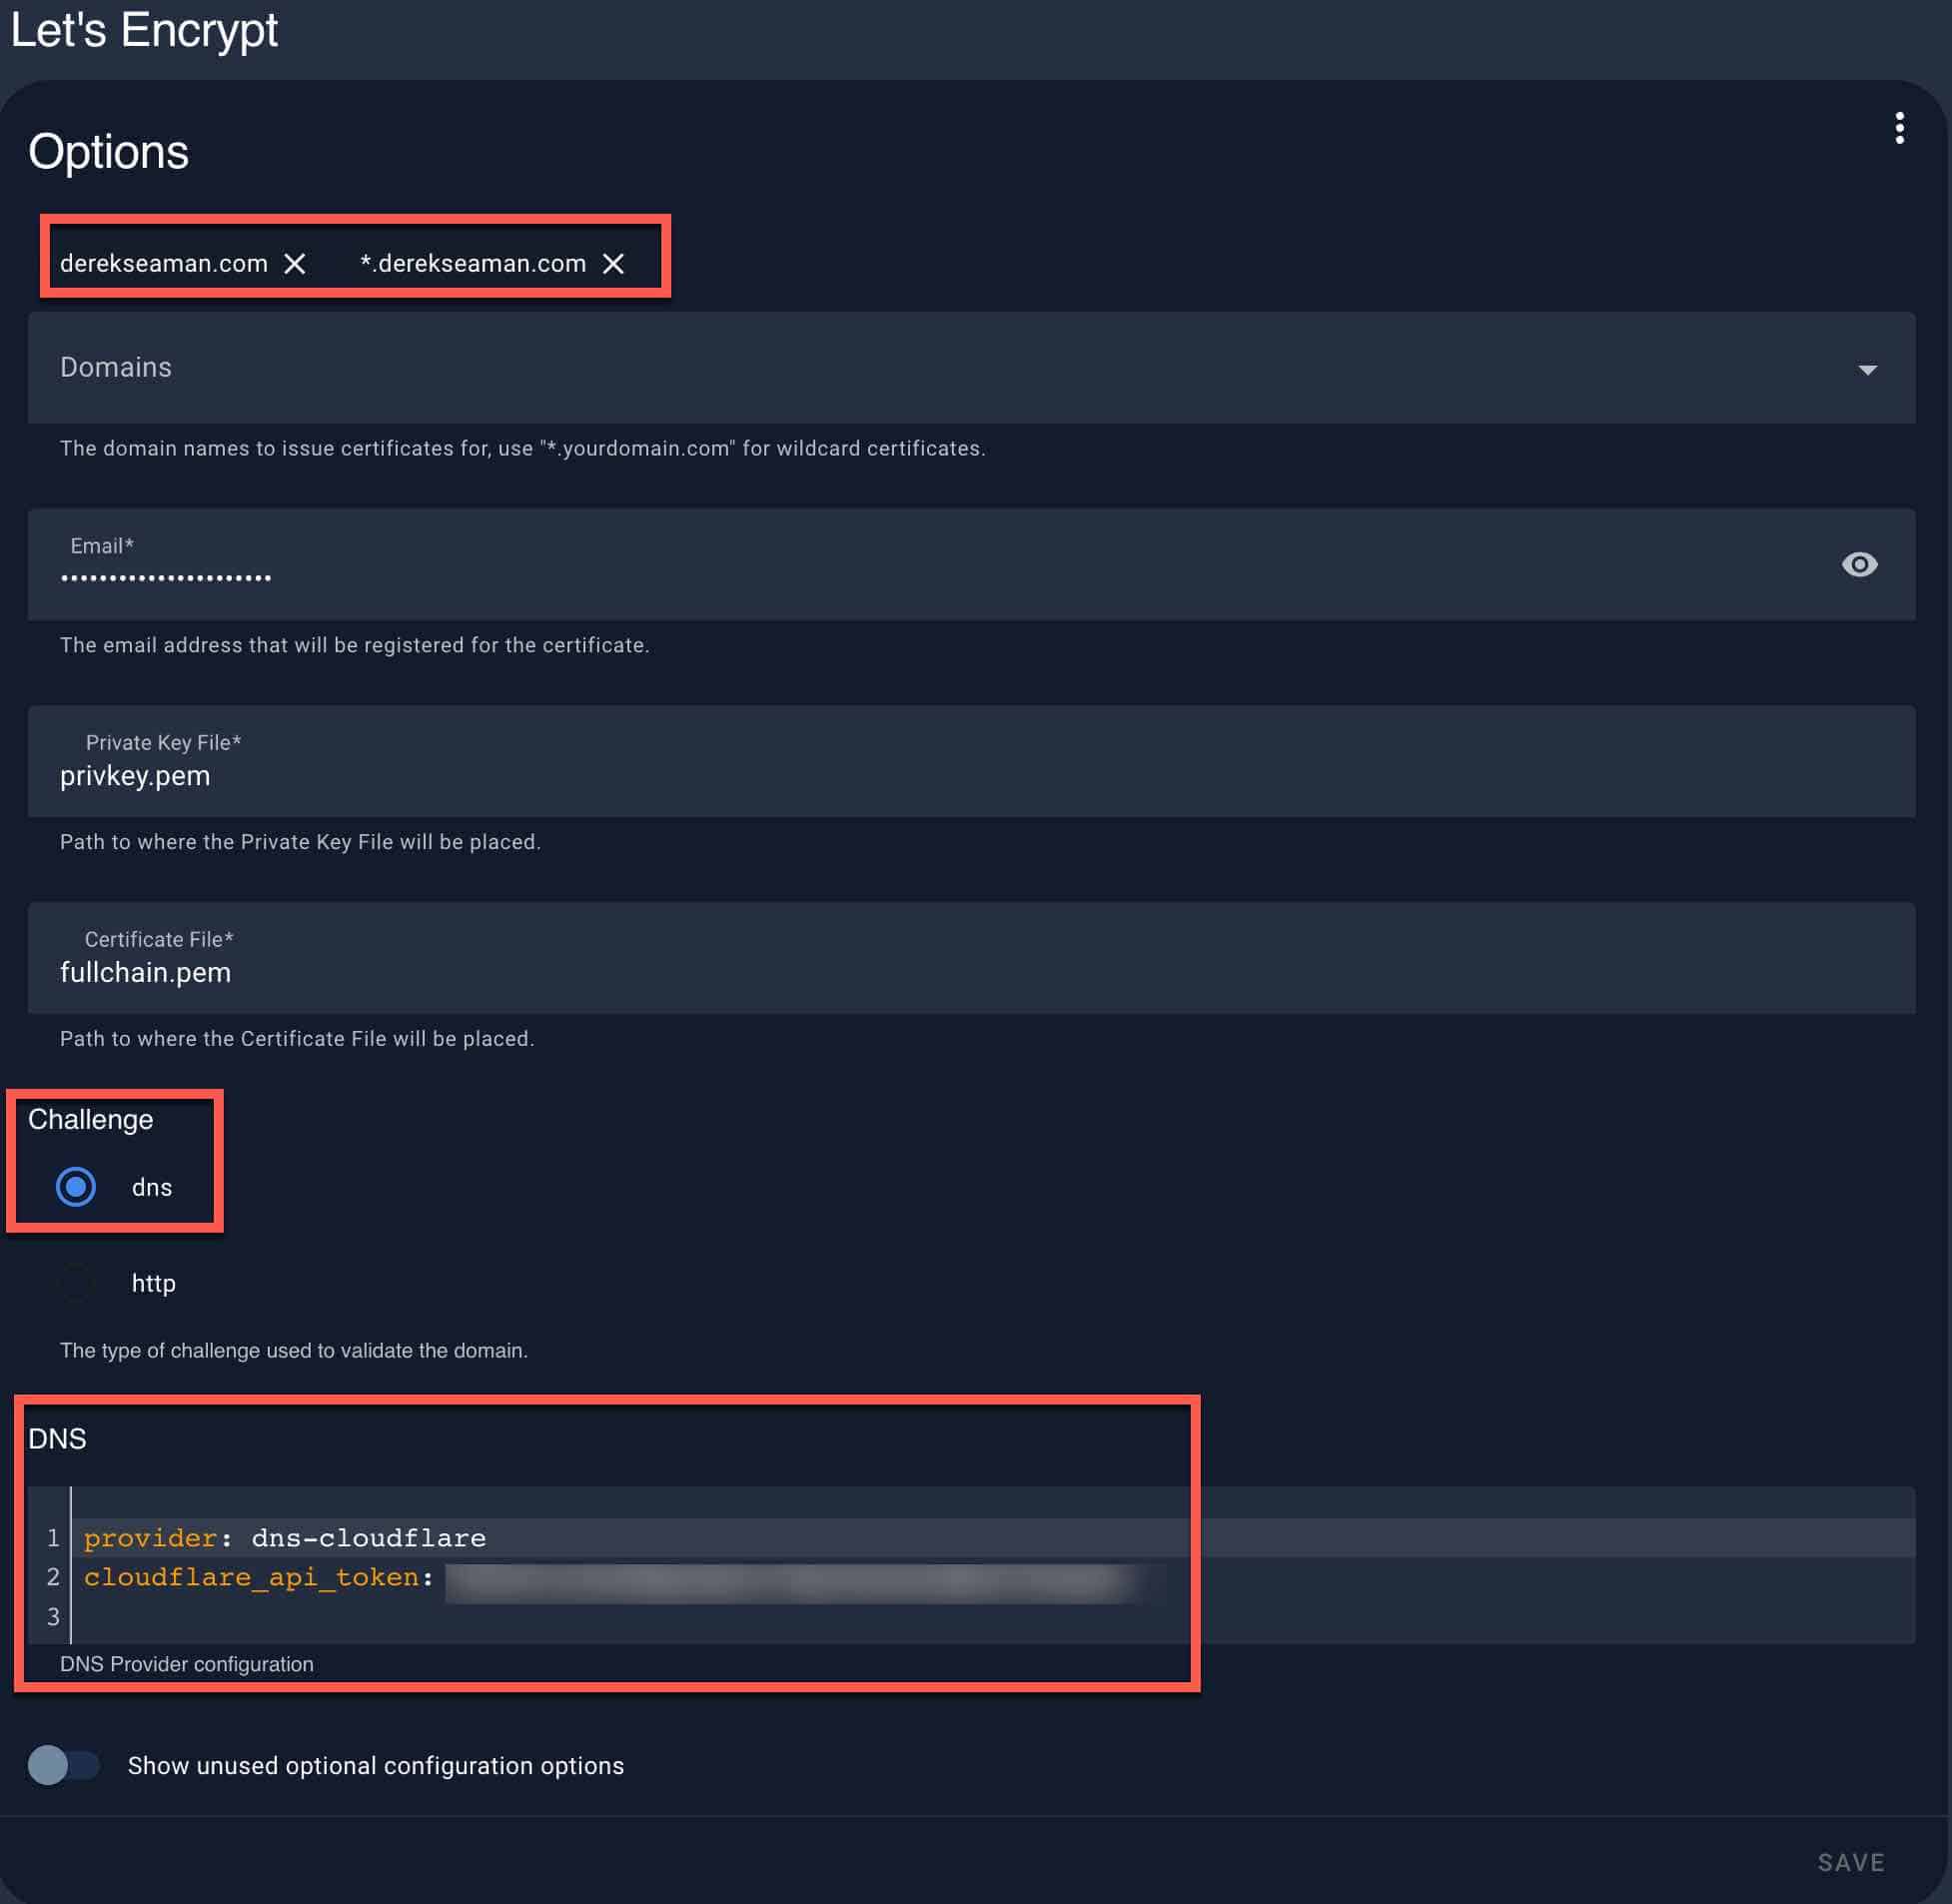
4. In the Configuration tab enter the domain(s) you want the certificate issued for. In my case I wanted a wildcard certificate, so I entered two domains:
derekseaman.com *.derekseaman.com
If you want the certificate issued for a FQDN (fully qualified domain name), you could do that as well. Wildcard provides more future flexibility.
Enter an email an email address Let’s Encrypt can email you (for alerting, not for domain verification). Change the Challenge to dns. In the DNS section copy and paste the code block below, and use your CloudFlare API key.
Note: If you aren’ using Cloudflare, click on the Documentation tab in the add-on and review the Example Configurations for alternative providers.
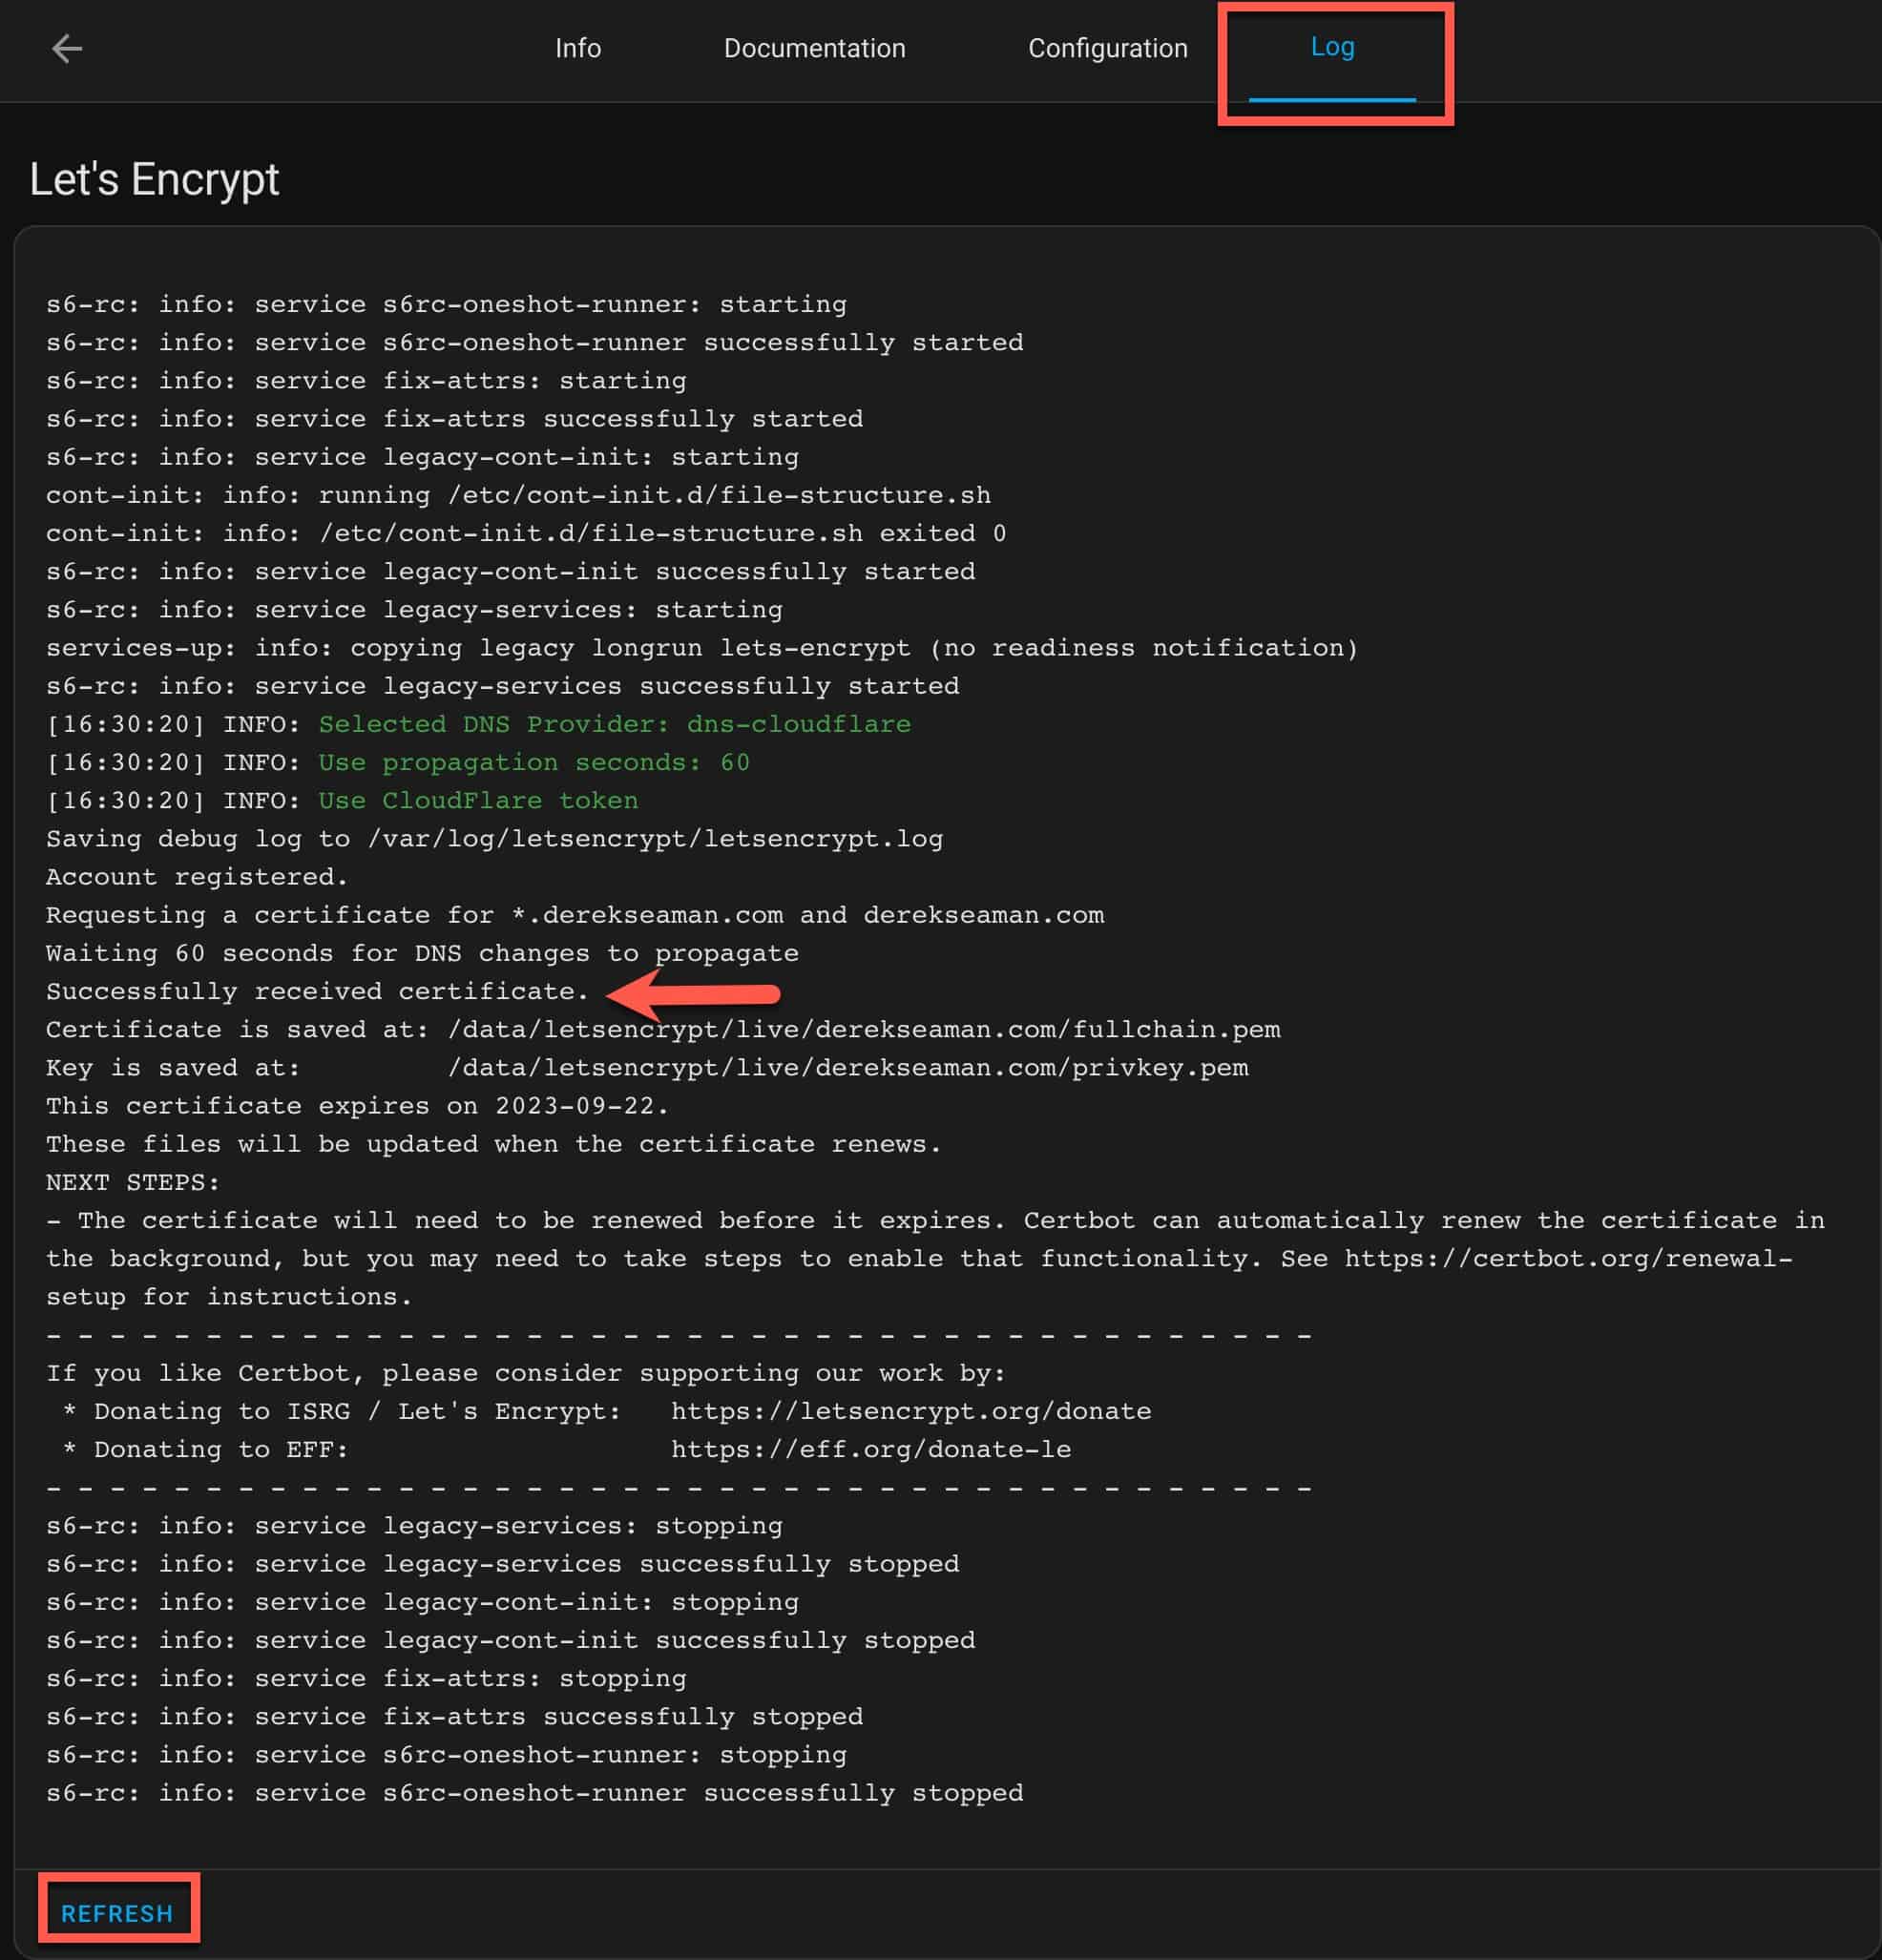
5. Click SAVE. 6. Flip back to the Info tab. Click on START. 7. Immediately flip to the Log tab. Periodically click on REFRESH to monitor the progress. Look for a successful issuance of your certificate.
8. Modify your configuration.yaml file and add the following lines. Save your configuration file.
9. Go to Settings -> System -> Network. Modify the internet and local network URLs to use the HTTPS FQDN.
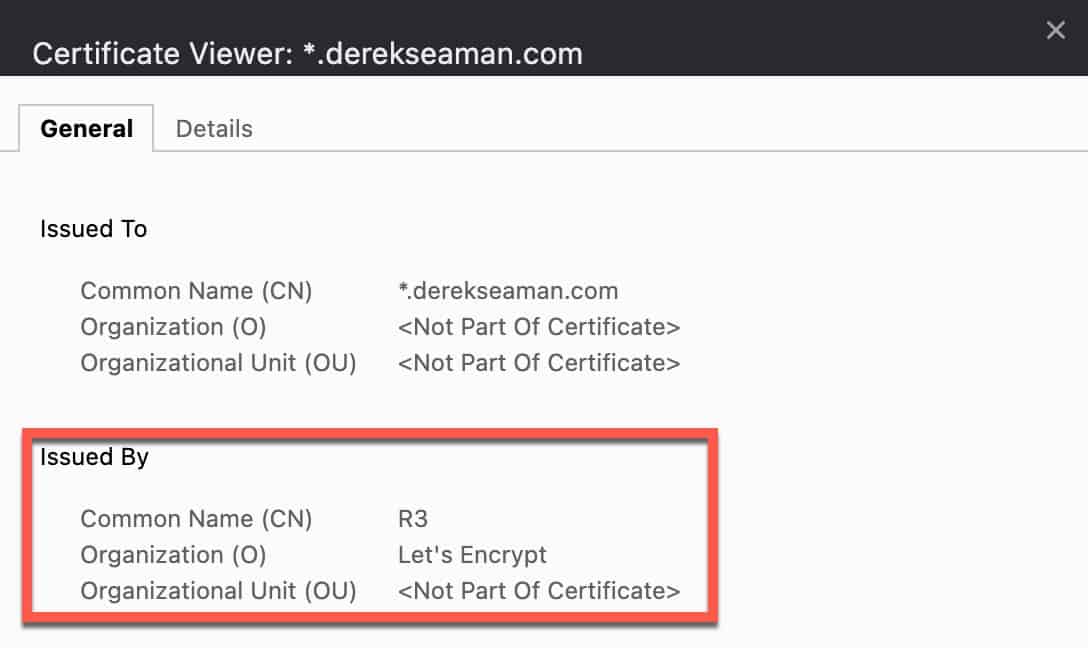
10. Go to Settings -> System -> Power Button in upper right -> Restart Home Assistant. 11. Close your browser window and open a new window using HTTPS to your Home Assistant FQDN. You should not see any browser certificate warnings. View the site’s SSL certificate in your browser and make sure it’s issued by Let’s Encrypt.
Certificate Expiry Monitoring
In order to automate our certificate renewal process we need first get an alert when the certificate is going to expire.
In Home Assistant go to Settings -> Devices & Services. In the lower right click on ADD INTEGRATION.
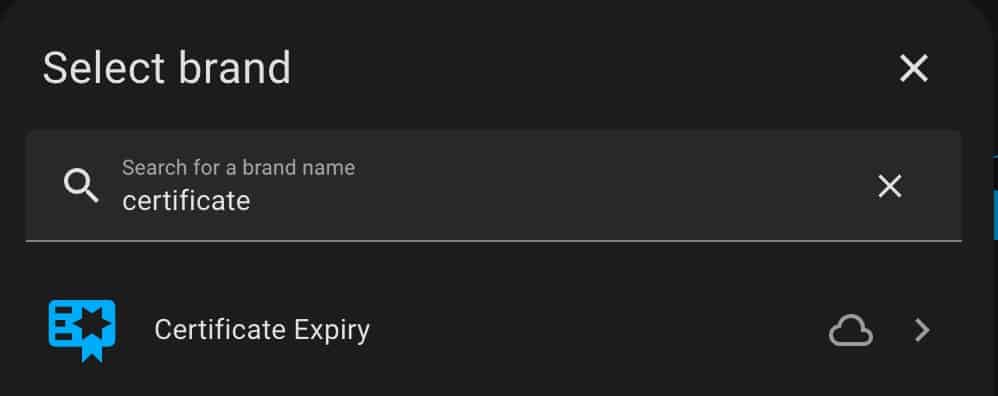
Search for certificate. Click on Certificate Expiry.
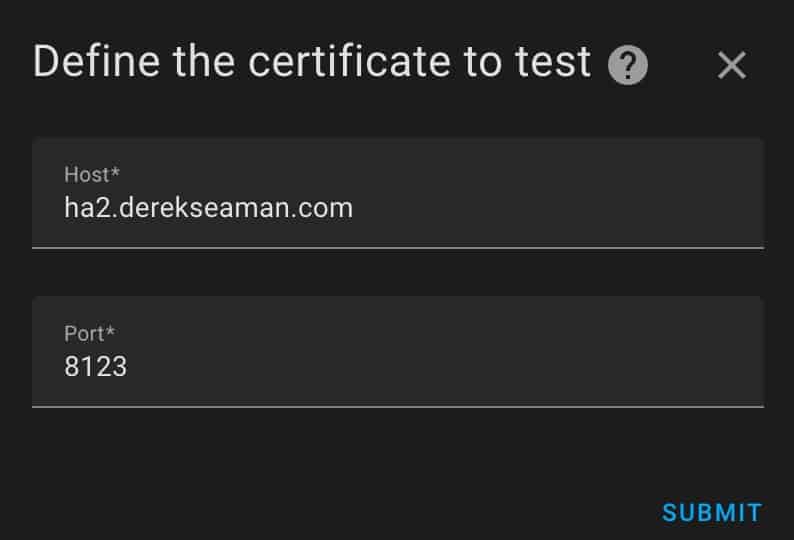
3. In the next window enter the FQDN of your Home Assistant server and change the port to 8123. Click SUBMIT.
Certificate Renewal Automation
We now need to import a blueprint that will automate the certificate renewal process. We will then setup an automation based on the blueprint.
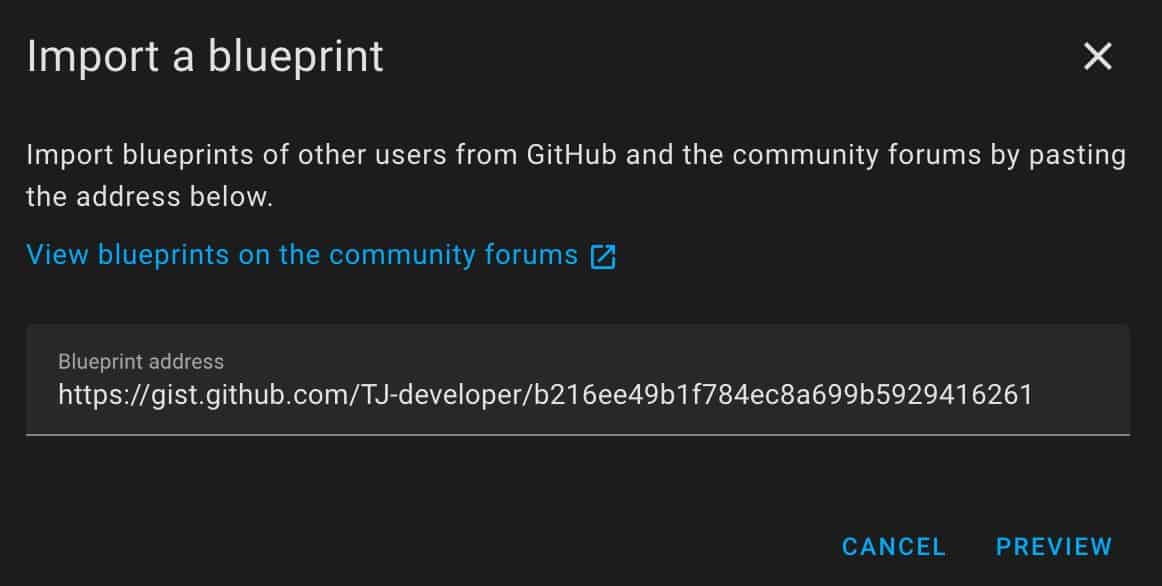
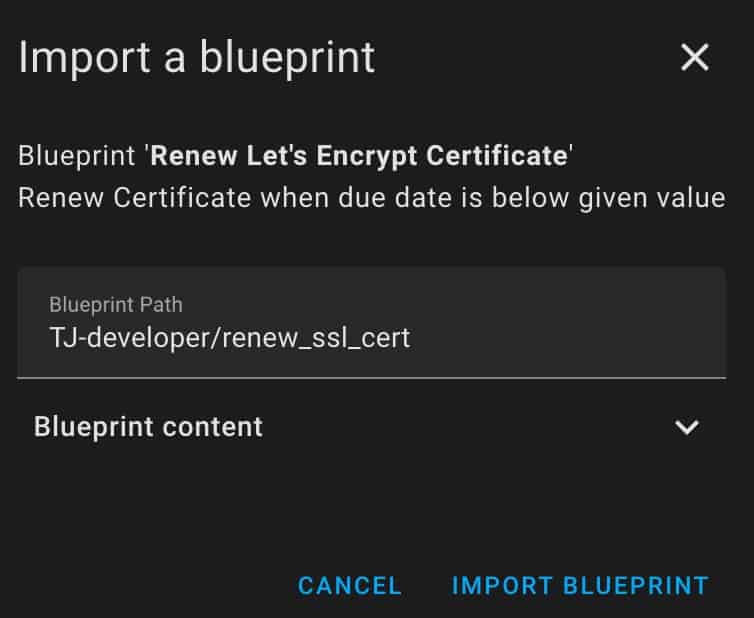
1. In Home Assistant go to Settings -> Automations & Scenes -> Blueprints. In the lower right click on IMPORT BLUEPRINT. Paste the following address in and click on PREVIEW.
2. When prompted to import the blueprint click PREVIEW. Then click IMPORT BLUEPRINT.
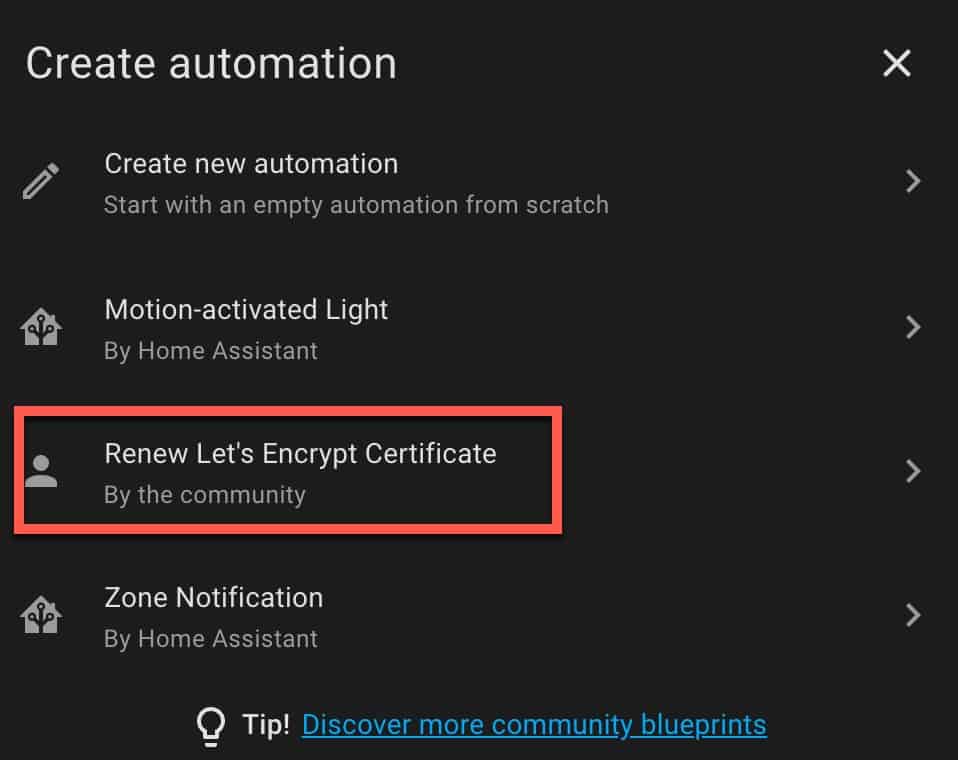
3. You should now see Renew Let’s Encrypt Certificate listed in your Blueprints list. 4. Go to Settings -> Automations & Scenes. On the Automations screen click CREATE AUTOMATION in the lower right corner. 5. Click on Renew Let’s Encrypt Certificate.
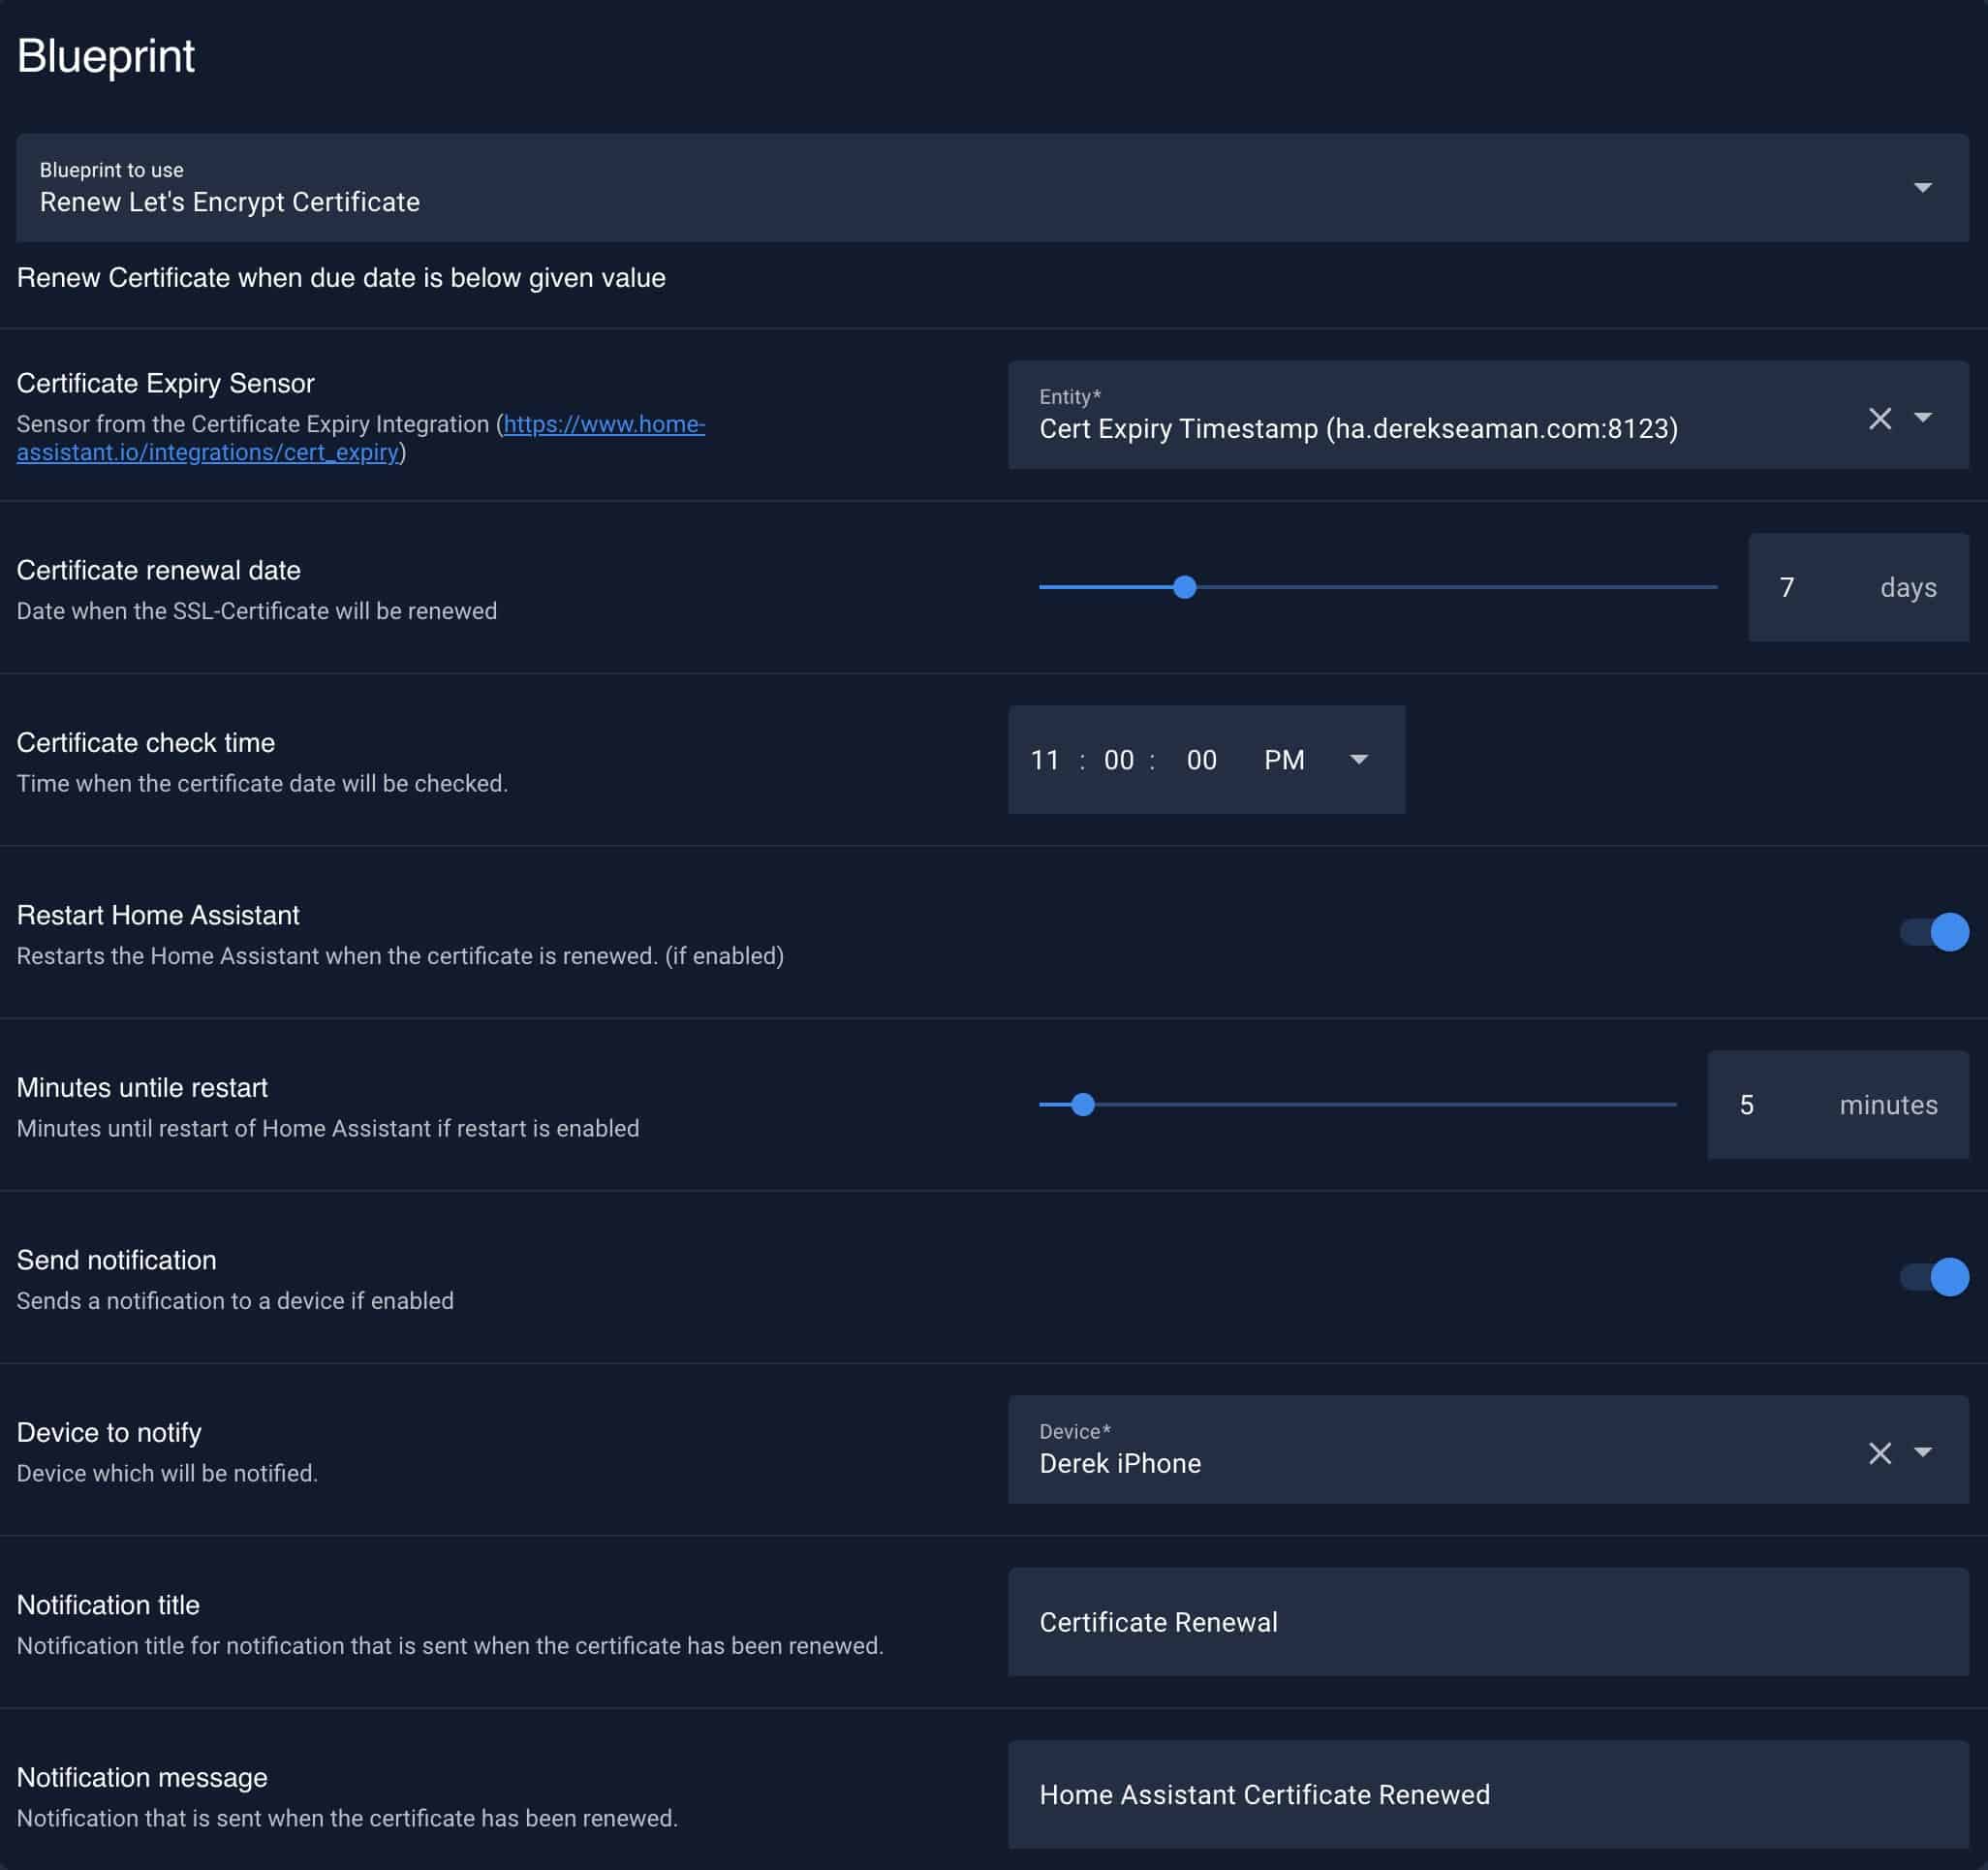
6. Configure the parameters as you see fit. The cert expiry sensor should be the one you configured in the previous section. You can adjust the renewal date (I prefer 7 days), check time, and configure notifications as you wish. Click SAVE. Name the automation and click SAVE.
Summary
Configuring an auto renewing Let’s Encrypt certificate takes a bit of work, as the Let’s Encrypt add-on does not manage auto-renewal. However, with the certificate expiry checking add-on and the renewal blueprint, it’s pretty easy to setup. You can now sit back, relax, and never have to worry about your Home Assistant Let’s Encrypt certificate expiring.
Hi,
Thank you for this tutorial, I’ve setup duckdns on my openwrt router a while ago and this part is working fine. I’m struggling to setup Let’s Encrypt using this configuration:
domains:
– xxx.duckdns.org
email: [email protected]
keytype: ecdsa
keyfile: privkey.pem
certfile: fullchain.pem
challenge: dns
dns:
provider: dns-duckdns
dns.duckdns_token: xxxxxxxx-xxxx-xxxx-xxxx-xxxxxxxxxxxx
I’m getting theses followig errrors in the log:
[10:06:24] FATAL: A required add-on configuration option is missing!
[10:06:24] FATAL:
[10:06:24] FATAL: Please set a value for the 'dns.duckdns_token' option.
[10:06:25] FATAL:
[10:06:25] FATAL: If unsure, check the add-on manual for more information.
i would be grateful if you could help me, have a nice day
Hi, I found this tutorial a couple of days ago (a big thanks to the author), followed the instructions and successfully enabled https. The only problem I’m experiencing is the same described by you.
I know that your comment is one year old, but have you find a solution?
Thanks


Does this methode requires to open a port (80 / 443) from the internet router to HomeAssistant?
No, not if you use DNS based validation.
Hi,
Thank you for this tutorial, I’ve setup duckdns on my openwrt router a while ago and this part is working fine. I’m struggling to setup Let’s Encrypt using this configuration:
domains:
– xxx.duckdns.org
email: [email protected]
keytype: ecdsa
keyfile: privkey.pem
certfile: fullchain.pem
challenge: dns
dns:
provider: dns-duckdns
dns.duckdns_token: xxxxxxxx-xxxx-xxxx-xxxx-xxxxxxxxxxxx
I’m getting theses followig errrors in the log:
i would be grateful if you could help me, have a nice day
Hi again, forget about the previous comment.
I did find my error, this entry was wrongly type: dns.duckdns_token has to be duckdns_token
Very nice!
But…How can this blueprint call Let’s Encrypt when Let’s Encrypt is embedded in NGINX Home Assistant SSL proxy?
This fork of of the blueprint supports the NGINX addon: https://gist.github.com/ChabanOS/9f4dfd1bfbc31984f19f3d192b63ed2d
Thanks! I also see the Blueprint does a HA “reboot” instead of “restart”.
Hi,
When trying to use the Certificate Expiry integration, I can’t seem to resolve my host; I always get the error “This host cannot be resolved”.
However, when resolving this host from within HA, the resolving works fine… (resolved by my PiHole at 10.10.0.30).
Any ideas what is going wrong here?
Hi, I found this tutorial a couple of days ago (a big thanks to the author), followed the instructions and successfully enabled https. The only problem I’m experiencing is the same described by you.
I know that your comment is one year old, but have you find a solution?
Thanks