Continuing my 2017 series on unattended Microsoft SQL installs, this post will cover SQL 2016 on Windows Server 2012 R2. If you want the unattended install for SQL 2012, check out my post here or for SQL 2014, go here. I’m using the same drive configuration for SQL 2016, as I did for 2014. These drives are:
C: OS
D: SQL Binaries
K: SQL Databases
L: SQL Logs
T: TempDB
Z: CD-ROM
So let’s get started on getting SQL 2016 installed via an unattended script. New to SQL 2016 is the removal of the .Net Framework 3.5 dependency. However, you must be running SQL 2016 CU2 or later per this KB article to resolve a database mail issue. You can easily install the baseline SQL 2016 via this unattended install, then download and install the latest CU or Service Pack afterwards. I’m assuming you have your various drives mounted, formatted, and ready to go. Next, download the two files below and save them to the root of your D drive.
SQL-2016-base.ini
SQL-2016-base.cmd
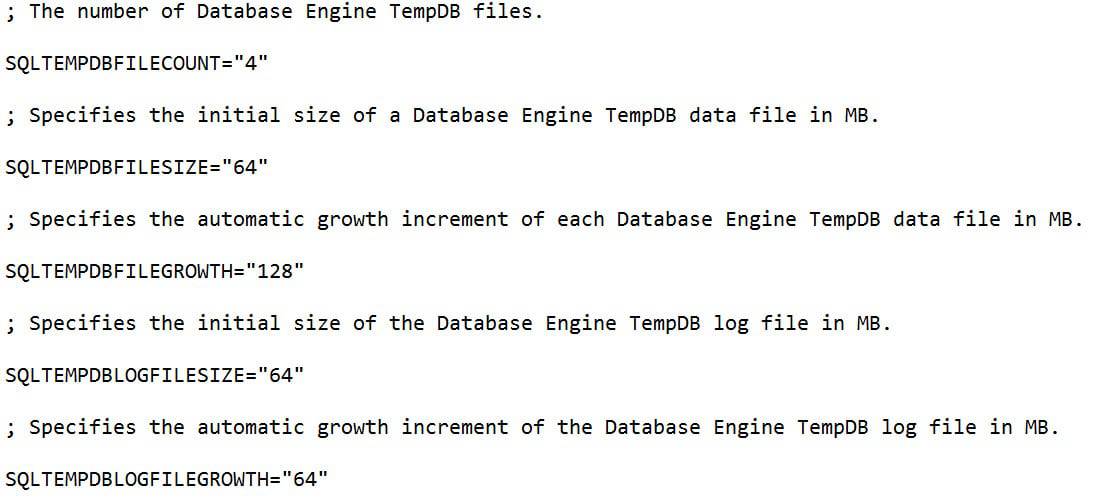
1. Open the SQL-2016-base.ini file with your favorite editor and modify all of the paths. They are sprinkled throughout the file, so be sure to check every line. New to SQL 2016 is the ability to customize TempDB files during the installation process. This allows you to follow SQL best practices and optimize the performance of SQL out of the gate. This is a great improvement. As you can see from the snippet below, there are various TempDB parameters you can tweak. All environments are different, so adjust these parameters as necessary.
3. Open a command prompt and run the SQL-2016-base.cmd file with an argument of the group which you want to be added to the SQL studio to administer the instance. Use the format domain\group. If you just want a local group, you can use BuiltIn\Group. Note: This is a change from SQL 2012/2014 where you could use MachineName\Group.

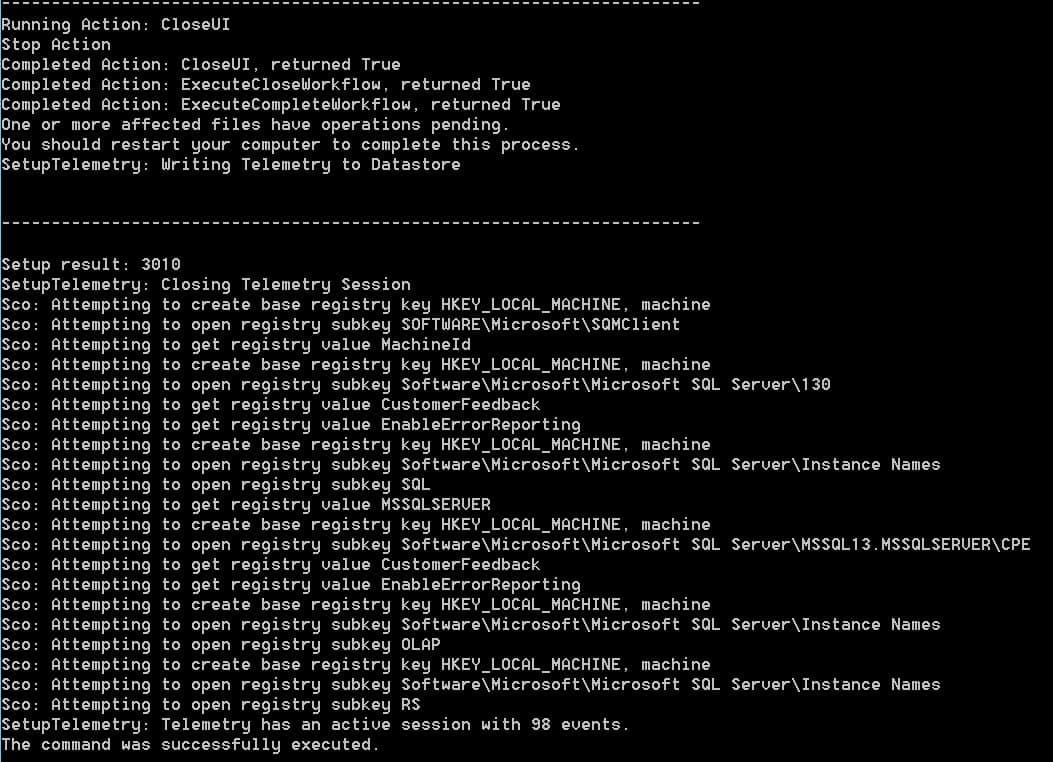
![]() 4. Sit back and relax, and give it 10 minutes or more. You will see the SQL installer GUI flash through various screens in an automated fashion. If the install was successful, at the end you should see the following status. Setup result 3010 means you need to reboot the VM. Reboot the VM now. If you don’t reboot with the setup code 3010, then the next piece we install will fail.
4. Sit back and relax, and give it 10 minutes or more. You will see the SQL installer GUI flash through various screens in an automated fashion. If the install was successful, at the end you should see the following status. Setup result 3010 means you need to reboot the VM. Reboot the VM now. If you don’t reboot with the setup code 3010, then the next piece we install will fail.
 5. Unlike previous versions of SQL, the main installer no longer has the SQL Studio components. So you can’t perform a single unattended install and come away with a working SQL Studio configuration. So, go back to the mounted SQL 2016 ISO and click on Setup.
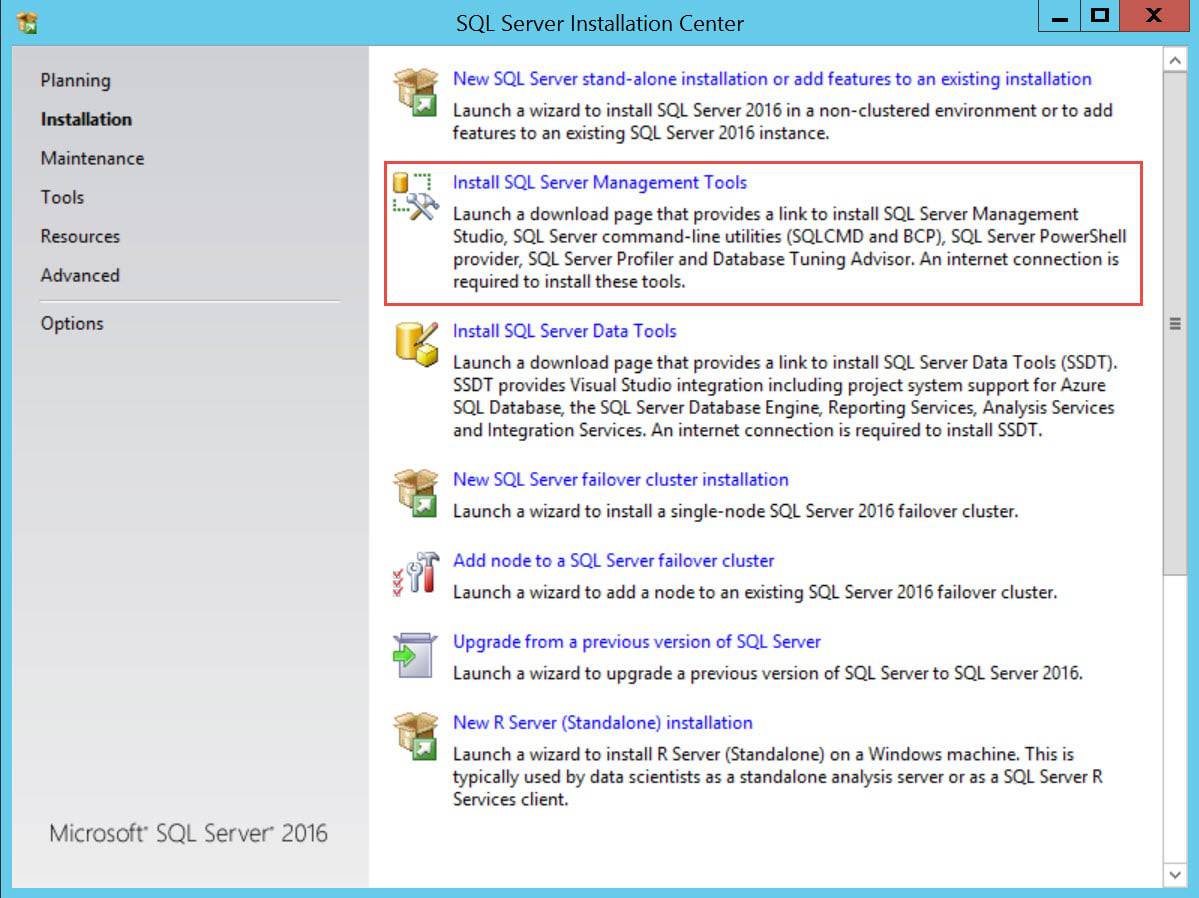
6. In the left pane click Installation. In the right pane, click on Install SQL Server Management Tools. This will not launch the tools installer, but will rather redirect you to a Microsoft webpage here to download the latest version of the SQL management studio.
7. After the download has completed, I find it best to launch it the old fashion way and use the GUI. Click through the wizard and wait for the install to complete. If you do want to launch it via the command line, you can use the following switches:
SSMS-Setup-ENU.exe /install /passive /norestart /log log.txt
However, there is no visual indication of what is going on and the command appears to instantly complete. So the only way you know what’s going on is by looking at the log and waiting for the install to complete. Frankly, I’d rather watch a GUI than monitoring a log file.
And there you go! Due to Microsoft changes in the installer, installing SQL 2016 is slightly harder due to the separate SQL Management Tools installer. But, even so, that’s only an extra 5 minutes of work.


looks like the files are removed from dropbox
Can you please send me copies of the INI and CMD file? Thank you
I fixed the dropbox links. They should now work.
cmd link points to ini file
Sorry about that….fixed it.