When building a smart home based on Matter it is critical that you get networking gear with working IPv6 multicast support. This post covers how to configure both IGMP (IPv4) and MLD (IPv6) snooping for Netgear M4300 Pro AV fully managed switches. If you have TP-Link Jetstream switches, check out my sister post: Configuring TP-Link IGMP & MLD Multicast Snooping.
Finding a switch with working IPv6 multicast support is easier said than done. For example, both QNAP and some Ubiquity Unifi gear have a track record of broken IPv6 multicast support that can wreck havoc on your Matter smart home. The primary symptom of buggy network gear is mDNS timeout entries in your Matter server logs. In Apple Home this can manifest itself as a Matter device randomly becoming unresponsive. For a VERY deep dive on Thread/Matter, check out my three part series: Smart Home Matter and Thread Deep Dive and see why multicast DNS is so critical for a stable Matter smart home.
I personally had a buggy QNAP switch, and one of the Home Assistant Matter developers had buggy Unifi gear. I now use a combination of Netgear M4300-16x and TP-Link Jetstream switches with great success. The Home Assistant developer went all in on TP-Link and saw massive, massive improvements in Matter device stability. In fact, for both of us Matter has been rock solid. Not a single mDNS timeout for me, which was a massive problem with QNAP. Matter is now working as intended for all 20 of my Thread/Matter devices. Both Apple Home and Home Assistant are now rock solid.
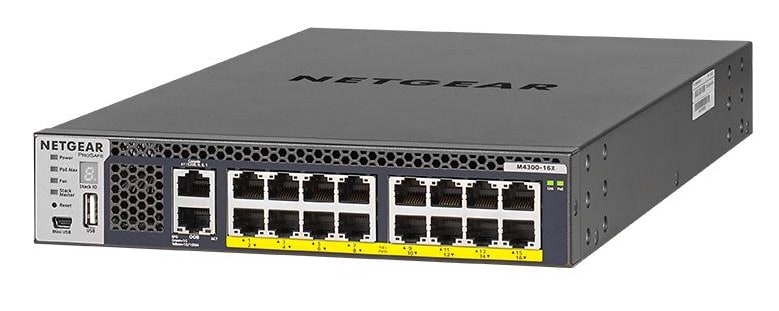
I recently got a killer deal on two Netgear M4300-16x switches. These switches are part of the Netgear Pro AV series. The are designed for high-end AV over IP applications. Netgear has a whole family of Pro AV switches with various port configurations.
The M4300-16x has 16 multi-gig (10/100/1000/2500/5000/10Gbps) ports all with PoE+ support. Mine are in a stacked configuration so they are logically one switch. These are true enterprise class switches with full layer 3 dynamic routing. Very surprisingly for datacenter grade switches, the fans on these switches are very quiet with a lite PoE load. I would argue the disk seek noise on my Synology is louder than these switches, so they work very well in a bedroom closet. You can check out the full data sheet for all the specs. Power consumption is also very low
Note: Not all Netgear switches have robust IGMP and MLD snooping support. If you are looking at switches outside of the M4300 line, carefully read the spec sheets to ensure they call out MLD snooping and querier support. TP-Link seems better about offering MLD snooping on more of their business class Jetstream switches, and TP-Link is much less expensive.
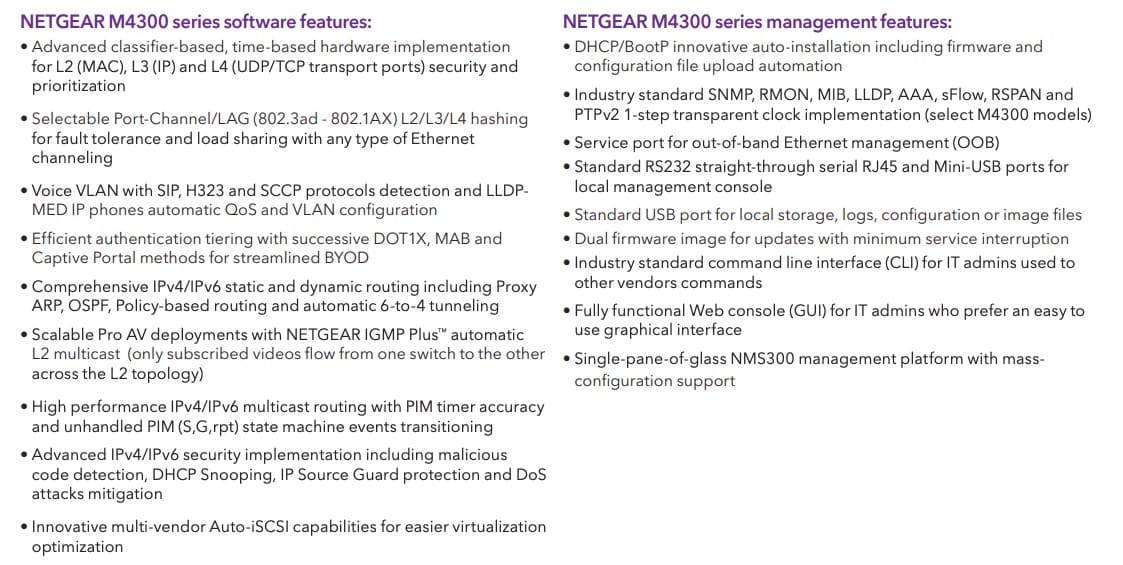
Although I only have the M4300-16x model, I would guess that their entire line of M4250, M4300, M4350 and M4500 switches have a very similar IGMP/MLD configuration process. One cool feature of these IP AV switches are baked-in preconfigured profiles using their Engage software. While their video profiles won’t apply to 99% of home users, they do have a Sonos profile. I went ahead used this profile for my primary network. However, this isn’t needed for Matter. But it does optimize, at the chip level, how the switch prioritizes Sonos multicast traffic.
Unlike TP-Link Omada SDN, you can simultaneously use their Engage software (Mac/Windows) along with the advanced switch web interface to do configuration.
Configure IGMP Snooping (IPv4)
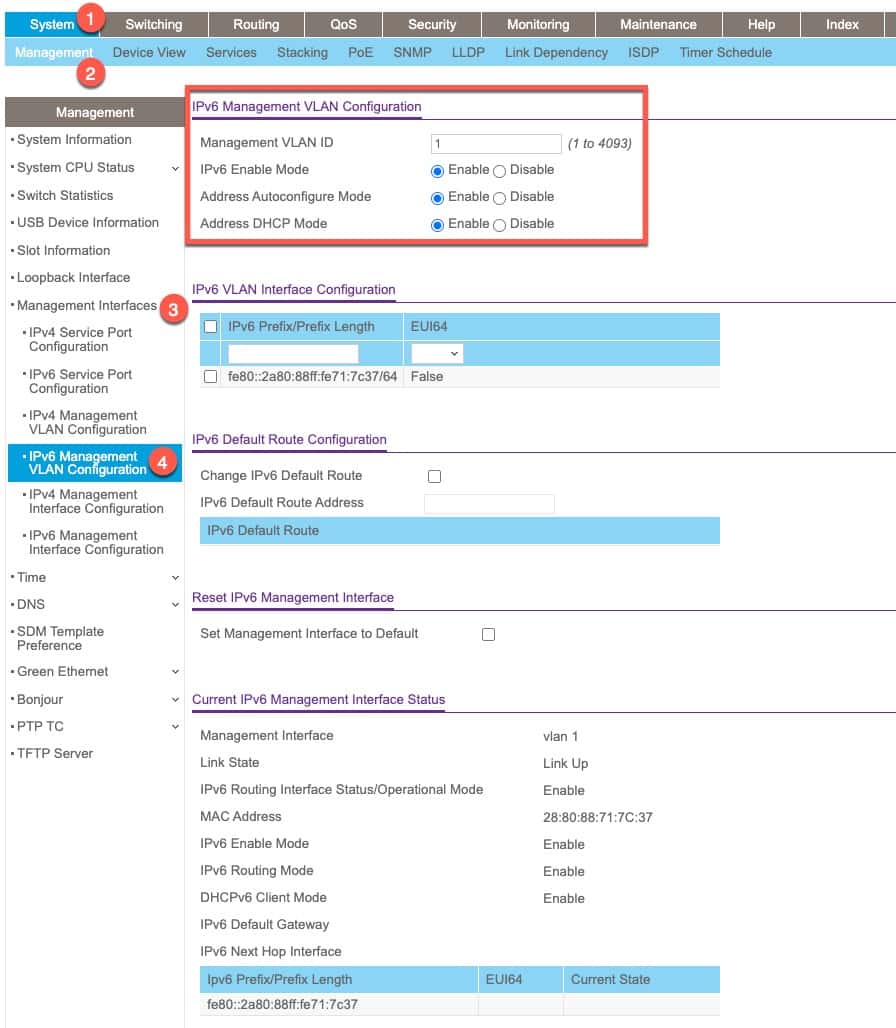
Login to the admin interface. Go to System -> Management -> Management Interfaces -> IPv4 Management VLAN Configuration.
Make sure that all of your IPv4 information is correct and take note of your IPv4 address. We will need that later.
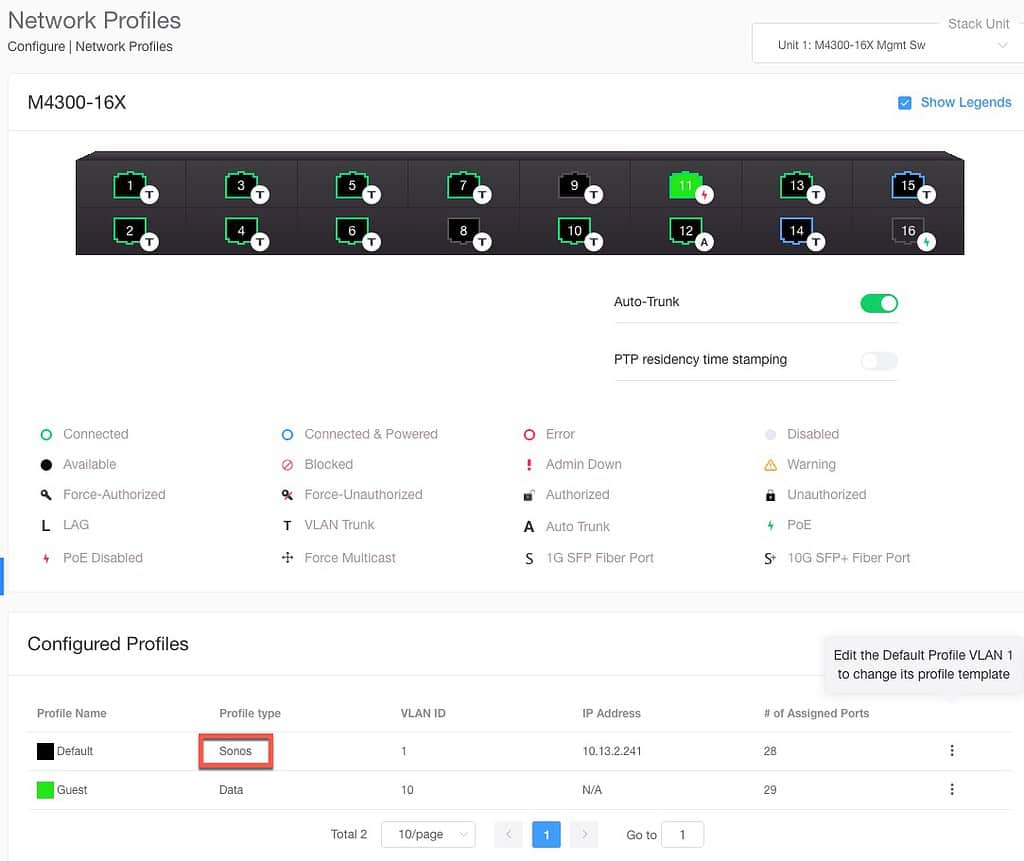
3. Go to Switching -> Multicast -> IGMP Snooping -> Configuration. 4. Configure the settings as shown below. Click Apply.
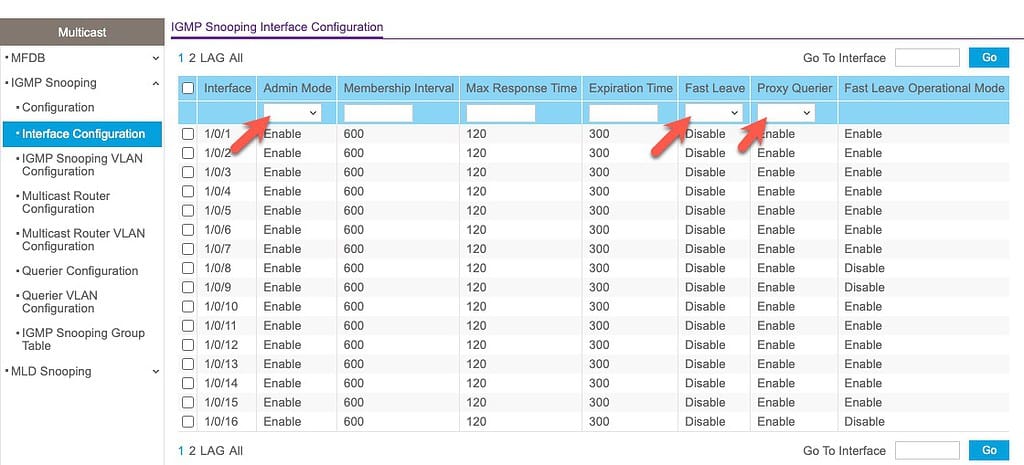
5. In the left pane click on Interface Configuration. Select all of the interfaces and change the following:
Admin Mode: Enable
Fast Leave: Disable
Proxy Querier: Enable
6. Click Apply.
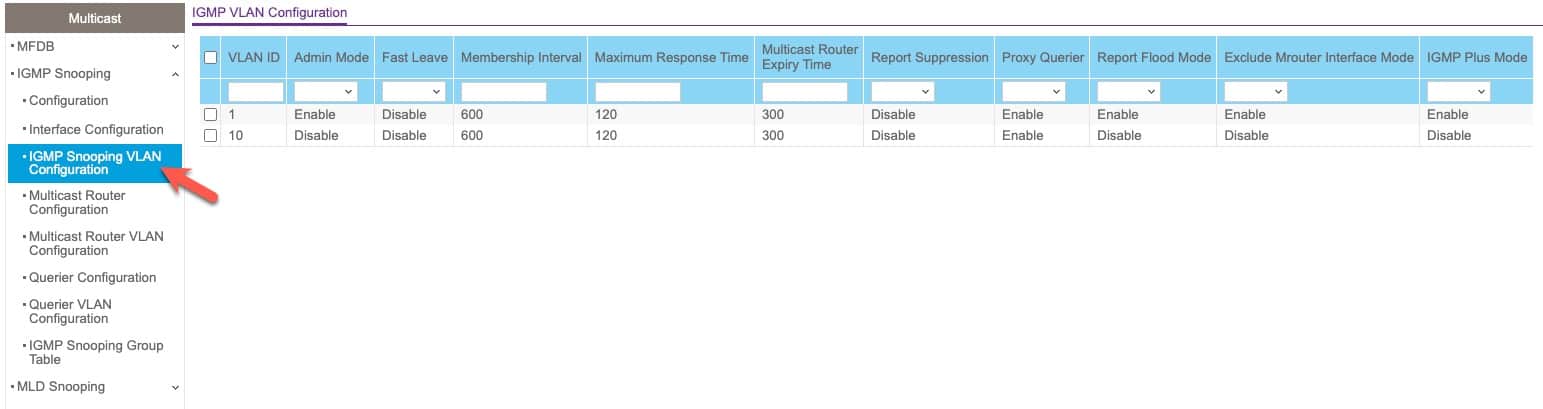
7. In the left pane click on IGMP Snooping VLAN Configuration. 8. For your IoT VLAN configure the following:
Admin Mode: Enable
Fast Leave: Disable
Report Suppression: Disable
Proxy Querier: Enable
Report Flood Mode: Enable
Excluding Mrouter Interface Mode: Enable
IGMP Plus Mode: Enable
9. Click Apply.
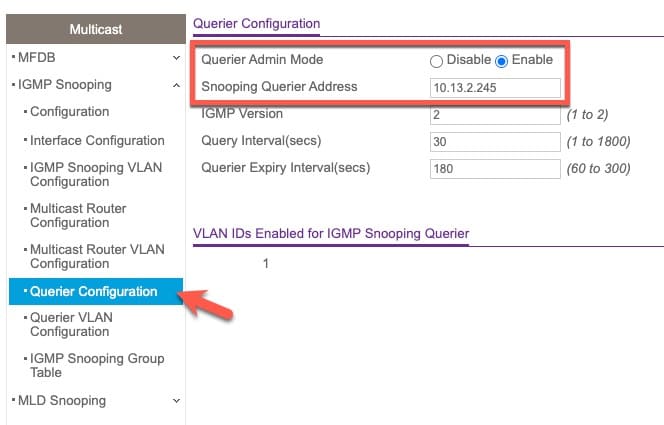
10. In the left pane click on Querier Configuration. 11. Enable Querier Admin mode and enter the switch’s IPv4 address for Snooping Querier Address. 12. Click Apply.
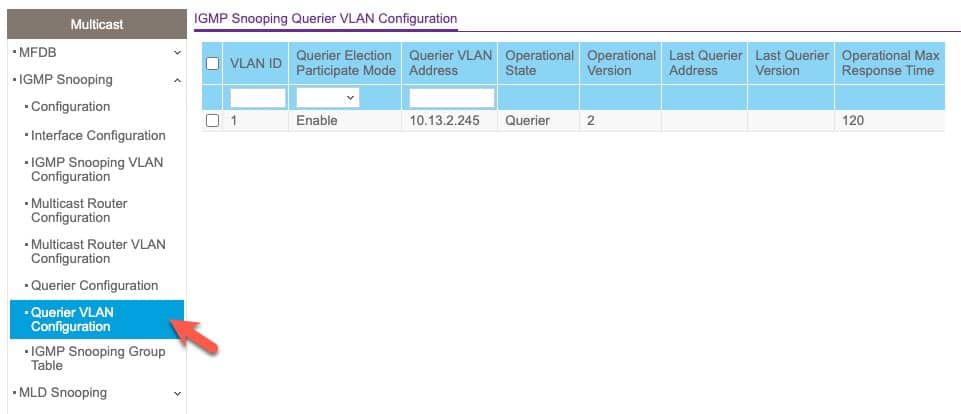
12. In the left pane click on Querier VLAN Configuration. 13. Select your IoT VLAN, enable Querier Election Participate Mode. For Querier VLAN Address enter the switch’s IPv4 address. 14. Click Apply. 15. Verify the Operational State changes to Querier.
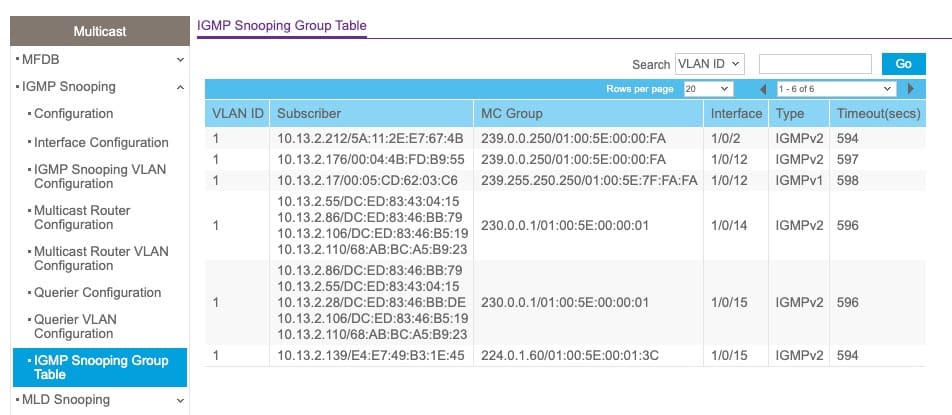
16. In the left pane click on IGMP Snooping Group Table. If everything is working you should see some entries populate.
Configure MLD Snooping (IPv6)
Login to the admin interface. Go to System -> Management -> Management Interfaces -> IPv6 Management VLAN Configuration.
Copy the fe80: IPv6 VLAN Interface Configuration address to the clipboard, without the /64.
Click Apply.
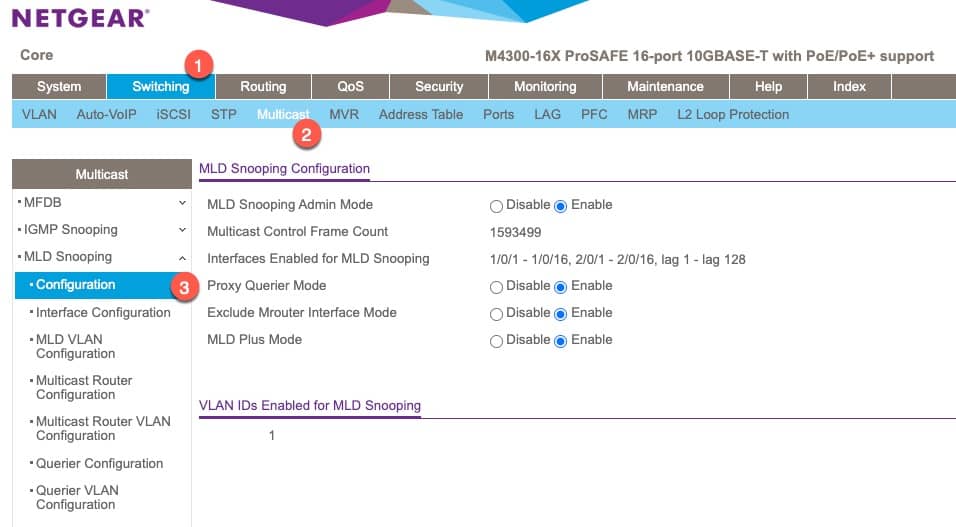
4. Go to Switching -> Multicast -> MLD Snooping -> Configuration. 5. Configure the settings as shown below. Click Apply.
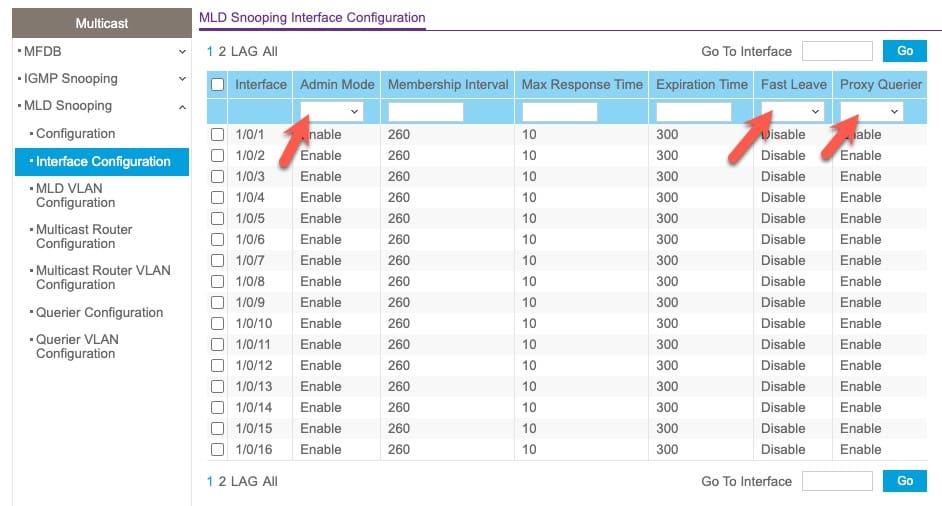
6. In the left pane click on Interface Configuration. Select all of the interfaces and change the following:
Admin Mode: Enable Fast Leave: Disable Proxy Querier: Enable
7. Click Apply.
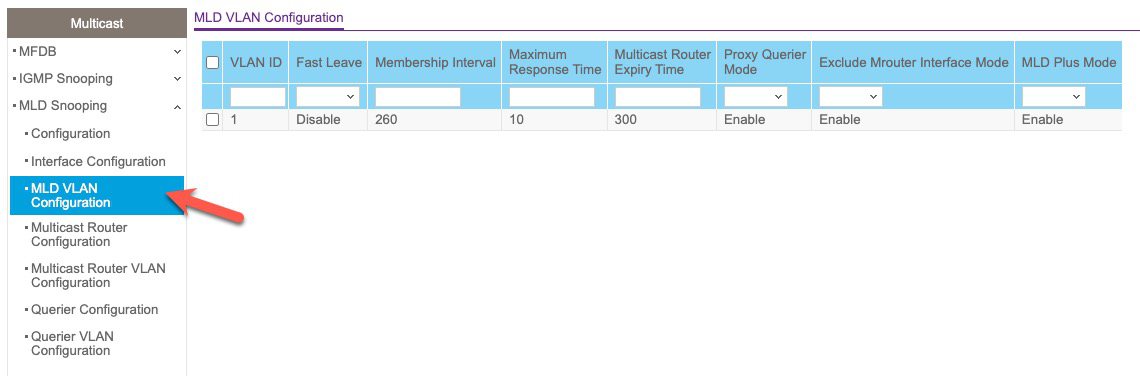
8. In the left pane click on MLD VLAN Configuration. 9. For your IoT VLAN configure the following:
Fast Leave: Disable
Proxy Querier Mode: Enable
MLD Plus Mode: Enable
10. Click Apply.
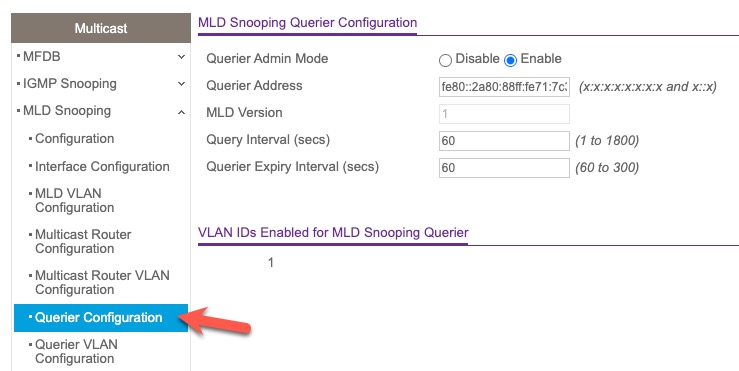
11. In the left pane click on Querier Configuration. 12. Enable Querier Admin mode and enter the fe80: address that you previously copied to the clipboard. 13. Click Apply.
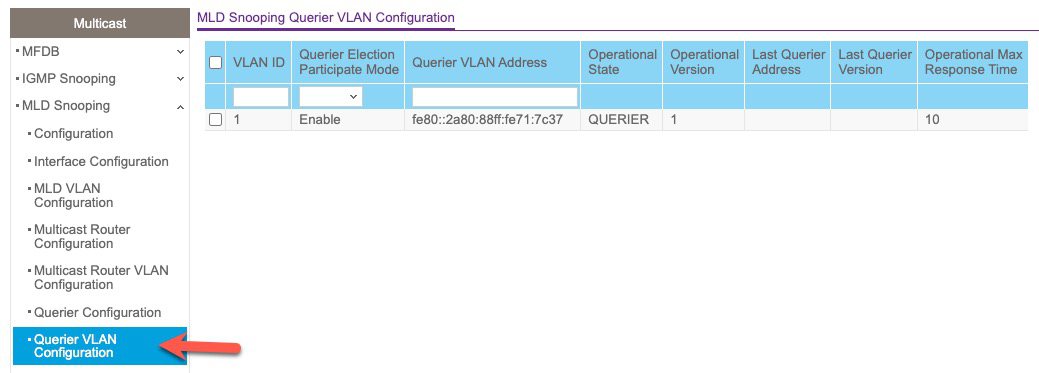
14. In the left pane click on Querier VLAN Configuration. 15. Select your IoT VLAN, enable Querier Election Participate Mode. For Querier VLAN Address enter the same fe80: IPv6 address that is on your clipboard. 16. Click Apply. 17. Verify the Operational State changes to Querier.
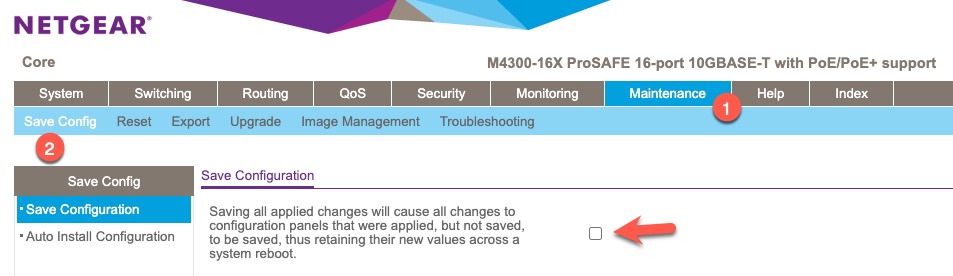
18. Unfortunately with firmware 12.3.17.13 there is no MLD multicast group table. Hopefully Netgear will add this in the future. 19. Go to Maintenance -> Save Config -> Save Configuration. 20. Tick the box then click Apply.
Summary
The Netgear M4300 enterprise grade AV over IP switches are very good switches. While not overly common in residential settings, you can sometimes find amazing deals on them which make it reasonable to use at home.
These switches are built for extremely high throughput multicast traffic with stringent QoS enforcement at the chip level. And as such, the M4300 switches support robust IGMP and MLD snooping. My only minor complaint is the lack of a real time MLD snooping group table.
Since replacing my QNAP switch with these M4300 switches an an edge TP-Link Jetstream switch, all of my Matter mDNS timeout issues went away. Every single mDNS issue….poof…fixed with the TP-Link switch! My Matter devices are now rock solid. I could not be happier with the combination of my two M4300-16x switches for my core and an edge TP-Link TL-SG3428X switch.