Home Assistant: Ultimate Backup Guide

One the most important aspects of maintaining Home Assistant is regular backups. Implementing the 3-2-1 backup rule with Home Assistant is now easier than ever, with the 2023.6 release. The 3-2-1 rule states you should have (at least) 3 copies of your data (production + 2 backups), on two different media types, and a copy off-site. This post will walk you through how to just this with Home Assistant OS (HAOS), using your local NAS and a Google Drive account. 

Introduction

Prior to Home Assistant 2023.6, the built-in backup feature of Home Assistant just stored the backups within HAOS. So if your HAOS server died, it’s likely your backups were gone as well. Not cool! There were of course third party add-ons which enhanced the backup feature with cloud or Samba storage options. However, it could get a bit tedious to configure if you wanted to backup to your local NAS and a cloud option, like Google Drive. 

However, new in Home Assistant 2023.6 is the ability to backup directly to a SMB or NFS share, and set that as your default backup location. Now, with an add-on like Google Drive backup, it’s easy to follow the 3-2-1 rule. 

In this post I’ll cover setting up a SMB share on Synology, mounting that to Home Assistant 2023.6, and then setting up Google Drive backup to also send a copy to the cloud. This will meet the 3-2-1 requirements with minimal fuss. You could also double up on cloud backups by using your NAS to backup the Home Assistant share to another cloud, like Wasabi. That’s out of scope for this article, but can be done pretty easily. 

Of course you can use any NAS that supports SMB or NFS shares, so if you are using QNAP, TrueNAS, etc. then 95% of the guide still applies to you. The only difference will be in how you setup the file share on your NAS. But everything in Home Assistant will be the same.

For the purposes of this post, we will be using a SMB file share. It provides more security, IMHO, as accessing the SMB share will require a username and password. NFS shares typically use IP based security, with no user authentication. 

The Ultimate Restore Guide

A couple of months ago I wrote a detailed tutorial on restoring Home Assistant. If you ever need to restore Home Assistant, this guide should cover most of the bases. I’ve completely refreshed it to include restore from NAS, so it’s a one stop restore shop.

Home Assistant: Ultimate Restore Guide

SMB Share Configuration

Note: If you don’t have a Synology NAS, just do the following on your own NAS. If you have a Synology NAS, skip down to the next section.

  • Setup a dedicated SMB share for Home Assistant backups
  • Create a dedicated username/password for Home Assistant to connect to the SMB share
  • Configure the permissions on the HA SMB share to only allow Home Assistant to access it, and make sure the HA account has full read/write permissions on the share.
  • If you want to configure any type of NAS-based snapshots for the share, do so

Creating a new Synology DSM user

These instructions are written using Synology DSM 7.2. Steps may slightly differ on other versions of DSM.

  1. Login to your Synology and open the Control Pane.
  2. Click on User & Group. Click on Create and select Create user.
  3. Enter a username, select a STRONG password, and check the box to disallow the user to change the account password.

4. On the Join Groups page don’t change anything and click Next.

5. On the Assign shared folders permissions screen, don’t make any changes (we will do this later). Click Next.
6. On the Assign user quota page don’t make any changes. Click Next.
7. On the Assign application permissions screen don’t make any changes. Click Next.
8. On the Set user speed limit page don’t make any changes. Click Next.
9. Review the settings on the Confirm settings page. Click Done.

Creating a new Synology SMB Share

  1. On your Synology open File Station.
  2. Click on Create, then select Create shared folder.

3. Enter the name of the SMB share. Don’t use spaces or weird characters. 

4. On the Enable additional security measure screen select Skip and click Next.
5. On the Configure advanced settings check the top box to enable checksums. Click Next.

6. On the Confirm Settings page click Next.
7. On the Configure user permissions page, give your new Home Assistant backup account read/write access. Click Apply.

Synology Snapshots (Optional)

As an added layer of protection for your Synology HA backups, I strongly suggest setting up local snapshots. This can help mitigate “oh crap” situations, such as ransomware or catastrophic user errors that wipe out all backups on the share. 

  1. Login to DSM and open Snapshot Replication.
  2. In the left pane click on Snapshots.
  3. Locate your HA backup share in the right pane. Click on the share, then click on Settings.

4. Setup a schedule and retention as you see fit. I setup a nightly snapshot well after the Google Drive backup time, and only keep the last 14 snapshots. 

Home Assistant NAS Configuration

Home Assistant 2023.6 is the first version to offer native NAS backup capability. So make sure you are at least using 2023.6, or the setup pages will be mysteriously missing. 

  1. Login to Home Assistant. Go to Settings -> System -> Storage. 
  2. Click on ADD NETWORK STORAGE.

3. On the Add network storage page fill in all the information as shown. Note for the remote share name you just use the actual share name, no backslashes or other characters are needed. Click CONNECT.

4. If all goes well you will now see a Backups entry under Network Storage.

5. Go to Settings -> Backups. In the upper right hand corner click on the three dots. Select Change default backup location.
6. Pick your NAS share from the list and click Save.

7. Staying on the Backups page, in the lower right corner click CREATE BACKUP.
8. Enter a backup name, ensure Full Backup is selected, and click CREATE.
9. Wait for the backup to complete. Then go over to your NAS and look at the Home Assistant share you created. You should see a newly created tar file with a “random” filename.

Home Assistant Cloud Backups - Google Drive

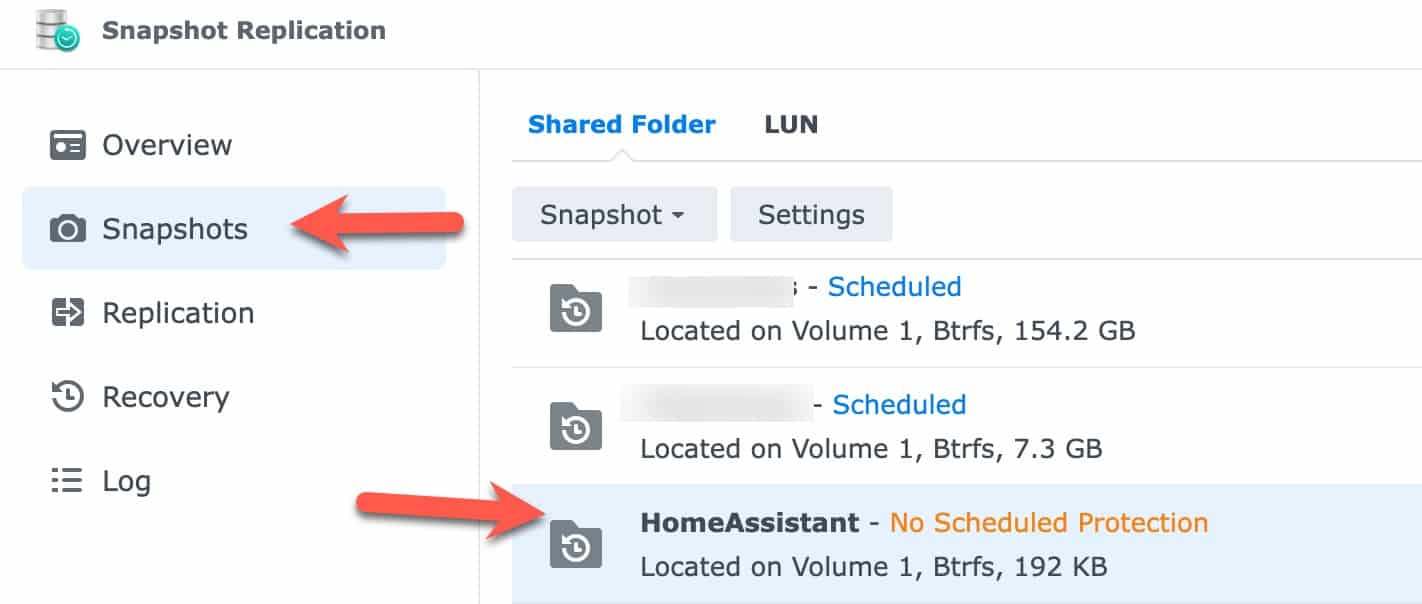
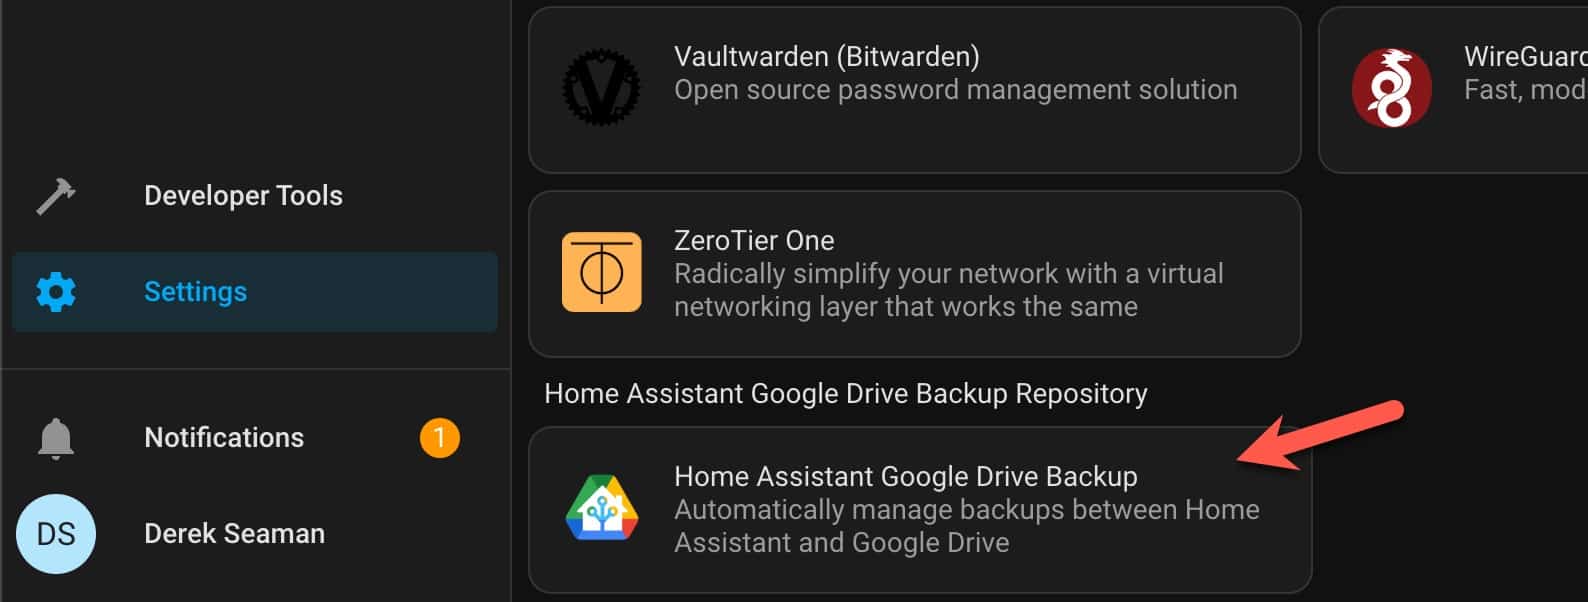
The Home Assistant Google Drive Backup add-on is one of the best, if not THE best, HA backup add-on you can use. It is highly configurable, is regularly updated, and seems pretty bullet proof. So we will using this add-on to do our cloud replicate (the off-site backup). It can also help maintain the number of backups stored on your NAS. 

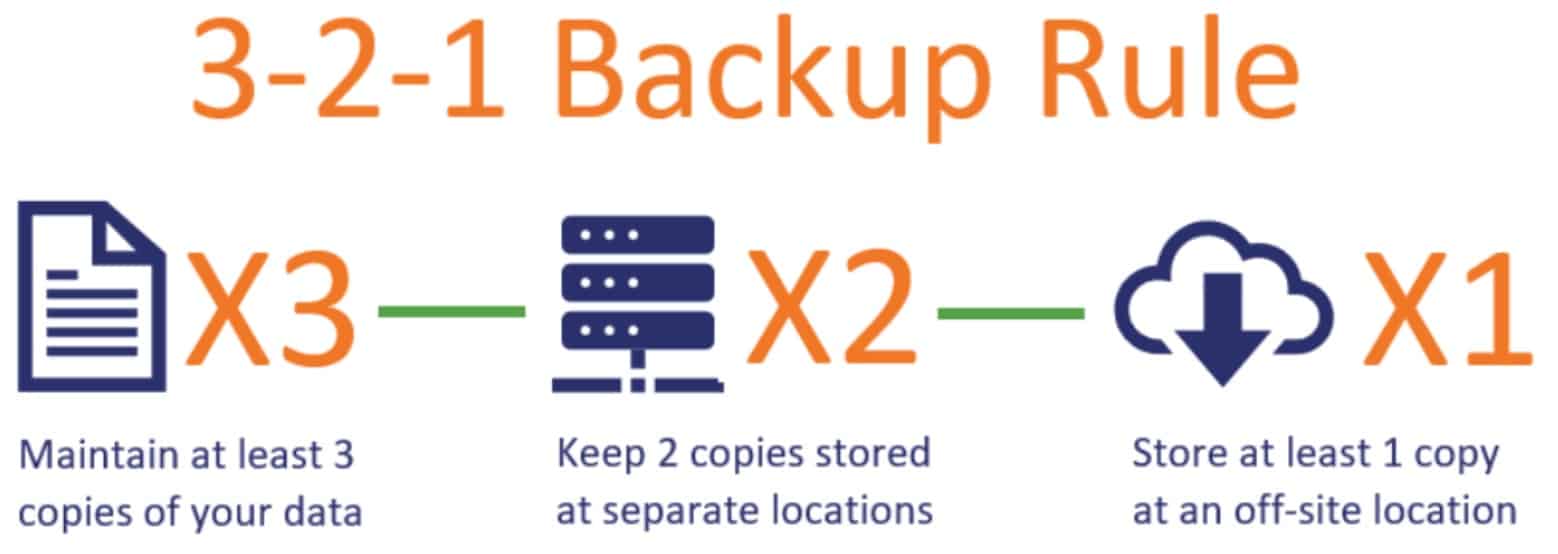
Now that HA has NAS backups, and the Google Drive Backup add-on can help manage those backups, we need to quickly discuss a backup strategy. Prior to NAS backups, I significantly limited the number of local backups (inside HAOS) and relied on the cloud for longer term backups. 

However, it’s likely your NAS will have a ton of space, and most HA backups are relatively small. So with the addition of NAS storage I now use:

  • The last 60 backups storage on my NAS (two months of nightly backups)
  • Keep the last 7 backups in Google Drive (one week)

I will only use backups stored in Google Drive as a last resort backup in case my HAOS server and NAS suffer a catastrophic failure (fire, flood, earthquake, etc.). Basic Google Drive accounts are limited to 15GB of storage. And you might already be using some of that storage space for other content, leaving less than 15GB for HA backups. If your main Gmail account is really short on storage, you might want to consider a fresh Gmail account that is dedicated to HA backups. 

It’s up to you how many backups you want to store in the cloud, but at a bare minimum I would recommend 2. I’m a bit paranoid, so I picked 7.  My average backup is about 600MB, so I still have plenty of Google Drive storage space. 

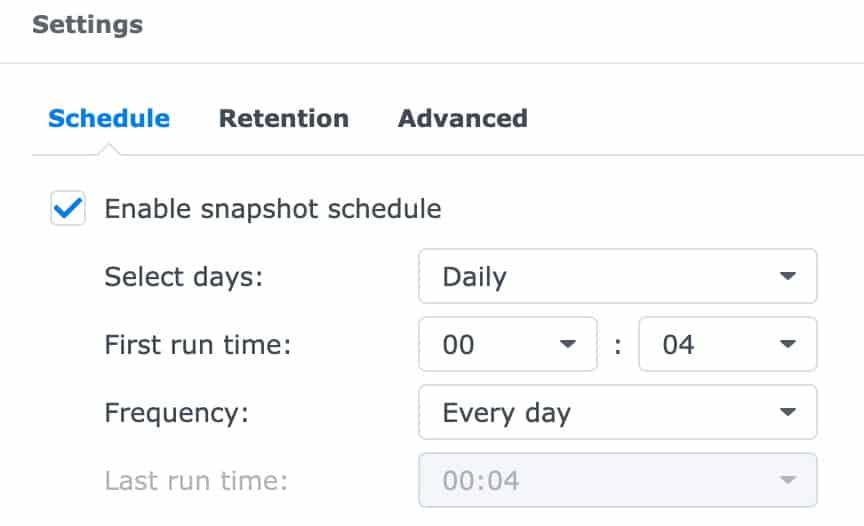
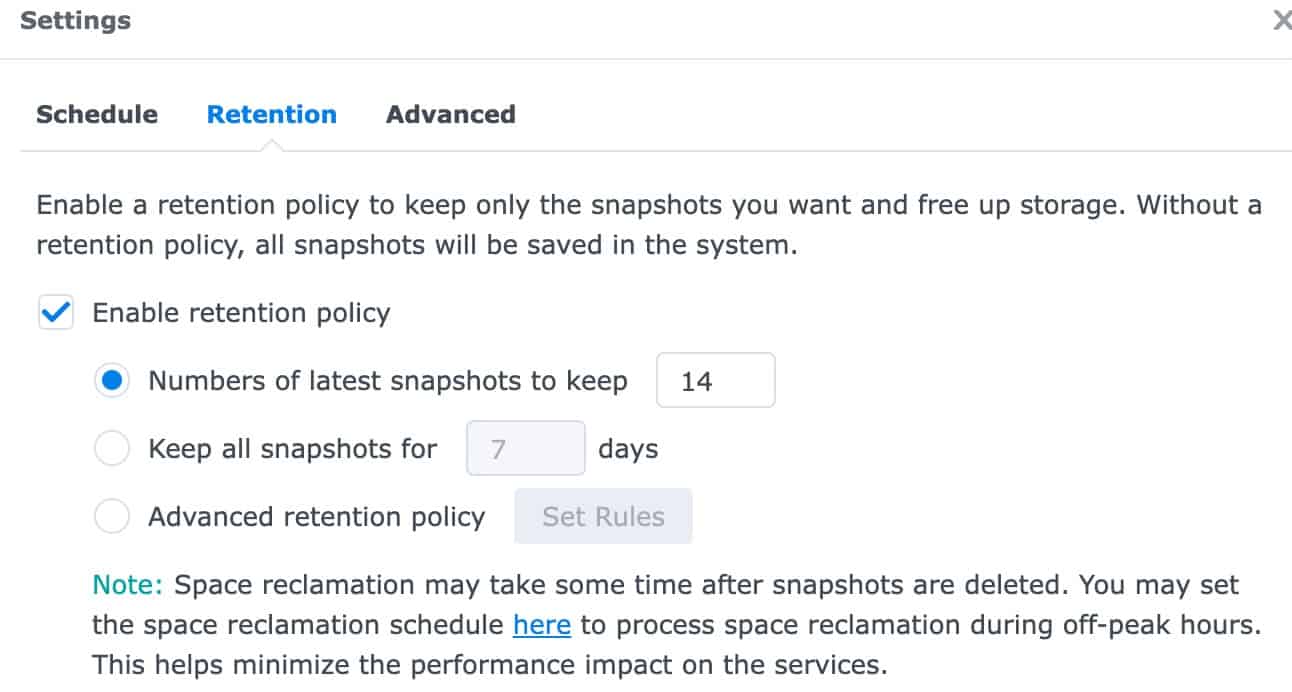
Lastly, the backup add-on does have a really nice “Keep Generational Backups” option. This let’s you customize the retention period for daily, weekly, monthly, and yearly backups. However, given my generous NAS storage, and the limited utility of old backups, I opted to not use generational backups. I think the last 60 backups on my NAS give me plenty of recovery options. And the last 7 are in the cloud, as well, so I have a multitude of recovery points.

Let’s install Google Drive Backup:

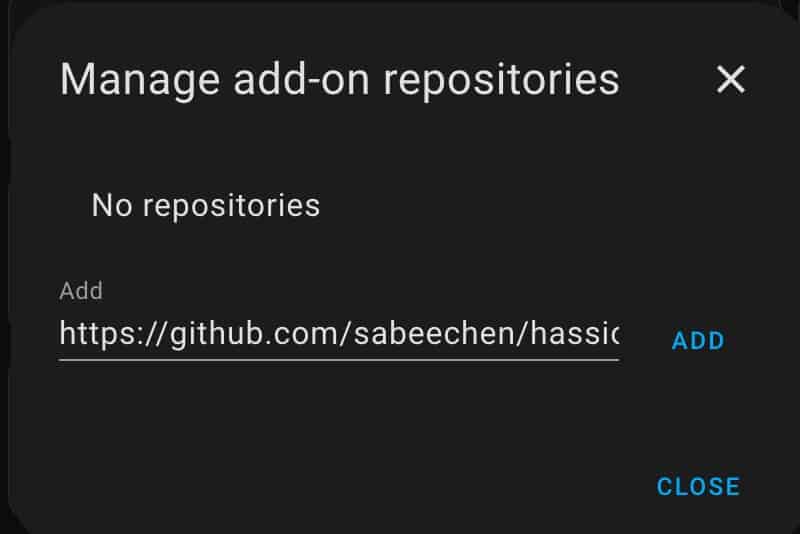
  1. In Home Assistant Navigate to Settings -> Add-ons -> ADD-ON STORE (bottom right corner).
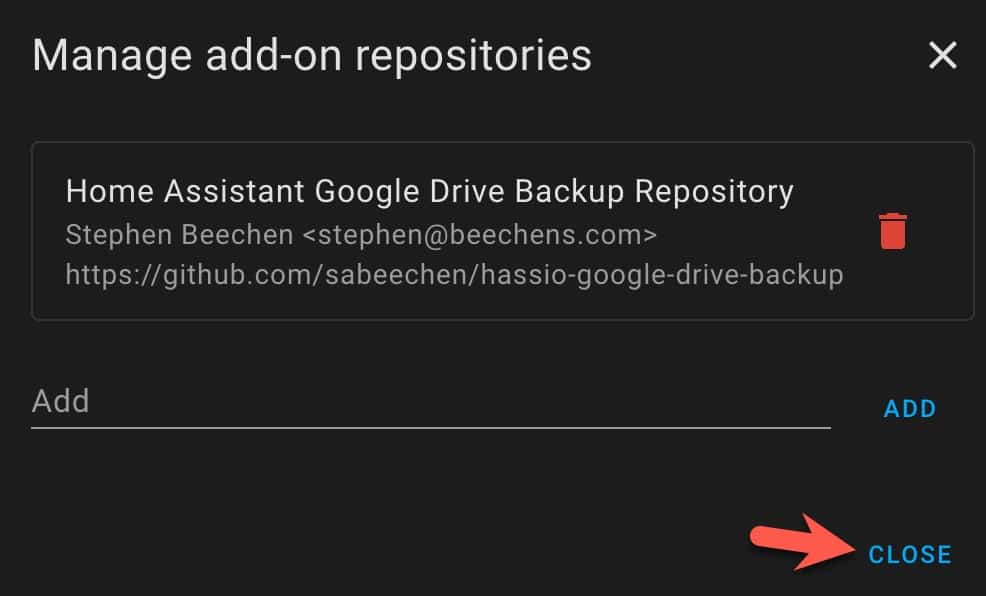
  2. Click the three dots in the upper right corner, then click Repositories. 
  3.  Copy the URL below and insert it in the repository prompt. Click ADD. On the next popup prompt click CLOSE.
				
					https://github.com/sabeechen/hassio-google-drive-backup


4. Refresh your browser’s webpage. If all goes well, if you scroll down to the bottom of the add-on Store you should see Home Assistant Google Drive Backup. Click on it. 

5. Click INSTALL. Wait a few minutes for it to download and install.
6. After it installs and UI refreshes, click on all four configuration sliders, then click START. Wait a few seconds.
7. Click OPEN WEB UI. Click on Settings.

8. The configuration screen is where you will setup your backup policy. Configure the settings as you see fit. I suggest you modify at a minimum:

  • Backups in Home Assistant (on your NAS)
  • Backups in Google Drive
  • Days between backups (1 = daily)
  • Backup time of day (do at off-peak)
  • Encryption password
Note: Save this password in your favorite password manager. It should be long, complex, and very hard to guess. 

9. Click SAVE.
10. Click on AUTHENTICATE WITH GOOGLE.
11. Walk through the wizard to authorize habackup.io to access your Google account. If you get “Something web wrong” then try this:

  • Open a fresh private browser window
  • Login to HA, navigate to the Google drive backup add-on and open the Web UI again
  • Click on AUTHENTICATE WITH GOOGLE again.
  • Go through the wizard and COPY the authorization string.
  • Back on the Google Drive Get Started page paste the authorization code into the box. Click SAVE.

12. If everything looks successful, click the blue Plus in the lower right corner. Enter a backup name and click CREATE BACKUP. 
13. After the backup is done,  in the upper right corner click on Actions, then Open Drive Backups. Review your Google drive to ensure the backup appears.
14. On your NAS navigate to your HA backup share and ensure a new tar backup was created. 
15. After your first scheduled backup is supposed to run, review the contents of both your NAS and Google drive to ensure the backups are where you expect them to be. 

The screenshot below is from my production HAOS instance. You can see that the Google Drive backup UI is very informative with a lot of details about each backup. 

Backup Failure Notifications

The Google drive backup add-on has two ways to notify you of a backup job than runs more than 12 hours behind schedule. 

  • A notification in the HA UI
  • A binary sensor (binary_sensor.backups_stale) that you can use in automations

With this entity you can setup an automation that alerts you to any backup failures. Just create a new automation, use the Backups Stale entity, and use Problem state. You can then define any action that you want, such as sending an email, a text message, or any other notification method you have defined in Home Assistant.

Test your Backups

A backup does you no good if the backup itself is corrupted, or you forgot your encryption password. Given that you’ve probably spent many (hundreds?) of hours configuring HA, blindly assuming your backups will restore is not the best idea. 

I strongly urge you to do periodic test restores of your HA backups. To do this, I would setup a fresh non-production instance of HAOS. You could use Proxmox, an old PC, or a desktop virtualization solution like Parallels, Fusion, or VMware Workstation. Install the latest HAOS, then perform a restore using your latest backup. Ensure that it it works as expected. 

You can use my tutorial to guide you through a restore:

Home Assistant: Ultimate Restore Guide

Summary

Backing up your Home Assistance server is extremely important. Following the 3-2-1 backup strategty has never been easier with the 2023.6 support of NAS storage. Combined with Google Cloud Drive storage, it’s pretty darn easy to setup a robust Home Assistant backup solution. Be sure to check out my Home Assistant: Ultimate Restore Guide when you need to do a restore.

Print Friendly, PDF & Email

Related Posts

Subscribe
Notify of
3 Comments
Oldest
Newest Most Voted
Inline Feedbacks
View all comments
unmesh
August 19, 2023 5:43 pm

For backups to my NAS, can I specify a folder on the SMB share rather than have the backups at the root of the share?

John W Brisbin
January 4, 2024 10:02 am

Thanks for the info.
I note the following error/outdated reference in the NAS section:

  1. Login to Home Assistant. Go to Settings -> Storage

That is now:

  1. Login to Home Assistant. Go to Settings -> System -> Storage