For the last couple of years I’ve done a yearly My Dream Desk Setup post, where I go into great detail about my home office setup. One way that I’ve kept the desktop so clean is by mounting key peripherals under my desk using custom offset mounting brackets. This post is NOT sponsored in any way, and the company I used didn’t ask me to write a post or promote them in any way. I’m just an exceptionally happy customer.
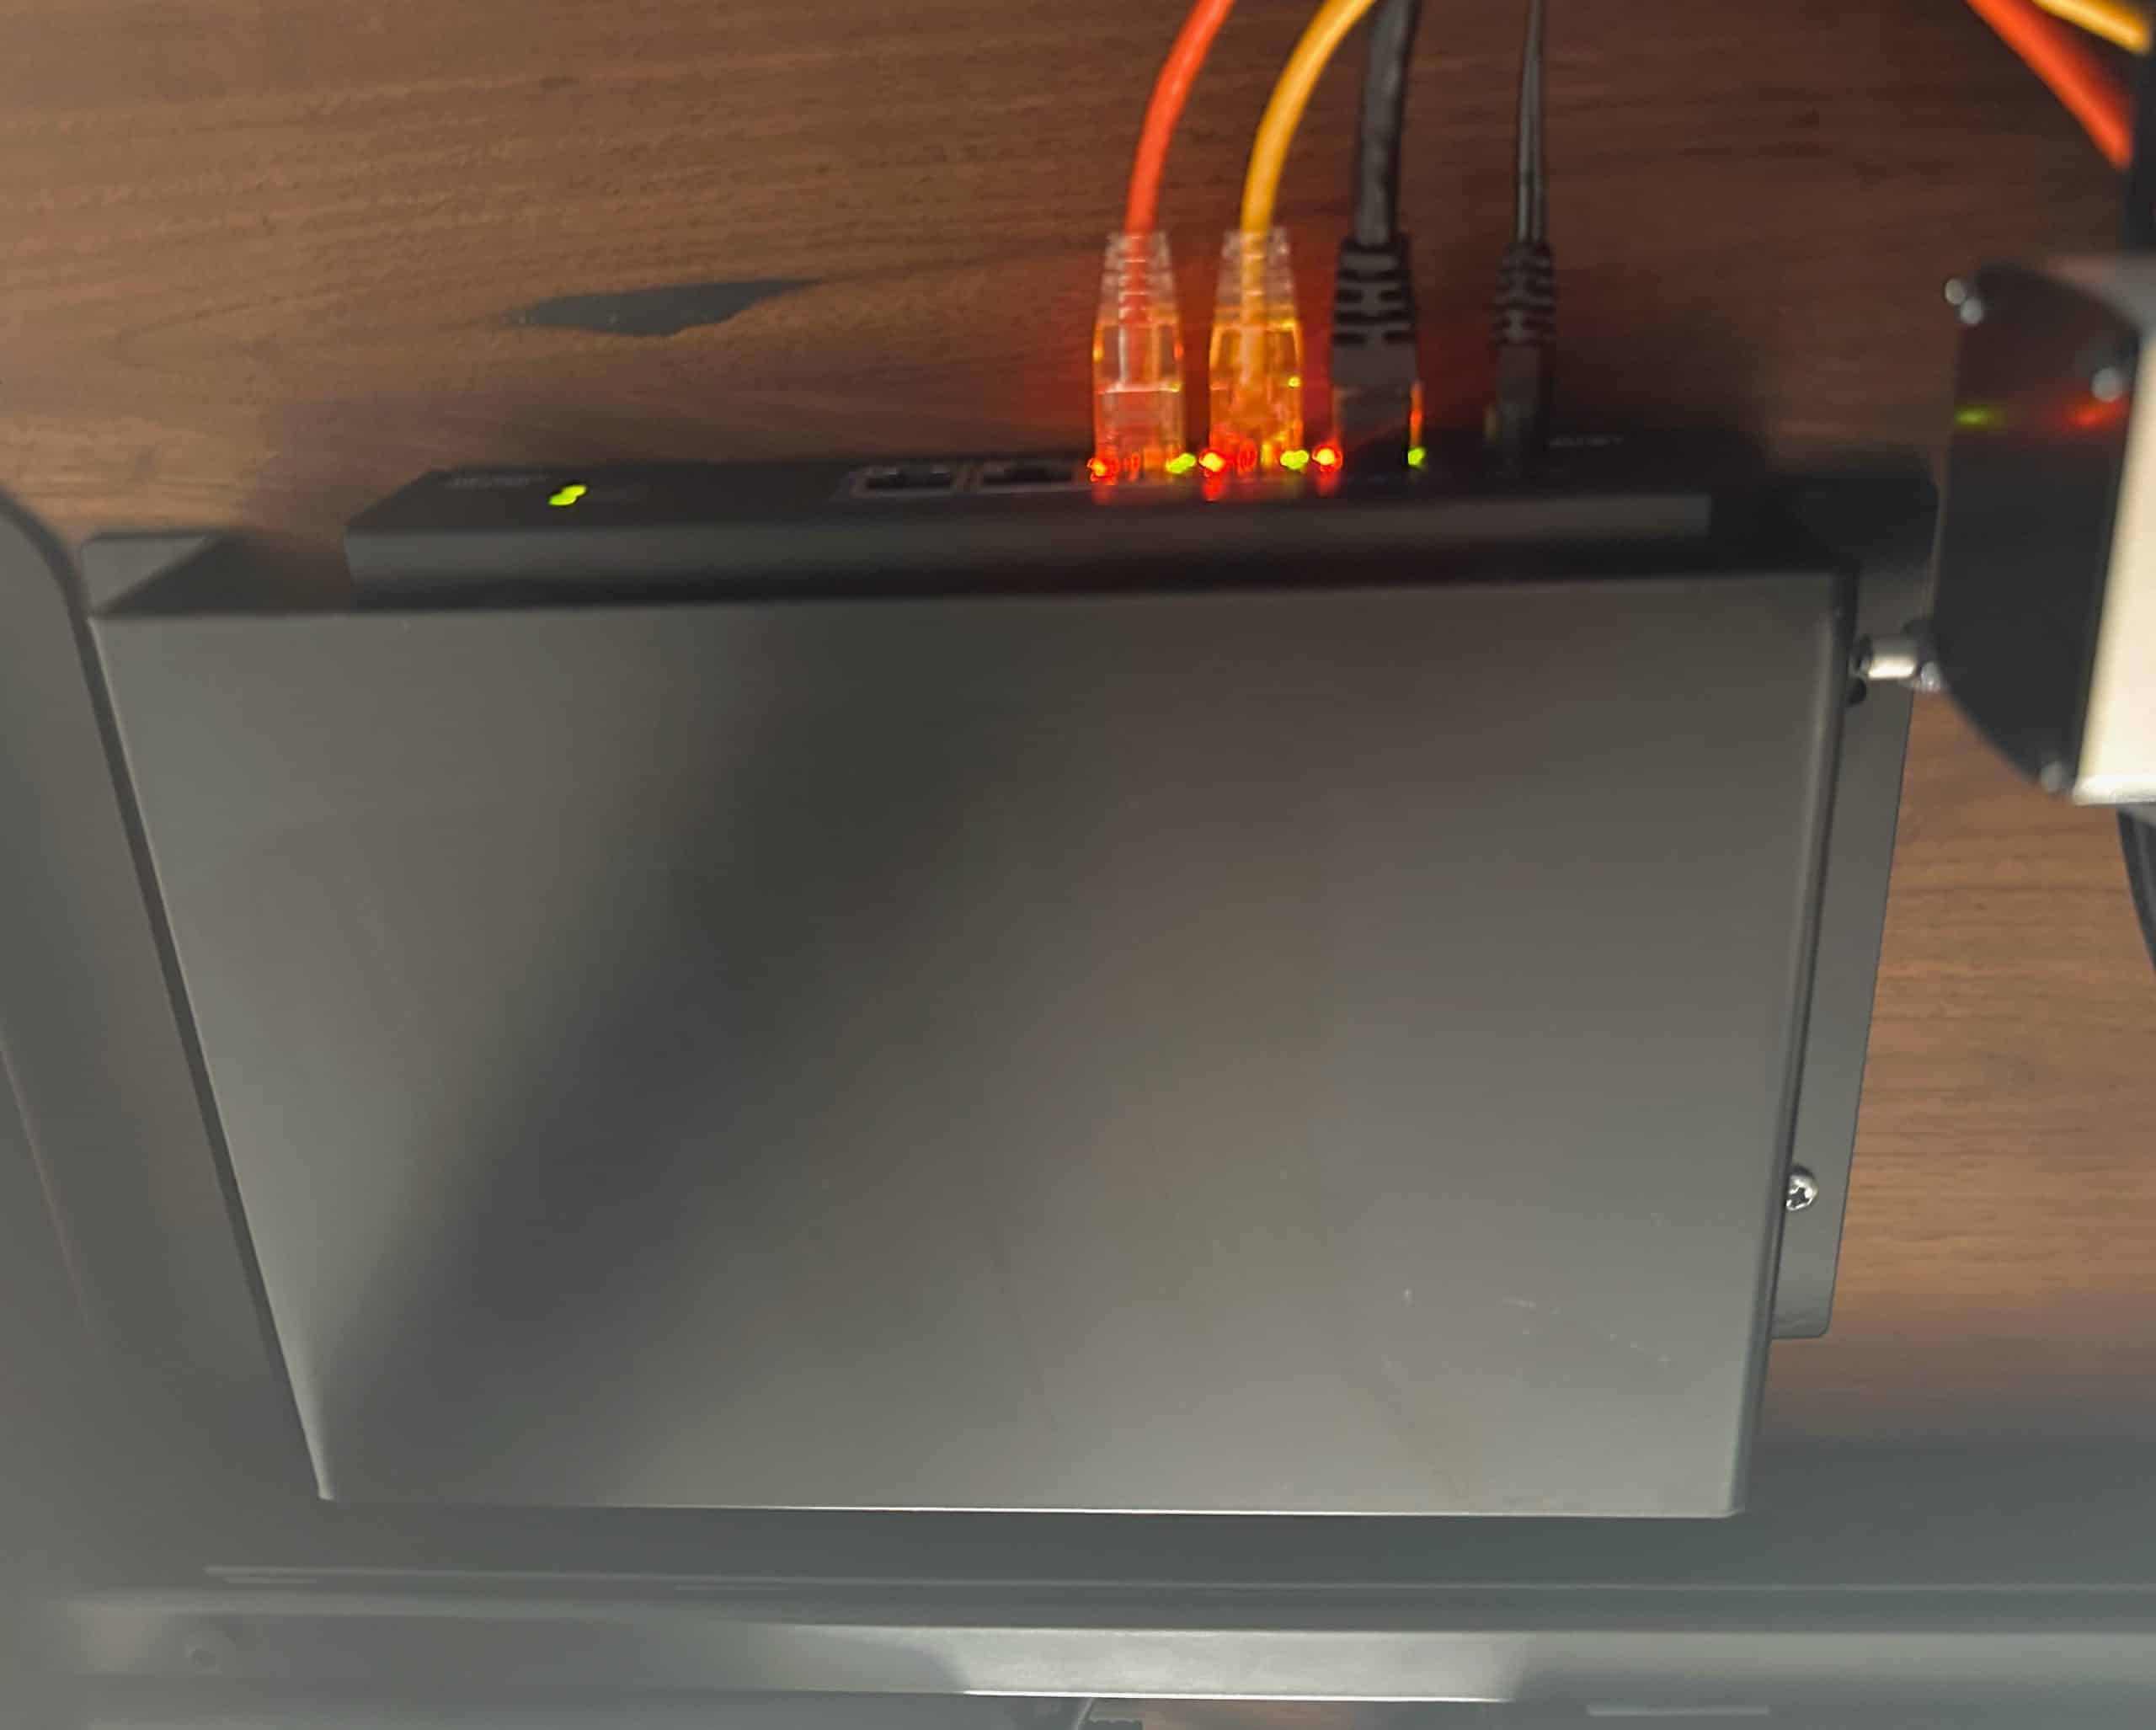
To date I’ve designed two custom offset mounting brackets: One for my Topping headphone DAC/Amp combo, and another for a 10Gb edge ethernet switch. Both share very similar traits: Heavy duty powder coated cold rolled steel, one inch mounting flange on both sides, and two holes on each flange for screws.
TRENDnet 10G Switch and Protocase Custom Mounting Bracket
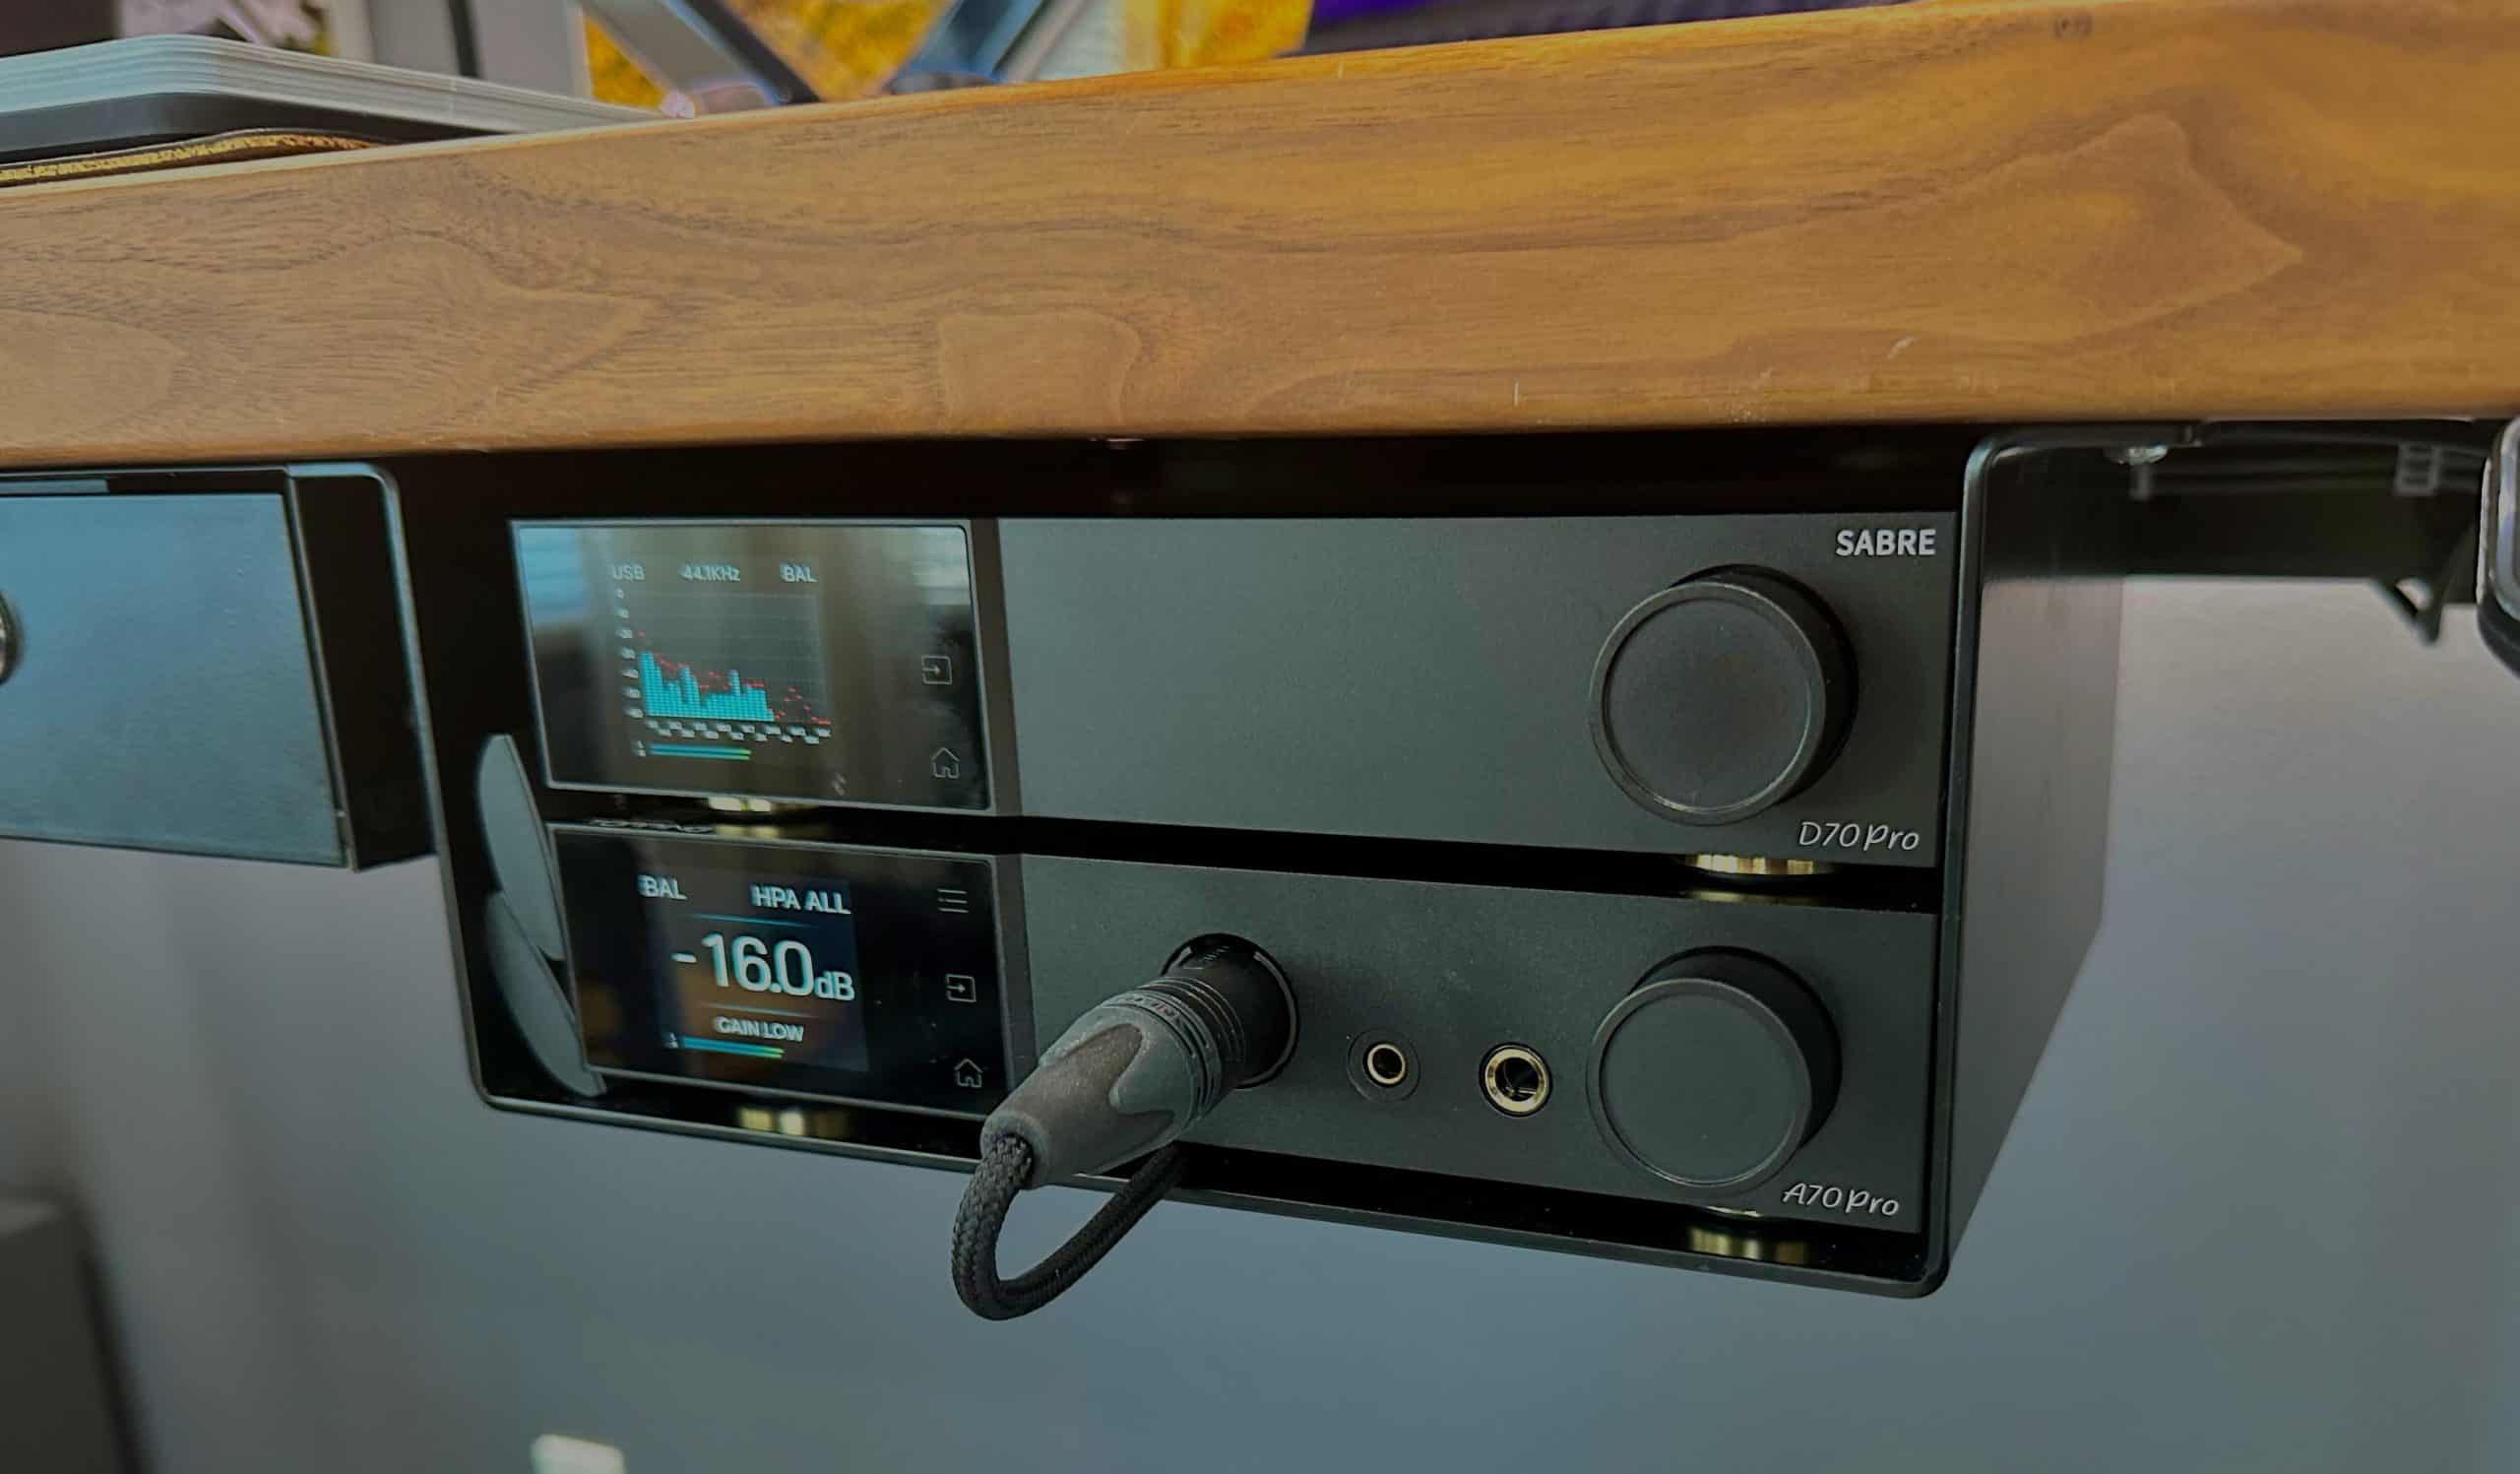
In the photo below you can see the mounting bracket for my Topping D70 Pro Sabre DAC and Topping A70 Pro headphone amp. I also made it wide enough so that the two remotes could slide in on the left side of the bracket. As a side note, the same bracket will also work for the Topping D90se/A90D DAC/Amp combo. Later in those post I’ll have dropbox links to the CAD files I used for each bracket.
By using these custom mounting brackets I can keep my desk top clean and really improve the aesthetics of my home office. So how did I create these brackets? Read on to find out how.
Protocase to the Rescue
A couple of years ago when trying to find a manufacturer for my brackets I did a lot of research. I wanted a company that didn’t charge me an arm and a leg, was fine with single quantity orders, and had free easy to use CAD software to design the brackets.
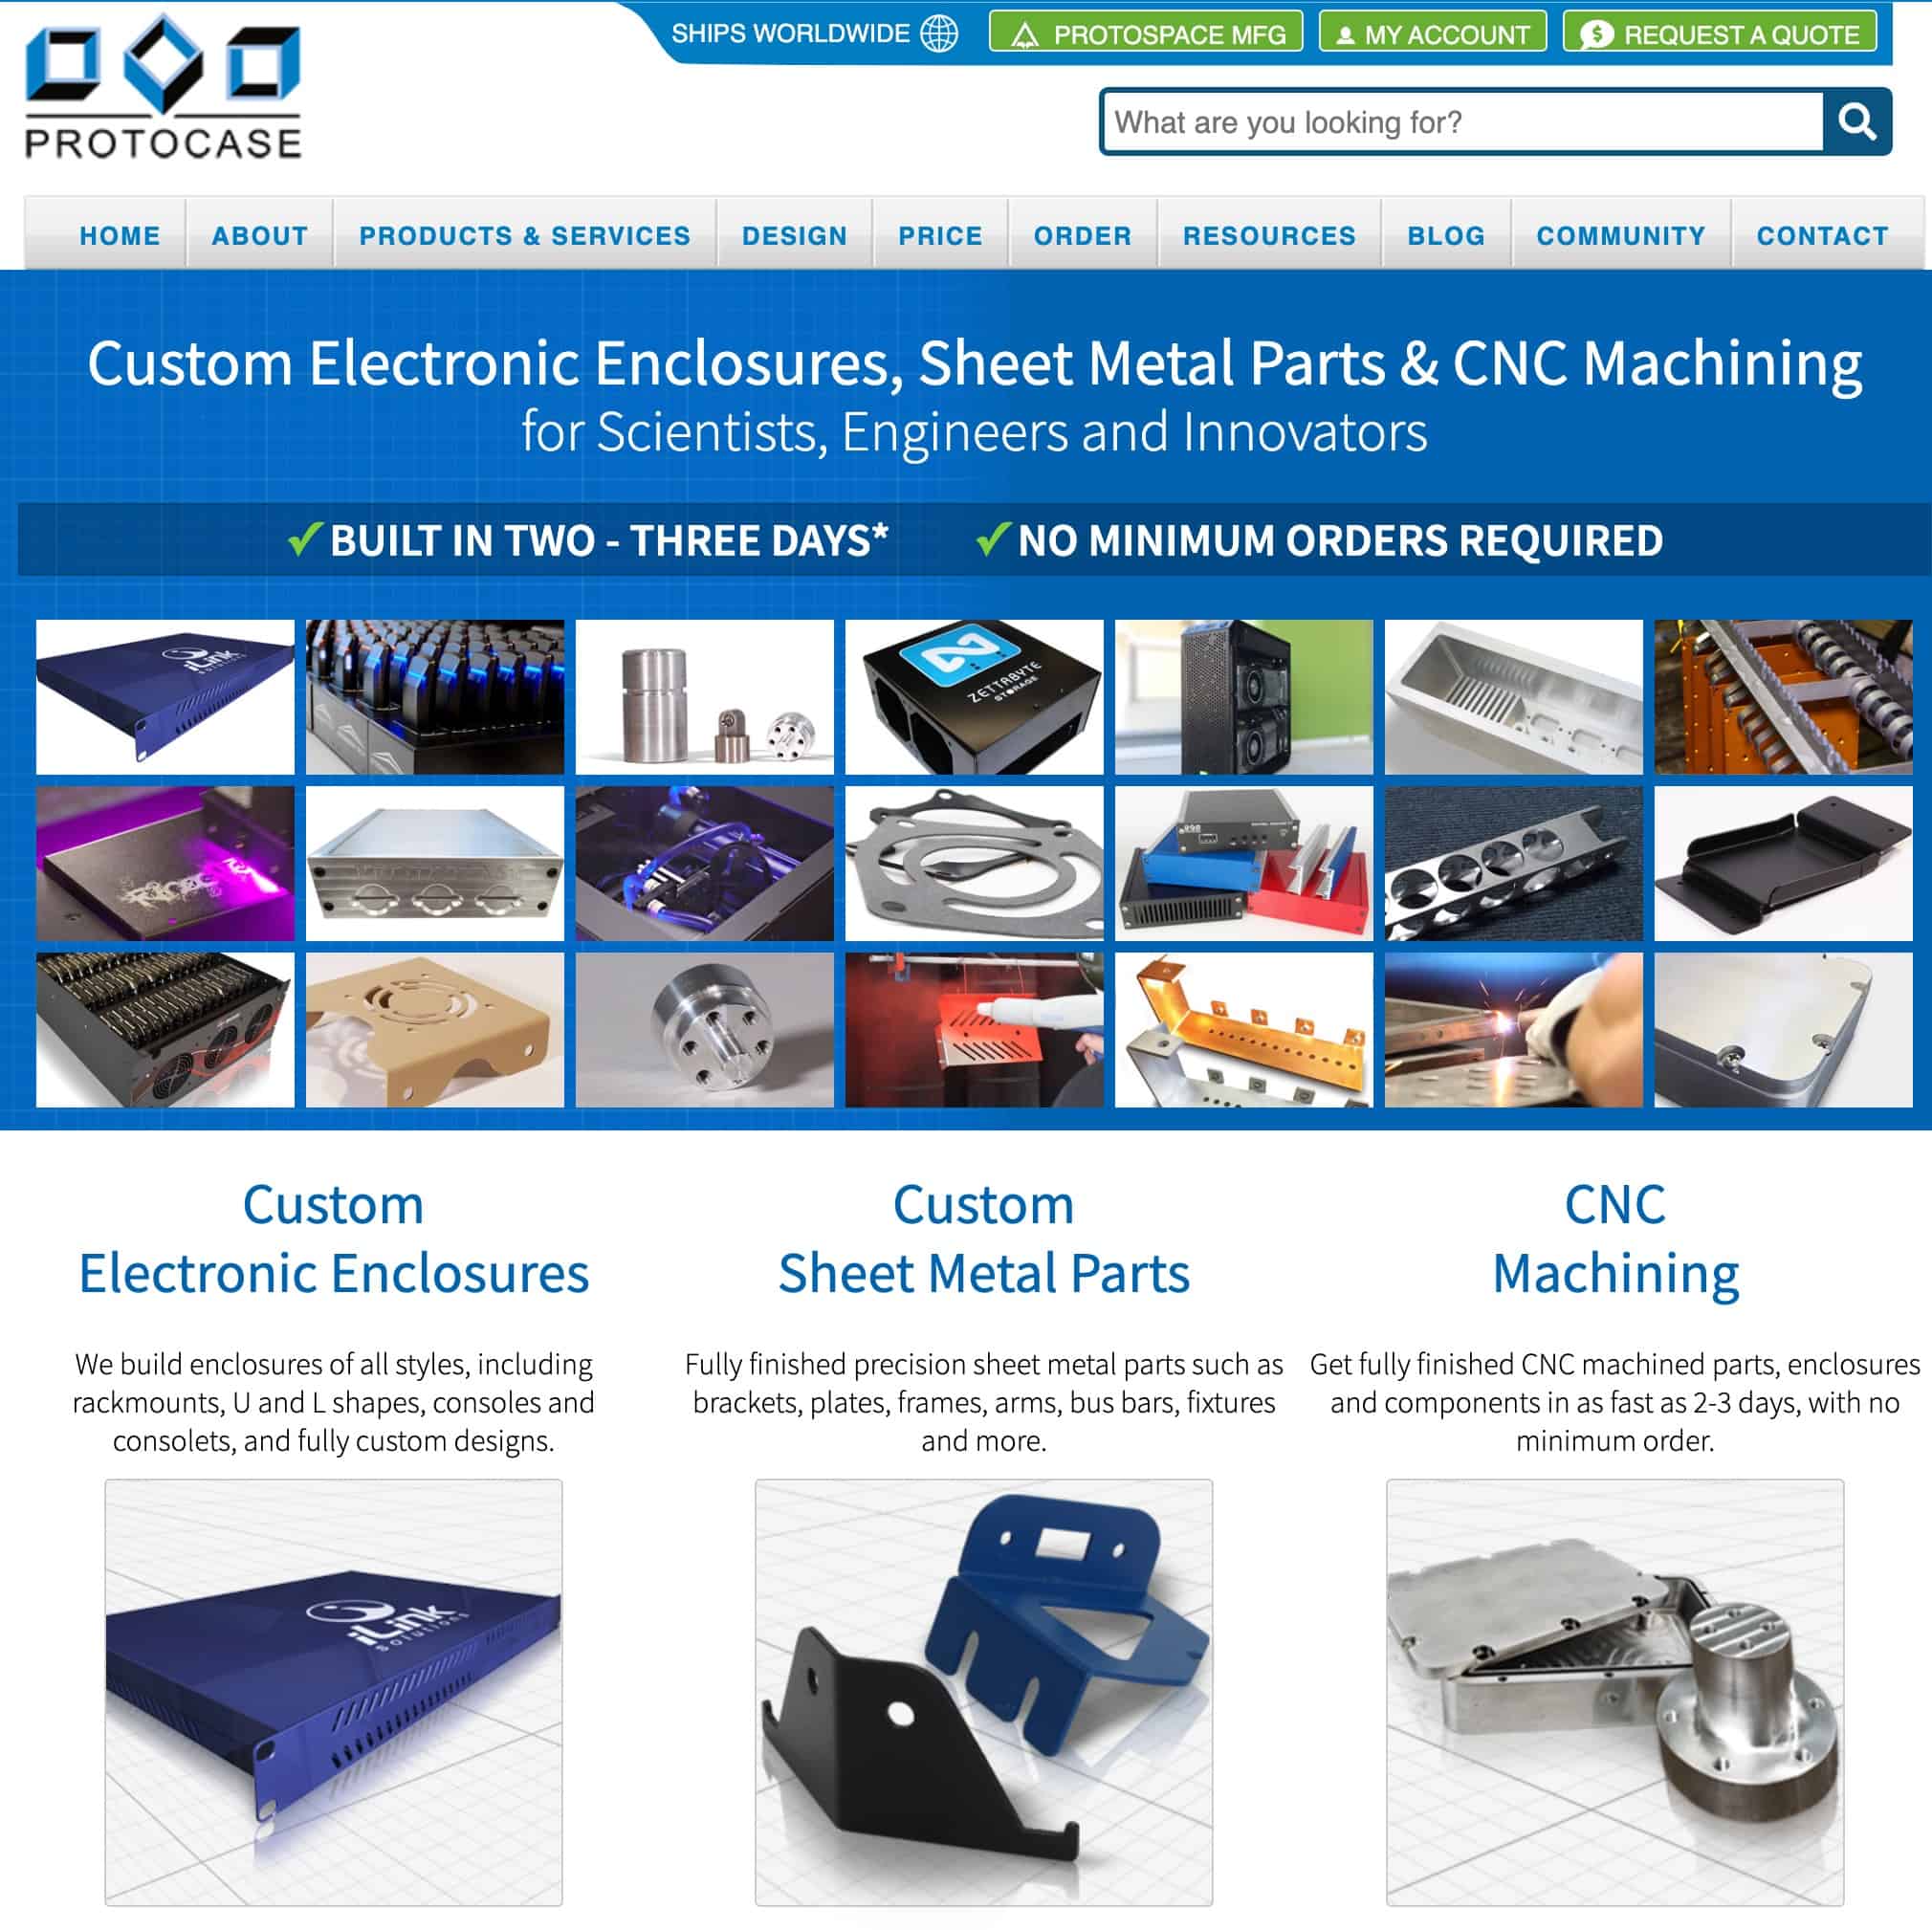
After extensive research I stumbled upon protocase.com. Their whole business model is custom enclosures for scientists, engineers, and innovators. And they can easily do single quantity orders, with a reasonable one-time setup fee per drawing. Any subsequent orders for the exact same item bypass that one time setup fee. This post will walk you through how to use the free CAD software to design an offset mounting bracket with your custom dimensions.
Using Protocase Designer (Free)
The first thing you need to do is down the free Protocase Designer software. It’s available for Windows, Mac and Linux. The software installation process is straight forward, so I won’t walk you through that. But after it’s installed we can now start designing our offset bracket.
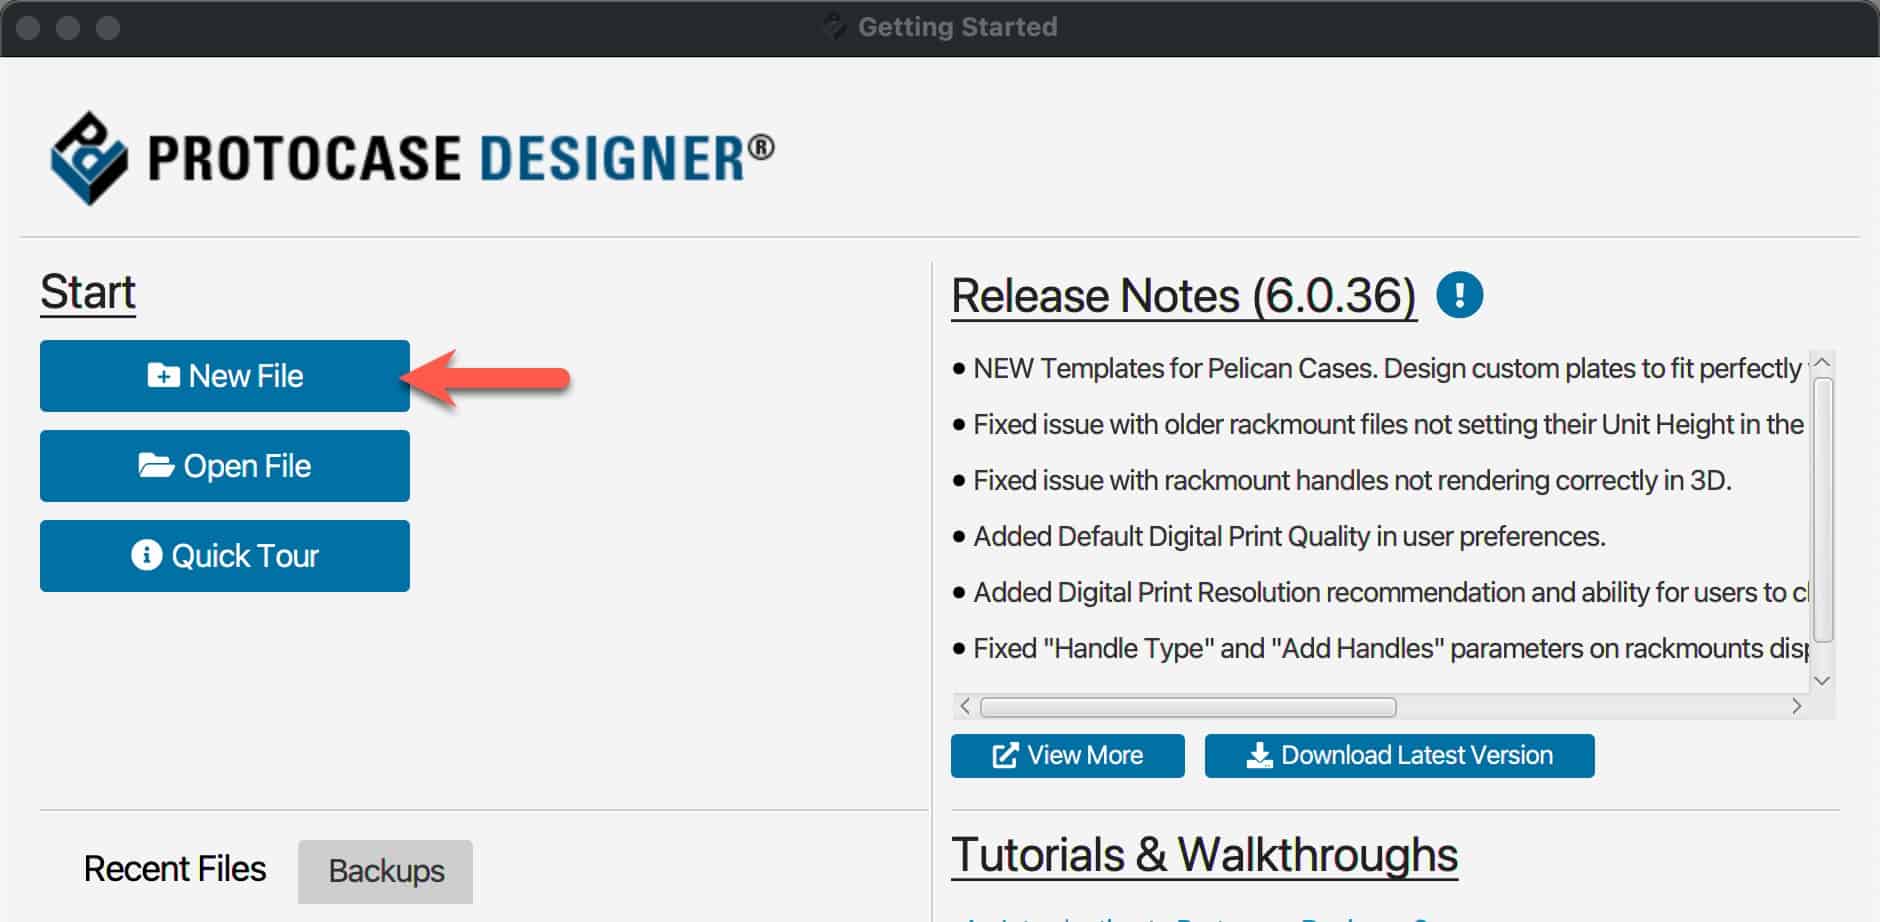
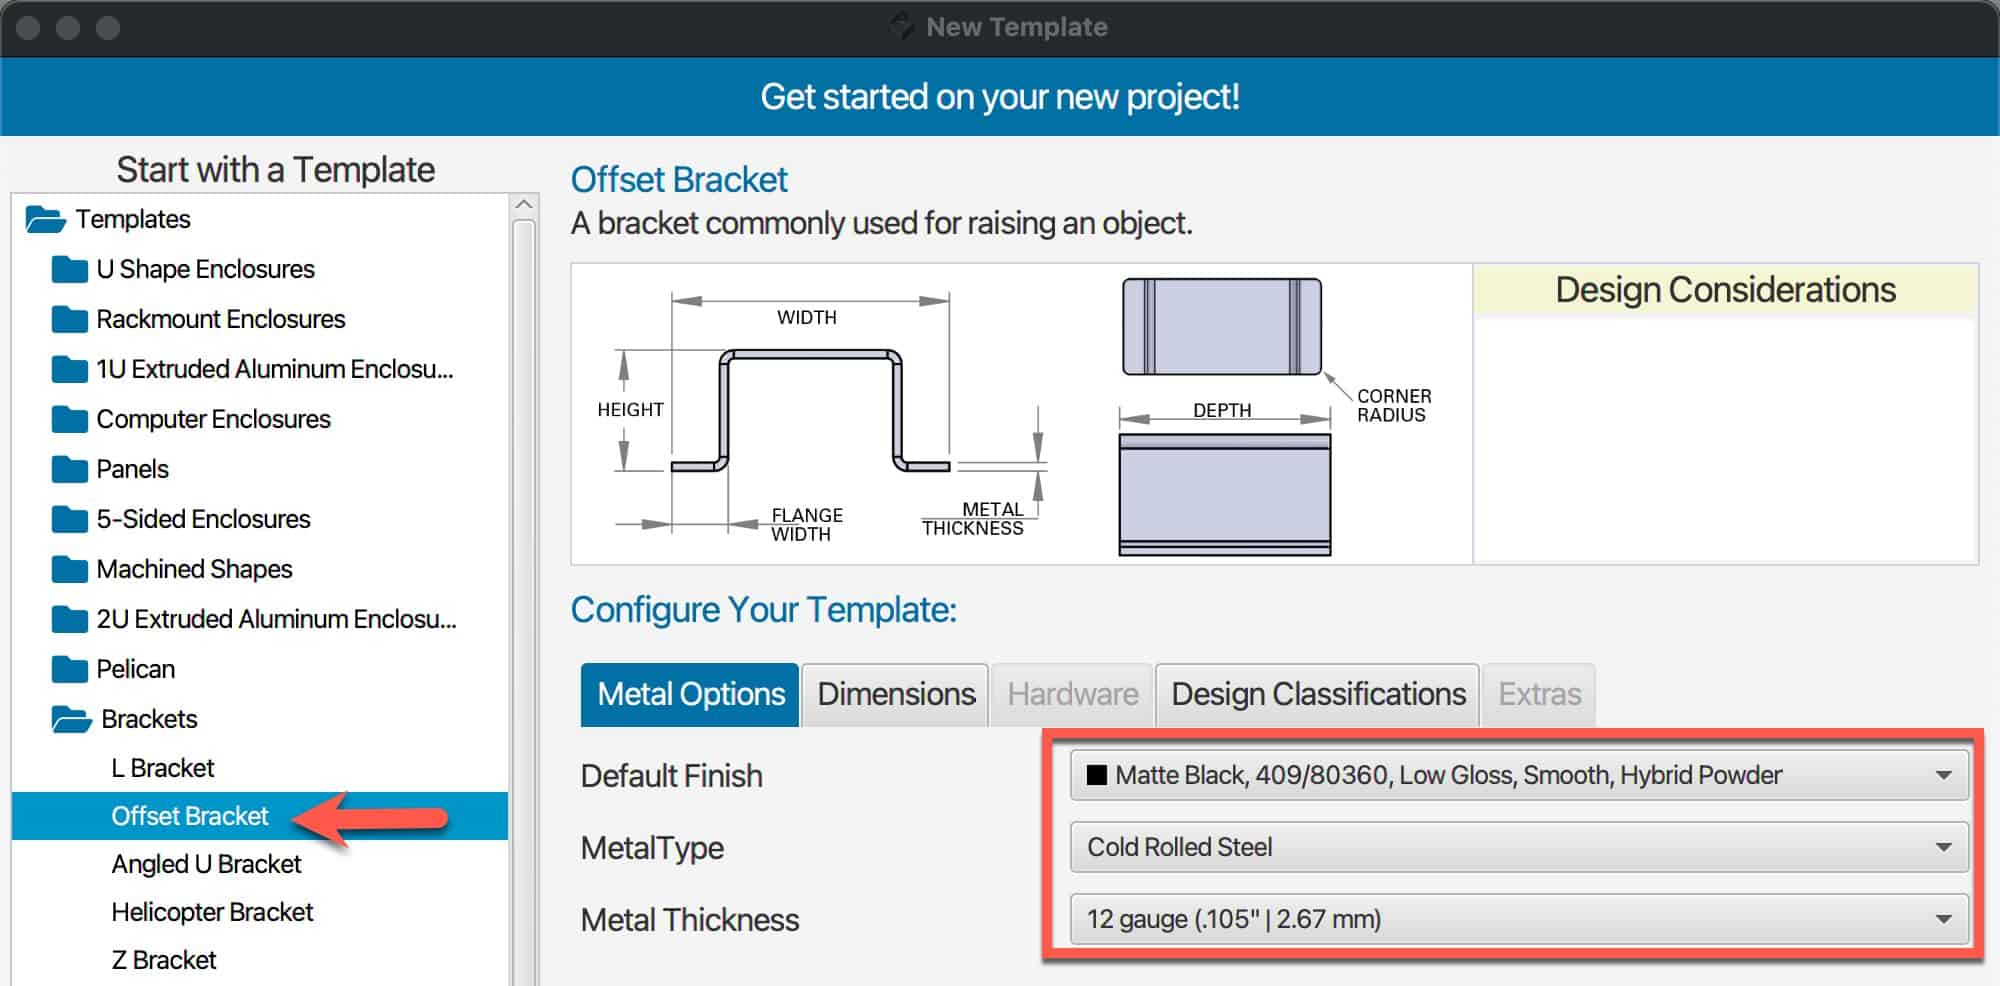
1. Launch Protocase Designer and select New File.
2. Under the Templates navigate to Brackets -> Offset Bracket. 3. In the middle of the window we can now select our material and finish. I love the matte black hybrid powder look. For the metal type Cold Rolled Steel is a great option. I wanted very heavy duty brackets, so I chose 12 gauge. The cost difference between the gauges is negligible. Protocase has a wide range of colors, materials, and thickness options so you can customize as you wish. But I’ve found the options I’ve shown below to work exceptionally well for my brackets.
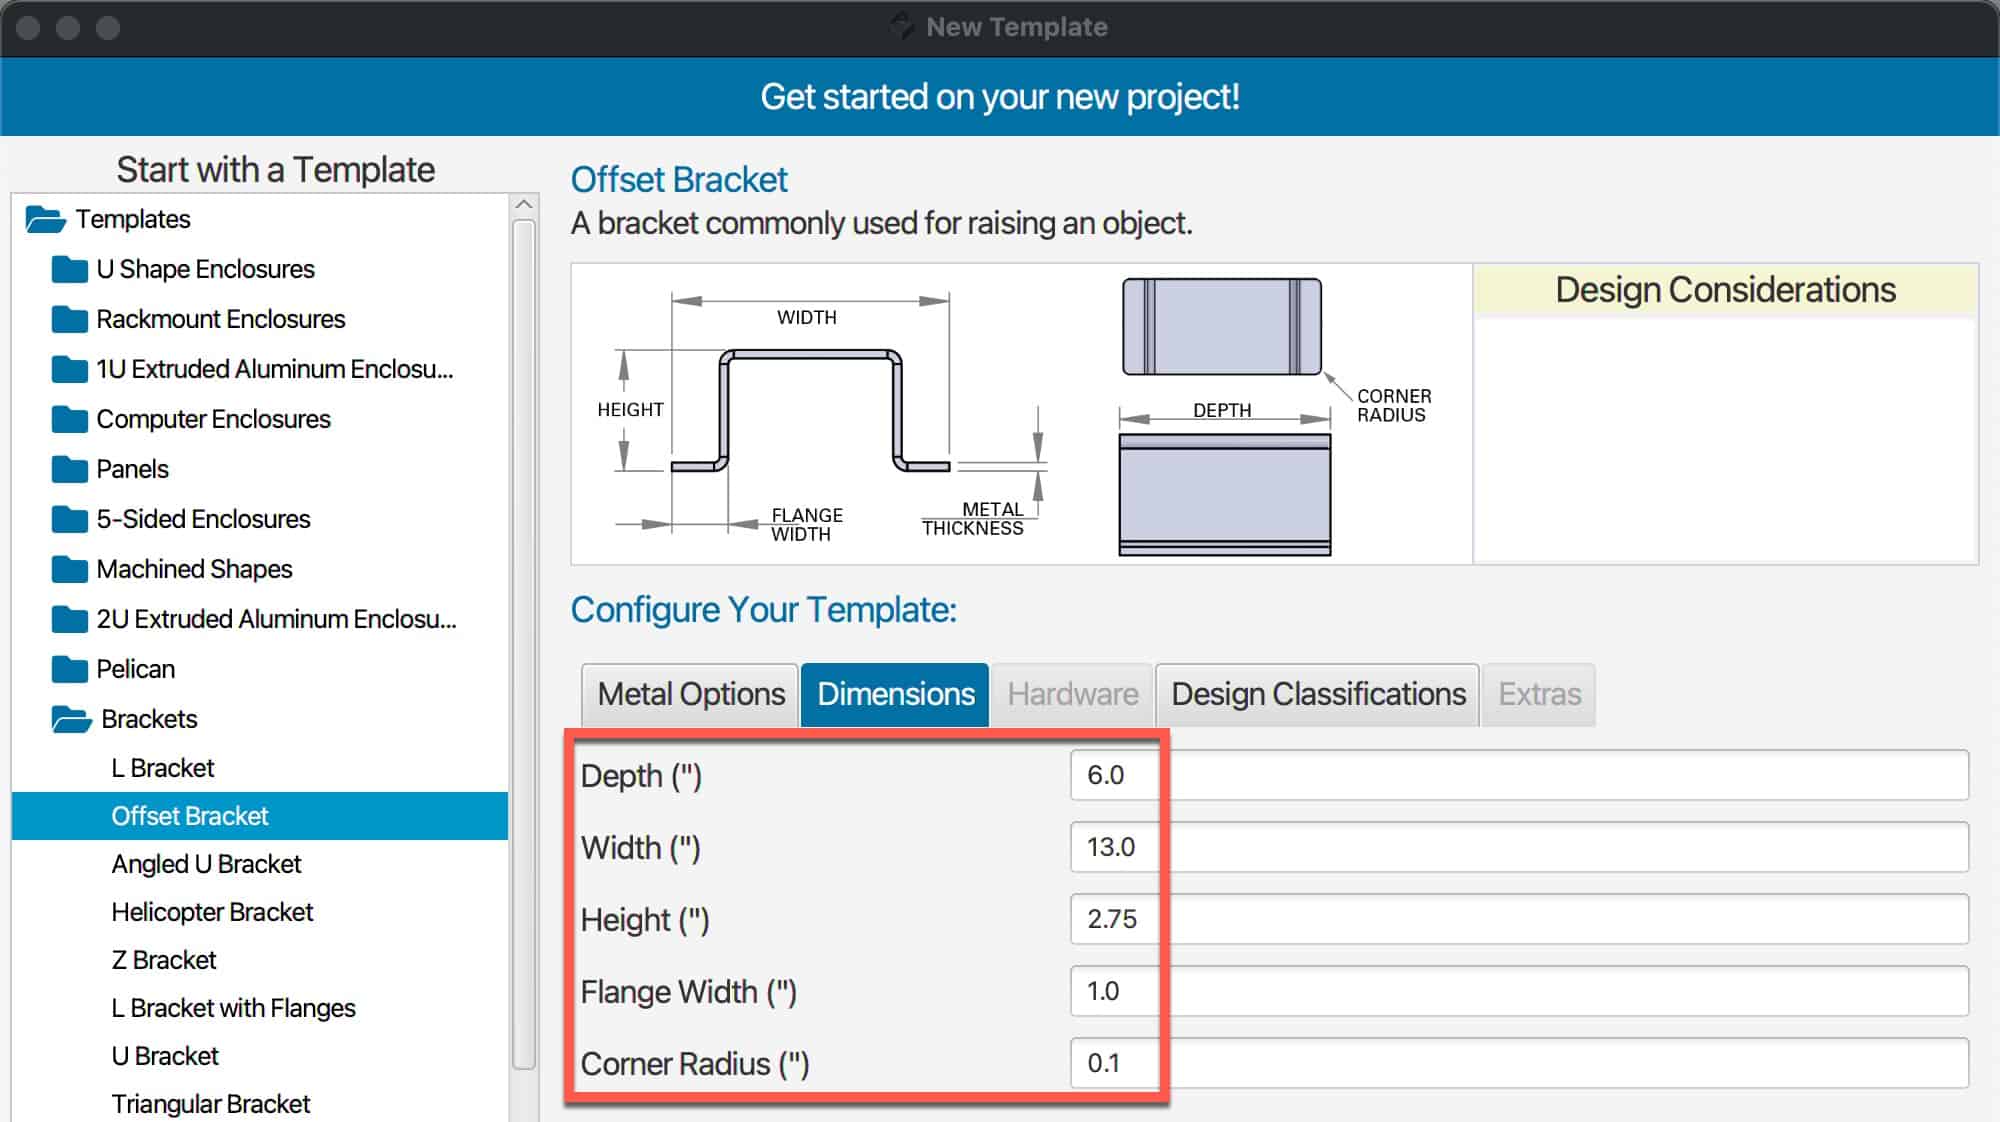
4. Click on Dimensions. Understanding how Protocase uses the dimensions you specify is key to getting the right size produced.
Depth – Straight forward. This is how deep, front to back, you want your bracket.
Width – This is a bit tricky. Their width INCLUDES the two mounting flanges in the dimensions. And a bit of the interior usable width it used by the material thickness (2x the material thickness you selected). So do NOT enter just the width of your device here.
Height – The height is the exterior height, which includes 2x the material thickness you picked.
Flange width – This is how wide the mounting flange is that will have the screw holes. I always use one inch.
Corner Radius – I leave this as the default .1.
Example: Let’s say you have a device that has the following dimensions: 10 inches wide, 2 inches high and 5 inches deep. For electronic devices you want some breathing room so heat can dissipate.
If I was designing the offset bracket for that devices, here’s what I’d do:
Add an inch to the depth: 5″ + 1″ = 6″
For the width I’d calculate it: 10″ + 2x 1″ (for each flange) + 1″ extra for breathing = 13 ” (minimum, might add more)
Add at least .75″ to the height to account for bracket material thickness, and allow an air gap above for heat dissipation. 2″ + .75″ = 2.75″
Always use 1″ for the flanges
Depending on the characteristics of your device, you might want even more air space around the device. Don’t make it too tight unless you want to cook your device.
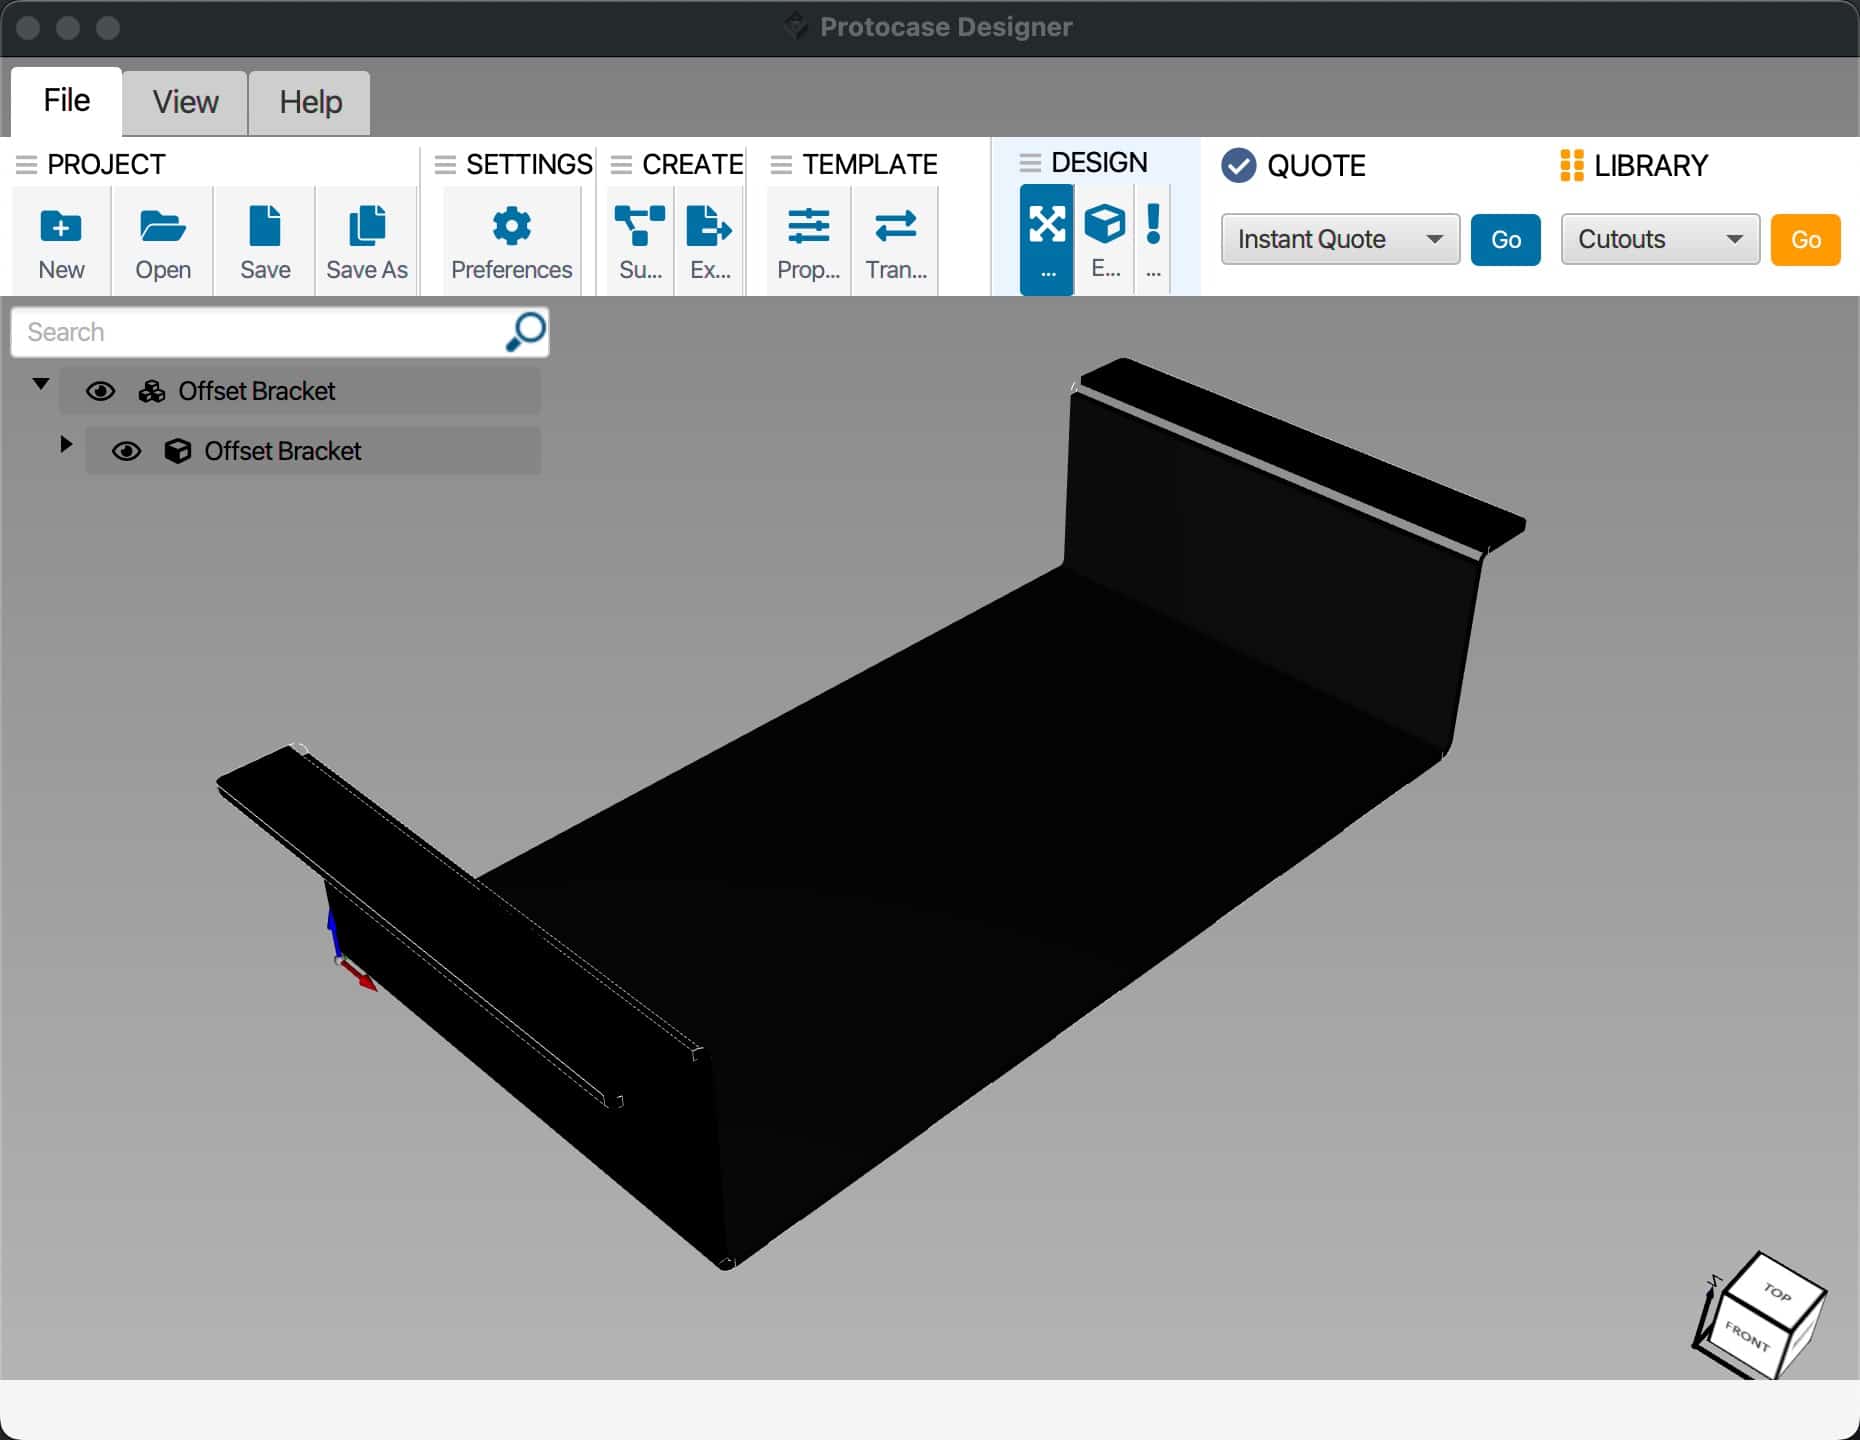
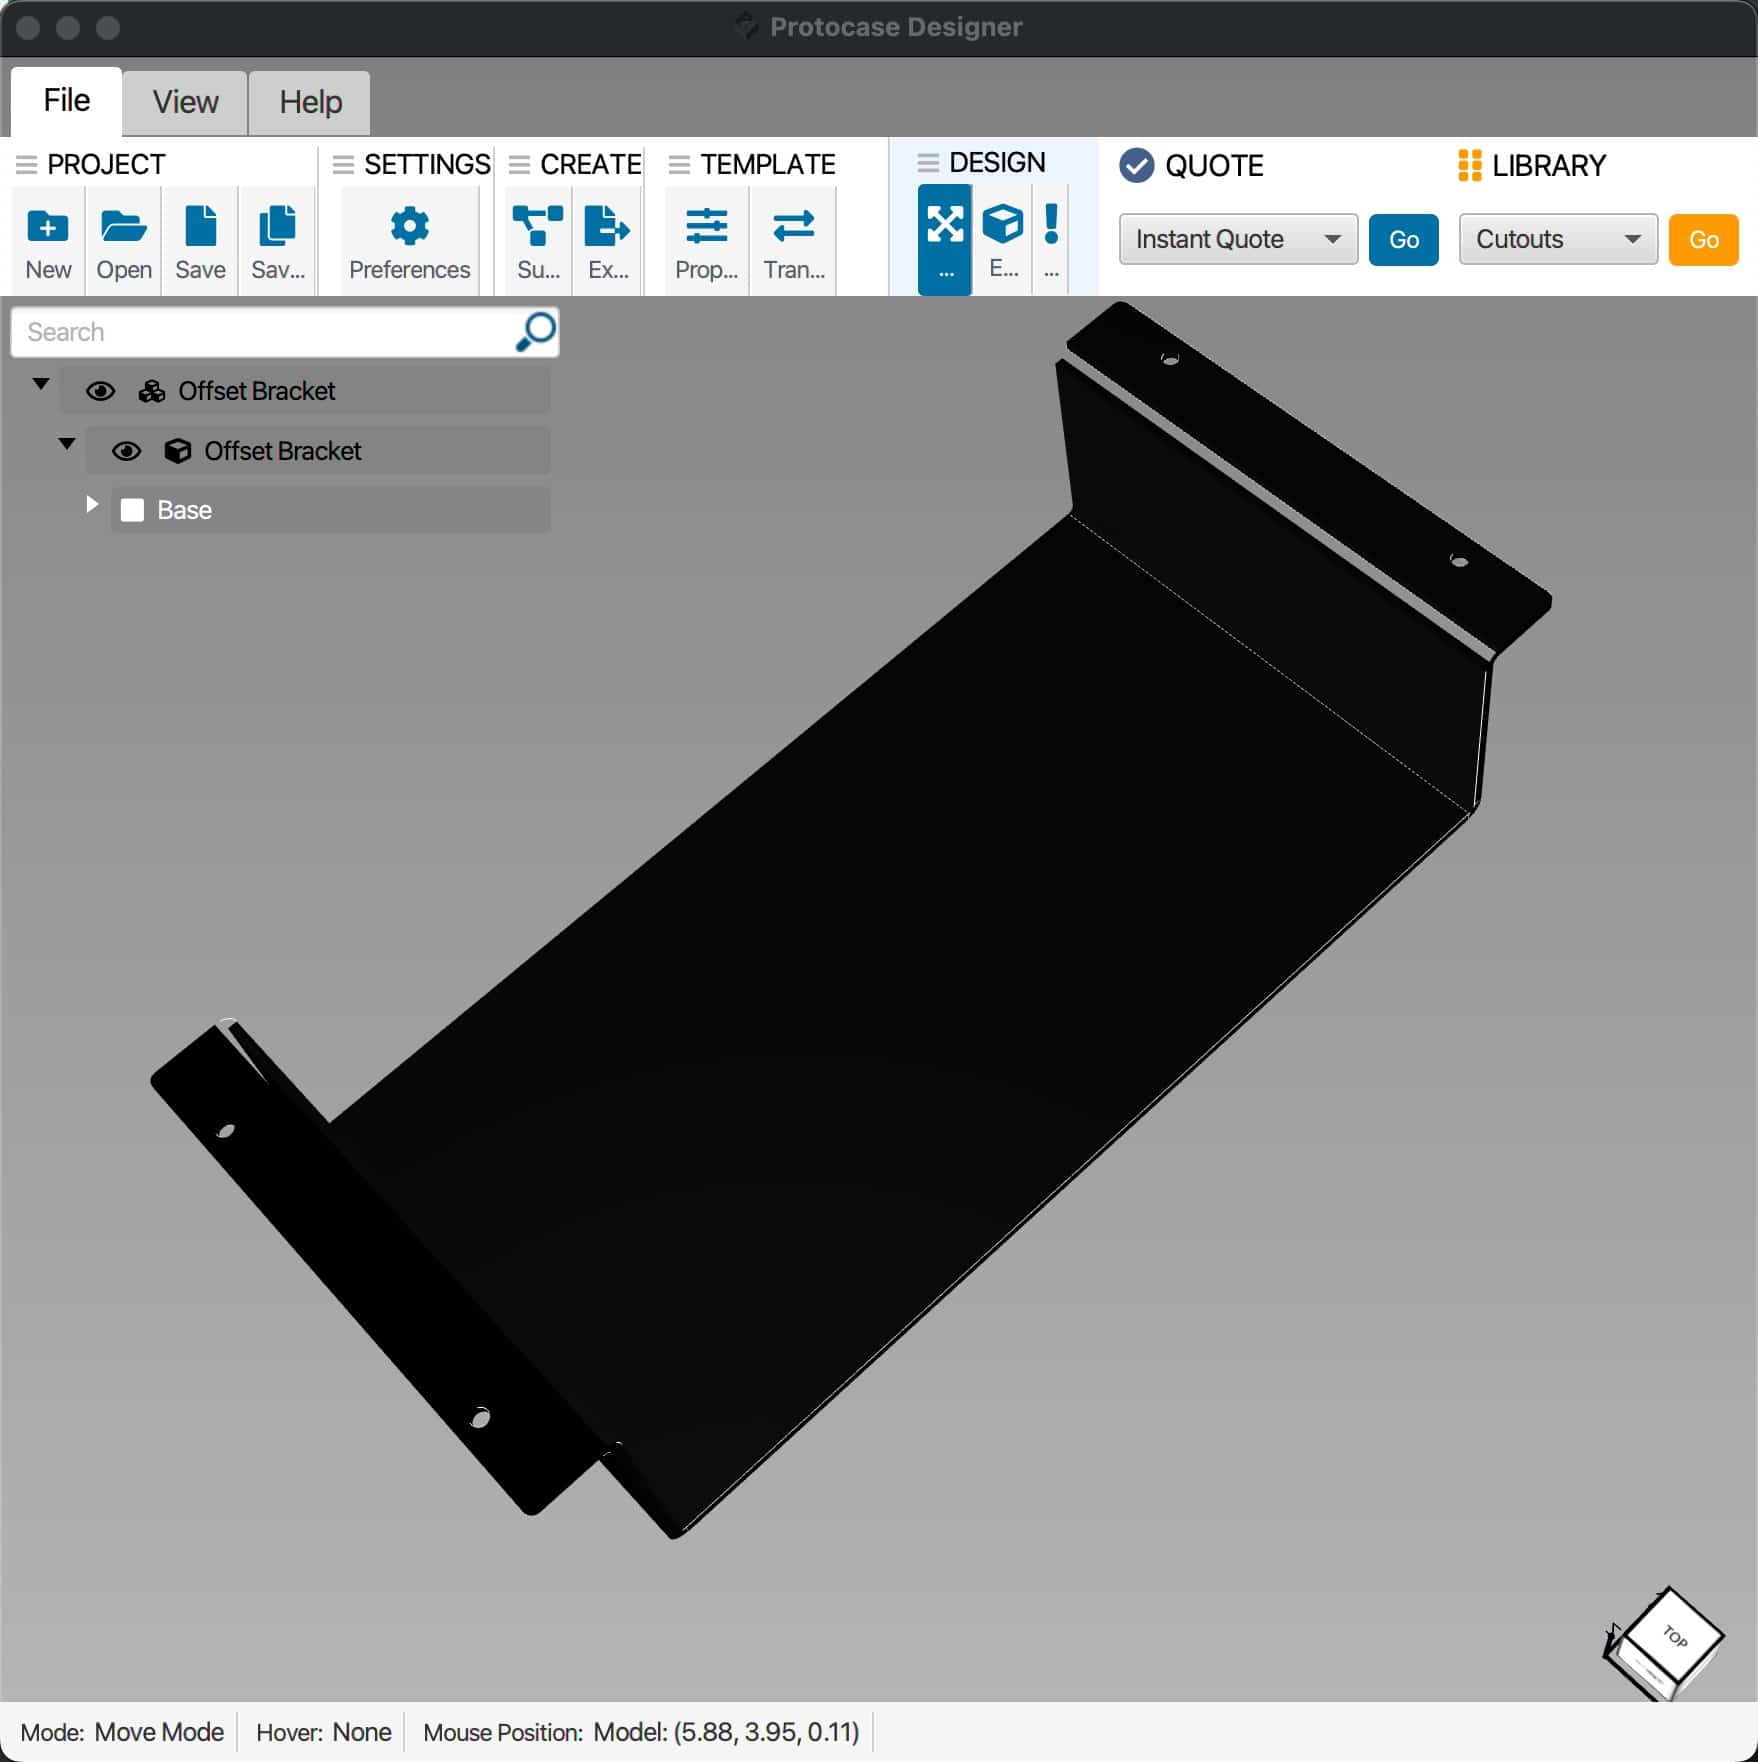
5. Click on Start Designing. You should now see a 3D representation of your bracket. The only thing we need to change is adding screw holes in both flanges. This is pretty easy.
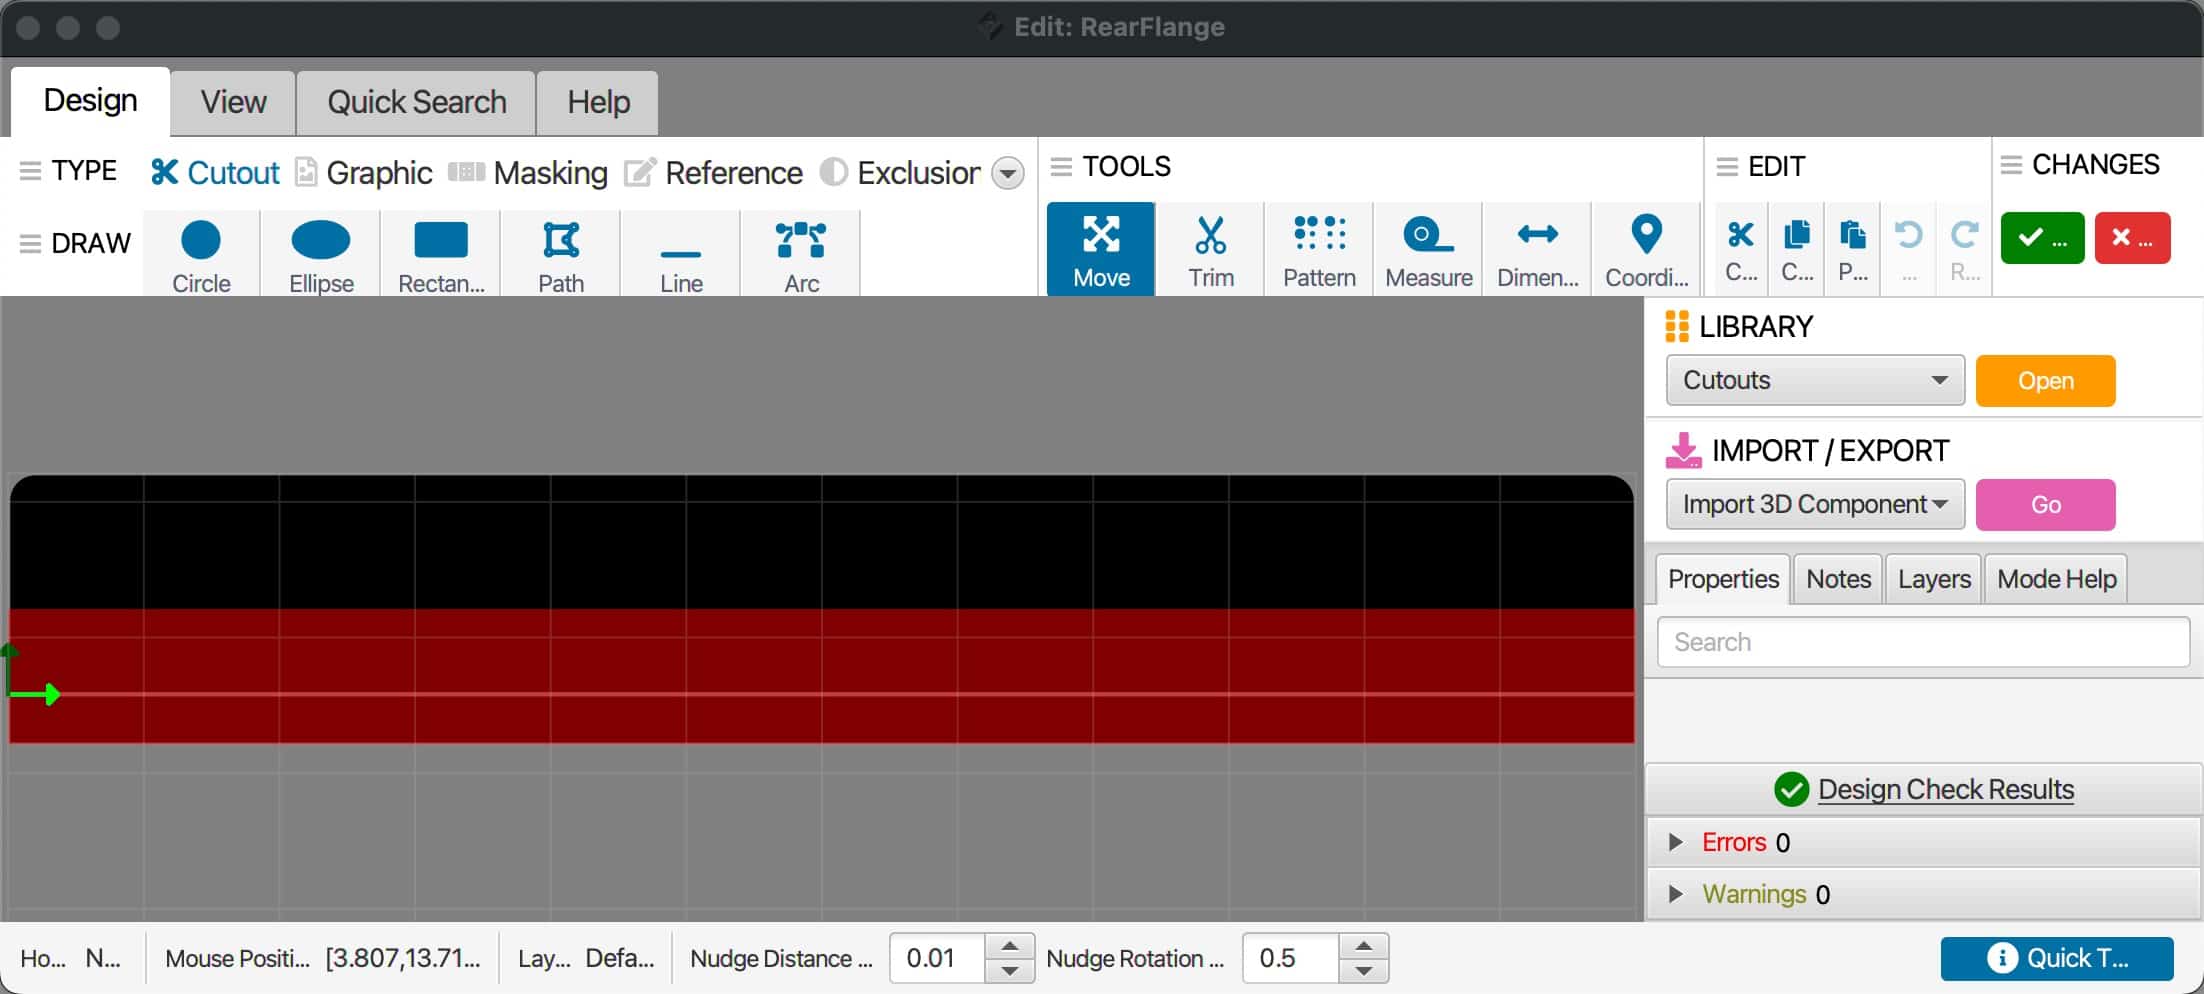
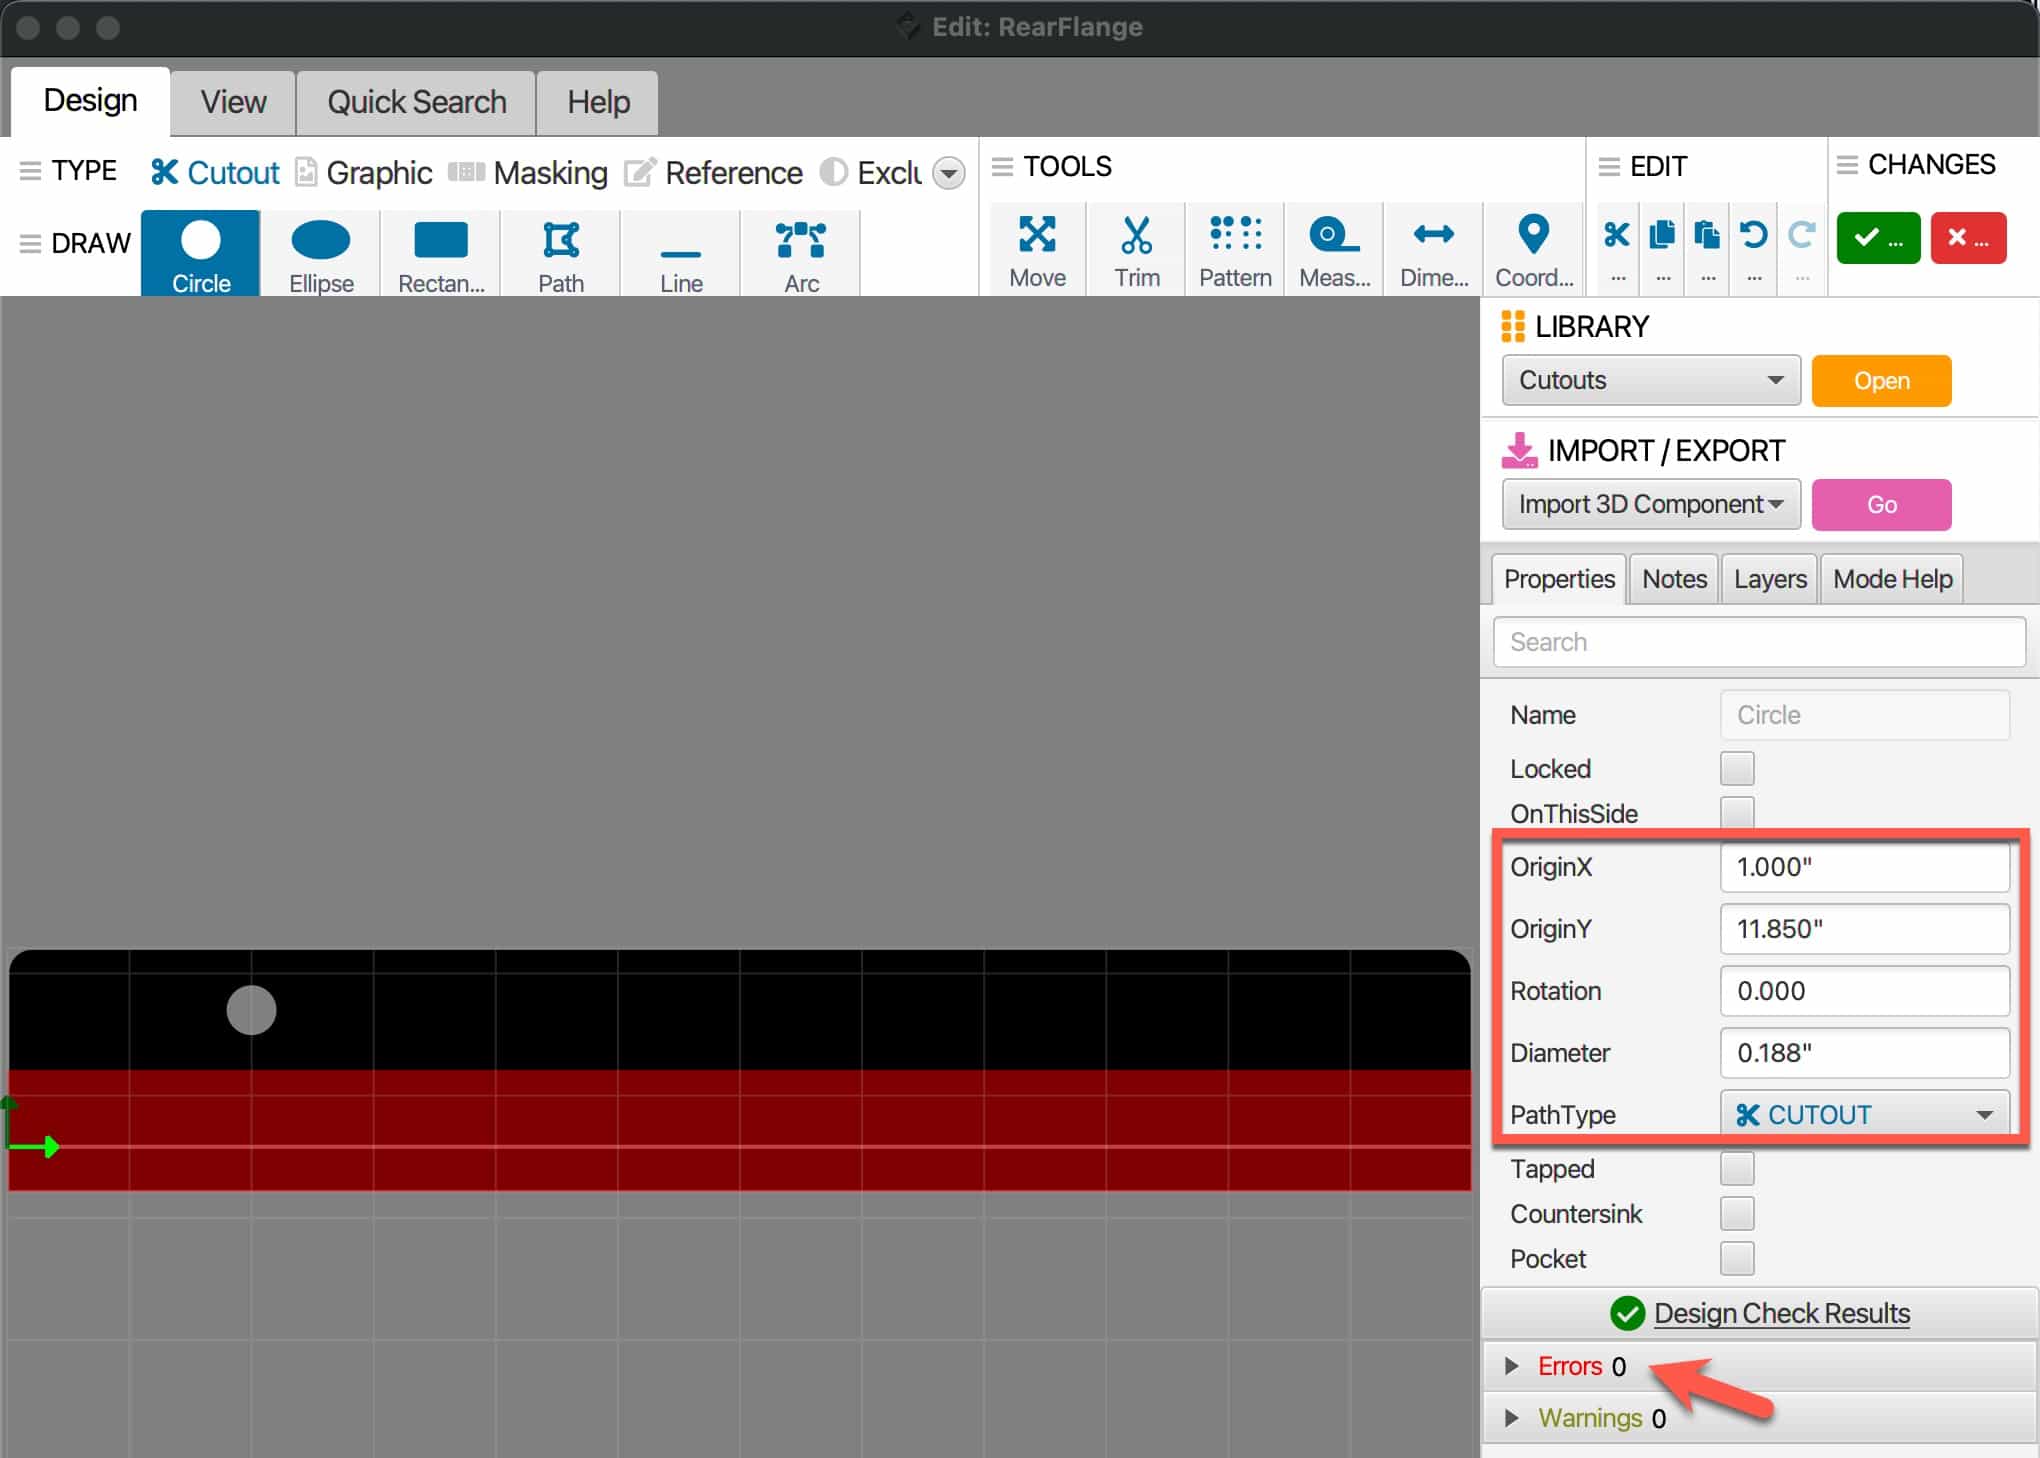
6. At the top of the window click on Edit Face. Click on one of the flanges. A new window should open that looks similar to the one below. The black portion of the diagram is where we want to place two mounting holes. They can’t be too close to the edge or to the body of the bracket.
7. Click on Circle in the tool bar. 8. Click and drag slightly somewhere close to where you want the first hole. 9. In the right pane change the diameter to .188″ (or whatever you want, but I’ve found this works well). This needs to be large enough for the type of screw you want to use. 10. Modify the OriginX and OriginY to place the hole where you want it. I suggest at least one inch in from both ends (OriginX), and center it vertically in the black portion of the flange (OriginY).
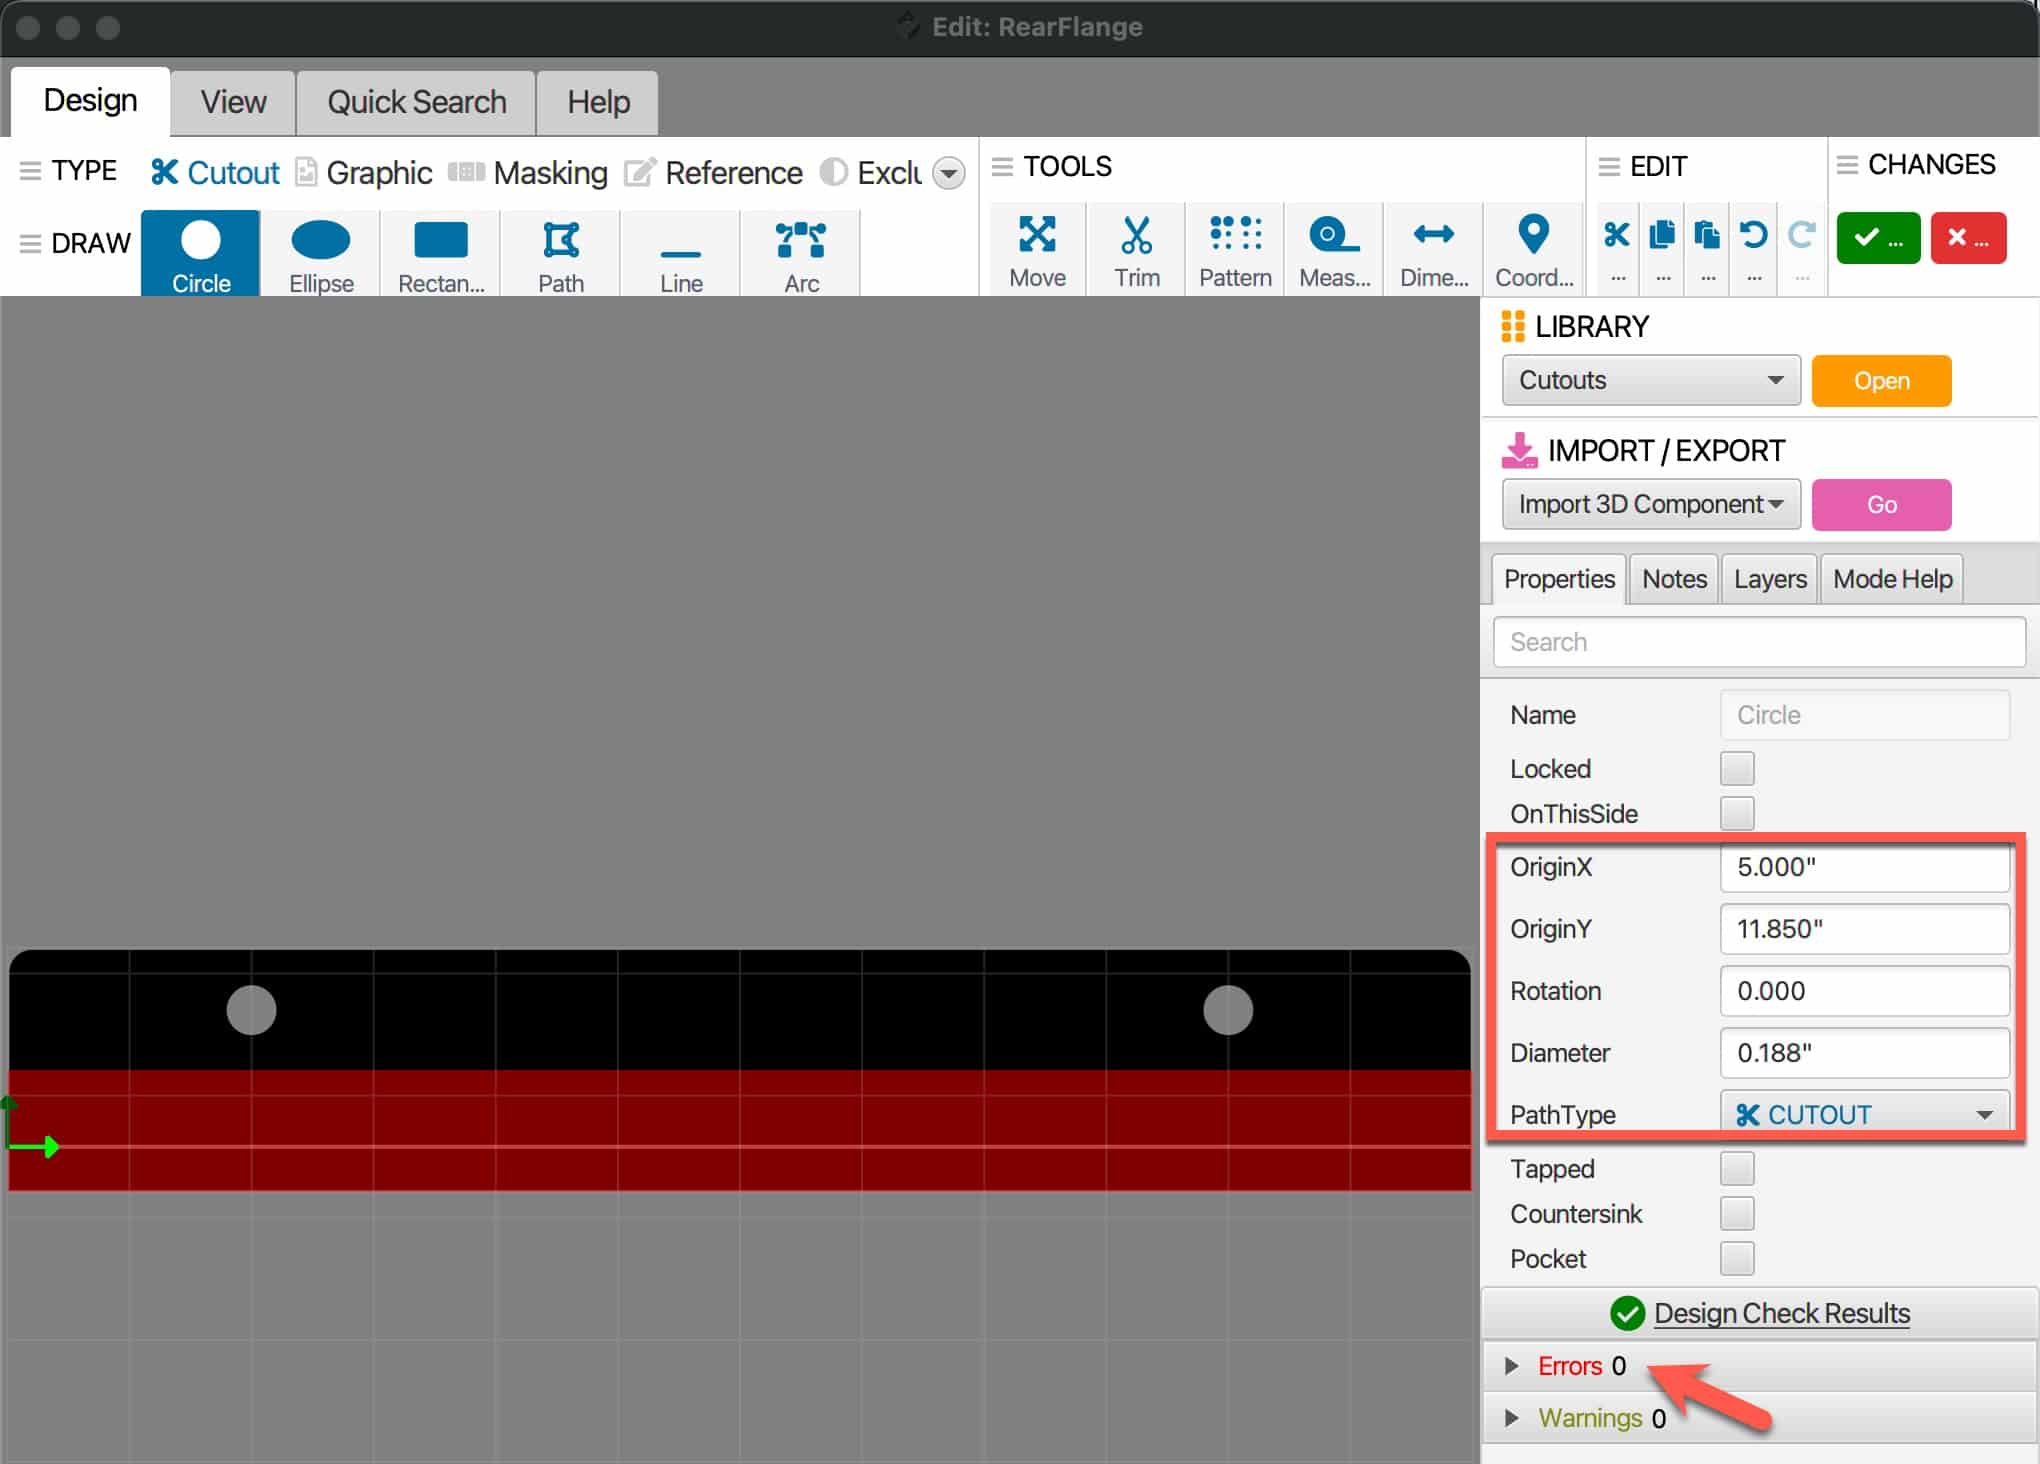
11. If your hole is too close to either edge, or it’s too small or large, you will see errors in the lower right of the window. Ensure you have NO errors. If so, adjust as needed. 12. Repeat the Circle steps to make a second hold on the other end of the flange. I would use symmetrical dimensions so that it looks professional. In this case, this means the Diameter and OriginY are the same as the first circle. You only need to adjust the OriginX to be an inch less than the depth of the bracket (5″ in my case). Again, check for any errors.
13. Click on Save in the tool bar. 14. Repeat the same process for the other flange. The second flange should use the same OriginX and dimensions for each circle as the first flange. The OriginY will be different, but try to center the circle on the black area of the flange. 15. Once you have added the holes in the second flange, review the bracket to make sure everything looks good. You can adjust the viewing angle of the bracket by dragging it on the screen.
16. Now we should save the bracket, before we try to get a Quote. Click on Save in the toolbar. 17. Just to verify there are no design issues, click on Check Design in the toolbar.
Getting a Quote
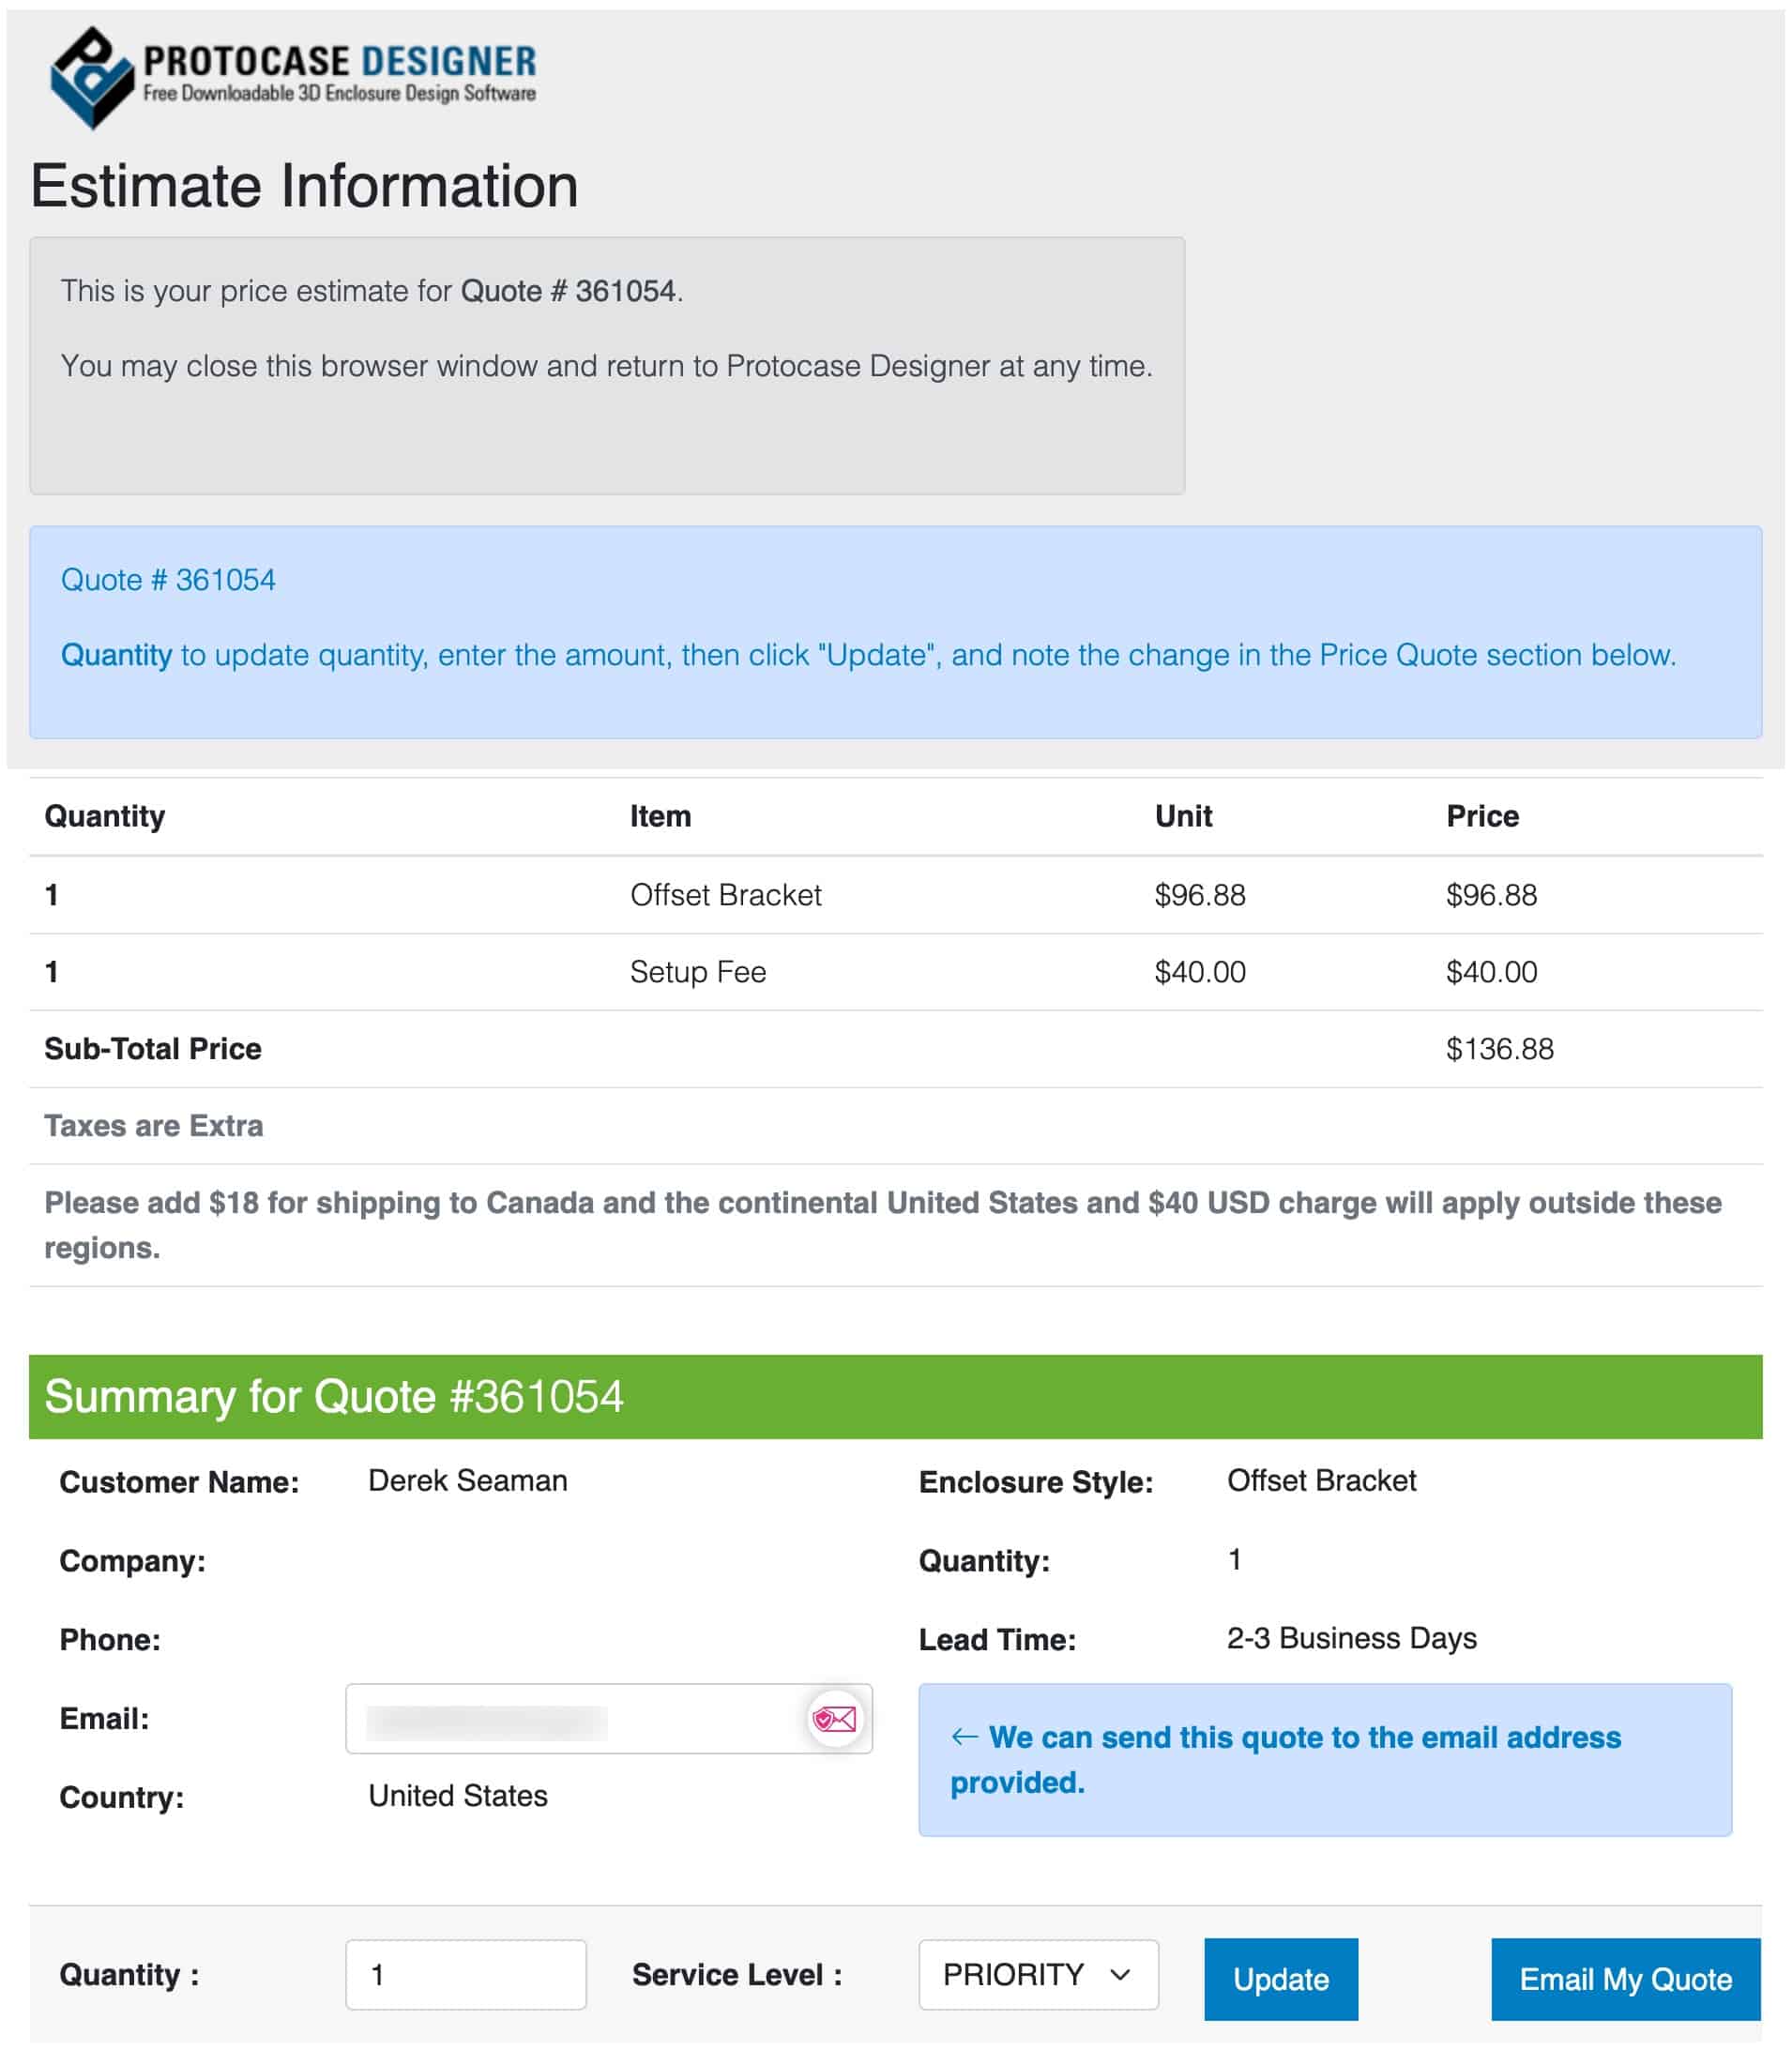
You can easily get an instant quote for your part. No humans needed. 1. Click on this Protocase link and create an account. 2. Login to your new account. 3. Back in Protocase designer click on Go next to Instant Quote in the toolbar. 4. If for some reason the website gives you 403 forbidden, click on Go again in Protocase designer and see if it works (usually does for me). 5. After a few seconds a quote should appear before your eyes. The setup Fee is a one time cost that is waived on future orders for the exact same item. You can then get an email quote. 6. If you wish to order, you can go through that process which in my experience does involve a human to generate a final invoice. But they are SUPER responsive and VERY friendly. Lead time is usually very short (2-3 business days), and they ship it in very robust packaging.
My Custom Bracket CAD Files
If you are interested in the brackets I’ve designed I’ve put my Protocase designer CAD files on Dropbox for you to download:
Protocase is a great resource to use for your custom under desk mounting brackets. You have a wide range of materials, colors to choose from and you customize every dimension. They gladly accept orders of quantity 1 (with a one time $40 setup fee), have very short lead times, and the quality of their work is amazing. I strongly recommend them for any custom enclosures!
2 thoughts on “Designing your own Custom Under Desk Mounting Bracket”
Allison
Awesome! You gave a wonderful step-by-step rundown of how to make this kind of bracket in Protocase Designer. So glad to hear it all worked out for you. Thanks for choosing Protocase and Protocase Designer! 🙂


Awesome! You gave a wonderful step-by-step rundown of how to make this kind of bracket in Protocase Designer. So glad to hear it all worked out for you. Thanks for choosing Protocase and Protocase Designer! 🙂
Love Protocase! Thanks for the speedy turnaround and free CAD software.