Now that Nutanix Acropolis is shipping with NOS 4.1.3, I wanted to cover a few basics in a series of blog posts. Most of you won’t be familiar with Acropolis, which is based on KVM. If you’ve used KVM in the past, you will know how difficult it can be. Acropolis removes much of the complexity and headache. So for my first installment, I wanted to do something very basic: Upload an ISO to the Nutanix cluster which I could use to image a VM, then create a VM and install the OS from the ISO.
Please take note that the Acropolis road map is quite detailed with many major enhancements in both terms of features and ease of use. So in a few months this procedure will probably change, particularly around ISO management. But 4.1.3 is shipping today, so here’s what you need to do. This assumes you have a running Nutanix cluster imaged with Acropolis/KVM.
1. From your Windows machine launch WinSCP. Enter the hostname/IP of your Acropolis cluster, change the port to 2222, then use a username of ‘admin’ and your cluster password. WinSCP should then connect to NDFS.
2. Once WinSCP connects, in the right pane you will see a list of containers. If no containers exist, then you have a brand new cluster and need to go into PRISM and create a storage pool and container. Refreshing WinSCP may not reveal the new container(s), so you may need to reconnect to see them. I went into my first container and created a directory called “ISO”.
3. Next, in the left pane of WinSCP navigate to your ISO(s) and drag them into the right pane. Wait for the upload process to complete.
Note: In NOS 4.5 we will be adding a PRISM ISO upload option, so you won’t need to resort to WinSCP for uploading your ISOs. There’s also some cool feature in the future around ISO libraries that is in the works.
4. Login into PRISM (the Nutanix GUI not the NSA spy tool). From the left pull-down menu select “VM”.
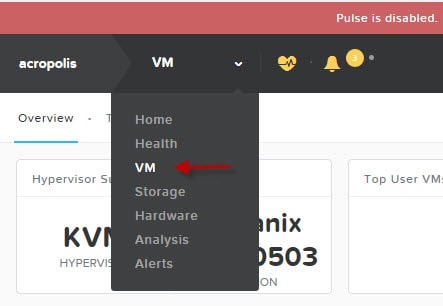
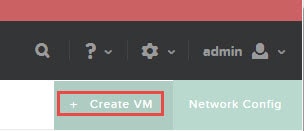
5. From the left-side menu, select Create VM:
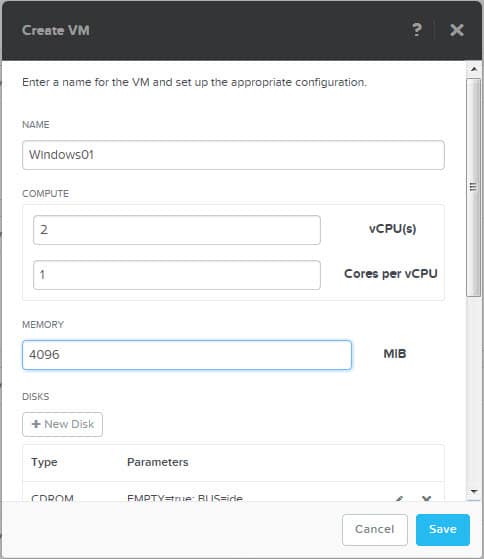
6. Next up we need to define some VM parameters, such as memory and CPU. Fill in the form as appropriate for your VM.
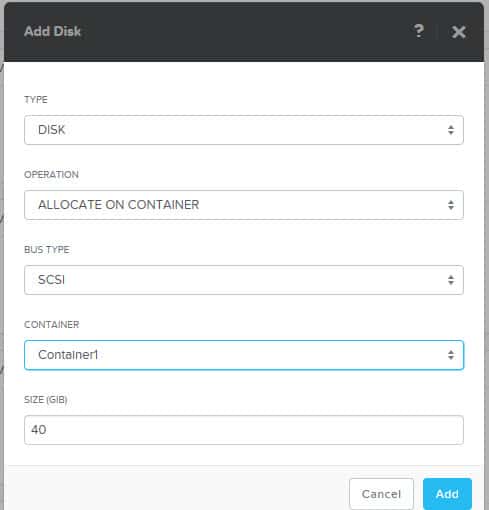
7. Next, click on New Disk. The dialog box below opens up. Assuming you’ve already created a container, just enter the size of the disk in GB. All disks are thin provisioned, so no need to select various format types.
 8. After the disk is created, we now need to add a NIC. If this is the first VM you have created, and haven’t yet defined any networks, we need to define a network to attach the VM to. You can of course have different networks, each associated with a different VLAN. Click on “New NIC”, then you will see the box below.
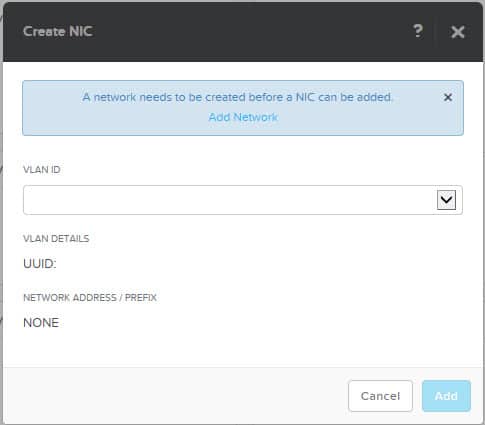
Because we have no networks, click on “Add Network”. Add the relevant VLAN ID and close the dialog box. Note, in NOS 4.5 you will be able to define network names, so you won’t have to rely on remembering long UUIDs.
9. Now, if you followed my article to inject the VirtIO drivers into your Windows ISO, then configure the CD-ROM to mount your ISO image from the NDFS datastore. If you have a virgin Windows ISO image and didn’t inject the drivers, then you can mount a second CD-ROM to the VM. In this second CD-ROM mount your VirtIO ISO image.
10. Power on the VM, and wait for Windows to boot. When you get to the “Where do you want to install Windows?” screen you have two option. First, if you created your custom Windows ISO then your boot disk should be listed and you can proceed as normal. If you are relying on the second CD-ROM, then click on Load Driver and browse to the vioscsi driver for the appropriate operating system. Your boot disk should now appear.

11. Proceed with the Windows installation as normal. Once Windows is fully installed, login as administrator.
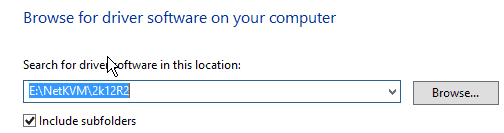
12. Open the Device Manager, and you will see a NIC under Other Devices with a yellow exclamation point. Right click and update driver software. On the VirtIO CD navigate to the NetKVM folder and appropriate OS. You NIC will now be detected.
13. Congratulations! You now have a fully functional Acropolis Windows VM. Unlike other hypervisors, you don’t need to install any additional drivers..just SCSI and NIC. Keyboard, video and mouse are all native and should work as expected.


