This is part 2 of the VSS Labs vCert Manager installation and configuration series. In Part 1 we got vCert Manager installed, and secured with a trusted SSL certificate. In this section we will get into the nuts and bolts configuration and start replacing certificates.
vCert Manager Configuration
1. First we will setup a SMTP server, which is used to send email notifications of various events such as expiring certificates. Login to vCert Manager and from the main menu select Settings. The in the left under Company Settings select Portal Settings.
2. Enter the SMTP server details for your organization. Notice that the tool supports SSL encrypted SMTP, and SMTP authentication. You can even test out the SMTP authentication from right within the tool. Here you can also setup different notification settings. I’ll just leave the defaults here.
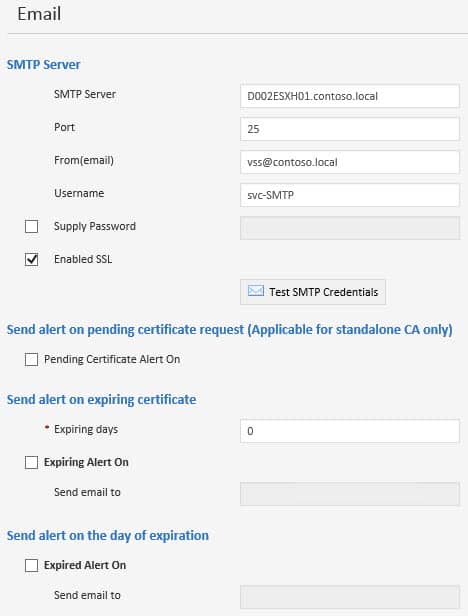
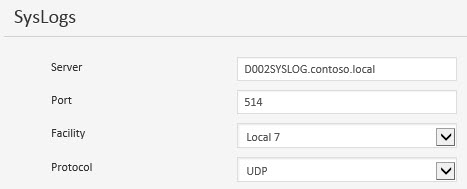
3. You can also configure SYSLOG settings. You can easily change the port number, and protocol (TCP/UDP). This is great for services such as Splunk, where you can customize different SYSLOG listeners on different ports. Click the Save icon on the left to save all of your settings.
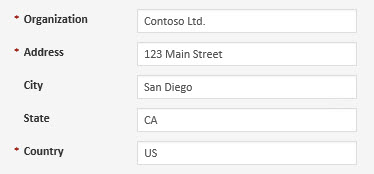
4. In the left pane click on Company Profile and fill out the details. These will be used for certificate generation.
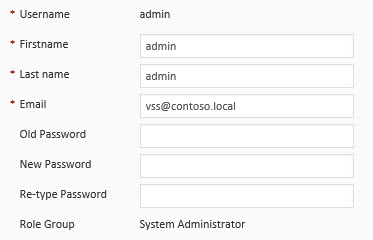
5. In the left pane click on My Account. Here you can change the password for the default ‘admin’ account. Change it to a nice complex password.
6. In the left pane click on Sites change the site name to something relevant to you. This should reflect where the vCenter components reside. Mine are in San Diego.

7. The tool also supports role based access controls (RBAC), and you can add additional accounts that have different levels of permissions. Roles include Home, Cert Manager, Administration, Settings, Reports, Logs, About.
8. Now we need to establish a connection to our Microsoft CA. On the main page click on Administration in the top banner. In the left pane click on Certificate Authorities. Click on the green Add button. Fill in the details as needed. I would suggest setting up a service account that has proper permissions in your CA, vice your normal admin account like I show below. Better security, and better traceability. Shame on me. Click on Get Templates and select your VMware SSL template that you’ve already created.

After you add the CA, it will now be shown in the middle status pane.

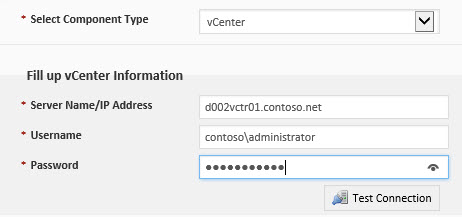
9. In the left pane click on Infrastructures. Click on the green Add button. Enter your vCenter details, and service account information. Again, use a service account here and not your administrator account like I did. Test the connection to validate the information.
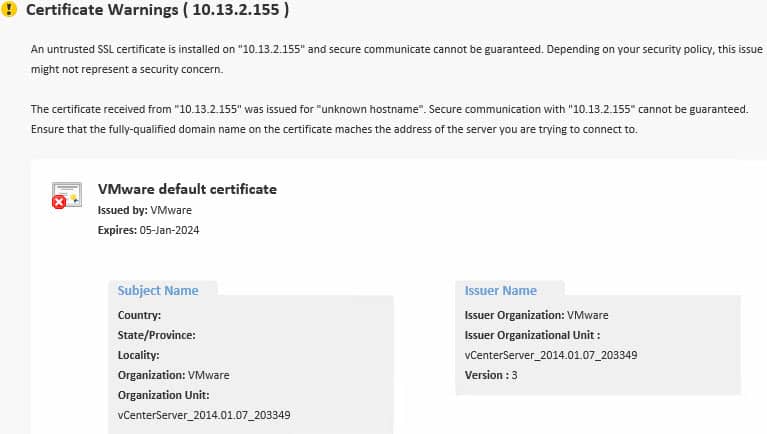
10. Now you will probably get a large certificate warning screen, since your vCenter certificate is probably not trusted at this point. Click on the I trust this certificate button.
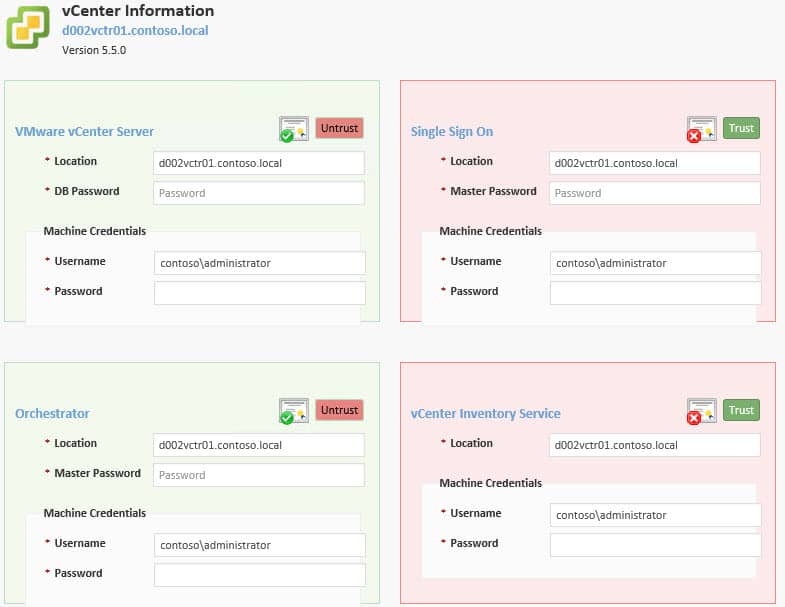
11. Next up is a credentials page where you need to enter passwords several times for the various components that it detects. After all of the passwords are entered, click on the Trust buttons for SSO and Inventory service. Note, that if you are using Windows authentication or SQL express for vCenter, just enter a dummy password in the DB Password field.
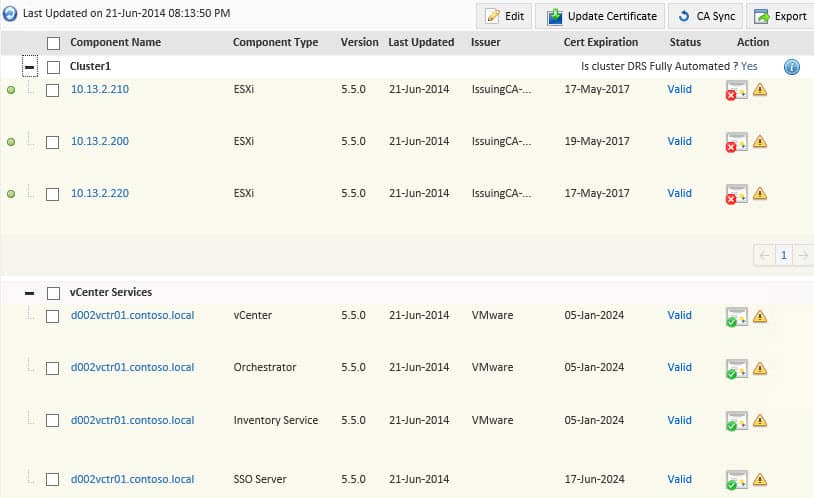
12. On the main menu bar click Cert Manager. You should now get a nice little graphic with the quantity of discovered components.

13. Click on the vCenter FQDN and you will see a table format of the same information. Click on the graphic to enlarge it.
We are now ready to actually replace the certificates. That will be coming up in Part 3. Stay tuned!


When can we expect Part 3 Derek?
In the coming week or two.
So is there a Part 3?
No, VMware has acquired VSS Labs and thus I'm sure the product will greatly change or be integrated into another product. So I'm not blogging anymore about the program until VMware re-releases it.