This is the second part in a blog series of how to install and configure VMware Horizon View 5.2. In Part 1 we did the basic connection server install, and installed Adobe Flash player. Next up is configuring a trusted SSL certificate for VMware Horizon View.
There are a number of ways to request and mint SSL certificates. You could use a commercial CA, Microsoft internal CA or another flavor of CA if you wish. Unlike some vCenter components the View SSL certificate does not need any unusual properties beyond Server Authentication usage. No unique OU properties, no client authentication, no data encryption, etc. I would advise using a SAN certificate, so you can access the server via shortname and the FQDN without certificate errors.
I am using an Enterprise online Windows Server 2012 Certificate Authority in this example. The CA has been pre-configured to issue a variety of certificate template types, one of which I called “Server Authentication-SAN”. You don’t need a template with this name, but the template needs to support the SAN field, which the basic “computer” template will NOT. For general steps on how to configure a custom certificate template for a Microsoft CA, see my article here.
Additional articles in this series:
VMware Horizon View 5.2 Part 1: Basic Installation
VMware Horizon VIew 5.2 Part 3: Initial Config
VMware Horizon View 5.2 Part 4: VM and Pool Creation
VMware Horizon View SSL Certificate Installation
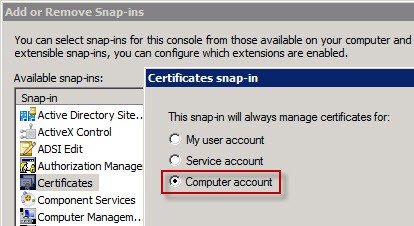
1. On the View server open a blank MMC. Add the Certificates snap-in and chose Computer account.
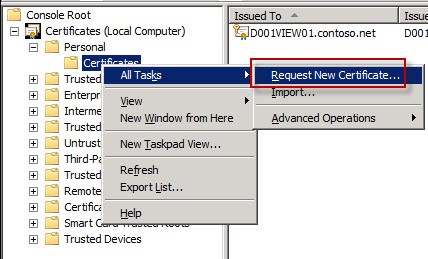
2. Open the Personal certificates container and expand Certificates. Depending on the auto-enrollment policy (if any) in your domain, you may find two or more certificates listed. One of the certificates will be the self-signed VMware certificate that we no longer want to use. You can see this by looking at the “Issued By” field.

3. Now we want to request a new certificate from our online CA via a the certificate request wizard. Right click on Certificates, select All Tasks, then Request New certificate.
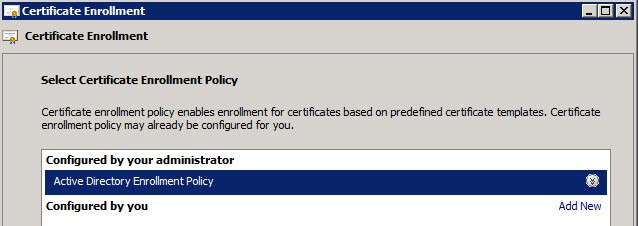
4. A couple of clicks into the wizard you should see an Active Directory Enrollment Policy listed.
5. Click Next and you should now see one or more templates that your CA administrator has published. If you use the standard “Computer” template the CA will strip any SAN values that you enter. So if you want a SAN certificate you will need to use a CA template that allows for such usage. Since SAN certificate are not uncommon, I already had a certificate template ready. Again, for a link how to create a custom CA template see my article here.
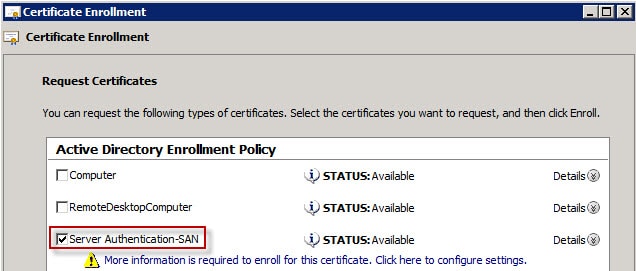
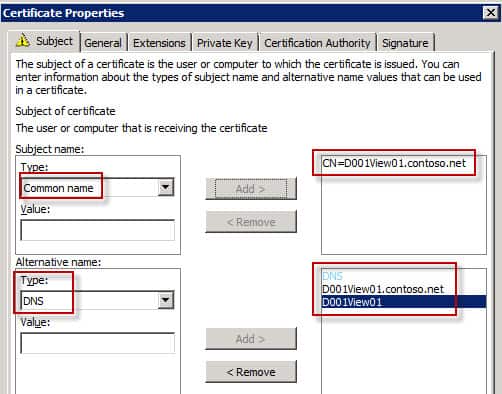
6. Check the box next to your SAN template. Click on the line of text next to the yellow warning. On the Subject tab you now need to configure the “Common name” for the subject name and add two “DNS” alternative names. Use the View server FQDN for the Subject Name and add both the FQDN and short name DNS names for the alternative name, as shown below.
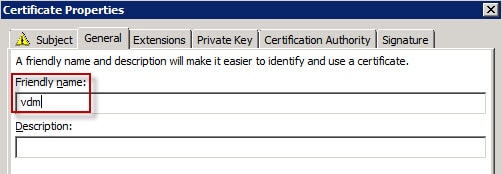
7. Click on the General tab and enter a friendly name of vdm.
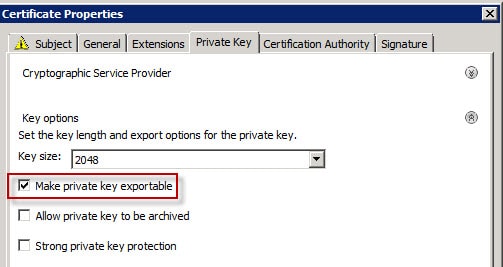
8. Click on the Private Key tab and under Key Options allow the private key to be exportable.
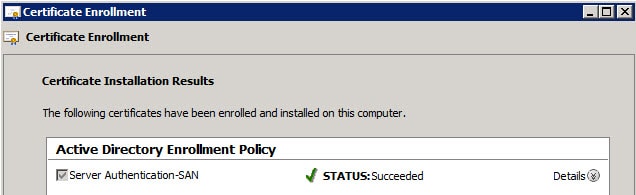
9. Click OK then click on Enroll. If all goes well you should get a succeeded message.
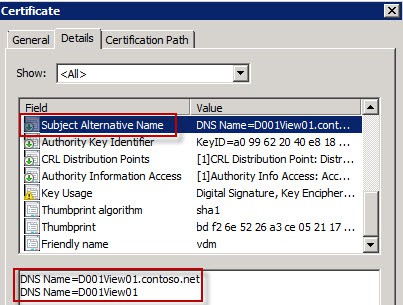
10. In the MMC double click on the new certificate and validate all properties, including Subject Alternative Name are properly populated.

A fatal error occurred when attempting to access the SSL server credential private key. The error code returned from the cryptographic module is 0x8009030d. The internal error state is 10001.
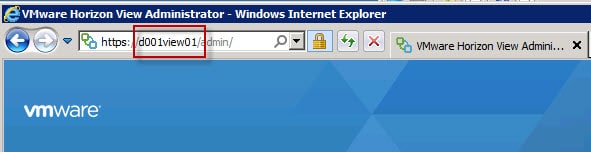
13. Now you can launch the View administrator and change the URL to either the server’s short name or FQDN, and you should NOT see any browser SSL errors.
14. Once you login you can click on the Dashboard icon on the left and view the server details for your connection server. It should show a valid SSL certificate.
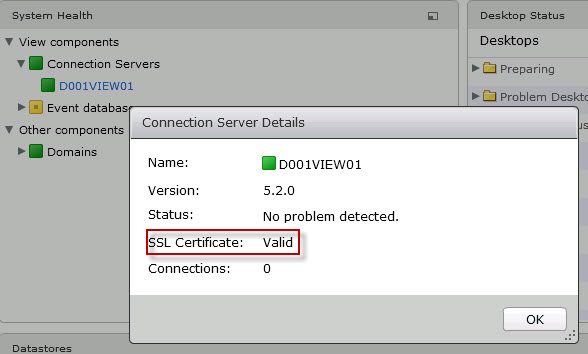
Congratulations on configuring your View Connection Server SSL certificate. Very easy, and straight forward (vCenter team are you listening?). Next up is Part 3, where configure basic parameters in the View Connection Server.


great post, Thanks!
Thanks so very much. Worked very well. My SSL cert shows now shows as valid and green. Gives me the warm fuzzies.
Ignorant question next. Do I need to install the View 5.2 Server cert to each client (Ipad, Windows, PCoIP zero client) to eliminate the "Your credentials will not be secure" (Zero Client P20) and "VMware View cannot verify your connection" (Ipad). I am having trouble finding info on how to get it to the respective devices (except Windows). Thanks again!
I shall answer my own question – yes, you need to install the certs on the client side. To install to a P20 client and if you are using a Windows CA, export as a .pfx (pkcs #12) then convert it to a .pem using openssl. Here is a good resource on how to do that – http://ait.its.psu.edu/services/identity-access-m…
I followed these steps and was imported a godaddy cert. i backed up the self assigned view cert and saved it and removed it as suggested. After adding my cert, restart of services and a reboot of the server, i get Internet Explorer cannot display the webpage when trying to connect to the view admin console. Any help is appreciated.
Thanks for the post, I was looking everywhere for the answer to the "A fatal error occurred when attempting to access the SSL server " problem. Importing the private and marking it as exportable sorted it out.
Thanks!
Hello Derek. Thank you for your job! It's very helped me! Can I use this sequence for replacing certificates in sequrity server, transfer server and composer server (separate machine)?
Maxim, yes this can be used to generate certs for other components of your View infrastructure. To give your Composer server a new cert, you need to run the sviconfig utility from an elevated command prompt. This utility will replace the cert for you, note the Composer service MUST be stopped before you attempt to replace the cert. Hope this helps!
Great blog post Derek, helped me out when I was learning View and subsequently passed the DTA (without any on-the-job experience with the product).