For Home Assistant enthusiasts that are also in the Apple ecosystem, the holy grail has always been full two-way control of your iPhone (or iPad and Mac) and Home Assistant. For the longest time you’ve been able control Home Assistant from your iPhone, but not the other way around. Until now. With iOS 27, iPadOS 27 and macOS 27, Apple has opened up the ability to control your Apple devices from Home Assistant via Shortcuts. This is a game changer. If you are on the ’27 beta train, you must be using developer beta 5 or later. In previous versions key functionality was broken.
Update August 30, 2026: I’ve revamped the automation to be more realistic. I now use an Ikea Bilresa button on my nightstand to turn on my iPhone sleep focus mode. I also added a section about third party iOS notifications being able to trigger Home Assistant automations. Also, in iOS 27 Apple finally added the ability set the sleep focus mode via Shortcuts.
Full Two-Way Shortcut Automation
For a long time the Home Assistant Companion app for Apple devices has exposed a lot of functionality to directly control your Home Assistant instance. Actions include activate scenes, control fan/lights/switches, perform action, press buttons, run scripts, trigger automations, and more. You could then easily create Shortcuts to automate these actions to control your smart home. Using Shortcut triggers you could even automate these actions, such as when you arrive home.
Recently I wrote two articles, centered around focsus modes, that show you the power of Shortcuts controlling your smart home:
Perfect Shortcut Focus Mode Tracking for iOS 27 and iPadOS 27
Home Assistant: iOS Focus Mode Automations (2027 Edition)
What feature did Apple add to the ’27 OS family that allows Home Assistant to now control your Apple devices? It actually boils down to a very simple new Shortcuts automation trigger: “When I receive a notification from“. And what unleashes the true power is the fact that you can add up three notification filters: Message, Title, Subtitle.
Combine this with the Home Assistant Companion app, and now you can control your iPhone/iPad/Mac from Home Assistant by merely sending custom notifications to your Apple device that can do anything a Shortcut can do. By using the custom notification filters, you can now send any custom text notification to your Apple device and it will trigger a Shortcut automation. Best of all, is that these Shortcut triggers can run in the background even if your device is locked.
Also, starting with iOS 27 Apple has now added the ability fully control the sleep focus mode via Shortcuts. Prior to iOS 27 they supported all focus modes EXCEPT sleep focus mode, which was bizarre.
Configuring Home Assistant Notifications
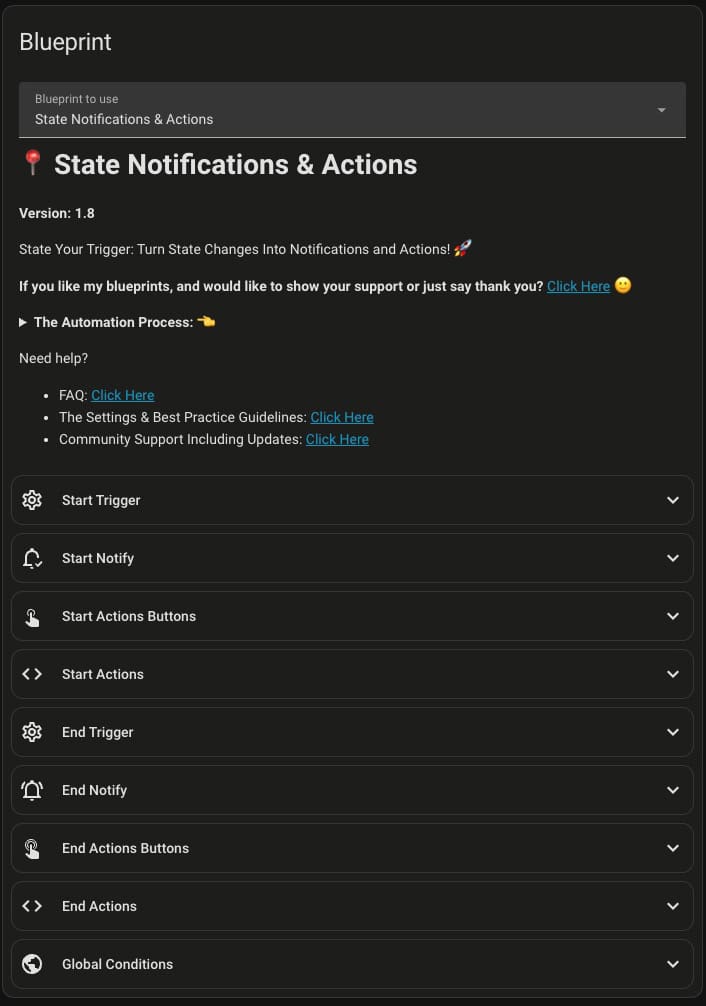
In order to control your Apple devices we need an easy way to send Home Assistant Companion notifications. My preferred method is to use a blueprint by the famous Home Assistant community member, Blacky. His blueprint is called “State Notifications & Actions” allows you easily send custom notifications to the Home Assistant Companion app.
In this example I’ll use my Ikea Bilresa button to turn on my iPhone sleep focus mode. I have the Ikea button on my nightstand, so when I got to bed all I need to do is tap the top bottom to kick off my good night automation.
This is the sequence of events:
- Configure the “State Notifications & Actions” blueprint in Home Assistant to trigger when the top button on my Ikea Bilresa button is pressed.
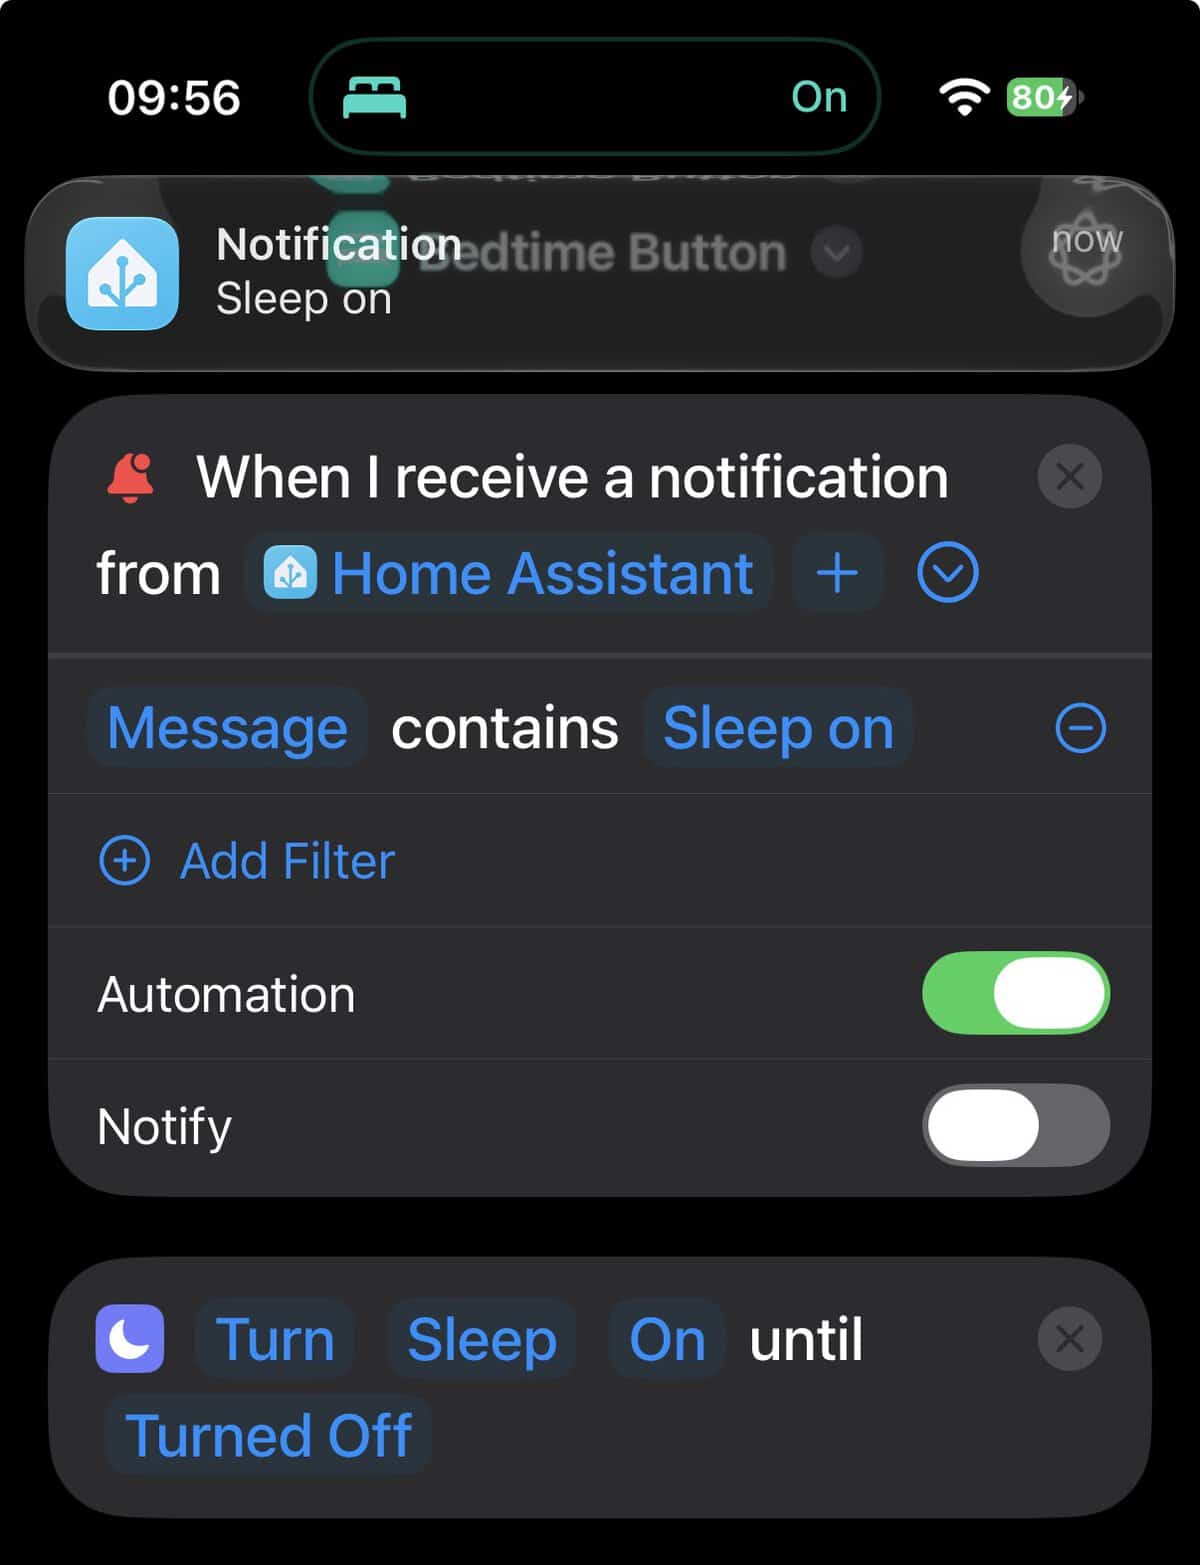
- Write an Apple Shortcut automation that triggers on notifications from the Home Assistant Companion app. I filter on the message body containing “Sleep on”.
- The blueprint will send a notification to my iPhone with the title “Notification” and a message of “Sleep on”.
- Even with the screen locked, the sleep focus mode will be turned on. All other Apple devices (iPad, Mac, etc.) will follow the same focus mode change.
State Notifications & Actions Blueprint
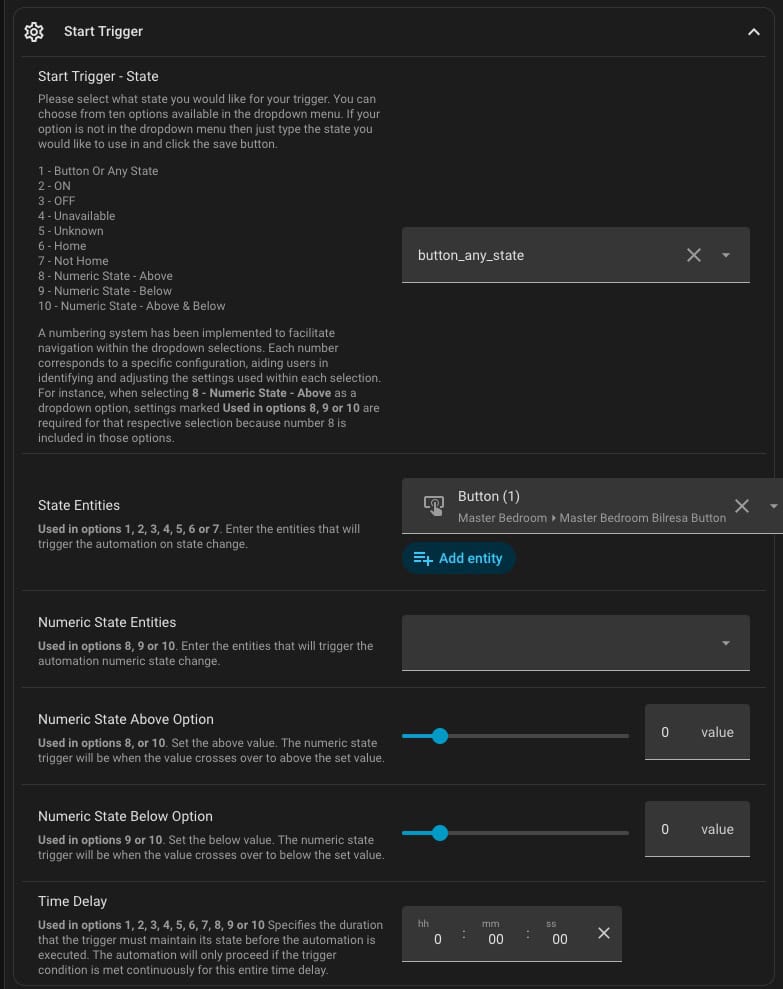
Blacky’s blueprint is highly customizable. The Blueprint has so many options that I can’t possibly cover them all in one post. So I’ll just stick to the very basics to get you started. First, we need to configure the Start Trigger section.
For this example the trigger very simple. I selected option 1 – Button Or Any State. Then selected the Master Bedroom Bilresa top button.
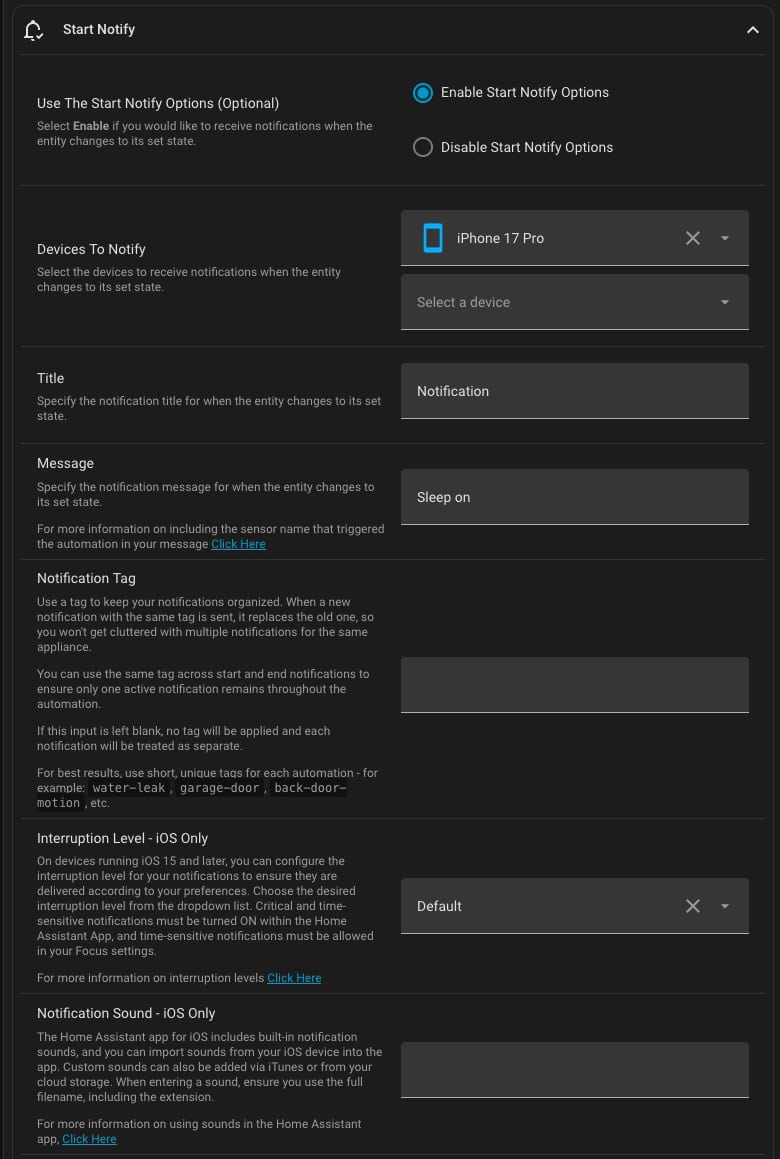
Next we need to configure the device to notify and the title and message. Here I selected my iPhone 17 Pro. You can also select your Mac or iPad, as well. As we will see when I configure the Shortcut trigger, I’m only filtering on the “Message” field by using the “Contains” filter. For aesthetics I suggest using a Title, such as Notification.
The Message field is where you can enter your custom message that the Shortcut will trigger on. Here I used ‘Sleep on’. Take note that you can’t just send a notification with just the Title. At a minimum you need content in the Message field. No other settings are required in the blueprint, so I won’t cover them here. Blacky has given us a ton of options to customize the notifications.
Shortcut Configuration
Configuring the Shortcut is very straightforward. You can do this on any OS ’27 device, including iOS, iPadOS, and macOS.
- Go into the Shortcuts app, tap Automations, tap +, then tap Edit.
- Scroll down the Apps section, then tap Notification.
- Tap App, then select Home Assistant app
- Tap Add Filter.
- Tap Title and change it to Message.
- Tap on Body and enter the text string that matches your notification message field. Does not appear to be case sensitive.
- In the action search bar type ‘focus‘ and select ‘Set Focus‘.
- Tap Do Not Disturb and select your desired focus mode.
- Tap ‘Off‘ and change it to ‘On‘.
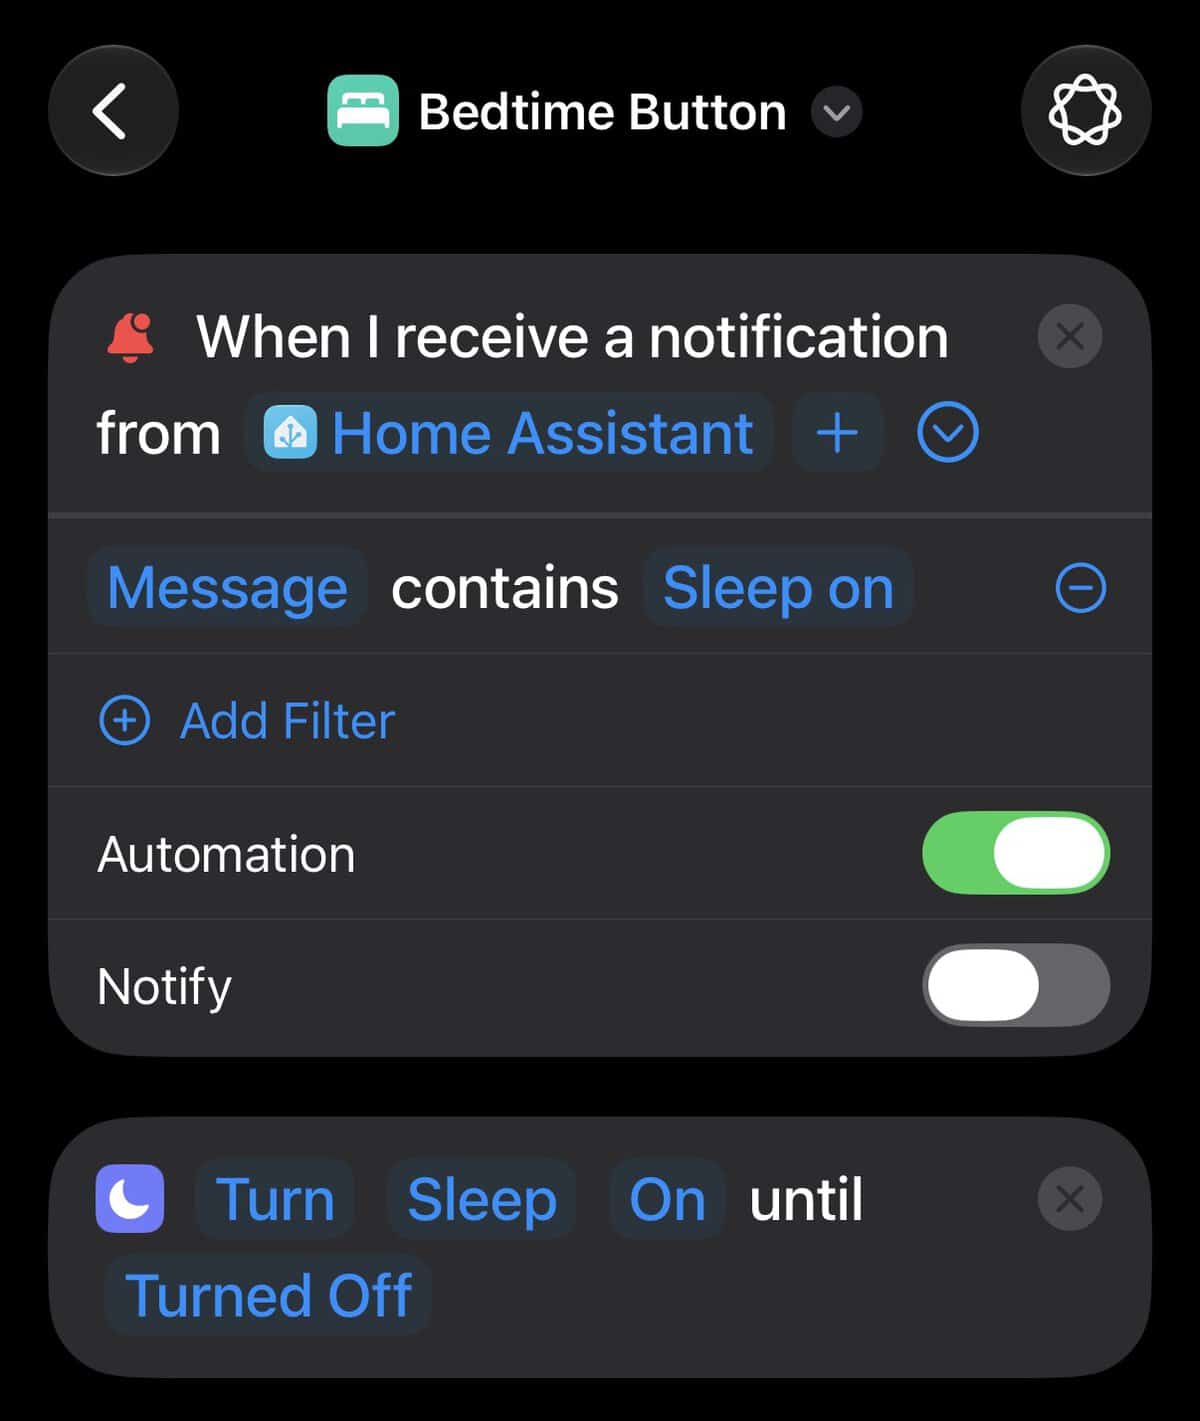
Now when I tap the top button on my Belresa my iPhone gets the Home Assistant notification, the shortcut is triggered, and my iPhone turns the sleep focus mode on. I have separate Home Assistant automations that triggers when the sleep focus mode is turned on, and it turns off lights and closes my blinds.
How about Third Party iOS Notifications?
Another really cool things you can do is leverage any third party notification on your iPhone to trigger a Home Assistant automation or set an entity state. For example, let’s say you have the Amazon app on your iPhone and you get a package delivery. You can create an automation trigger on your iPhone for the Amazon notification, then have the Shortcut use the Home Assistant companion app to trigger an automation, or set an entity state. For example, Home Assistant could flash some lights, or make an announcement over your smart speaker that a package has been delivered.
Summary
Apple has unleashed a whole new level of automation with their ’27 OS family and Shortcuts automation triggers. We are now able, directly from Home Assistant, to send notifications to our Apple devices and have them trigger any local actions that a Shortcut can perform. On the flip side, any third party notification on your iPhone can trigger a Home Assistant automation or set an entity state. This can be super useful to integrate devices/services that don’t have a Home Assistant integration.



I’m back to either bug you or cheer you on again! Another great one, Sir!
Like the other 2 articles on the topic were once again on the same page. I run HAOS on an always on headless Mac mini in VM Fusion. So, I set this up a few weeks ago and it’s been great!
My 2 uses so far: Automations:: notify the mini when a sensors battery is below 30% in Claude name of sensor. And Notify the mini when an automation fails.
The shortcuts: When the Mac gets the notifications it sets a reminder for the next day (in Apple reminders) for 7am telling me either what failed or what battery needs charging/replacing. I picked 7am because I’m usually wrapping up my coffee and I’ll take care of the “issue” after. *I also get an email each morning at 5am from the mini with my calendar, reminders, weather, birthdays, etc for the day so I see it in that list prior to 7am most days.