Unlike general presence detection, room-based location detection with Bluetooth can tell you who, or what, is in each room. This is great for highly customized automations with Home Assistant, that could, for example, set room lighting or the temperature based on who is in the room not just the mere fact that anyone is in the room. You could also get really advanced and setup your Home Assistant dashboard to automatically change on your phone based on which room you are currently in.
It’s not rocket science to use Home Assistant with Bermuda BLE Trilateration with cheap ESP32 devices running ESPHome used as Bluetooth proxies to setup room-level presence detection with person (or pet) awareness.
An alternative to Bermuda BLE Trilateration is using ESPresense, which requires dedicated ESP32s. I found it much harder to configure and tweak than Bermuda BLE. Not to mention the ESP32 device must be dedicated to ESPresense. Plus, trying to get a floor plan into the app and accurately translated into coordinates seemed like a monumental task. I’ve been using Bermuda BLE Trilateration for a few weeks and found it to be very reliable with my iPhone.
Update December 23, 2025: I forked an ESPHome package which can automatically grab your Bluetooth private encryption keys (IRKs), making tracking your phone or smart watch pretty easy. I updated the private bluetooth section with links to my repo.
What is a Bluetooth Proxy?
A Bluetooth proxy is a device running ESPHome that acts as a Bluetooth listener for Home Assistant. Instead of relying on your Home Assistant server’s built-in Bluetooth (which has limited range), these proxies extend Bluetooth coverage throughout your home.
Each proxy listens for Bluetooth Low Energy (BLE) beacons transmitted by your phone, smart watch or tracking tags. By measuring the signal strength (RSSI) of these beacons at multiple proxy locations, Home Assistant can determine which room you’re in. The closer you are to a proxy, the stronger the signal it receives.
Place one proxy in each room you want to track, assign it to the corresponding area in Home Assistant, and the Bermuda will automatically detect which room has the strongest signal from your device—telling you exactly where each person (or pet) is in your home. This updates in real time, and with my configuration, recognizes which room I’m in under 10 seconds.
Buying your ESP32 Bluetooth Proxy
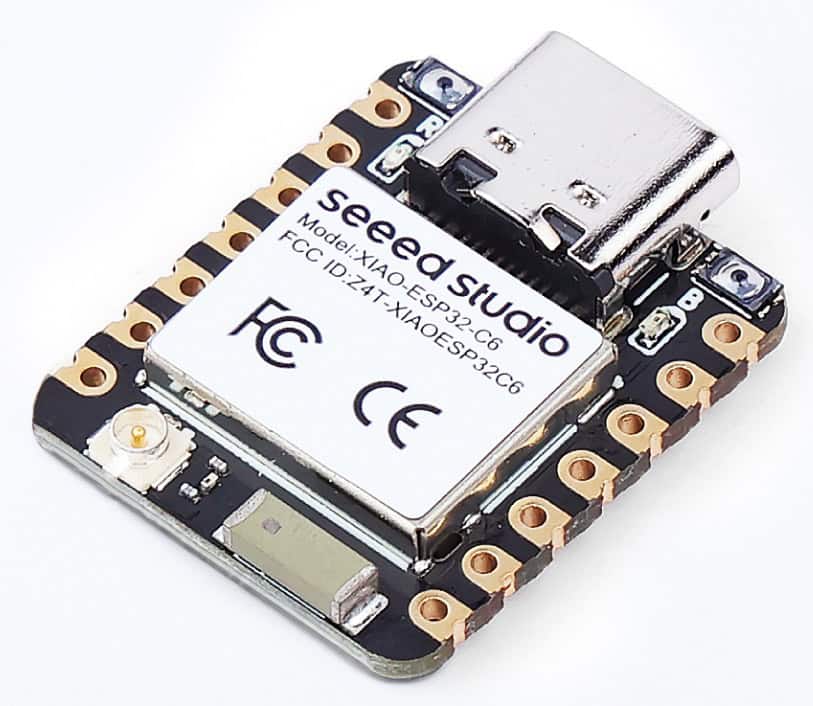
The ESP32 world is vast with a lot of different chipsets and manufacturers. They come in all kinds of different form factors, and are typically very cheap (under $10 USD). I wanted a leading edge ESP32 chipset, and found the Seeed Xiao ESP32-C6 to be a great device. At $5 USD, this is super cheap and allows you deploy a lot of them around the house on a budget.
The built-in PCB based Bluetooth/Wi-Fi antenna on the C3 and C6 is quite poor. I’m using their “A-01” external antenna with great success. At least at the time of this post, Seeed wasn’t including the A-01 antenna in the C6 kit. Seeed, however, offers an ESP32-C3 device which ships with the A-01 antenna. In the strongest terms possible I urge you to use the A-01 antenna.
Both Seeed boards work excellently as Bluetooth proxies. The Seed Xiao ESP32-C6 offers WiFi 6 (faster, more efficient), plus the option to add Zigbee/Thread later. The Seeed Xiao ESP32-C3 is slightly cheaper and perfectly capable for BLE tracking. For room presence specifically, either will work great—choose the C6 if you want future-proofing, or fall back to the C3 if it’s quicker to ship.
ESPHome, as of the date of this post, doesn’t yet enable Wi-Fi 6 nor take advantage of the Zigbee/Thread radio. For a more detailed side-by-side comparison, check out this Seeed blog post. Both are very tiny at ~21mm x 18mm, and are USB-C powered.
I don’t have my own 3D printer, but I am working with a person that does and is creating a case for the Seeed ESP32-C6 + A-01 external antenna. Once that is ready for purchase, I’ll update this post.
Seeed is certainly not the only manufacturer that you can run ESPHome on. There’s a large amount of devices and form factors, so pick the one that best suits your needs. Etsy and other sites are great for finding pre-made 3D printed cases for many common ESP32 devices. Check Reddit or Home Assistant forums for other popular ESPHome devices if you don’t like the C3/C6 options.
Powering your ESP32 Device
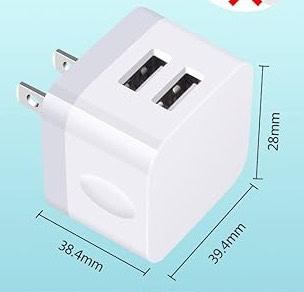
Your ESP32 device will need continual power to function as a Bluetooth proxy. After some diligent searching on Amazon, I found a pretty compact power adapter that can easily plug into the wall and not look terrible. This no-name compact USB charger is working very well for me.
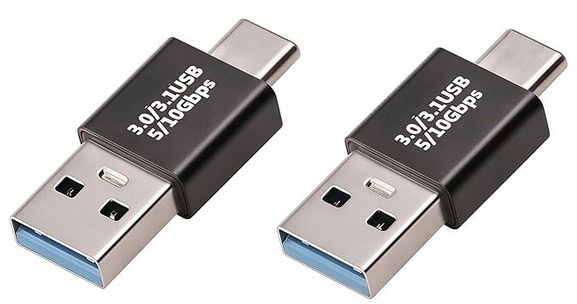
For the most compact setup, I found these very tiny USB-A to USB-C dongles so I can plug my ESPHome device directly into the USB dongle and wall charger.
Here’s the final product (antenna not shown). Yes it’s not as slick as a commercial all-in one product, but neither does it look terrible. The case I got is just temporary until I get the larger case which will accommodate the antenna. This can easily be tucked away behind your sofa, bed, or under a desk. Ironically, the power adapter and USB-C dongle cost more than the ESP32-C6 alone.

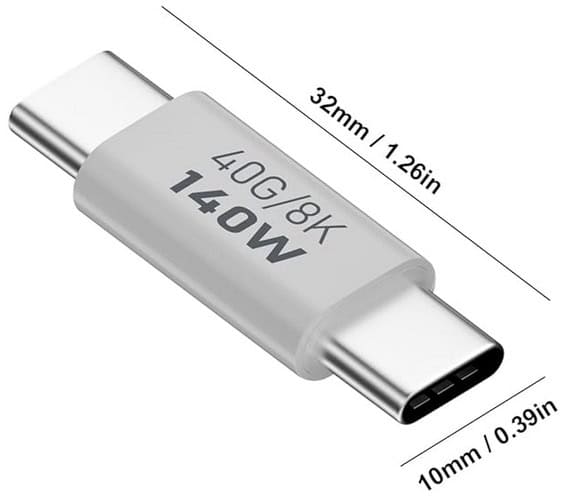
If you have a USB-C wall wart, then the tiny adapter below would be a great option:
Flashing your Seeed XIAO ESP32-C6 or C3
1. First up we need to install the ESPHome Device Builder add-on. This can be accomplished in a couple of clicks. Surf on over to the ESPHome Device Builder page and follow the painless installation process.
2. After ESPHome Device Builder is installed surf over to my GitHub repo for the C3 and C6 YAML configuration files we will need to copy to Home Assistant.
ESPHome-Seeed-Xiao-ESP32-C6-Config
ESPHome-Seeed-Xiao-ESP32-c3-Config
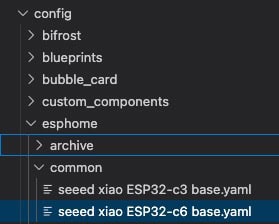
In my repo navigate to examples \ common and copy the base C3 or C6 YAML file to your Home Assistant server. It needs to be copied to config / esphome / common.
3. In Home Assistant navigate to the sidebar and select ESPHome Builder. In the lower right click on New Device. Click Continue.
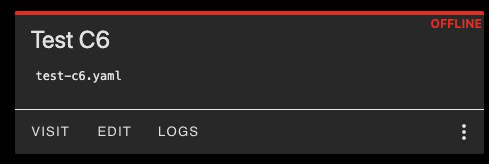
4. On the Create configuration dialog select New Device Setup. Enter the name of your proxy (e.g. Office C6) and click Next.
5. Select any device from the device type list, as we will be discarding most of the configuration. I selected the ESP32-C6. Click SKIP on the Configuration created! dialog.
6. Click on Edit for the device you just created.
7. Go back to my Github repo and in another tab and copy the contents of the corresponding /examples device config YAML file. It should look something like the screenshot below:
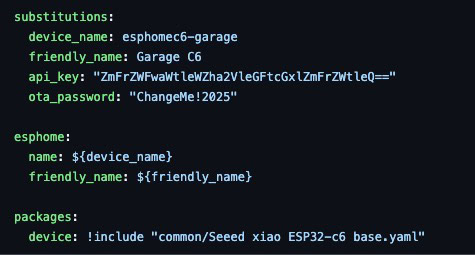
8. Go back to your ESPHome device builder and at the bottom of the dummy YAML configuration file paste the contents of my Github device configuration. Copy the API and OTA keys from the auto-generated YAML at the top into the corresponding places in my device YAML at the bottom.
9. Delete all of the auto-generated YAML above my YAML so that just the contents of my device config file remains. The net result should be a configuration file that looks like the above screenshot, but with your custom API/OTA keys.
10. Modify the device_name and friendly_name as needed. Device_name must be all lower case and contain no spaces. Friendly_name is more flexible with caps and spaces allowed.
11. If all went well, the only contents remaining in the device configuration file is the contents of my Github device file with your customized API keys and device names.
12. In the upper left corner of the ESPHome Device builder click on SECRETS. Overwrite the contents with the following and modify as needed for your Wi-Fi credentials. I would set the wifi_captive to something relatively simple since it’s only needed to reconfigure your ESP32 if it can’t connect to your Wi-Fi. Click on Save.
					# Your Wi-Fi SSID and password
wifi_ssid: "yourssid"
wifi_password: "yourpassword"
wifi_captive: "yourpassword"
13. Back in the main ESPHome Builder page click on the three dots in the bottom right corner of your device. Click Validate. Ensure your configuration is valid. If not, fix any errors. It will merge the contents from my base C3/C6 YAML file to your customized device YAML file.
14. Make sure you are using Chrome or Edge before you attempt to flash locally via USB. These two browsers have the needed ‘WebSerial’ serial port access built-in. Other Chromium based browsers might work too, but Chome/Edge are sure fire bets. Firefox and Safari do NOT work.
15. Click on the three dots in the lower right hand corner of your device in ESPHome Builder, then select Install. Select Plug into this computer. Plug in your ESP32 device to your computer. Select the serial device that looks like your ESP32 board. It might show something similar to USB serial/JTAG debug on a mac. Wait for the installation to complete. If you are on a Windows computer, device drivers might need to be installed.
Note: If you aren’t accessing Home Assistant over a valid, trusted, HTTPS connection you might be kicked over to the standalone ESPhome installation page. Wait for the firmware package to be built and select the Factory format package to download. This will download a bin file. Go to the ESPHome page, connect to your ESP32, then install the bin file via USB.
16. Monitor the installation and boot logs. You should see it boot up and connect to your Wi-Fi network.
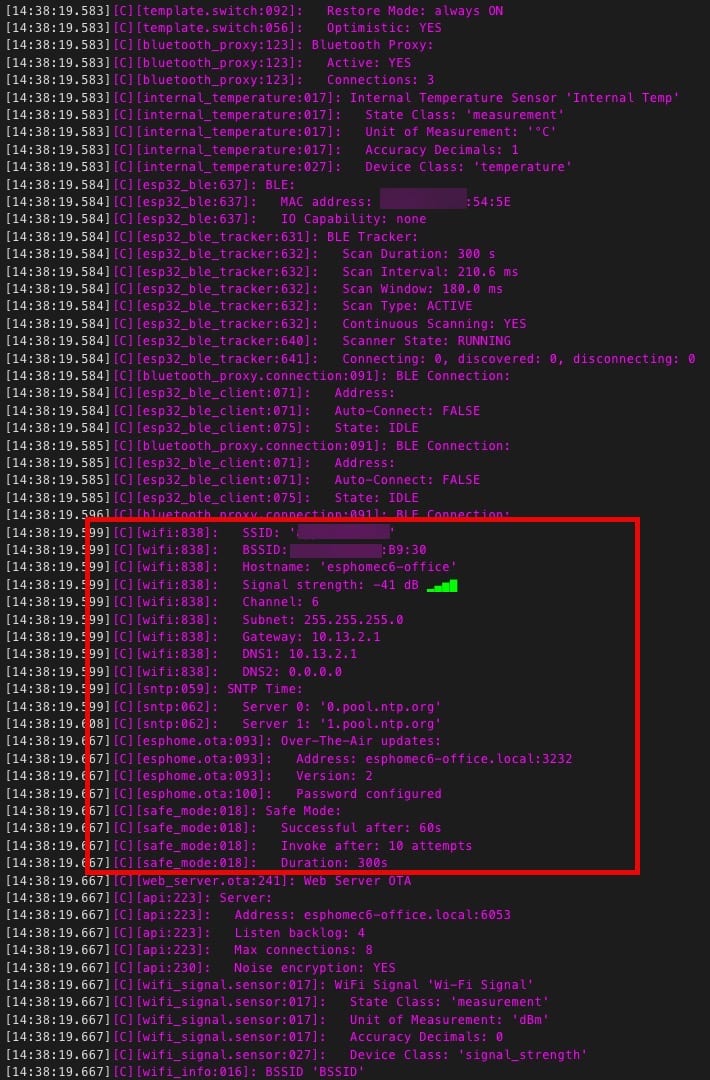
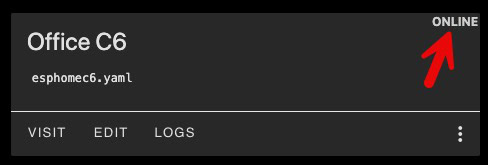
In ESPHome Builder you should now see your device shown as ONLINE.
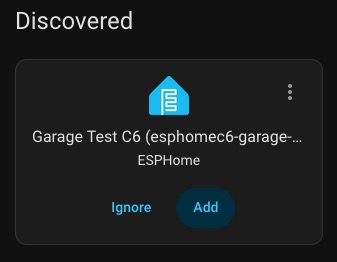
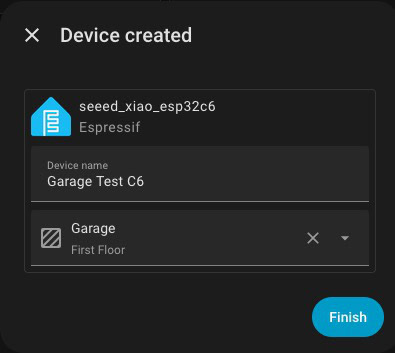
17. Once your ESP32 has booted and is on the network it should automatically appear under Settings -> Device & services. Click on Add and be sure to assign it to the room/area it will be placed in.
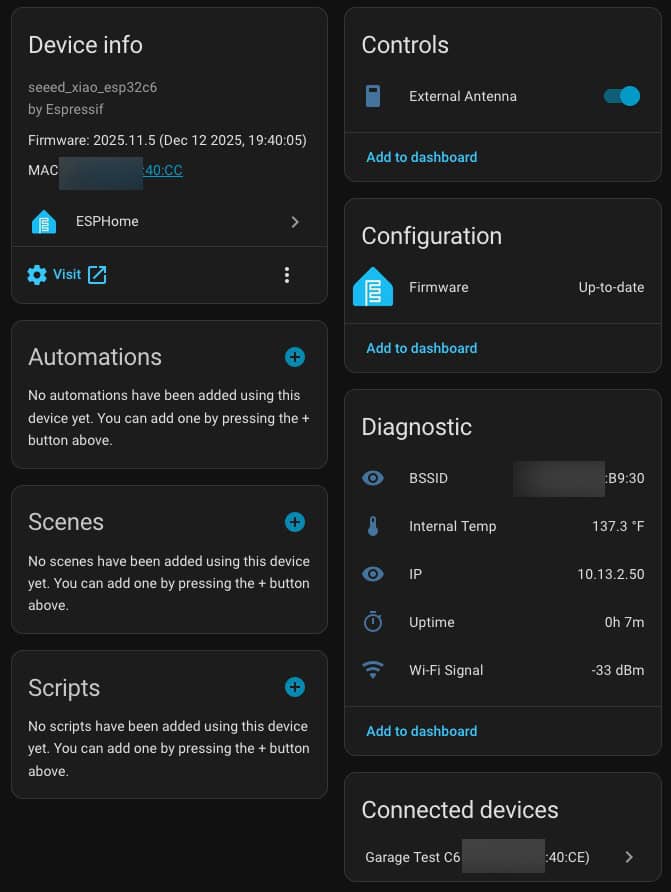
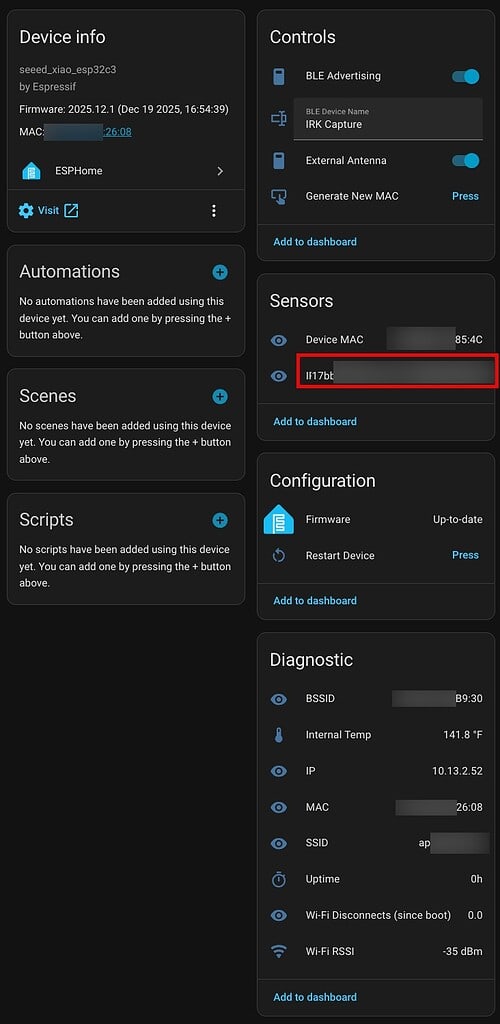
Once your ESP32 is added to Home Assistant, you will see some detailed device info. My customized C3/C6 YAML shows more details than other more basic configurations.
Private Bluetooth Addresses
Many modern smart devices—including iPhones and Apple Watches—use Bluetooth Resolvable Private Addresses (RPA) to protect your privacy. Instead of broadcasting a fixed Bluetooth address that could be used to track you, these devices constantly change their MAC address.
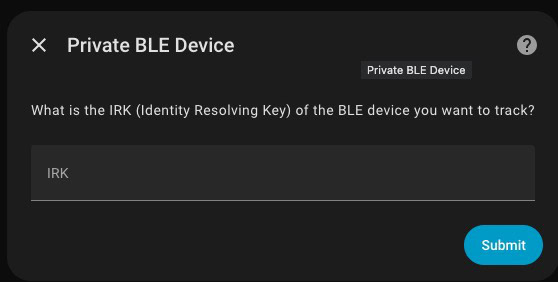
While great for privacy, this makes home presence detection challenging. The solution is Private BLE Device tracking in Home Assistant. By obtaining your device’s Identity Resolving Key (IRK), Home Assistant can identify which rotating addresses belong to your device, enabling reliable presence detection at home without compromising your privacy protection elsewhere.
Obtaining the IRK for each device you want to track can be a bit cumbersome. The Home Assistant Private BLE page has details on how to use macOS and Windows to find the IRK for paired devices. You will need to get the IRK for both iPhone and Android phones.
Over on my Github page, I forked an ESPHome package which can grab IRKs from your iPhone, Android phone, and smart watches. It is called “IRK Capture” and uses the ESP-IDF framework, giving it broad ESP32 device compatibility. Simply flash this package to your favorite ESP32 device, then pair your device to the ESP32 and it should instantly grab your IRK. My Github repo has all of the instructions.
Once you add a device via the Private BLE Device process it will automatically be detected in Bermuda BLE Trilateration.
If you want to track less smart devices, like a Tile tracker or something else, you may be able to directly use the Bermuda BLE Trilateration UI to list all discovered BLE devices near you and pick the right one.
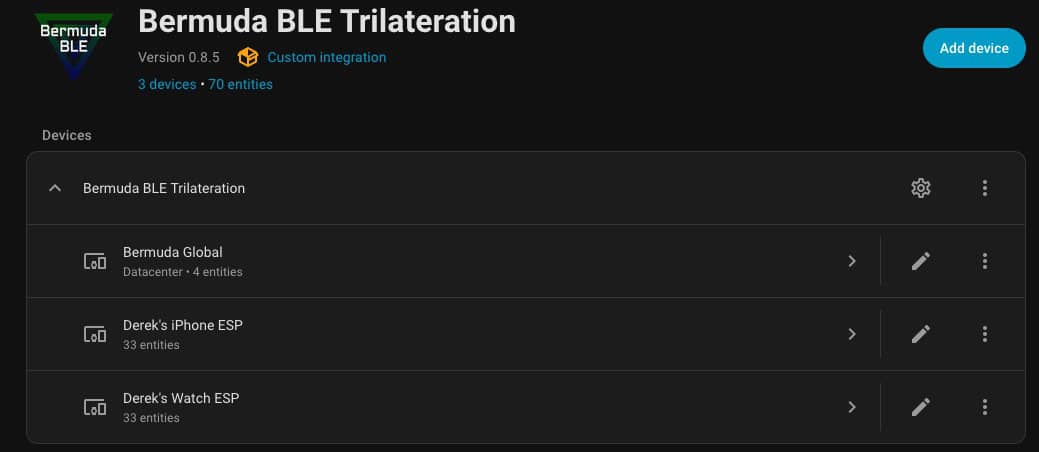
Bermuda BLE Trilateration
The Bermuda BLE Trilateration Github page has very detailed installation and configuration instructions. I installed it via HACS in just a few clicks. If you already have all of your ESPHome devices deployed and IRKs loaded, you are now ready to tweak the Bermuda BLE configuration for room-level presence sensing.
The Bermuda configuration instructions and FAQ are pretty decent in pointing you the right direction to tune your configuration for reliable BLE presence sensing. A few lessons learned from my deployment:
- Standardize on a SINGLE type and hardware configuration of ESP32 for all of your Bluetooth proxy devices. Signal strength readings can vary wildly between device types, which can make fine tuning very hard. I use all Seed Xiao ESP32-C6s with an external antenna.
- My iPhone is significantly more reliable in terms of not jumping room to room and providing consistent distance ‘pings’ to my ESPHome devices. My Apple Watch Ultra 3, maybe due to power savings, would often jump wildly far distances even without being physically moved.
- Be thoughtful with where you place your ESPHome devices. Think in 3D space for possible Bluethooth signal overlap. Do not be afraid to move your proxies to different positions to provide the most consistent experience.
- Take the time methodologically tune all of the needed settings in Bermuda for solid performance. Solid global settings and scanner RSSI configuration is KEY. In particular, fussing over accurate Reference Power and Attenuation settings is critical.
- If your location jumps room to room, don’t be afraid to adjust per-scanner RSSI offsets over a period of several days to fine tune the hand off between rooms.
- If you have an open concept floor plan, ESPHome device placement is critical as is fine tuning Bermuda settings.
- I would only deploy ESPHome devices in rooms where you actually need to know WHO is in there not just the fact that someone is in there. If you just need general room presence information, get a device like the Aqara FP300 which will be much faster to respond and more accurate.
- Be sure to check out the How and where to place your Proxies article.
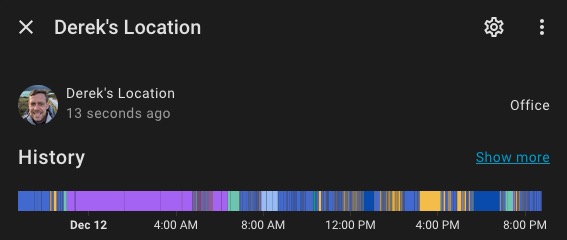
My ESPHome Fusion Template Sensor
I created a custom template sensor which combines both my ESPHome determined location, plus my location as determined by Home Assistant with the HA companion app on my iPhone. This means when I am ‘home’ that the sensor will tell me which room I’m in. If I’m not home, then it will display a variety of states such as which zone I’m in or the fact that I’m ‘away’. I then use this template sensor on my dashboards to show exactly where I am at all times.
					- sensor:
    - name: "Derek ESPHome Location"
      unique_id: derek_esp_location
      icon: mdi:account
      attributes:
        entity_picture: "/api/image/serve/23ad1620c640dd705d236a414b8dd7c2/512x512"
      state: >-
        {% set esp_area = states('sensor.derek_s_iphone_esp_area') %}
        {% set person = states('person.derek_seaman') %}
        {% if esp_area not in ['unknown', 'unavailable', 'not_home', ''] %}
          {{ esp_area }}
        {% elif person == 'not_home' %}
          Away
        {% elif person in ['unknown', 'unavailable'] %}
          Unknown
        {% else %}
          {{ person }}
        {% endif %}
Summary
By using ESPHome Bluethooth proxy devices sprinkled around your home, you can enable person-specific room-level tracking for very cool Home Assistant automations. For example, you could have a dynamic mobile dashboard which automatically flips to the right dashboard within seconds of stepping into a different room. Or you could customize the lighting or HVAC settings depending on WHO is in the room, not just the fact that the room is occupied.
You could also get creative and track your pets, by using a cheap Bluetooth tracker like a Tile. The possibilities are endless and you can get very creative. ESPHome devices are dirt cheap and not too hard to configure. One you get everything properly tuned, it’s really like magic.