This blog post will walk you through jailbreaking your Echo Show 5 Gen 1 & 2, or Echo Show 8 Gen 1, wiping Amazon’s Fire OS, and loading Lineage Android. You can then install the Home Assistant companion app, View Assist, Fully Kiosk or whatever you want to display your Home Assistant dashboard. In this post I cover:
- Jail Breaking your Echo Show 5 (Gen 1 and 2), Echo Show 8 (Gen 1 only)
- Wipe Fire OS and load Android Lineage 18.1
- Rooting Lineage
- Install F-Droid with privileged extension (auto app updates)
- Installing the Home Assistant Companion app
- Tweaks for the Home Assistant Companion app
- (Optional) Install Obtainium for View Assist
For this procedure I used a Windows computer and a micro USB cable. The XDA forums also provide Linux alternative commands, if you wish to go that route. Links to those posts are further on in this post. After your Echo Show is jail broken, you can use macOS/Windows/Linux to do any additional configuration that you wish via the standard Android SDK CLI tools.
January 10, 2026 Update: The wonderful people over at the XDA forums jailbroke the Echo Show 5 Gen 2. I’ve updated this post to include links. I haven’t personally tried Gen 2, but it should follow the same process.
Background
A couple of weeks ago I was made aware via social media that Amazon Echo 5 and 8 Generation One devices were jailbroken and could be loaded with a stock Android LineageOS. This opened up the possibility of using them with Home Assistant as touch screen smart speaker dashboards. I was excited, as up until this point I didn’t have any Home Assistant dashboard devices around the house.
I immediately jumped on E-Bay and ordered two Echo Show 8 Gen 1 devices, and after a successful Home Assistant experience, ordered two Echo Show 5 Gen 1s as well. I now have four Lineage Android Home Assistant smart devices sprinkled around the house.
The Echo Show devices do not have high end CPUs. Lineage is more alpha/beta, than “production” quality but has been quite stable for me. Bottom line: This is more an experiment in the unknown, and expect some hiccups. However, on balance Lineage Android plus Home Assistant has been a very positive experience. I’m using them with View Assist, which really opens up the possibilities beyond just showing a Home Assistant dashboard.
Finally, I had no role in creating the exploit. I wrote this post because I haven’t seen a single one-stop-shop for the entire jailbreak process, rooting, and loading various Home Assistant related apps. I’ve pieced together all the content in this post from various sources, coupled with my own experiences. Before you proceed to buying and jailbreaking an Echo Show 5 or 8, thoroughly read the XDA Forums posts to understand the scope of what to do, and if the exploit is still unpatched by Amazon.
E-Bay Buying Tips
My E-Bay buying experience for the Echo Show devices had a few hiccups. It seems that often the sellers don’t know what generation of device they are selling. Twice I got Generation 2 devices, not their explicitly advertised Generation 1 devices. Another had a dead external power brick. And one was still registered to an Amazon account.
Also, at any time Amazon may (will?) patch the exploited used to jailbreak the devices. So if you are interested in going down this road, I would personally buy your devices ASAP and jailbreak them before Amazon has patched the exploit. I would also strongly urge you visit the XDA Echo Show forums, where this exploit was first launched to verify that Amazon hasn’t patched it.
Echo Show 5 and 8 Gen 1 devices can be bought for about $75/each or less, shipped, here in the USA. Carefully review any listings before purchase, and you might even message the seller before buying to triple check you are buying a Gen 1 device.
Factory Fresh Echo Show Setup
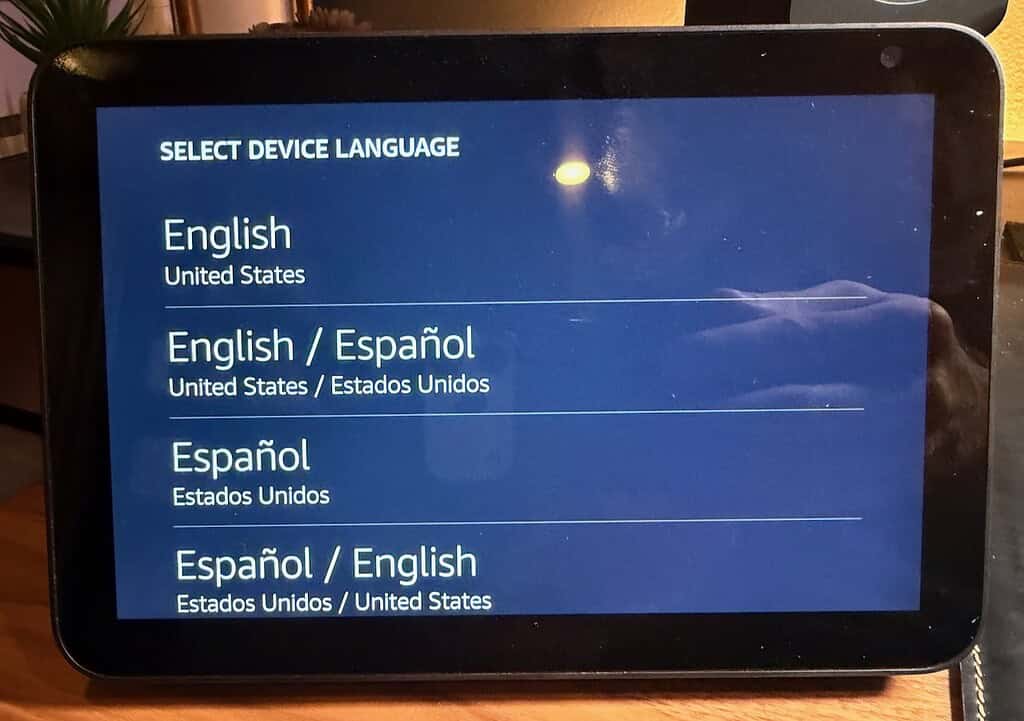
Plug in your new Echo Show 5 Gen 1 or 2, or Echo Show 8 Gen 1 (only). Wait for it to boot and select your language. Note: At the time of the publication of this post, NO OTHER Echo Show models OR generations are supported. You MUST use an Echo Show 5 Gen 1 or 2 or Echo Show 8 Gen 1 (only). You can keep tabs on the XDA Amazon forum for any newer developments for additional models that have been jail broken.
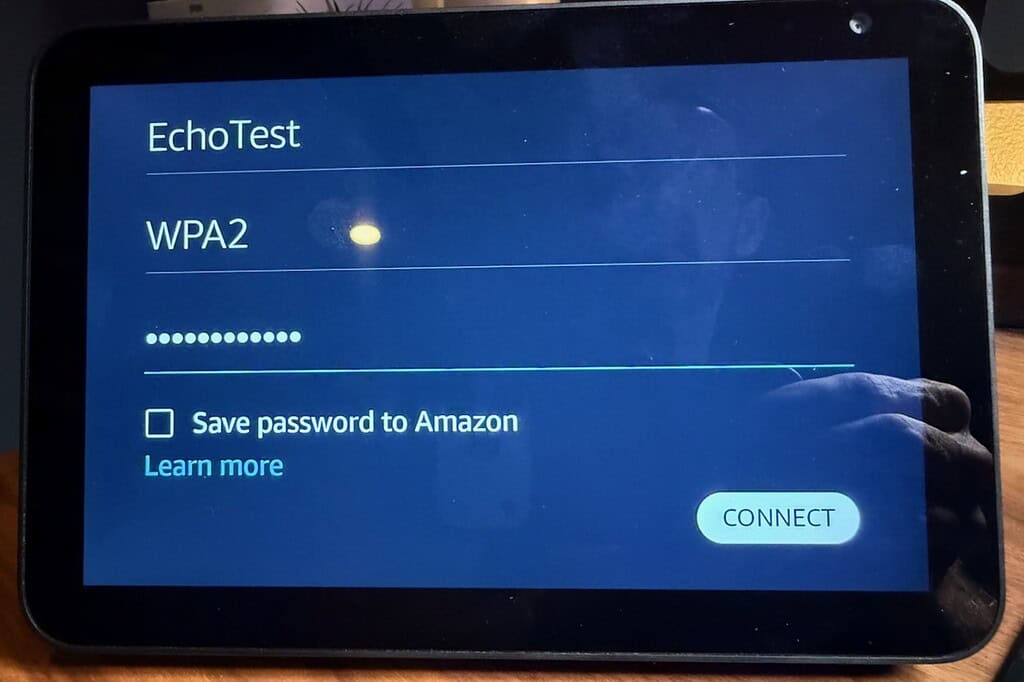
Select your 2.4 or 5 GHz network SSID, then enter your Wi-Fi password.
Review the Wi-Fi settings to make sure everything looks good.
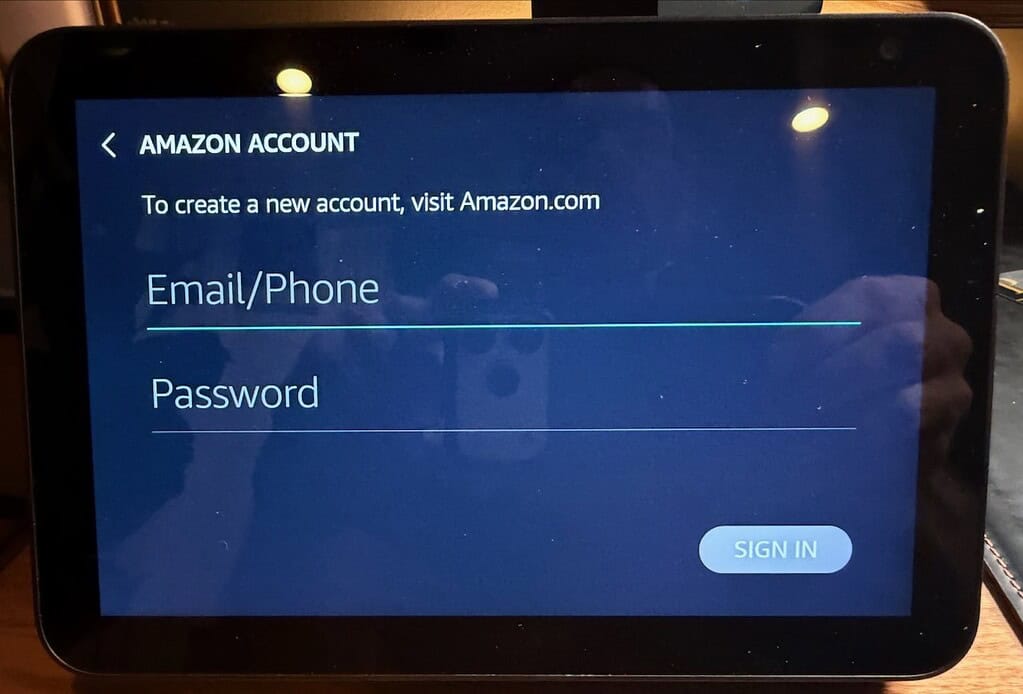
Link the Echo to your Amazon account via email/phone and password.
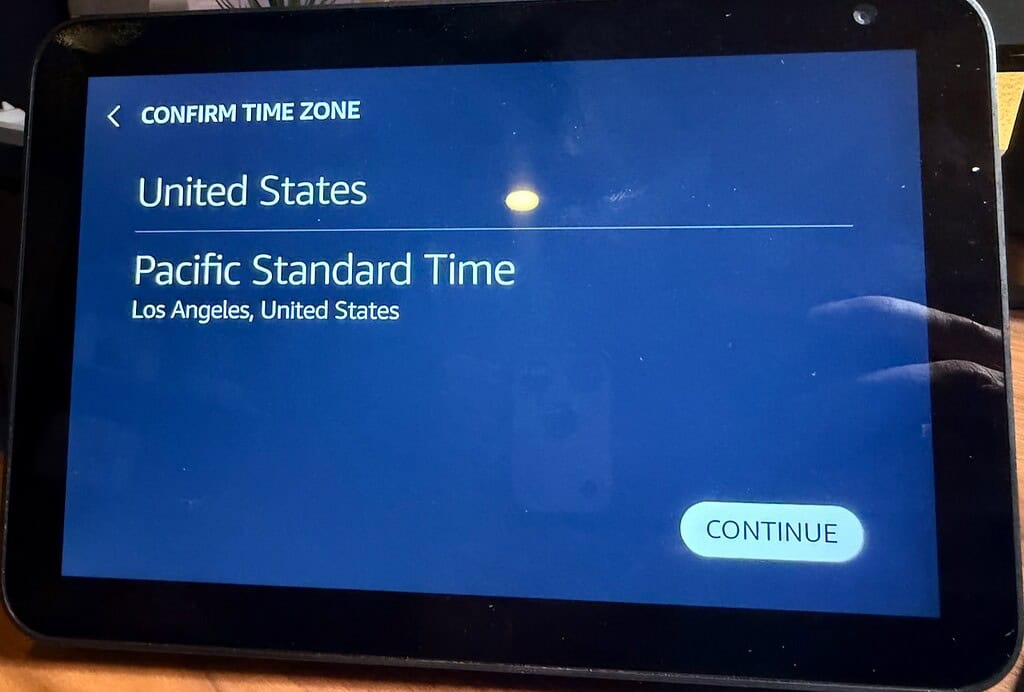
Select your Time Zone.
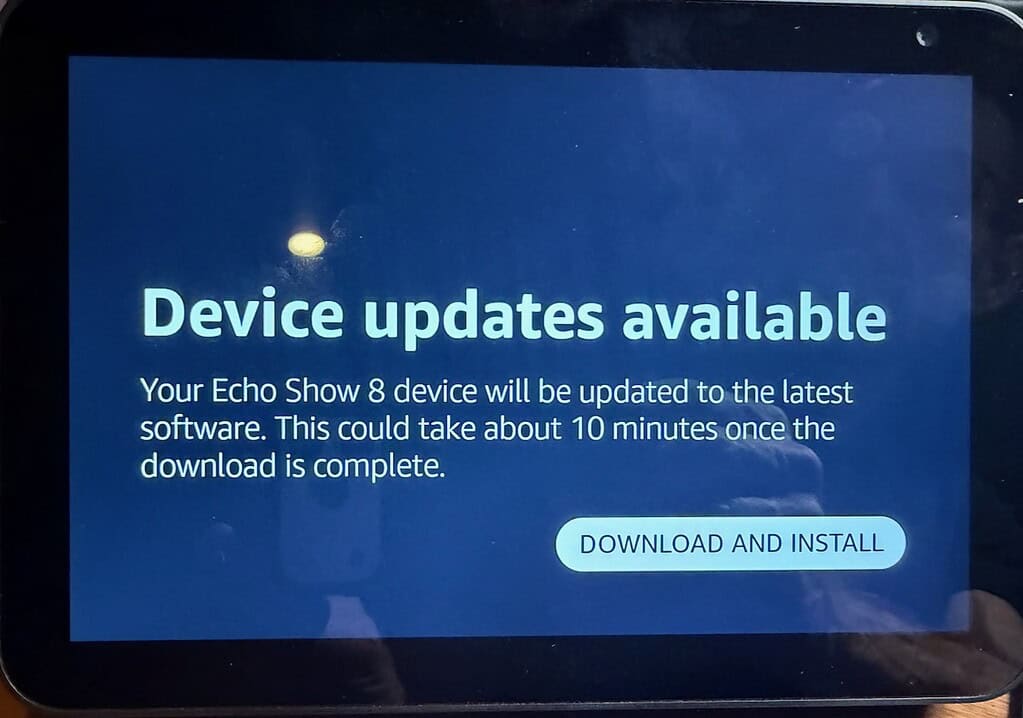
Tap through any more setup screens until you reach the Device Updates available screen. Download and install the updates. Wait a few minutes for the updates to install.
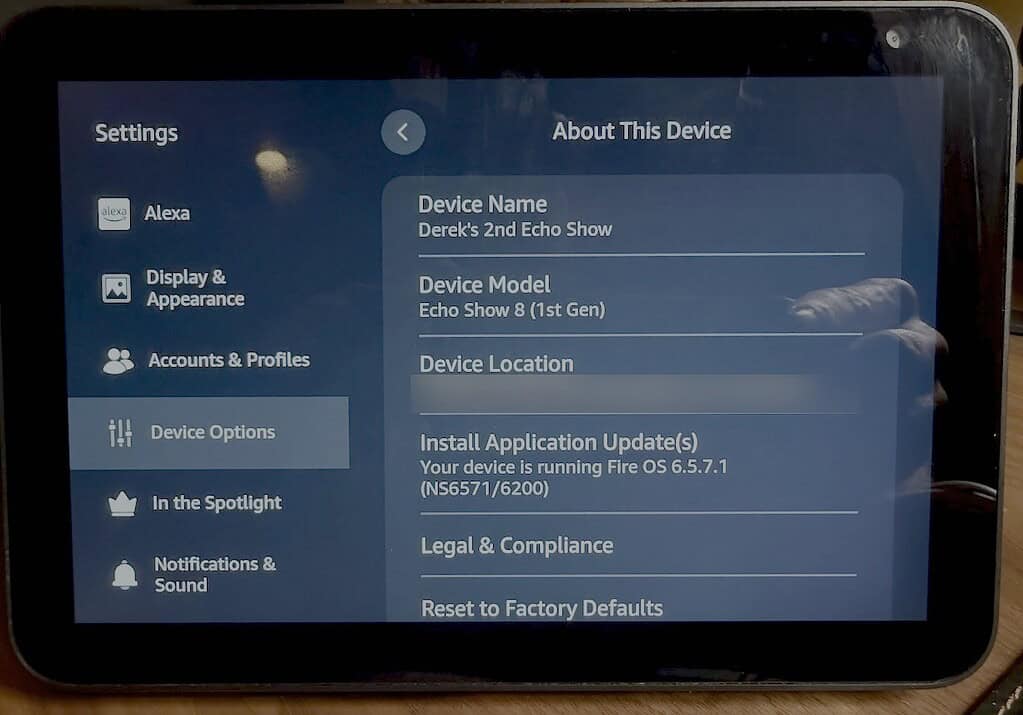
After the update skip through any additional configurations screens, such as photos and sidewalk. Once you reach the home screen, swipe down and go into Settings, then tap on Device Options. In the right pane scroll down “About this device” and if there’s another update, install it. Go through the update process.
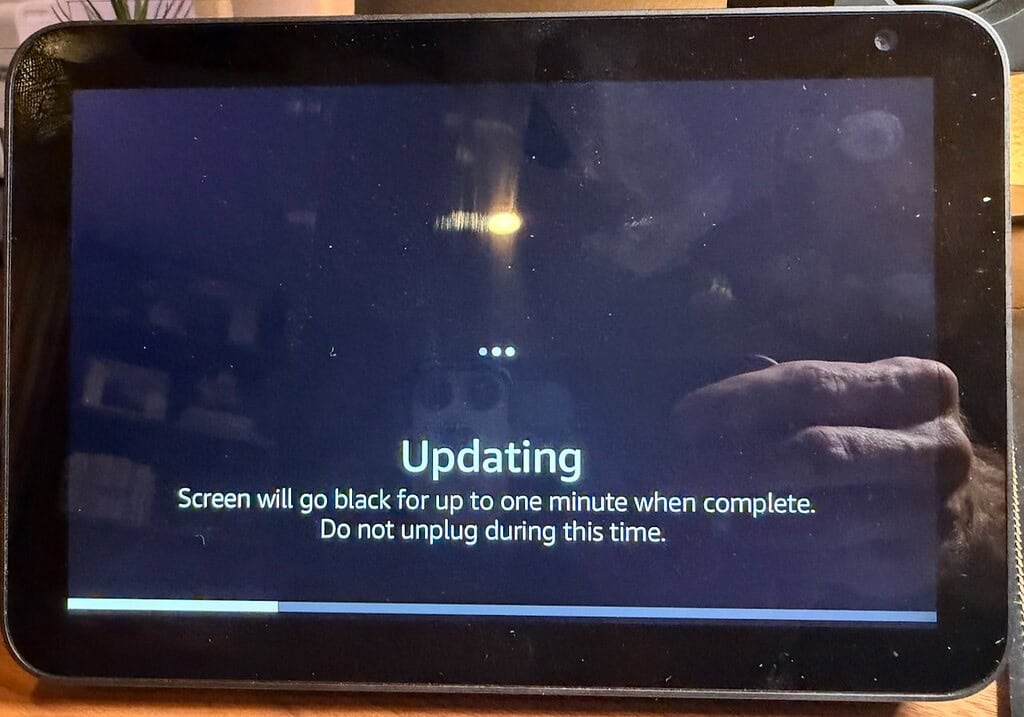
For the Jailbreak to work (as of the date of this post), you MUST be on Fire OS 6.5.7.1. I’ve observed that on my Echo Show 8 it took multiple software updates and patience to finally land on Fire OS 6.5.7.1.
For about 30 minutes even after the prior two updates, it was ‘stuck on a pre-6.5.7.1 version. Only after waiting several minutes did it “find” the 6.5.7.1 update. Once you are on 6.5.7.1 I would disconnect the Wi-Fi for the rest of the procedure, in case your Echo Show tries to download another update that has the exploit patched.
Jailbreaking your Echo Show 5 & 8 Gen 1
Note #1: I used Windows as the platform of choice to run all the commands. Linux is supported, but I don’t cover those commands here. You can check out the XDA forum links below to find out more about the Linux steps.
Note #2: A reader told me that with three of his devices he had to: 1) Do the initial Echo setup plus software updates, have the flash attempt fail 2) Do the initial setup again, 3) Then successfully flash a second time.
- On your Windows computer download and install the Kindle Fire Driver for Windows. On my Windows 11 25H2 machine the installer said it failed, however, the USB drivers were still installed and working after I rebooted. If the Kindle drivers do actually fail for you, you can try the manual Google USB driver package.
- Next you need to download the latest jailbreak package zip package. There are different zip packages depending on which Echo Show model you are using. Download:
Echo Show 5 Gen 1: This XDA post (amonet-checkers.zip)
Echo Show 5 Gen 2: This XDA post (amonet-cronos.zip)
Echo Show 8 Gen 1: This XDA post (amonet-crown.zip)
3. Unzip the amonet package that you downloaded.
4. Open an elevated command prompt and CD into the directory where you unzipped the amonet package and go into the amonet sub-directory.
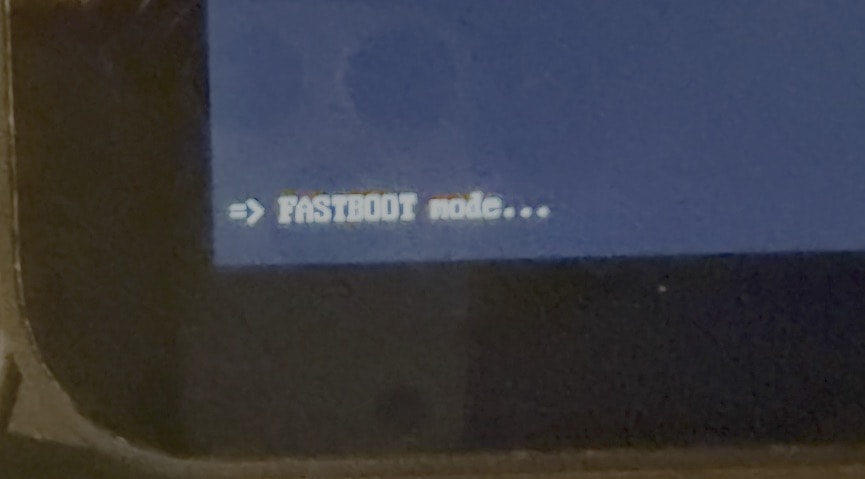
5. Pull the power to your Echo Show 5 or 8. Hold down all three buttons on the top and plug in your Echo Show. If successful you should see FASTBOOT mode in the lower left.
6. Plug in a micro USB cable to the Echo Show 5 or 8, then plug it into your Windows computer.
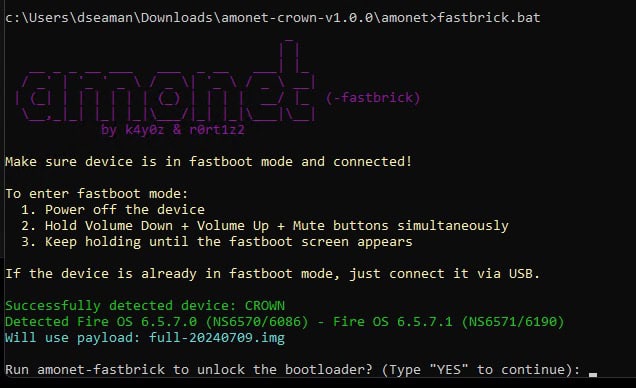
5. At the command prompt run fastbrick.bat.
6. If you have the right Echo Show and firmware the batch file will detect it and ask you to confirm the jailbreak process. Enter YES.
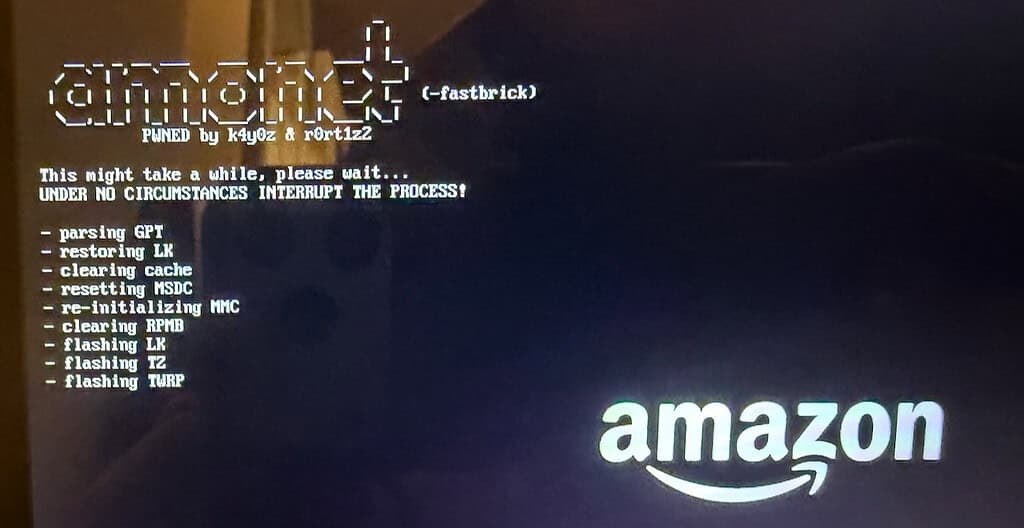
7. If the jailbreak is successful, you will see an amonet screen appear on your Echo show and see the flashing process. After the flashing process is finished, the Echo Show will reboot into the new custom boot loader, TWRP.
8. Download and unzip the Android SDK Platform Tools for Windows.
9. Pull the power to your Echo show. Hold down the Mute button, and apply power. Wait until it boots into Hacked fast boot mode. Open an elevated command prompt in the unzipped SDK platform tools directory and type:
fastboot oem flags 61

10. Go to the applicable link below and download the boot-root.zip file for your Echo show model. The boot payloads are different, but the file names are the same. You MUST use the correct one as they are different! The file sizes/names are they same but the contents are different and your Echo show will be stuck in a boot loop if you use the wrong one.
- Echo Show 5 (Gen 1)
- Echo Show 5 (Gen 2)
- Echo Show 8
11. Unzip the boot-root file and copy the boot-root image file into the unzipped Android SDK directory. Run the following command:
fastboot flash boot boot-root.img

12. Now enter:
fastboot reboot
13. After your Echo show reboots to the home screen, pull the power. Now that you have the modified boot loader, there are three boot modes:
- Hacked Fast boot – Apply power while holding MUTE button
- TWRP / Recovery – Apply power while holding VOLUME UP
- Stock FASTBOOT – Apply power and hold ALL THREE buttons
Boot your Echo Show device back into Fire OS and run the following commands:
adb shell
settings put global disable_bouncer 1

14. At this point Fire OS has been jailbroken and you could side load new apps. However, for better Home Assistant app responsiveness, we will wipe Fire OS and flash your Echo Show with Android LineageOS. This also eliminates the chance that Amazon could sneak an update on your Echo show to disable the exploit.
Flashing LineageOS 18.1
Now that we have a custom boot loader installed (TWRP) we can flash the Echo Show with Android LineageOS 18.1. Use the following download links based on your Echo Show model:
- Note that each model has different ZIP files, so only grab the one you need. Place the ZIP file in the same directory as your Android platform tools. Do NOT unzip it.
- Boot into TWRP / Recovery mode (pull power, hold VOLUME UP, apply power, keep holding).
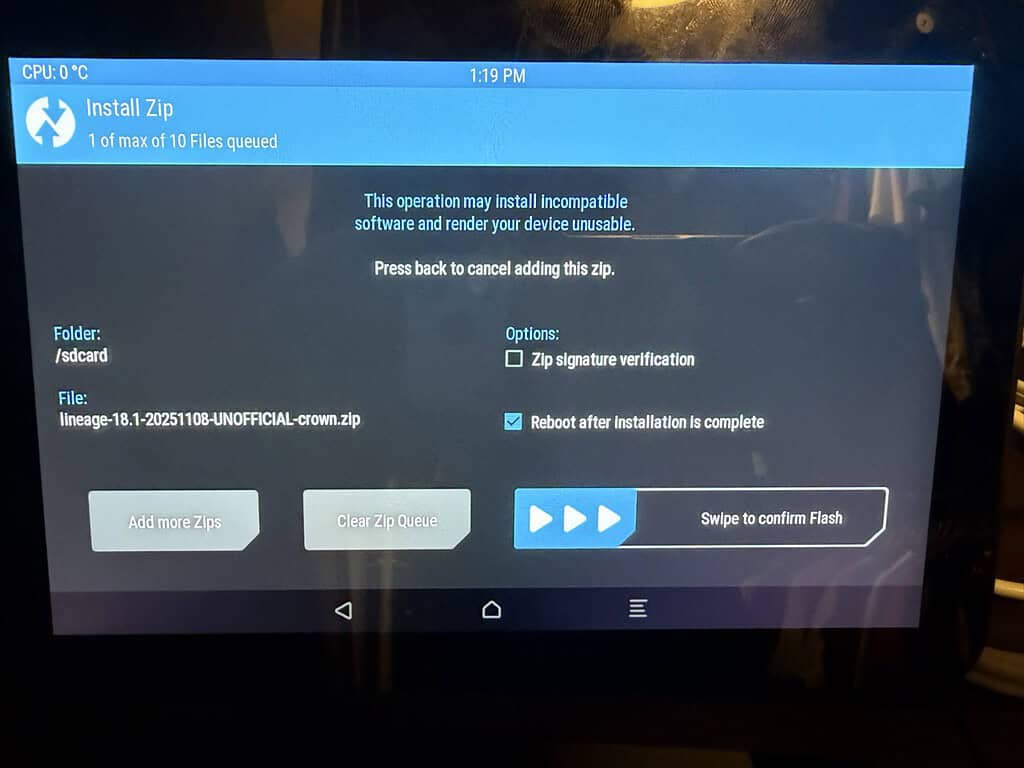
- Once in TWRP mode, run the following command, using the filename of the ZIP archive you downloaded. Wait for the upload to complete.
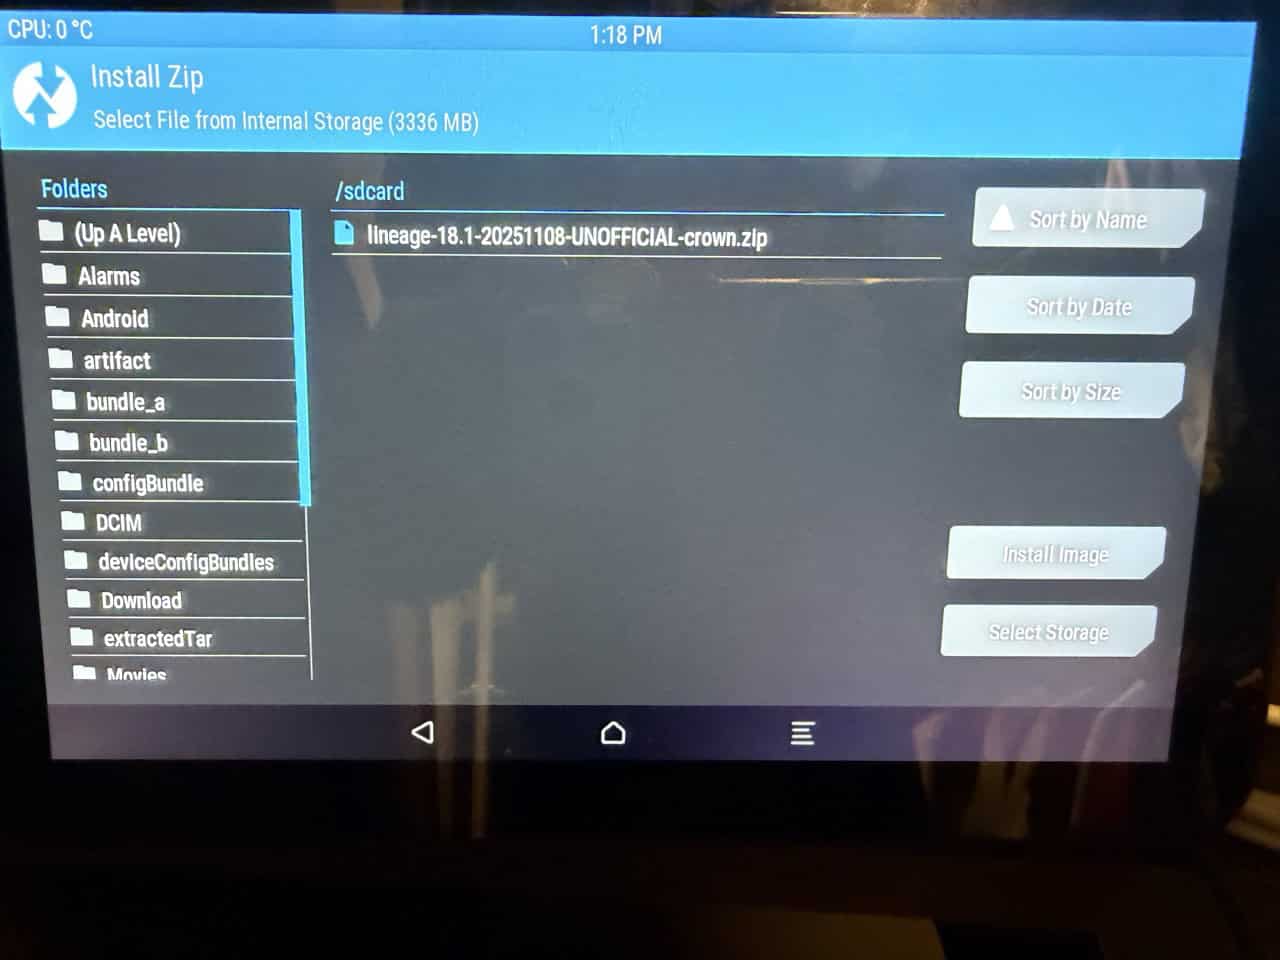
adb.exe push lineage-18.1-20251108-UNOFFICIAL-crown.zip /sdcard/


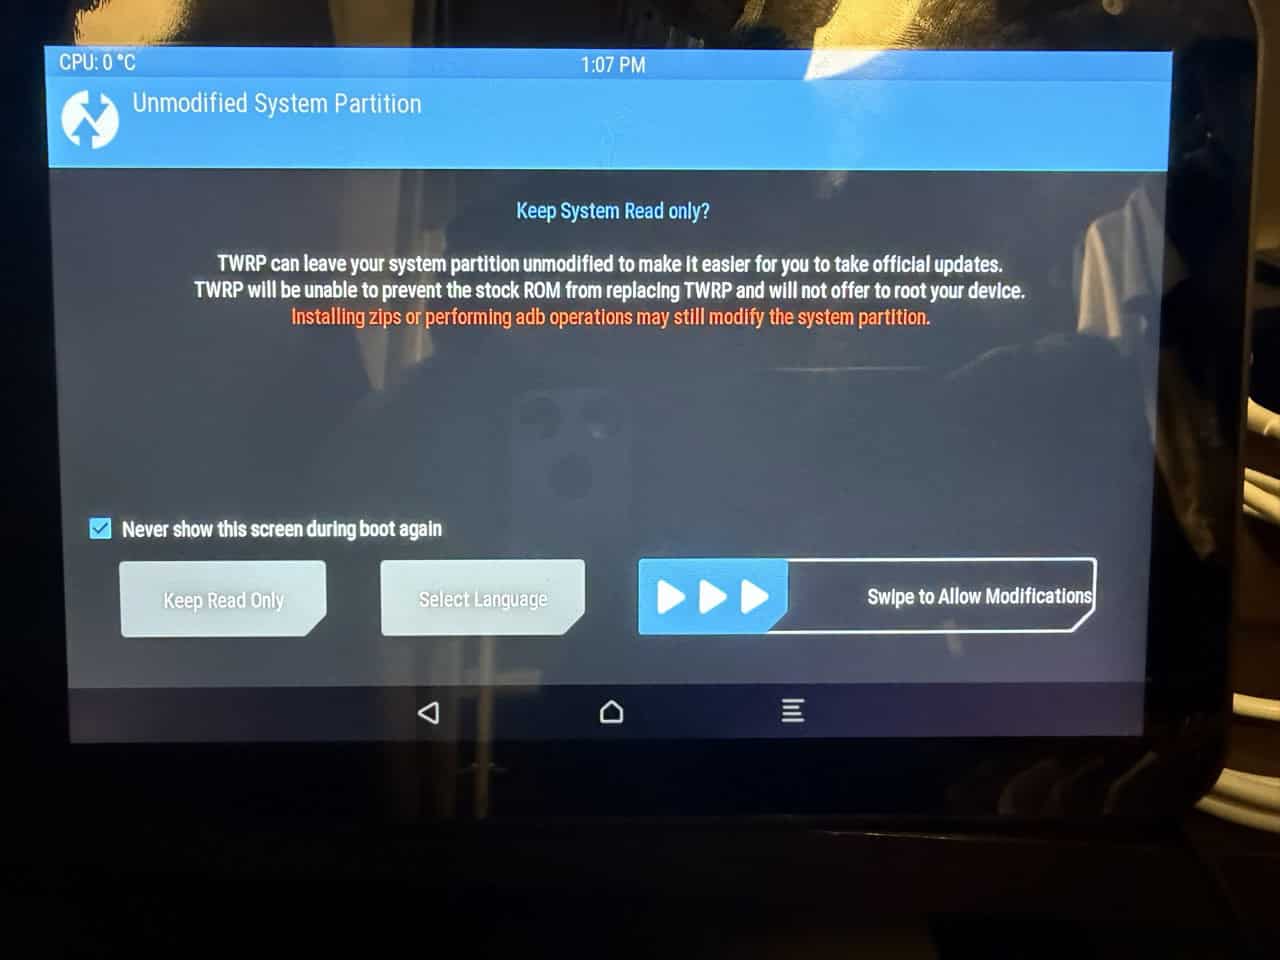
4. Go to your Echo Show and it should be on the TWRP screen. Tap on the “Never show the screen…” and swipe in the indicated area.
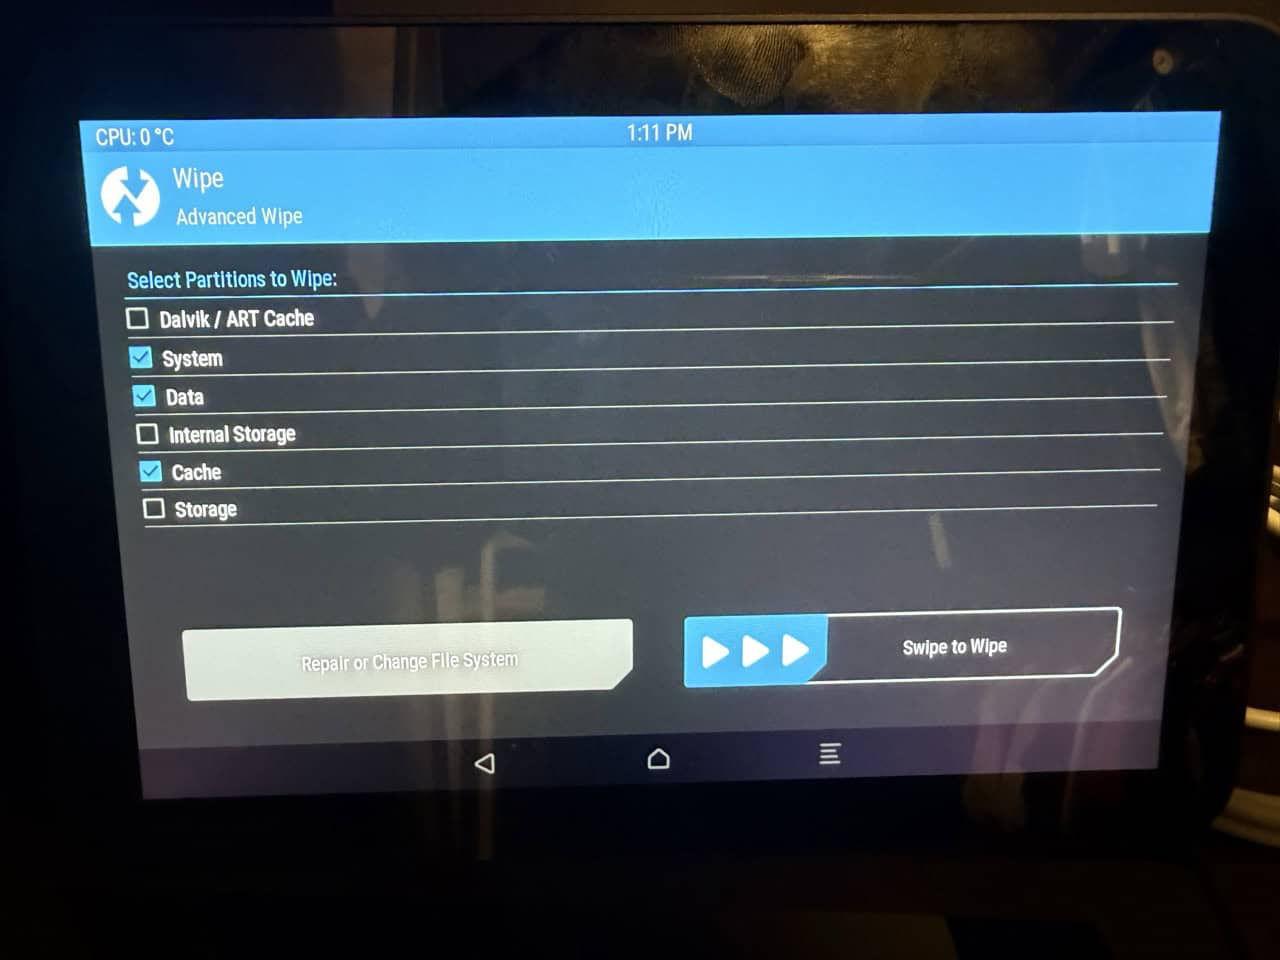
5. On the next screen tap on Wipe, then Advanced Wipe. Tap on ONLY system, data, cache. Swipe in the indicated area to wipe the selected partitions.
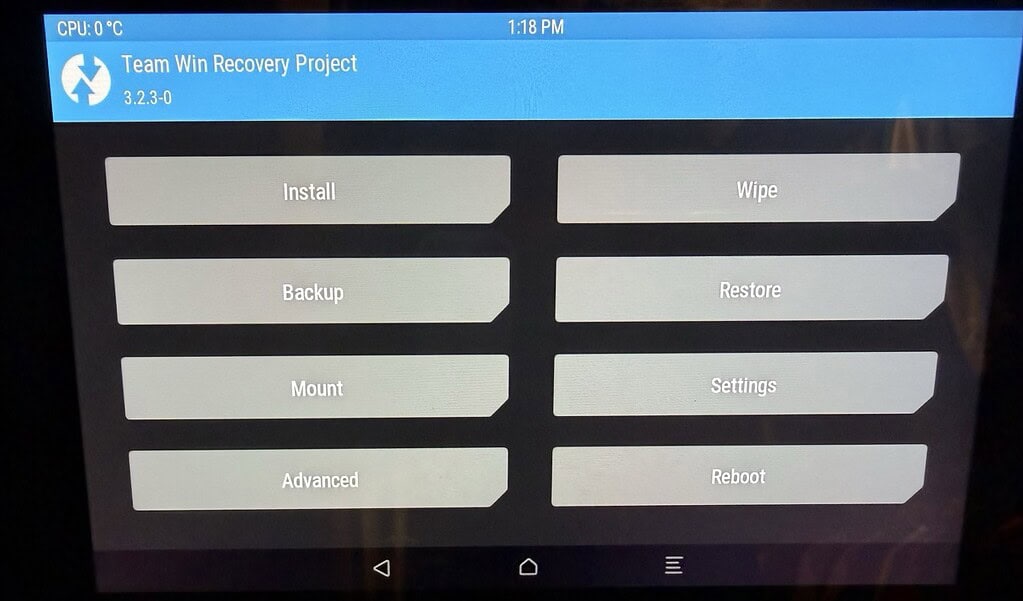
6. After the partitions are wiped, tap Back. Tap again in the upper blue area to return to the main TWRP home screen.

7. On the main TWRP home screen tap on Install.
8. Under /sdcard you should see the lineage ZIP file that you uploaded. Tap on the zip and tap Install Image. On the confirmation screen tap the reboot option then swipe to flash.
9. If all goes well, it should flash then reboot into LineageOS with a nice white welcome screen.
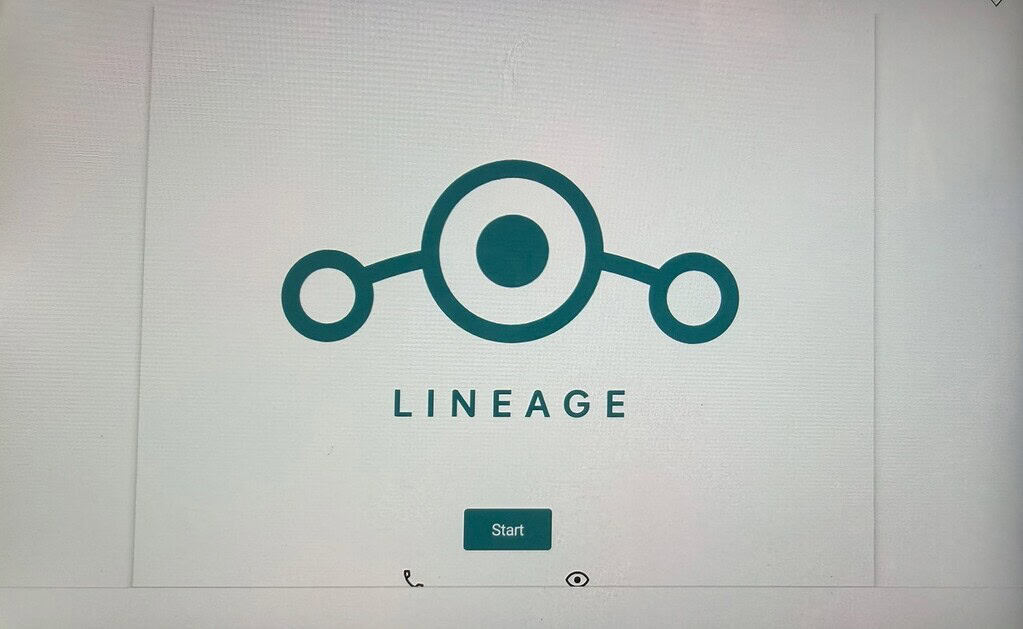
10. Tap through all of the welcome screens to setup time zone, date/time, Wi-Fi, etc. You should now be on the LineageOS desktop. And yes, LineageOS supports Wi-Fi WPA3.
11. Swipe up from the bottom of the screen and open the Settings app.
12. Tap on the About Tablet option. Scroll down to the build number and tap it rapidly 7 times to enter developer mode.
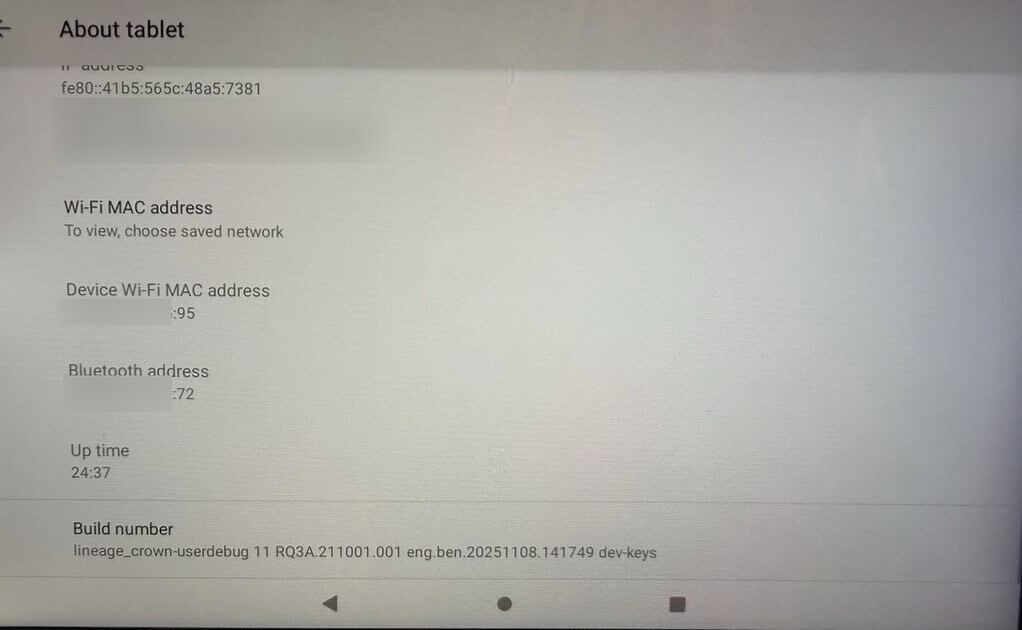
13. Go into Settings, System, Advanced, Developer Options. Enable USB Debugging and tap through the approvals.
14. Back on your computer run the following command and verify that the serial number of your Echo Show is listed. This means your Echo Show is in debug mode and we can side load packages (among other things).
adb devices

LineageOS Tweaks (Optional)
If you want tweak LineageOS, I have a few optional commands you can run.
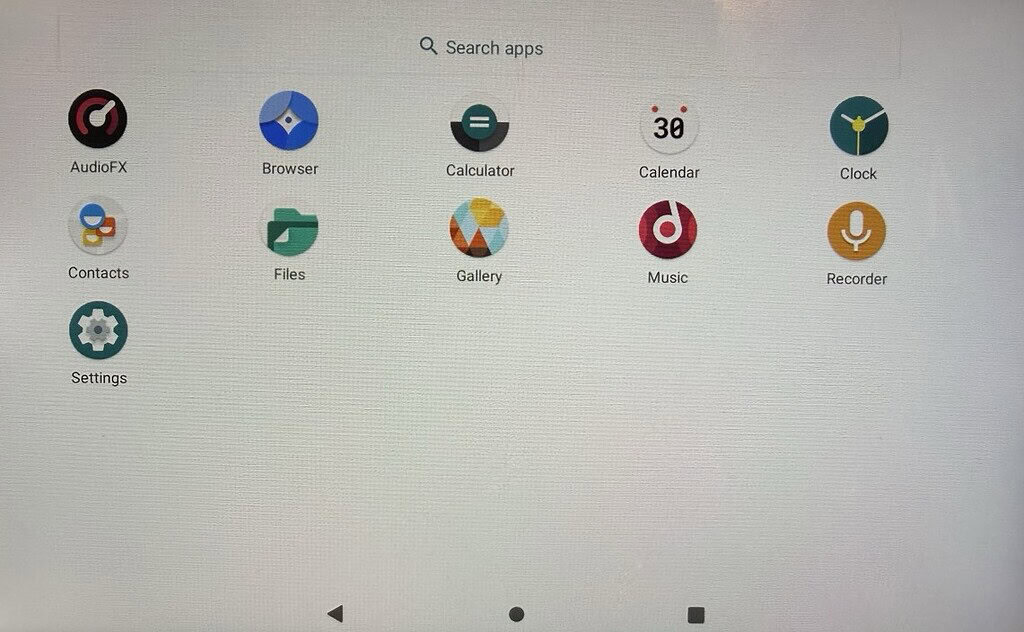
Disable contacts, recorder, calculator, music, calendar:
					adb shell pm disable-user com.android.contacts
adb shell pm disable-user org.lineageos.recorder
adb shell pm disable-user com.android.calculator2
adb shell pm disable-user org.lineageos.eleven
adb shell pm disable-user org.lineageos.etar
Increase the screen dimming timeout to 30 minutes and turn on dark mode:
					adb shell settings put system screen_off_timeout 1800000
adb shell cmd uimode night yes
Rooting your Echo Show
Note: Rooting your Echo Show is NOT required, but does give you more flexibility down the road. The home Assistant Companion app and View Assist run perfectly fine without a rooted device.
- Go to Magisk and download the latest ZIP (not APK). Copy the ZIP to the same SDK folder you’ve previously used.
- Boot your Echo Show into TWRP (pull power, hold volume UP, apply power). Wait for TWRP to boot up.
- Run the following command (adjust version as needed) to copy the ZIP to the Echo Show.
adb push Magisk-v29.0.zip /sdcard/
4. In TWRP tap Install, select the Magisk ZIP, and follow the prompts. Reboot.
5. After your Echo Show reboots, launch the Magisk app and follow the prompt to perform a full install.
6. If it prompts you to re-flash, select the Direct method and proceed. Reboot.
Installing Home Assistant
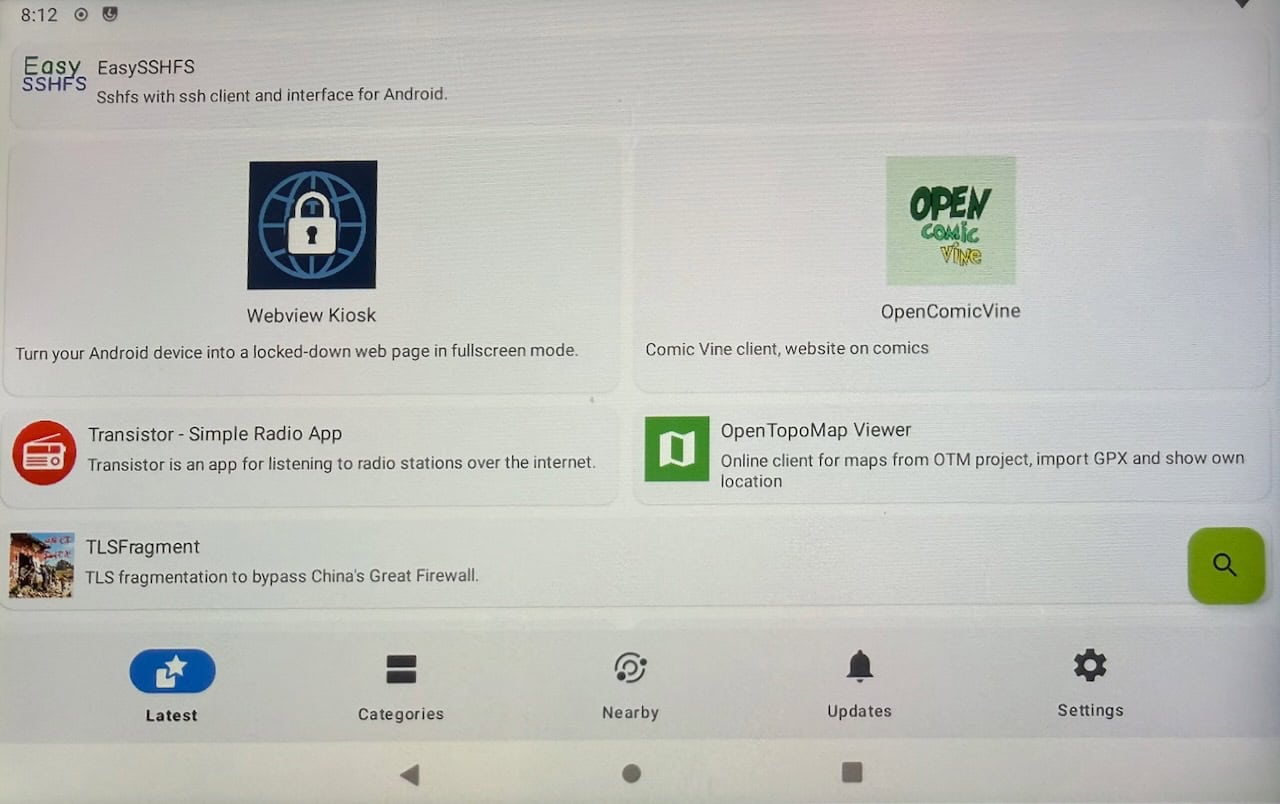
I’ll be using F-Droid to install Home Assistant companion app and for automatic updates (if rooted). You could directly sideload the HA APK via CLI tools and completely skip F-Droid. Or, you could install Obtainium (sideload or via F-Droid), and install HA and other apps via that route as well.
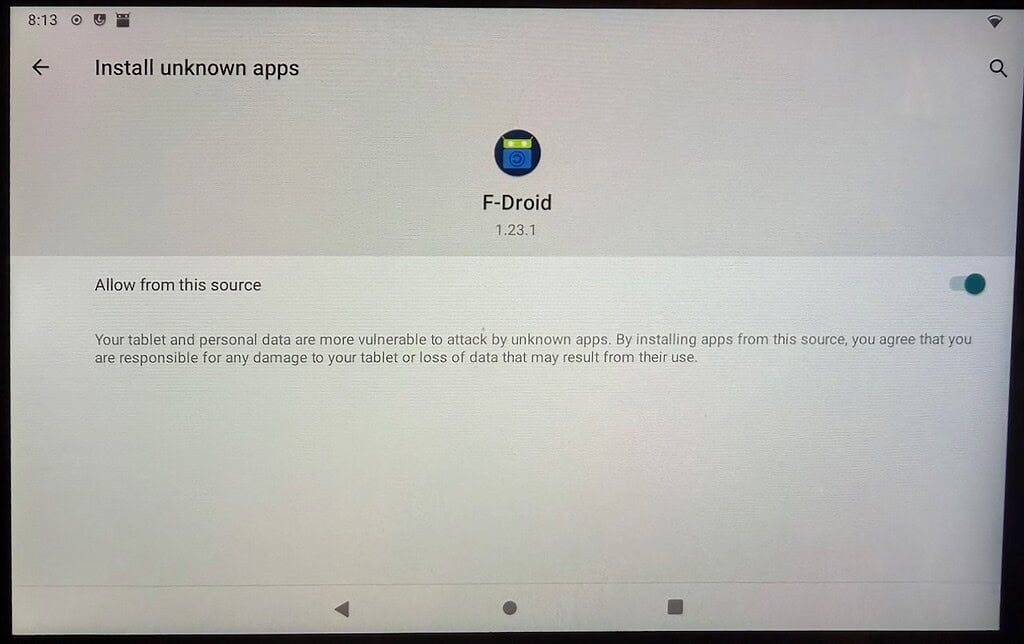
- Go to F-Droid and download the universal APK installer from the home page.
- Leave it zipped, but move the download into your Android SDK folder on your Windows computer. Run the following command:
adb install F-Droid.apk

3. Go back to your Echo Show and swipe up from the bottom to get to the installed apps page. Tap on F-Droid.
4. We will need to wait for F-Droid to (slowly) download the whole repo catalog of apps. I left my Echo show for 5 minutes and when I came back it was populated. You can tell the catalog was downloaded by the populated F-Droid homepage.
5. If you rooted your Echo Show, tap on the green search icon and search for “Privi” and look for “F-Droid Privileged Service extension” (second one down, NOT the OTA update). Install it.
6. If rooted, go into the F-Droid Settings, turn on Expert mode, and scroll down to Privileged Extension. Make sure it is ON.
7. Tap on the green search icon and search for Home Assistant. Tap Install. You will get a security pop up. Tap on Settings and enable the F-Droid app source. Run through the rest of the installation process.
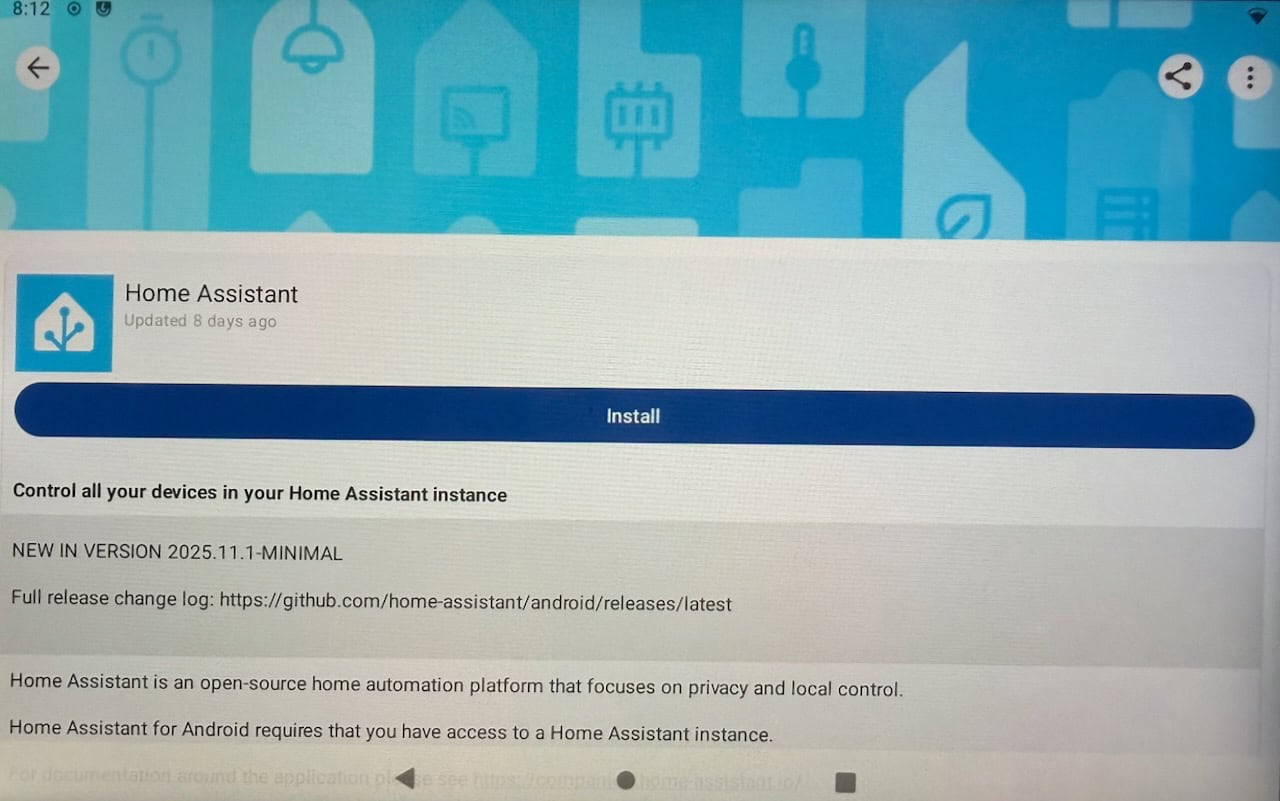
6. Go back to the Android app home screen and launch Home Assistant. Walk through the on boarding and login process. I suggest setting up a dedicated Kiosk user in Home Assistant and NOT using your primary admin account.
7. Launch the LineageOS settings app, go to Security, then Screen Lock. Change it to None. You might also want to peruse the other settings and enable things like dark mode and lengthen the screen saver timeout.
8. The XDA community recommended a couple more tweaks for the Home Assistsant companion app. For notifications, we need the SYSTEM_ALERT allowed, and to maintain continuous connections deviceidle whitelist needs to be enabled. Run the commands below from your Windows computer.
					adb shell appops set io.homeassistant.companion.android.minimal SYSTEM_ALERT_WINDOW allow
adb shell dumpsys deviceidle whitelist +io.homeassistant.companion.android.minimal
What's next?
Now that you have a jailbroken Echo Show with a stock Android distro, you have other options for accessing Home Assistant dashboards beyond just using the stock Home Assistant Companion app.
You can also use Obtainium to install and manage Home Assistant. It has a pre-defined package that you can search for and install with just a tap. If you want Obtainium to manage Home Assistant, un-install your F-Droid installed version, then install directly from Obtainium.
View Assist
View Assist is a great app that enables all kinds of Home Assistant functionality beyond just showing a dashboard. This includes voice and media features. I found it very feature rich and pretty stable. The Discord group is also very active and helpful.
View Assist gives you many features which you can control via HA automations. For example, you can wake and sleep the screen on your Echo Show automatically. This means if you have presence sensing in a room, you can wake up/sleep the display depending on room occupancy.
I would suggest installing the View Assist Companion app via Obtainium (install via F-Droid). This will let you auto-update apps (on rooted devices). Just add the repo URL below to Obtainium to install the View Assist Companion app.
https://github.com/msp1974/ViewAssist_Companion_App
Before you install the View Assist companion app, be sure to follow all of the installation instructions on the View Assist site. Installing the VACA on your Echo Show is the last step, so don’t just jump to that first. There’s some configuration required on the Home Assistant side that you MUST do prior to installing the client on your Echo Show.
The View Assist on Echo Show project is rapid progressing. If your Echo Show randomly goes to sleep or a lock screen appears, try the following settings:
					adb shell settings put secure screensaver_enabled 0
adb shell settings put secure screensaver_activate_on_sleep 0
adb shell settings put secure screensaver_activate_on_dock 0
adb shell settings put secure doze_enabled 0
adb shell settings put secure doze_always_on 0
adb shell settings put secure doze_pulse_on_pick_up 0
adb shell settings put secure doze_pulse_on_double_tap 0
adb shell locksettings set-disabled true
Fully Kiosk
Another option is Fully Kiosk. This turns your Echo Show into a dedicated Home Assistant dashboard. I personally have not tried this app, so I can’t speak from personal experience about it. But I do know it’s very popular. However, the plus version is not free and has a one time payment fee associated with it.
How do I 'factory reset' LineageOS?
If you want to re-flash your Echo show with a fresh LineageOS image (basically a factory reset), here’s the high level procedure:
- Boot into TWRP.
- Do an advanced wipe of the system, data, and cache partitions (ONLY, do not wipe other partitions).
- Re-flash with LineageOS ZIP (likely still in /sdcard).
- Reconfigure your Echo Show as needed.
Summary
Jailbreaking your Amazon Echo Show 5 (Gen 1 or 2) or 8 (Gen 1) is a fairly straight forward process. It will require a Windows computer and micro USB cable. This allows you to install Android LineageOS, paving the way for various ways to access your Home Assistant dashboard. Amazon may patch the exploit used, so if this is of any interest to you, I’d jump on this ASAP. Be sure to check the XDA Amazon Echo forum before making an Ebay purchase to validate that the exploit still works.
While the processors in the Echo Show Gen 1 devices are a bit sluggish, I found that the responsiveness is good enough for casual usage. You just need to deliberately press any touch targets for a second and briefly wait on the display to respond. While I haven’t tried streaming camera video, I suspect that might be problematic. Also, booting up to the View Assist dashboard is also a tad slow, but not terrible.
Given my good experience with these old Echo Show devices, I’d be thrilled if Nabu Casa built their own 5″ and 8″ clones that had an upgraded processor, along with a newer Android build. I would instantly buy several!


Flashed lineageos but got stuck on the amazon logo and it won’t boot to android
Hmm I’m not sure. Sounds like you got the right boot loader since you could flash Android. Are you sure you wiped the correct partitions? Wiping anything outside of what’s in the post could brick the Echo show.
I accidentally loaded the wrong file (my bad) but I restarted it after loading the correct file and it works great! Thanks for this amazing guide by the way
If you install View Assist Companion app it will, by default, open a web login to Home Assistant. Is there a way to avoid this and have View Assist use the Home Assistant android companion app instead. Thank you for your helpfull guide.
View Assist is it’s own app and configuration ecosystem. It’s independent of the Android companion app. View Assist has a very active Discord if you want to make suggestions to the dev team.
I managed to install HA on lineage in my echo 8 but I’m missing some app to add the speaker function. Preferably something that could make the speaker work as a chromeaudio device would be awesome or a Spotify connect app or even a Bluetooth connection. Do you have any suggestions? Thanks for the tutorial
THANK YOU SO MUCH. I haven’t completely gotten home assistant setup yet, but I was able to follow along with your steps and get as far as installing Lineage OS!! I’m already happy to be rid of the ads.
The biggest hang up for me so far is that the Magisk site – every download link I’ve tried has the 7zip handsome downloader that just installs a ton of garbage apps and some survey along with some other PUP apps. This part needs some tweaking. I’m still trying to figure that part out. Everything else super smooth, thanks!
Hmm I used an official source and had no issues with a tainted download and unwanted apps. Installed cleanly for me with zero cruft.
I struggled with this too.
Go to the official github, download the .apk file, and rename it to .zip https://github.com/topjohnwu/Magisk/releases
I’ve installed a number of custom ROMs on Android devices over the years and this was the best experience I’ve ever had! I’m used to lots of little roadblocks and having to search the web for solutions, generally because the tutorials assume too much prior knowledge and/or leave details out. Your tutorial was very detailed, assumed very little prior knowledge, and had great screenshots. You are my hero!
One little thing that came up was when opening Terminal in folder (which I’ve always found to be trickier than tutorials seem to assume), I had to put “.\” in front of a command. For example, .\fastbrick.bat. I think that’s probably because I didn’t start the Terminal session quite correctly, but the error message pretty clearly spelled out the solution.
Again, kudos for your great work!
Any alternatives to do this if we only access to MacOs? Besides getting a windows computer? Thank for the tip!
I would check the XDA forums where the jailbreak is discussed.