For Home Assistant users that want hyper local weather information, the 2023 ECOWITT Wittboy Weather Station GW2001, with Wittboy Wi-Fi Hub is an excellent choice. Unlike a traditional weather station that you might be thinking of, the Ecowitt Wittboy is solid state with no moving parts.
If you are using Home Assistant and want to integrate the Ecowitt Wittboy, you might run into a wrinkle. If you secure your Home Assistant server with a trusted SSL/TLS certificate, then the Home Assistant native Ecowitt integration will not work. This is due to Ecowitt not supporting SSL/TLS with custom servers, and the Home Assistant native integration doesn’t expose an unencrypted port to listen for the webhook data. The community released an Ecowitt proxy add-on which works around this issue. This blog post will walk you through using the Ecowitt proxy add-on for your secured Home Assistant server.
Update February 12, 2024: The Home Assistant Open Thread Border Router (OTBR) uses the same port (8081) as the default Ecowitt proxy port. I’ve added details on how to avoid this conflict.
Update December 11, 2025:Ecowitt now has an OFFICIAL integration that you install via HACS. This integration directly PULLS information locally from your gateway into Home Assistant. You can find the HACS installation instructions here: Ecowitt/ha-ecowitt-iot.
This HACS integration is preferred over the built-in HA solution, so you can ignore all of the instructions below (except the firmware section) and do the very simple configuration via their Github guide. There is a difference in the supported gateways between the Official integration and the HA version, so check out the Github page first.
What is the Ecowitt Wittboy Weather Station?
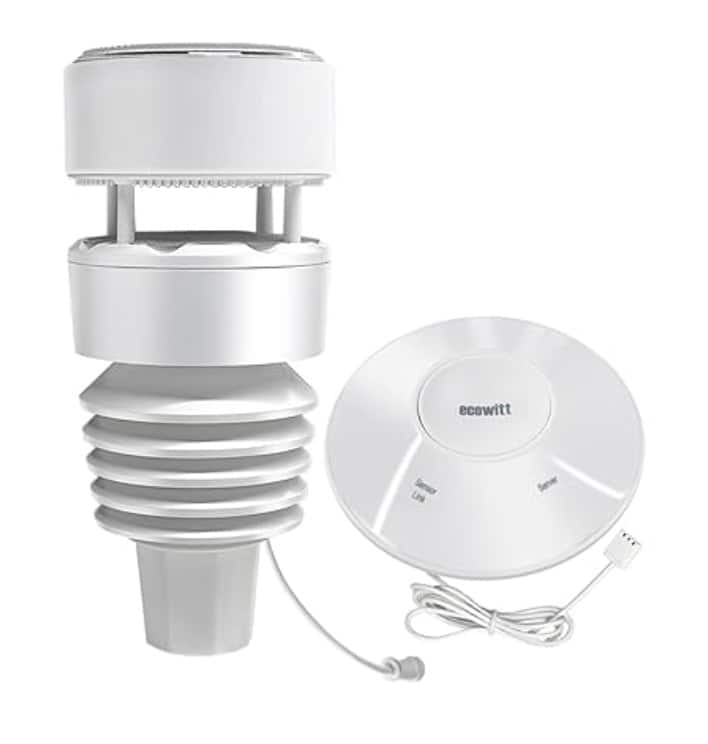
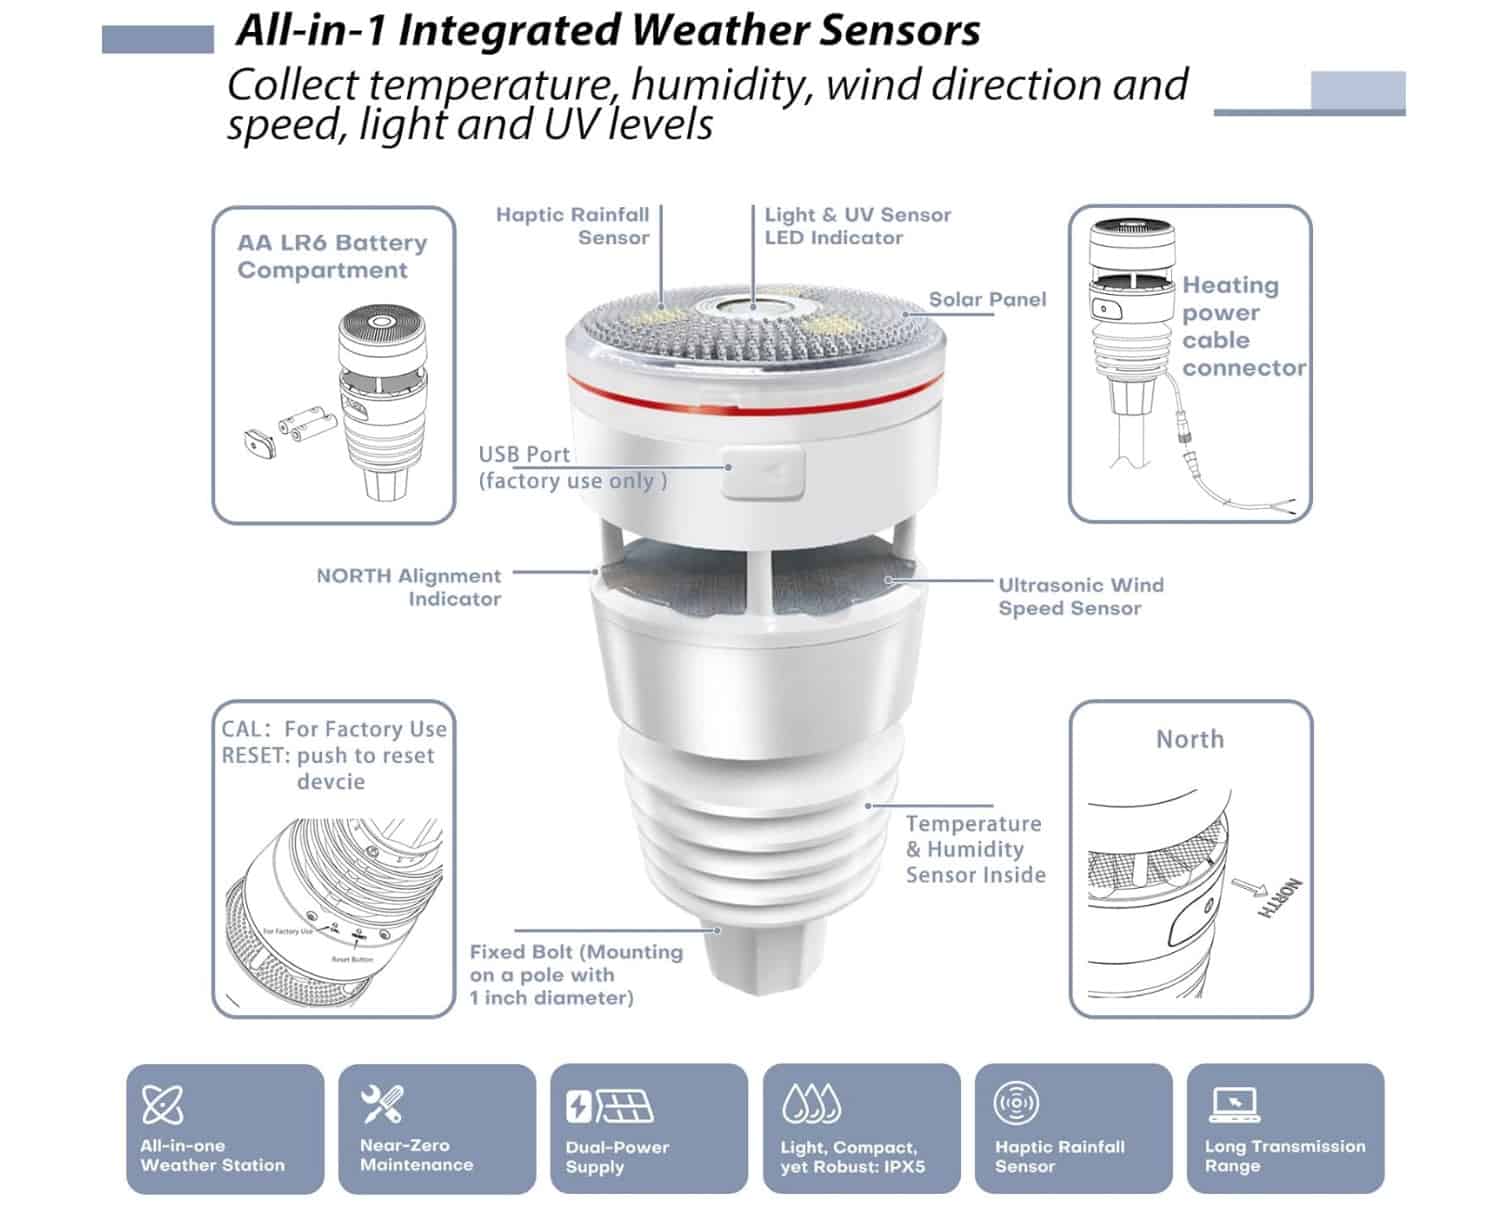
The integrated outdoor weather sensor collects accurate temperature, humidity, wind direction and speed, light and UV levels as well as rainfall data and transmit them to the wittboy Wi-Fi hub. The Wittboy is solar powered, with battery backup. So you can place it almost anywhere in your yard. The GW2001 saucer shaped gateway is placed inside your home and connects via Ethernet or WiFi. The gateway also has indoor temperature and humidity sensors. Ecowitt also sells add-on sensors that you can place around your yard. This includes moisture sensors, traditional bucket style rain gauges, and more.
The Ecowitt Wittboy mounts easily on a 1″ pole. You can fix the pole to your fence, place it in the ground, etc. I used pipe clamps and clamped it to the railing around my patio. The Ecowitt Wittboy weather station can also send data to SaaS services like Wunderground. Some smart sprinkler systems, like Rachio, then can pull data from your weather station via Wunderground for more accurate watering.
Ecowitt Firmware Upgrade
While not required for using with Home Assistant, I think it’s a very good idea to update your Weather station to the latest firmware. This can improve rain fall estimation, and other enhancements. Unfortunately Ecowitt’s firmware upgrade process is a bit tedious.
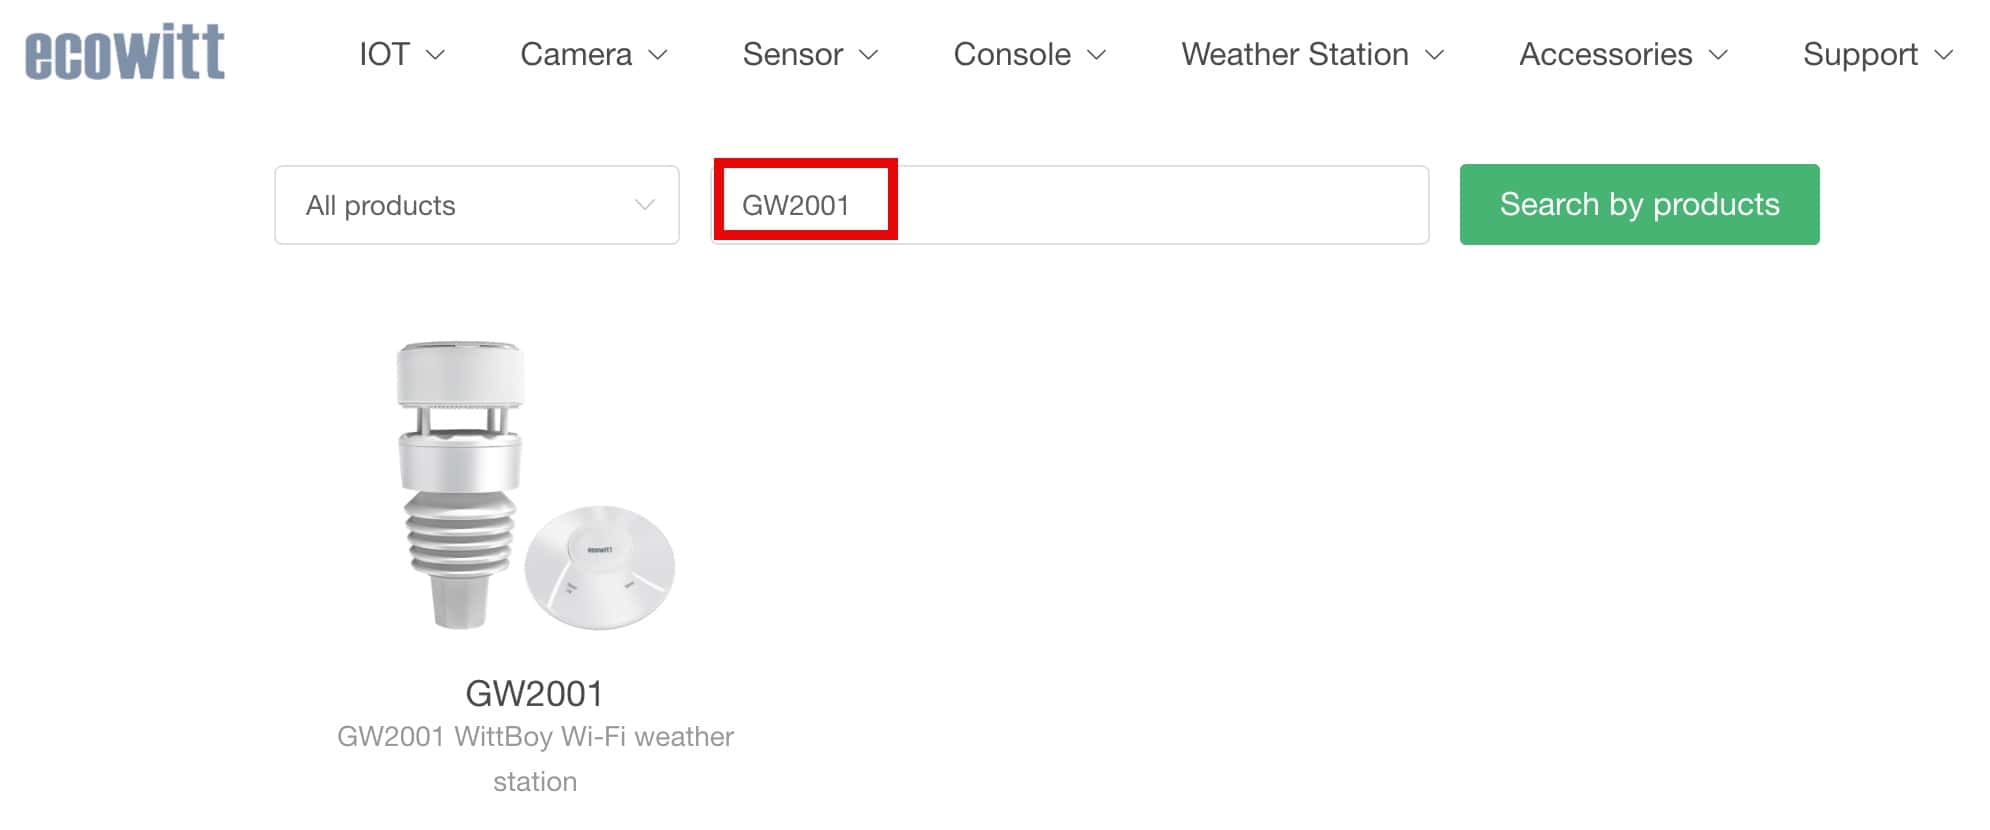
First, go to the Ecowitt Dowload page. Find your product. In my case I bought the GW2001 weather station.
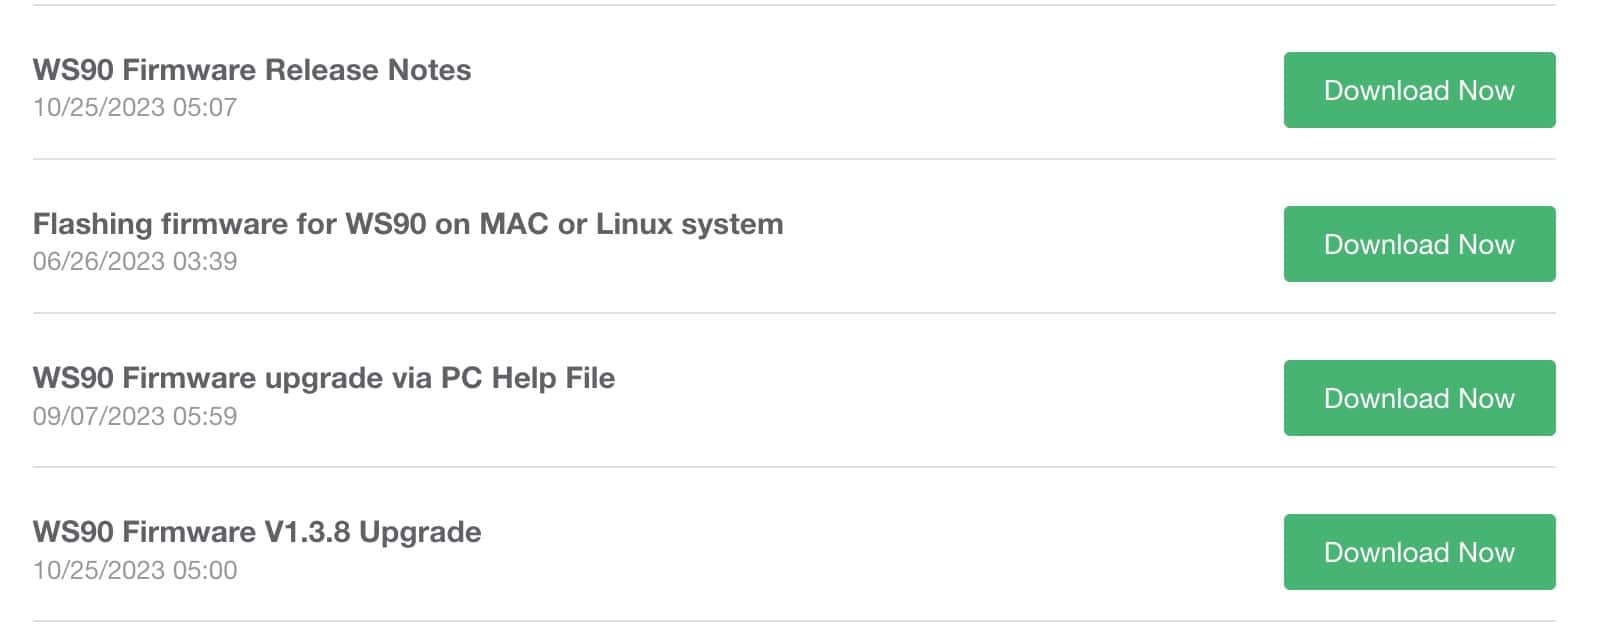
Scroll down to the bottom of the list and download the latest WS90 firmware. Using my Mac for the upgrade was problematic, so I went the PC route. Install their software and perform the firmware update, per their directions.
The Ecowitt WiFi gateway may have a firmware update available as well. In the Ecowitt phone app or on the gateway’s local webpage check for any updates. In my case the latest is v3.0.8.
Home Assistant Ecowitt Configuration
December 11, 2025:Please review Ecowitt’s new OFFICIAL Home Assistant integration before using the built-in HA Ecowitt integration. Ecowitt/ha-ecowitt-iot If your device is supported with the Official HACS integration, I would strongly urge you to go that route.
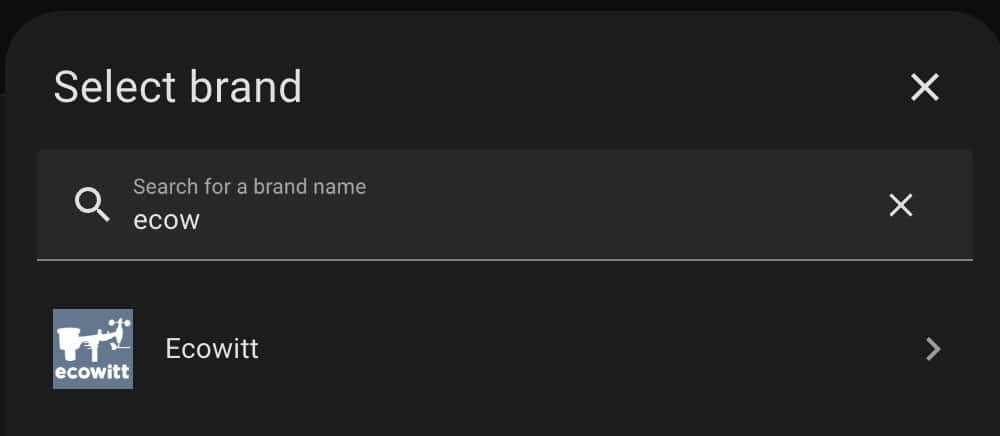
1, In Home Assistant go to Settings -> Devices and Services -> Add Integration. 2. Type Ecowitt in the search box.
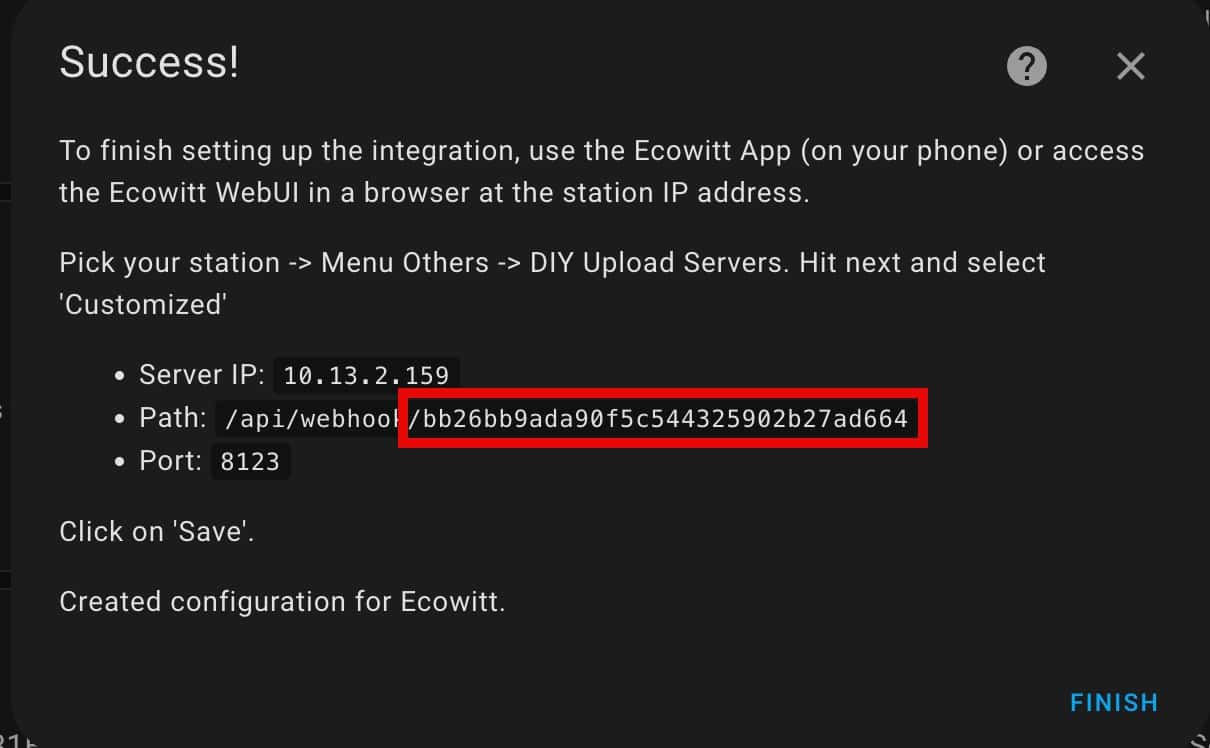
3. Click on Ecowitt, then click Submit. 4. On the popup window copy the web hook ID to the clipboard. Only copy the web hook ID at the end of the path. We will need this later. Click Finish.
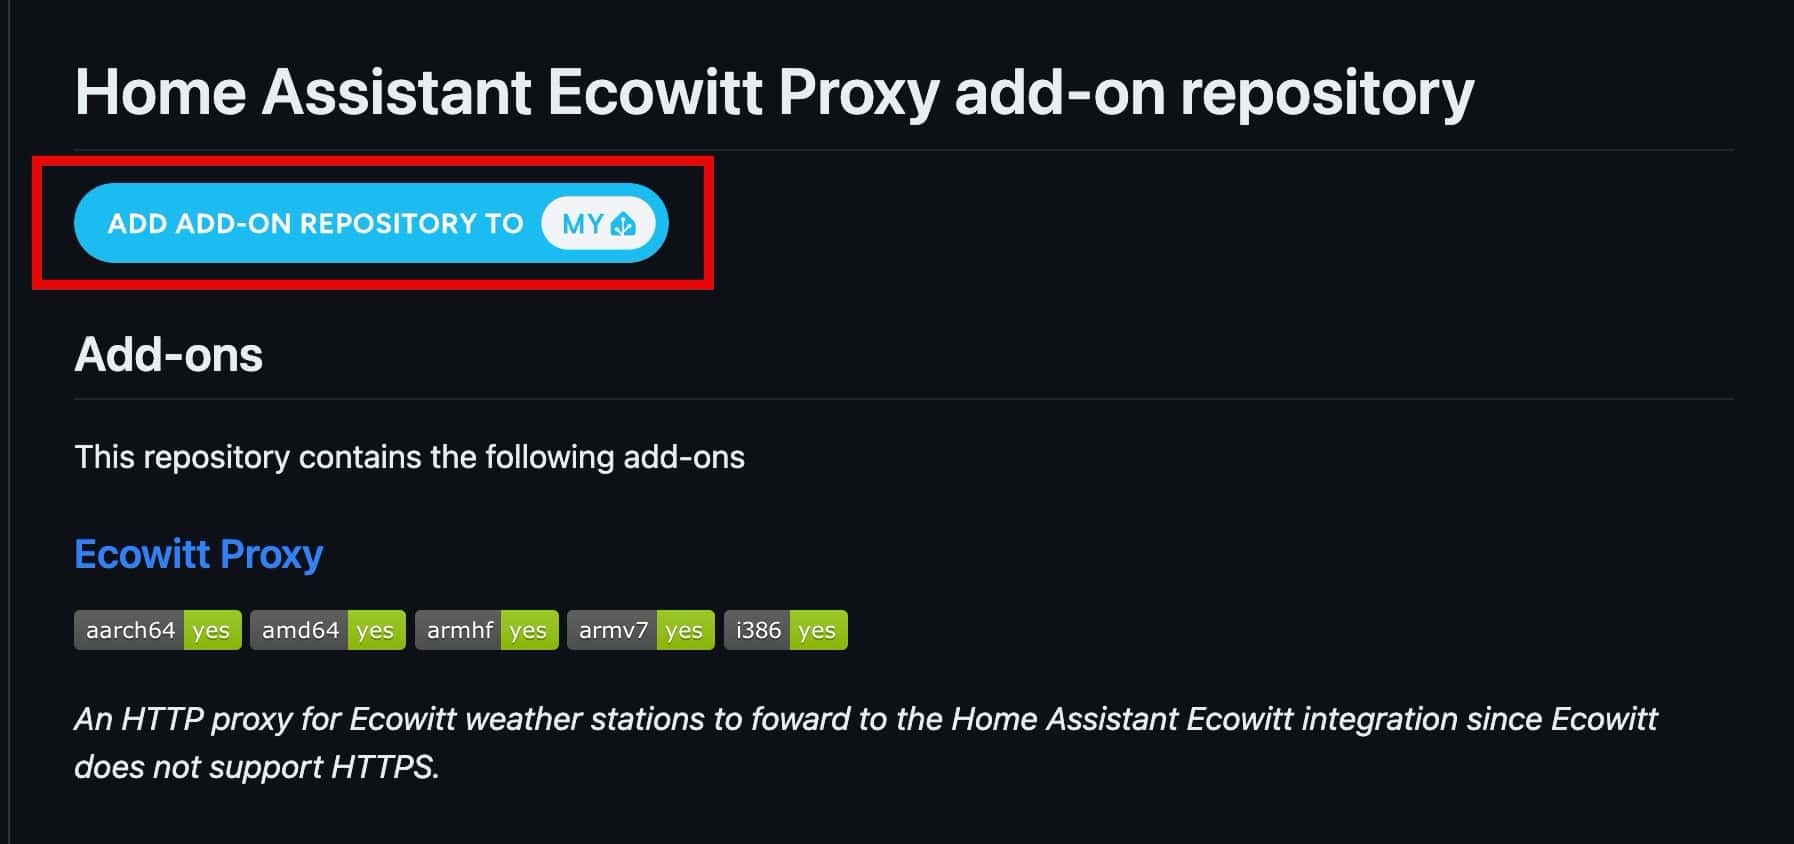
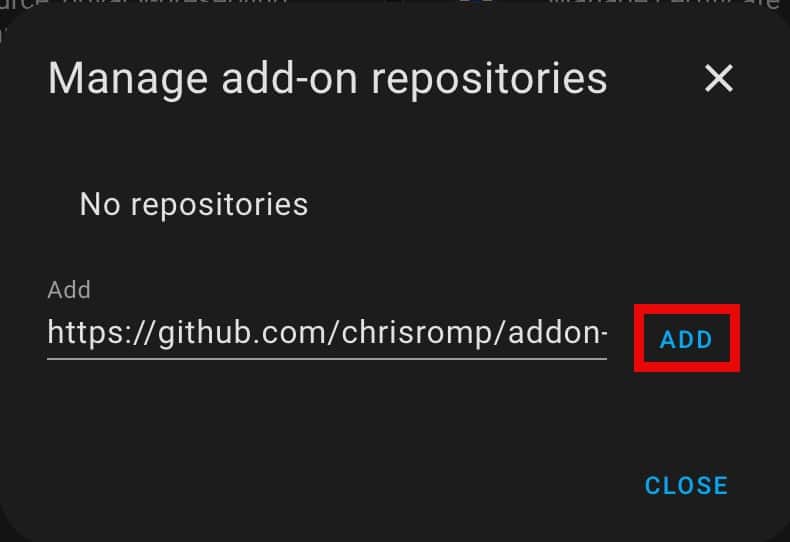
6. Home Assistant should open up and prompt you to add the Github repo. Click on Add, then Close.
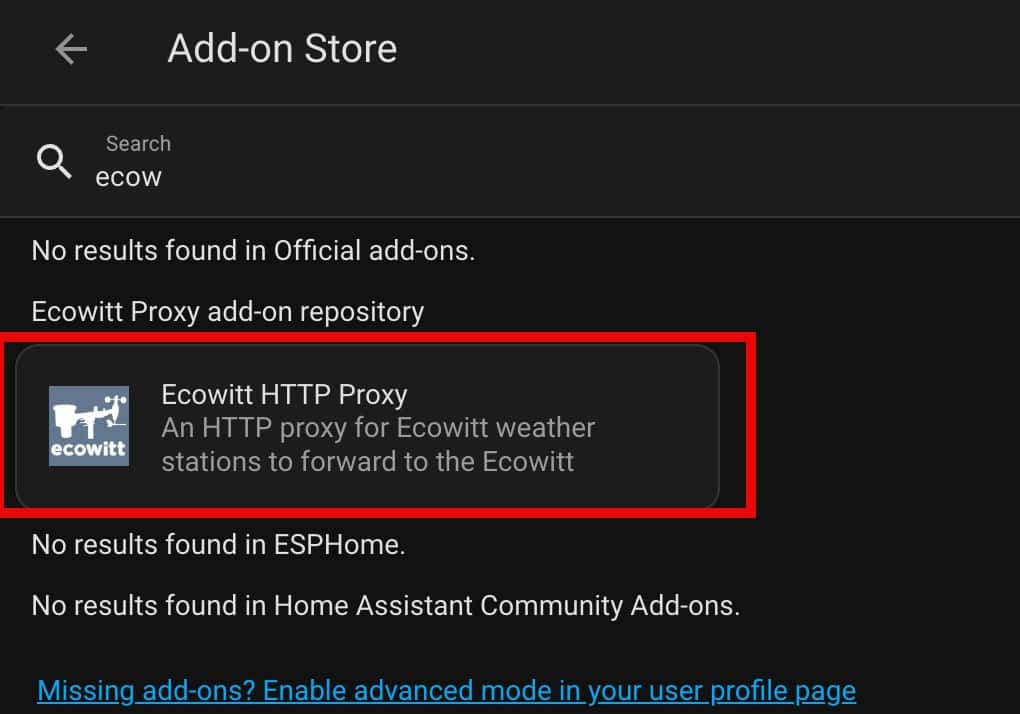
7. Go to Settings -> Add-ons -> Add-on Store. Search for Ecowitt. 8. Click on Ecowitt HTTP Proxy. Click Install.
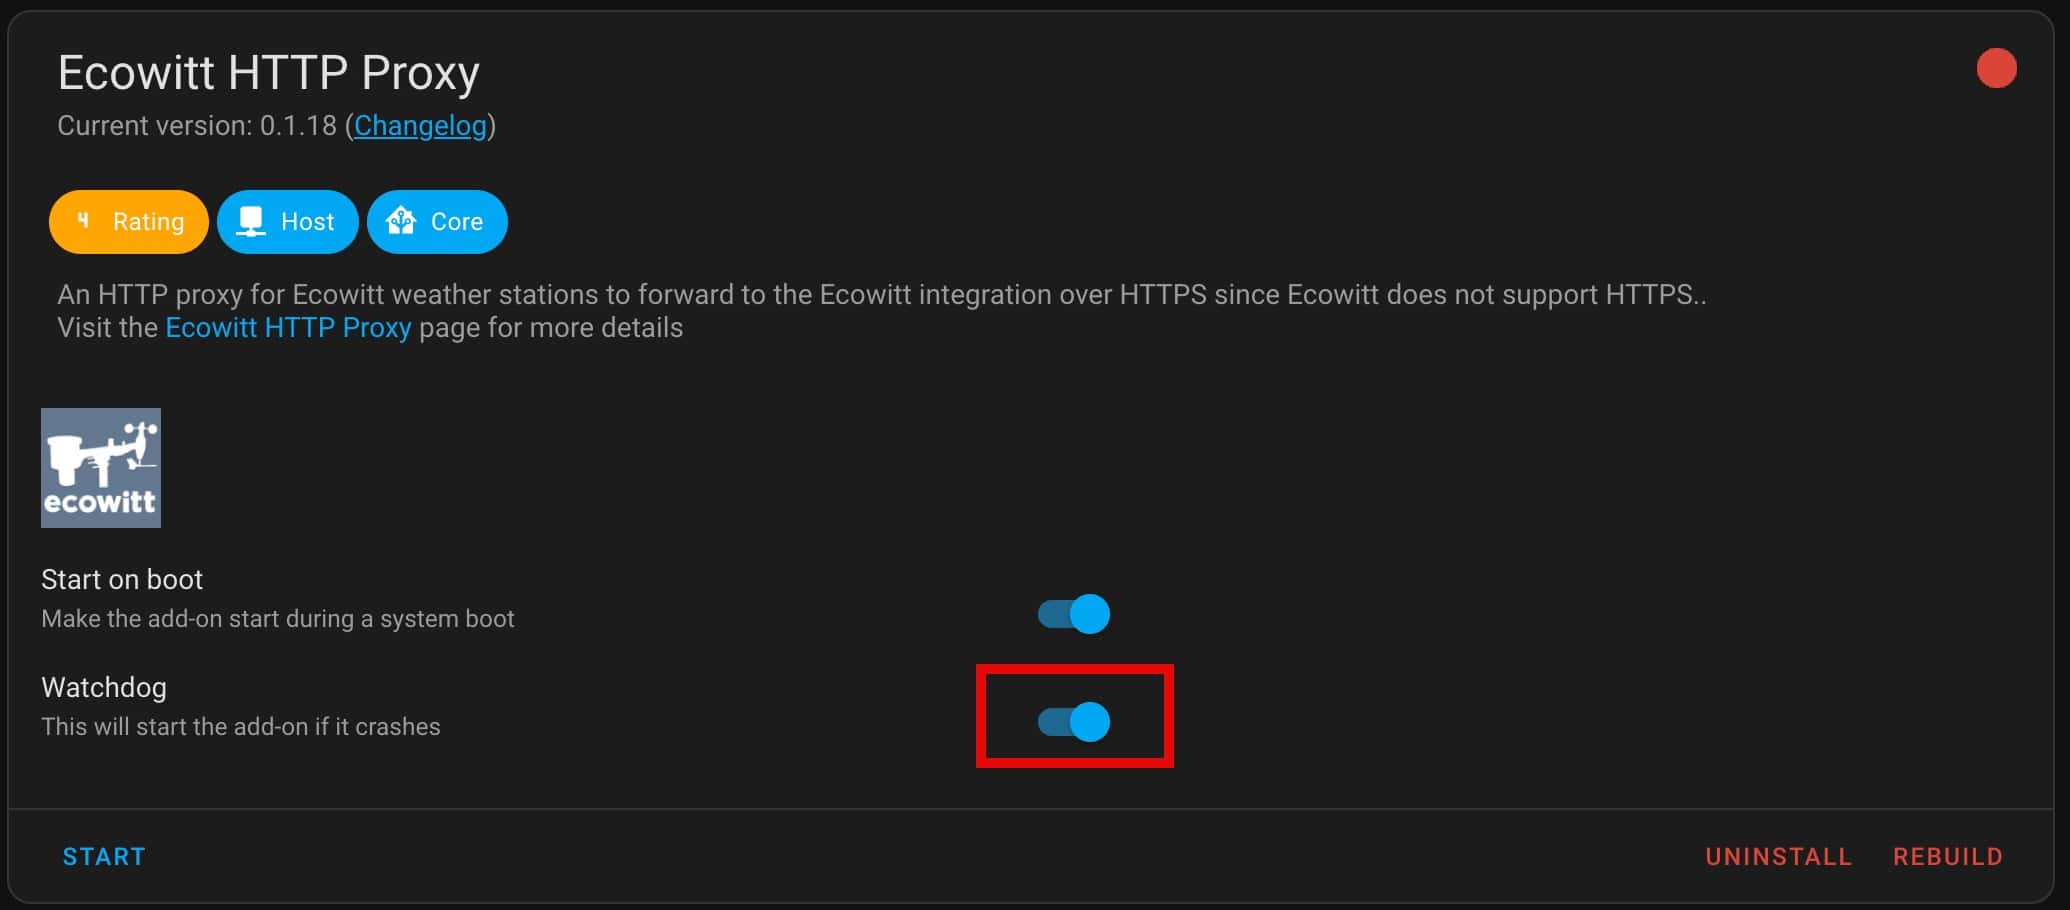
9. Turn the Watchdog toggle ON. 10. Click on Configuration at the top of the screen.
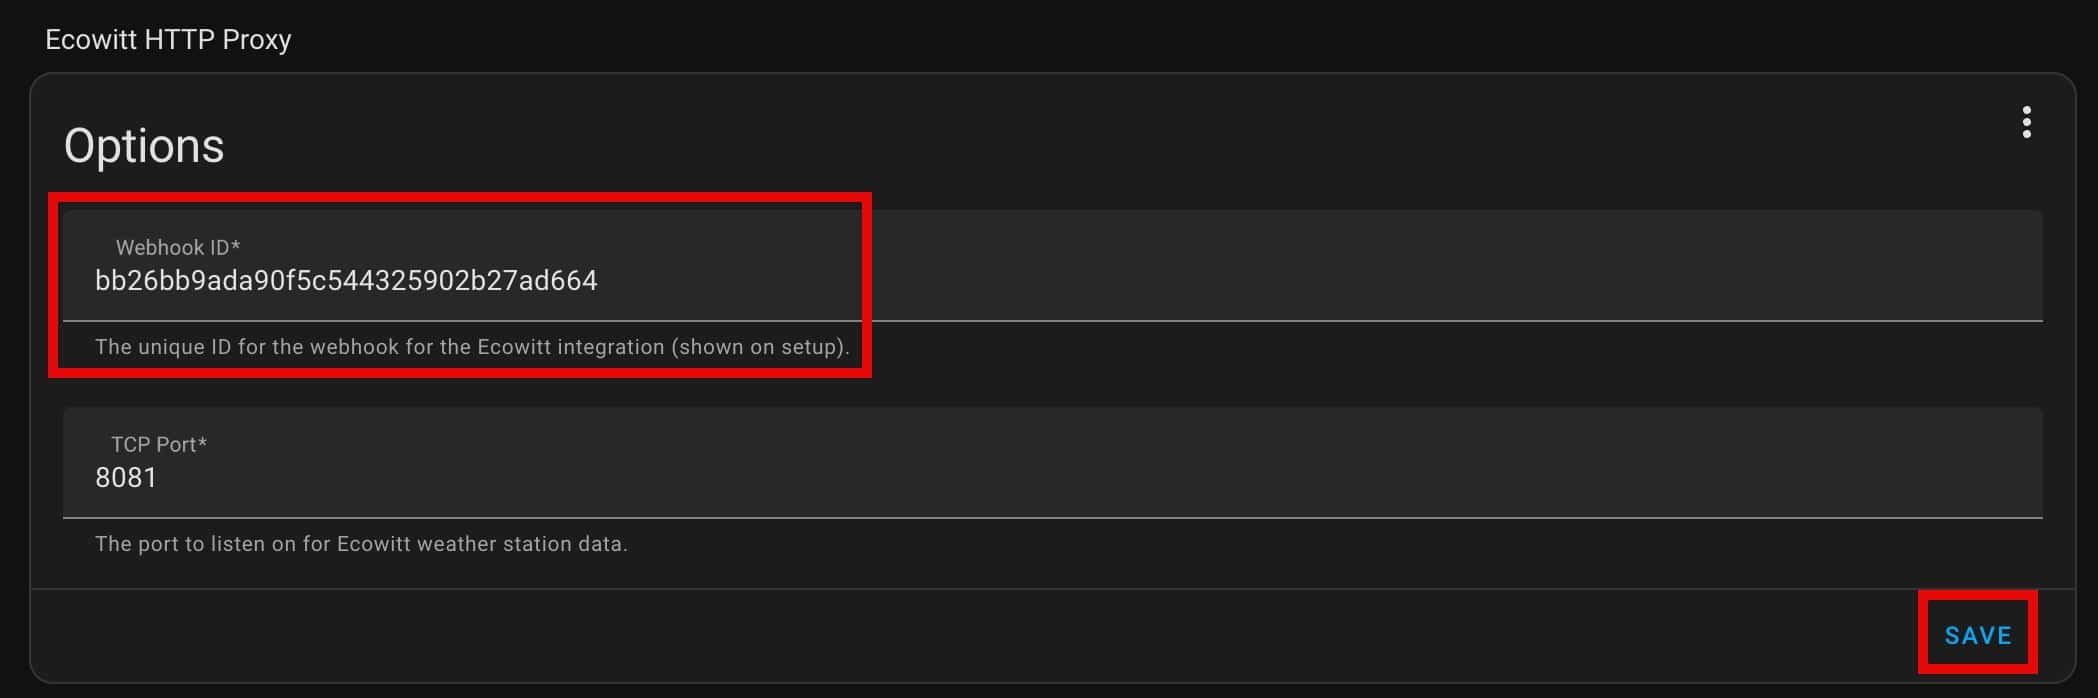
11. Paste the Webhook ID. Click Save. Make note of the TCP port listed (8081).
Note: The Home Assistant Open Thread Border Router (OTBR) is hard coded to use port 8081. As such, the default port in the Ecowitt proxy creates a conflict. To avoid future headaches, I suggest changing the port to 8082. If you don’t change the Ecowitt proxy port to something other than 8081, the OTBR will fail to start with an error message about a port conflict but doesn’t tell you what port. Or, if you already have the OTBR add-on, then the Ecowitt Proxy will fail to start.
12. At the top of the screen click on Info. 13. Click Start.
Ecowitt App Configuration
On your phone launch the Ecowitt app.
Make sure your gateway is selected. In the upper right hand corner tap on the three dots.
Tap Others.
Tap DIY Upload Servers. Tap Customized.
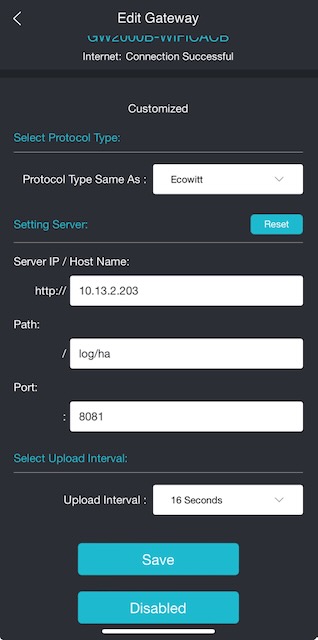
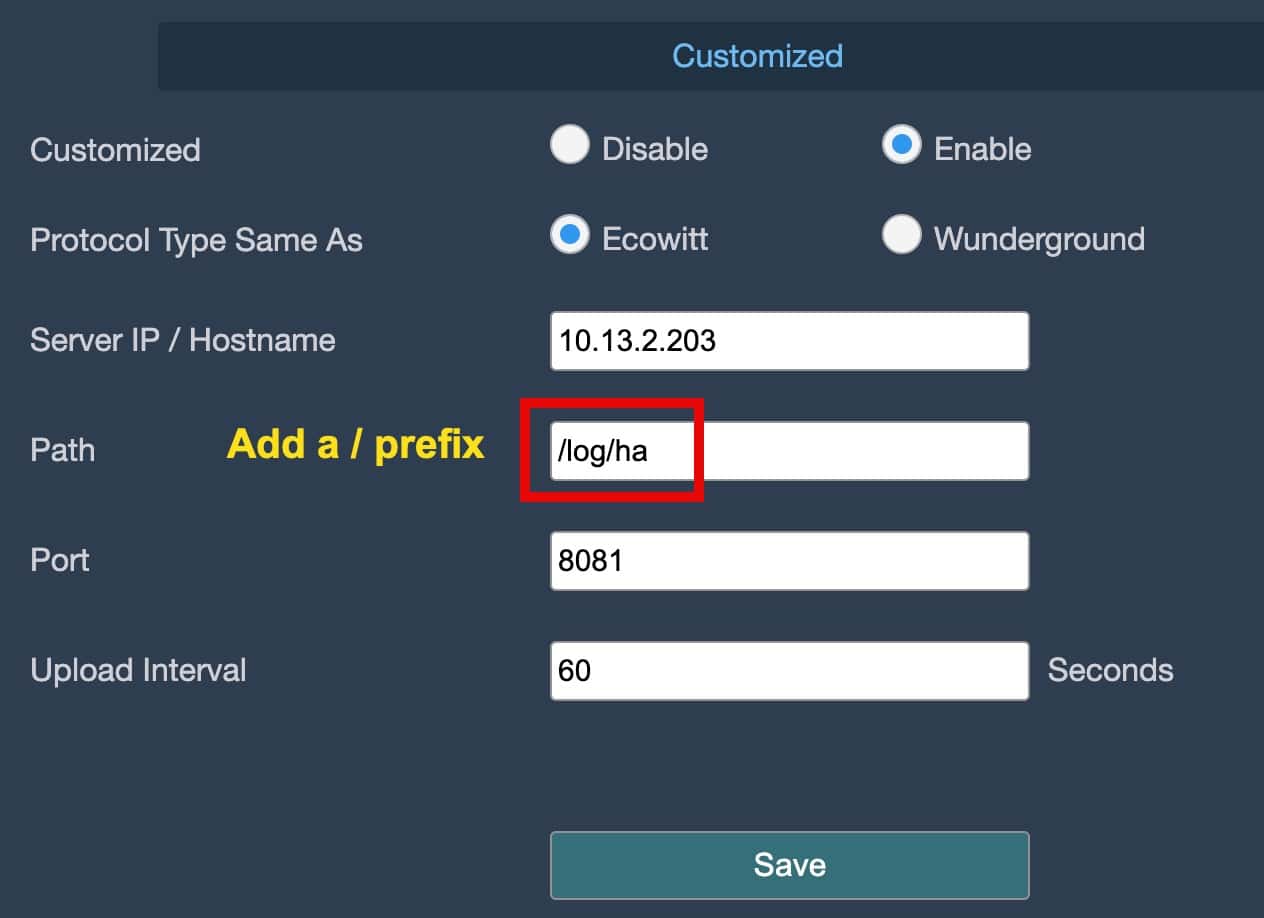
Configure the following:
Protocol: Ecowitt
IP: Your Home assistant IP address
Path: log/ha (Note: This is case sensitive. Log and HA must be all lower case. Do NOT prefix with a /)
Port: 8081 (Recommend 8082)
Upload Interval: Your choice
Note: If using the Ecowitt phone app, the path is already prefixed with a /, so only enter log/ha. However, if you use the gateway’s internal web configuration page it does NOT prefix the path with a /, so enter /log/ha (screenshot below). The path is also case sensitive, so make sure it is all lower case.
6. Tap Save.
Home Assistant Ecowitt Validation
In Home Assistant go to Settings -> Device & services. Click on Ecowitt.
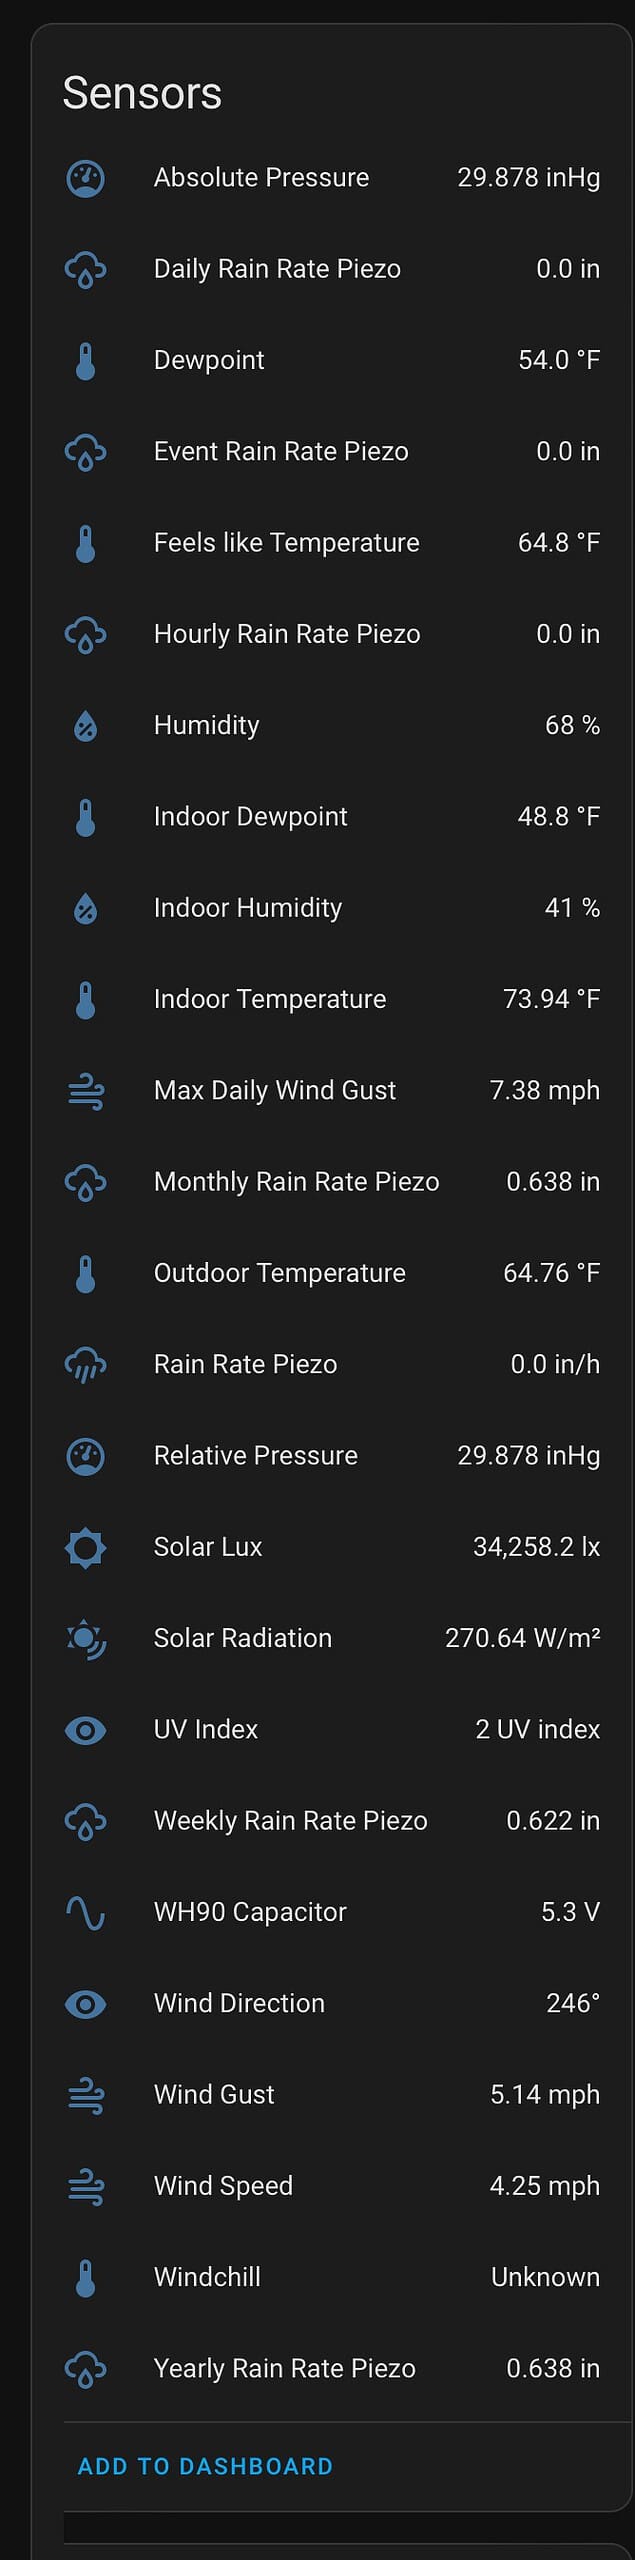
You should now see one device and a number of entities.
3. Click on 1 device. 4. You should now see a number of weather related entities, as shown below.
Summary
Unfortunately the Ecowitt gateway does not support SSL/TLS to custom servers. And in my case I use a trusted SSL/TLS certificate with my Home Assistant server. That means the native Ecowitt integration with HA would not work, as it would be secured with my trusted certificate.
Thankfully the community developed a proxy add-on, that listens on a unencrypted port, then forwards that data to the Home Assistant Ecowitt integration. The proxy add-on has been working great.
11 thoughts on “Home Assistant: Ecowitt Weather Station Setup”
Peter Antonvich
This worked great – only one comment- my phone made it Log/ha and not log/ha – I know it’s stupid but might add a note about that lol as it took me a bit to figure out way it didn’t work- again thanks so much for your time in documenting this
I’ve tried all sorts of ways and I can’t get it to work.
Could it be because of the IP entered which has to be https://192.168.X.X ?
In my case it works with DuckDNS. Should I set the URL to https://XXXX.duckdns.org/? I don’t know what else could be wrong, I’ve tried everything.
It works like a charm, not like the NGinx crap that made only problems.
Thanks for it finally I can use Ecowitt with HA as I buyed it shortly before they changed everything.
Hi,
I have bought the setup you have recomended but I have an issue.
I want to be able to save and download the data from one entity into excel.
The entity is in my HA but I have no idea how to extract the data to excel say once per month?
Any ideas or points please?
what if I have two ecowitt stations and need to add both to HA I have more soil sensors that single station could handle – it is a main reason why I have two)


This worked great – only one comment- my phone made it Log/ha and not log/ha – I know it’s stupid but might add a note about that lol as it took me a bit to figure out way it didn’t work- again thanks so much for your time in documenting this
Thanks I updated the post.
I’ve tried all sorts of ways and I can’t get it to work.
Could it be because of the IP entered which has to be https://192.168.X.X ?
In my case it works with DuckDNS. Should I set the URL to https://XXXX.duckdns.org/? I don’t know what else could be wrong, I’ve tried everything.
Thank you! After much searching I found your method and it worked flawlessly.
It works like a charm, not like the NGinx crap that made only problems.
Thanks for it finally I can use Ecowitt with HA as I buyed it shortly before they changed everything.
Thanks! I can’t take credit for the actual code, but glad the post was helpful.
Holy Jack Pot Batman – It worked!
Ambient Weather Station
Ecowitt GW1100b Gateway
Latest June 2024 Home Assistant
Brilliant work thank you. I really couldn’t get my head around the NGinx stuff.
Hi,
I have bought the setup you have recomended but I have an issue.
I want to be able to save and download the data from one entity into excel.
The entity is in my HA but I have no idea how to extract the data to excel say once per month?
Any ideas or points please?
what if I have two ecowitt stations and need to add both to HA I have more soil sensors that single station could handle – it is a main reason why I have two)
I’m not sure how to handle that. The third party proxy just allows a single port to be configured. I would suggest leaving a comment on their Github.