This post covers how to migrate a Plex Media Server (PMS) running on Synology DSM 7 to a Proxmox Plex Server LXC. This Plex LXC will then NFS mount your media library from the Synology, so your large media library remains on Synology.
Why would you want to do this? Well some Synology NAS models don’t have built-in GPUs so if you want to hardware transcode video you are out of luck. Or maybe you want lessen the CPU load on your Synology and move PMS to an external server.
You can follow my post Proxmox: Install Plex LXC with HW Transcoding/HDR Tone Mapping to help you build a Plex Server LXC on Proxmox. This migration guide while tailored for Synology to Plex LXC, would not take too much modification to use it for other migration scenarios between Linux-based systems.
Update January 26, 2024: Updated the tar command to actually exclude the cache. Thanks to a reader for catching the mistake and providing the solution.
Pre-flight Check
Before we start the migration we need to check how large the Plex Media server instance is (NOT including your library media files). This will dictate how much disk space your Plex LXC instance will need (and space to grow). Plex maintains a lot of metadata and indexes which can grow pretty large, and those are not stored in your media library but with the PMS instance itself.
1. Login to your Synology where your old Plex server is running.
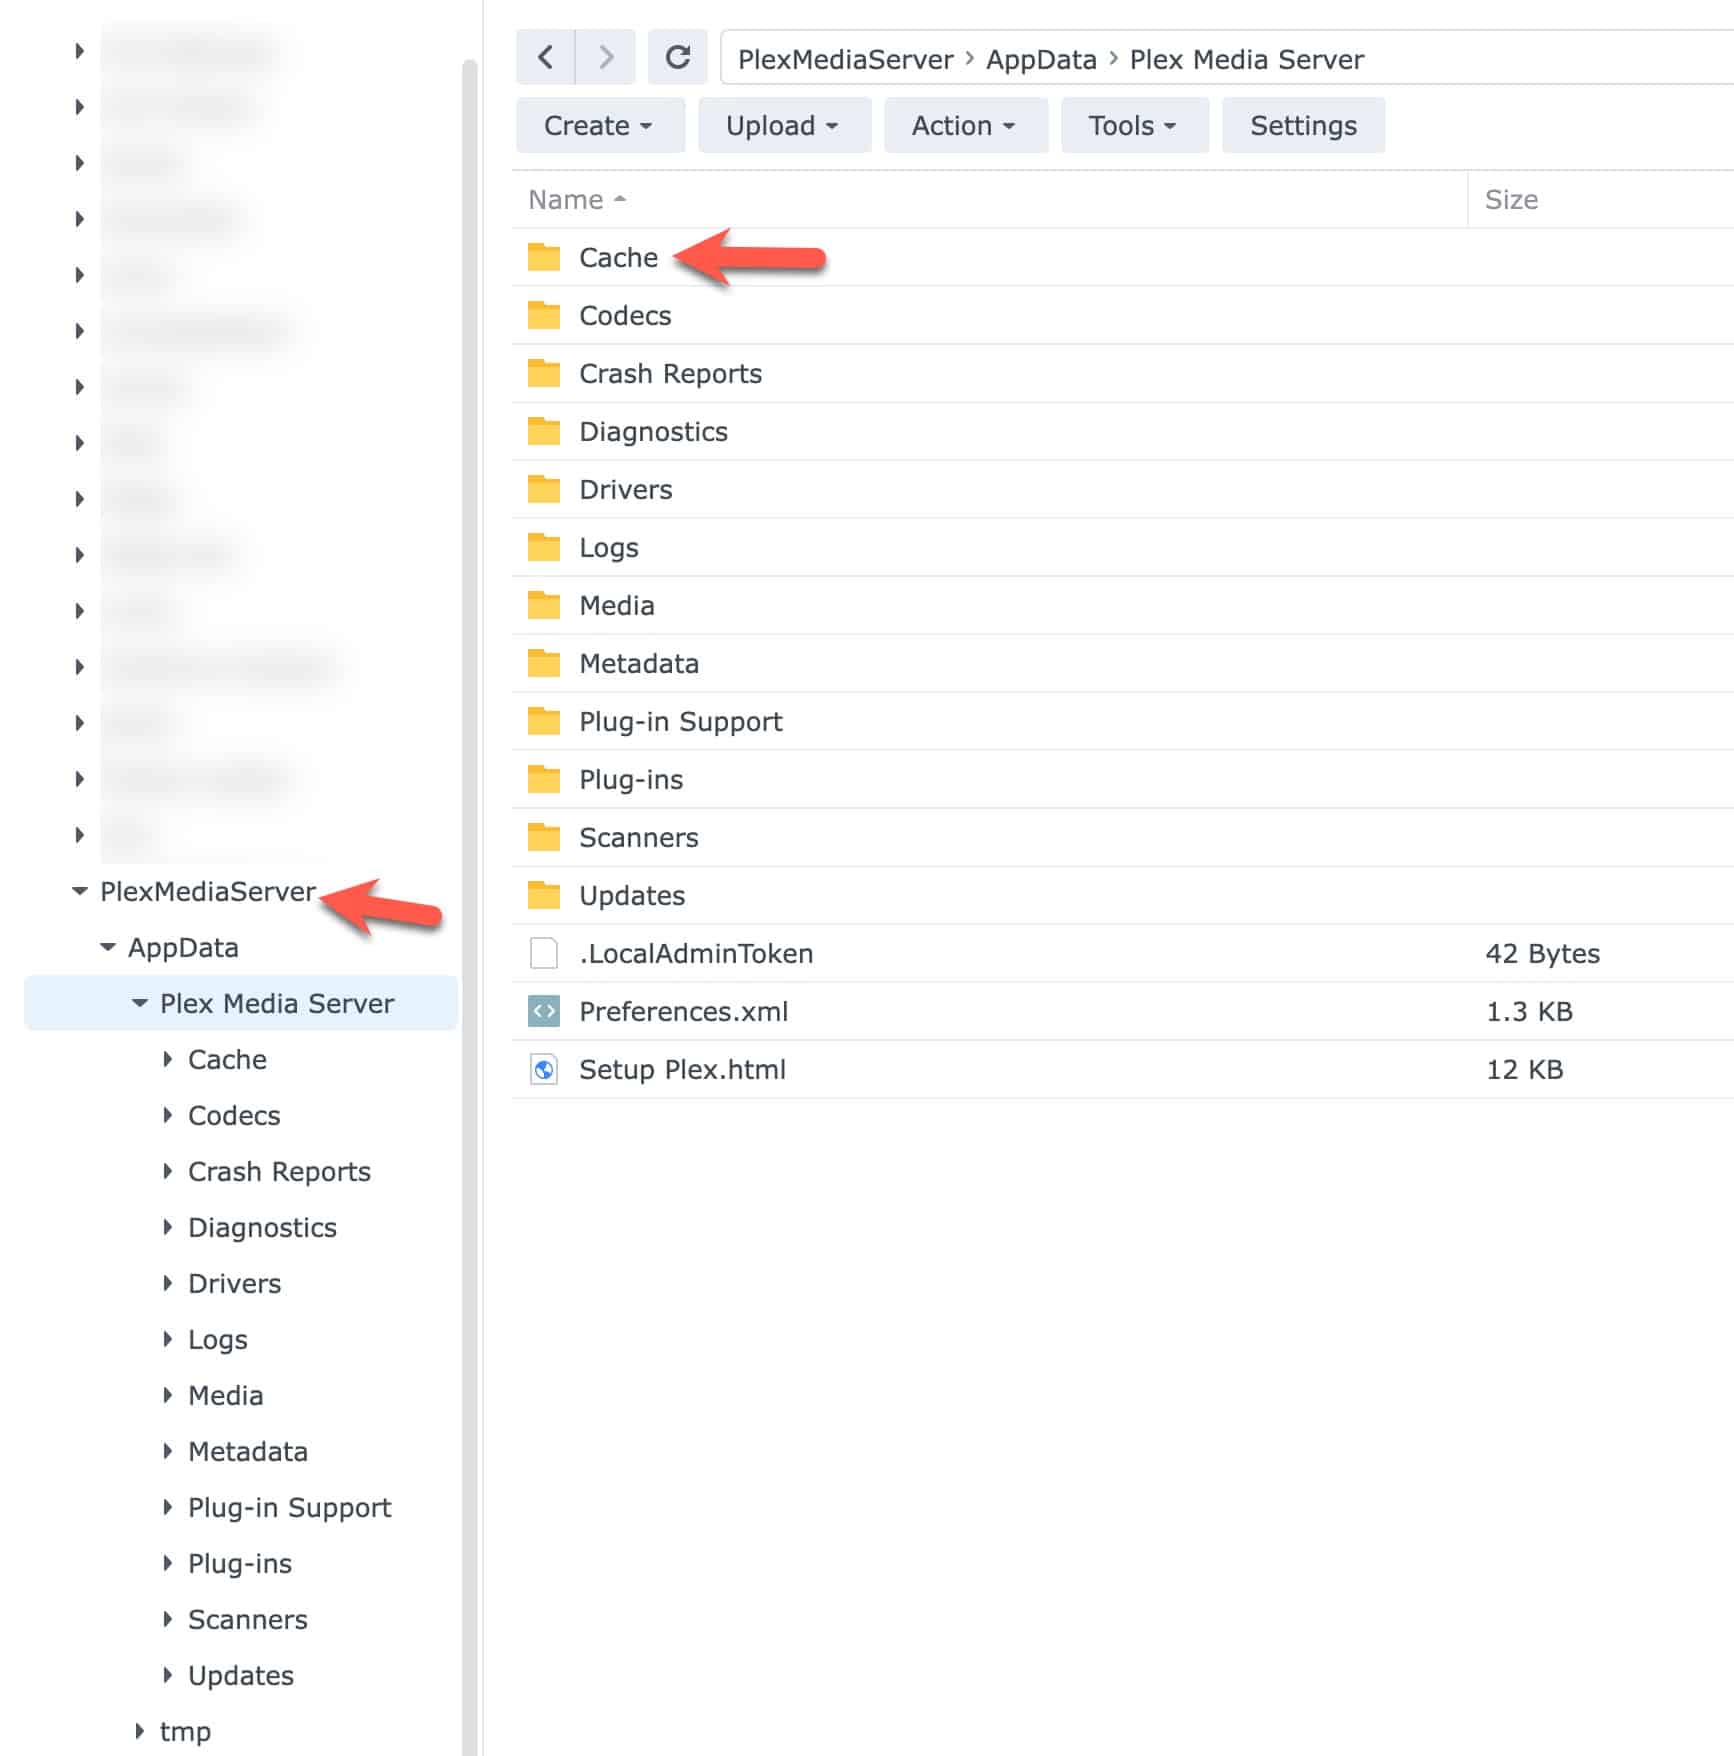
2. Open File Station, then at the root level expand PlexMediaServer -> AppData -> Plex Media Server.
3. On the Plex Media Server folder in the left pane right click and select Properties.
4. Wait for the Size: to fully populate and notate how large it is.
5. Expand Plex Media Server and click on Cache in the left pane.
6. In the left pane right click on Cache and look at the Size: property.
7. Subtract the Cache size from the PMS size to get an idea how much data you will be migrating.
Note: To properly size your Plex LXC disk, double the amount of storage that you just calculated. Then I would add another 5GB (or more) as buffer space. We will temporarily need both the full archive file and its unzipped contents occupying disk space at the same time. After everything is working, we can delete the tar file to free up that disk space.
8. If your Plex LXC disk size is smaller or similar in size to your calculated space, we need to expand the Plex LXC disk.
9. If you need to expand your LXC disk size, go to your Proxmox UI and locate your Plex LXC server. Shut it down.
10. Click on Resources in the middle pane for your Plex LXC and click on Root Disk.
11. From the tool bar select Volume Action. Select Resize.
12. Enter the amount of GB you want to increase the server’s storage by, not the total final size.
13. Wait for the disk resize operation to complete.
14. Start the Plex LXC server.
15. Look at the version of Plex server on your Synology and your LXC container. Do any needed updates to make sure they match exactly.
16. On your Synology open File Station and locate where your media library is stored. This is where all your music, videos, photos, etc. live. Take a note of the folder name(s).
17. Open Synology Control Panel, click on Shared Folder, and verify that your media folder(s) are shared. In my case I have a folder at the root level called Media which Plex uses and it’s already setup as a shared folder.
Plex Configuration Backup
This section assumes you have a fresh Plex LXC server deployed. If not, follow the link in the intro section for detailed instructions.
1. Login to your fresh Plex LXC instance via the web.
2. Click on the wrench in the upper right corner to open settings.
3. In the left pane select your Plex LXC server instance. (Important!)
4. Under Settings -> General click on Sign out.
5. SSH into your Plex LXC instance and login as root. Run the following command to stop the Plex media server service.
sudo service plexmediaserver stop
6. Login to your Synology, open Package Center, and stop the Plex Media Server service.
7. SSH into your Synology.
8. Find the location of where your Plex Media server is located. Check out this Plex support article for common paths.
9. In your SSH session CD to the following path (change if your location is different):
cd "/volume1/PlexMediaServer/AppData/"
10. Now we will tar the whole Plex Media Server folder, excluding the Cache directory.
tar -zcvf plexserver.tar.gz --exclude="./Plex Media Server/Cache" "./Plex Media Server"
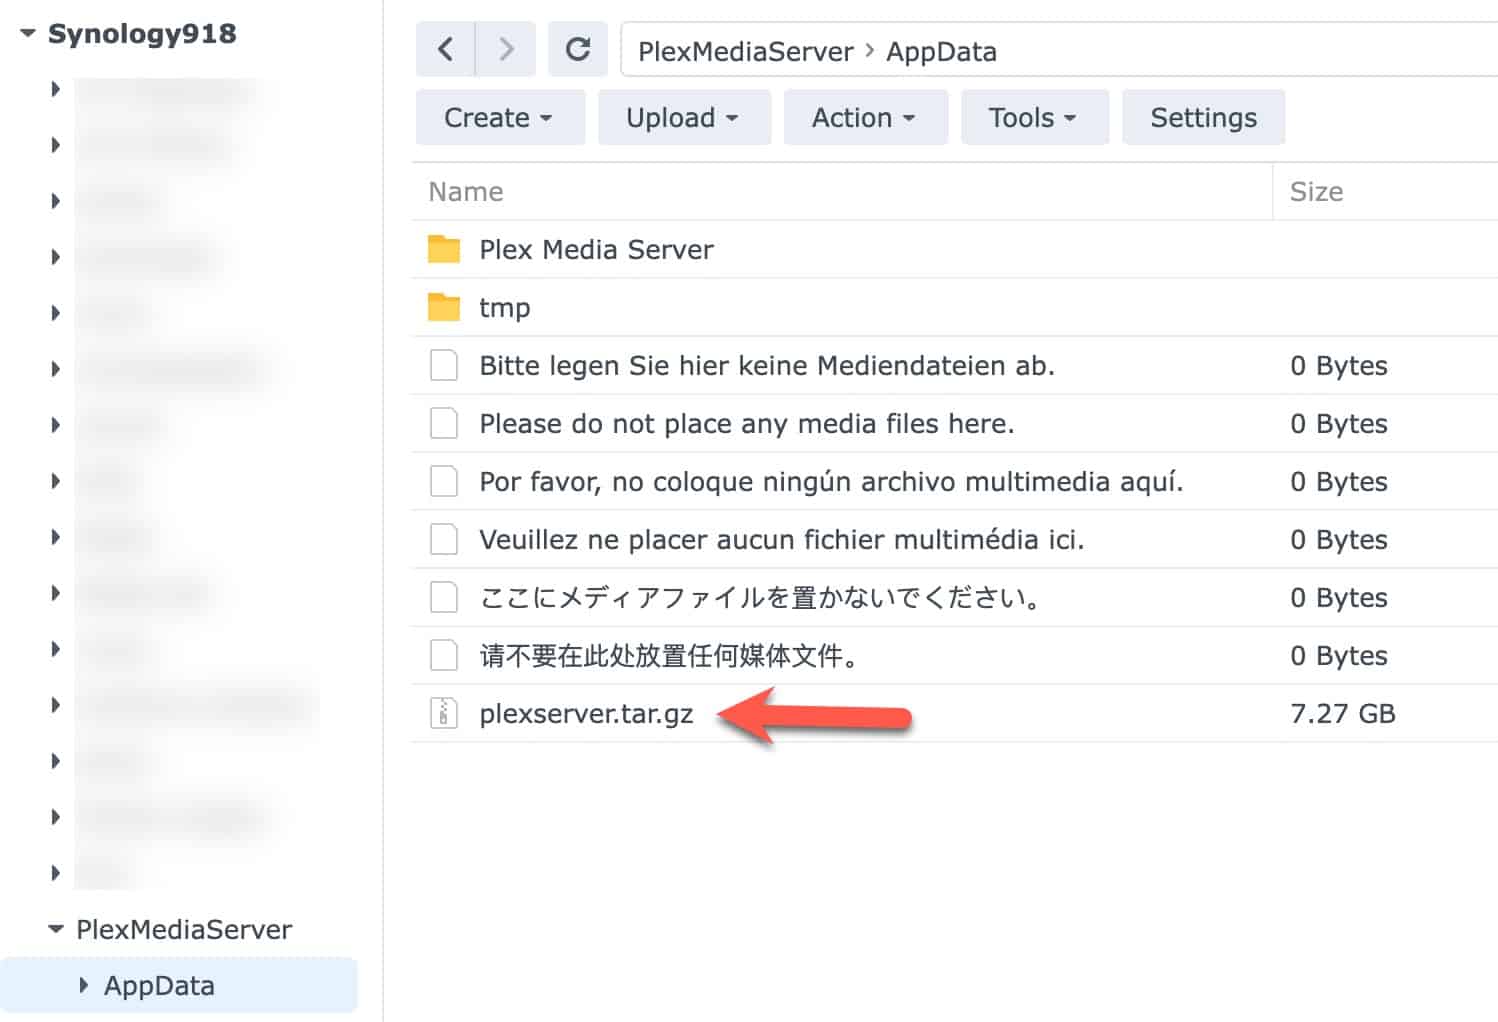
11. Back on your Synology open File Station and navigate to PlexMediaServer (root level) -> AppData.
12. If needed, click the file refresh button that looks like a circle with an arrow.
13. Right click on plexserver.tar.gz and download it to your computer.
Plex Configuration Restoration
- Open a SFTP session to your Plex LXC container.
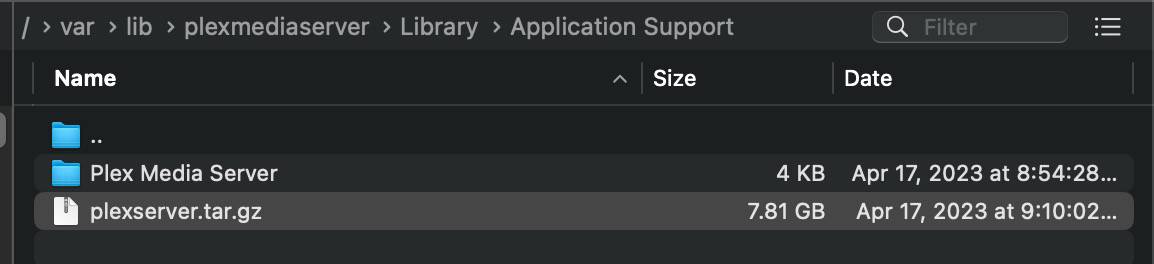
- In your SFTP client navigate to:
/var/lib/plexmediaserver/Library/Application Support/
3. Upload your tar file to the Application Support folder.
4. SSH into your Plex LXC and let’s backup the fresh Plex Media Server directory so we can revert back if needed.
					cd "/var/lib/plexmediaserver/Library/Application Support"
tar --exclude='./Cache' -zcvf plexserver-lxc.tar.gz "./Plex Media Server"
5. Wait for the backup to complete. It should be fast and small. Now let’s extract the Synology backup and over-write the existing Plex Media Server directory contents.
					 tar -xvzf plexserver.tar.gz .
 chown -R plex:plex "./Plex Media Server/"
6. Reboot your Plex LXC.
7. Open a browser and connect to your Plex LXC instance (http://IP:32400/web) and login.
8. If all goes well you should see the thumbnails of your recently added content. Your library will NOT be working at the moment though. That’s coming up.
9. In the Plex console under Settings click Remote Access.
10. Reconfigure as needed to ensure your new Plex LXC instance has inbound internet access. (Optional)
11. If you wish to rename your Plex server, under Settings click on General. In the right pane change the Friendly name.
12. If everything is looking good so far, you can now delete the local copy of the Synology Plex backup. If you want to keep it longer, help yourself. I would keep a copy on your local computer until you give Plex a good workout over the coming days to make sure everything is good.
					cd "/var/lib/plexmediaserver/Library/Application Support"
rm plexserver.tar.gz
NFS Setup
1. On the Synology open the Control Panel then click on Shared Folder.
2. Locate the media library folder(s). Right click and select Edit.
3. Click on the NFS Permissions tab. Click Create.
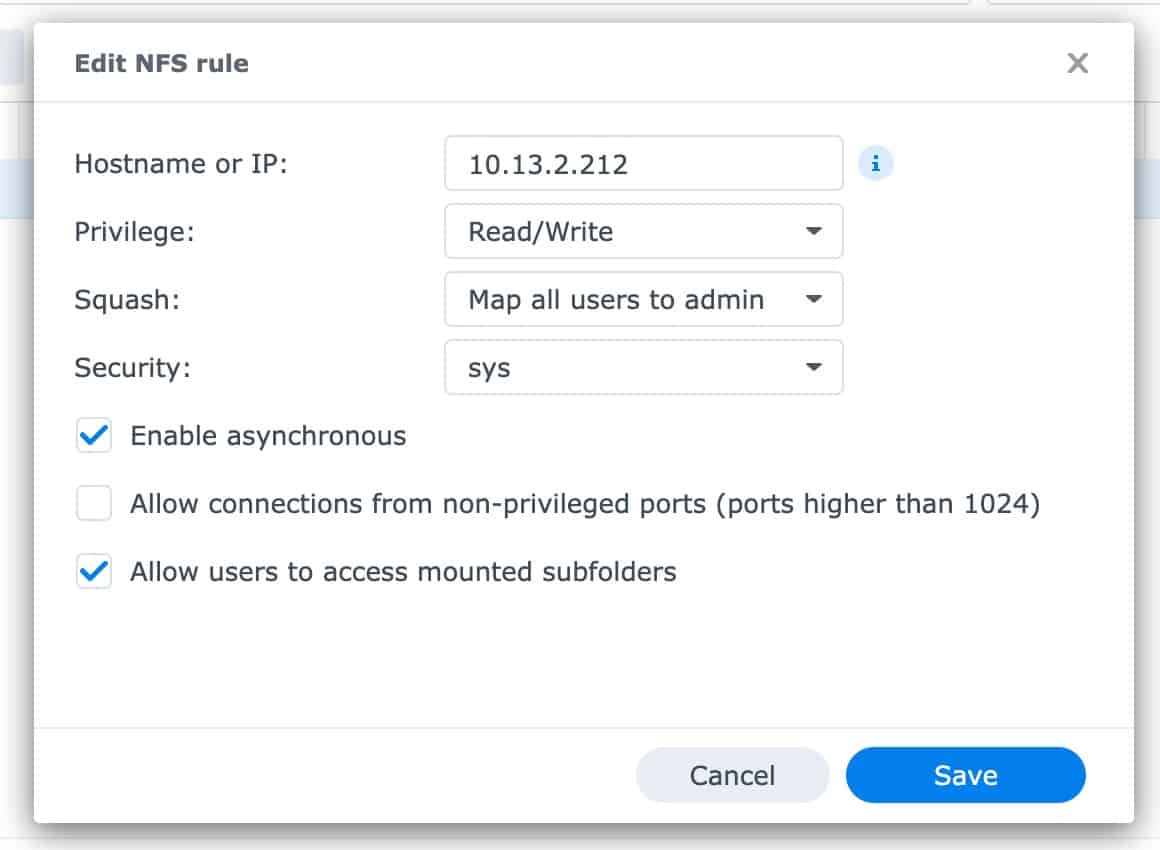
4. Add the IP address of your Plex LXC server.
5. Change the Squash to Map all users to admin.
6. Click Save. Click Save again.
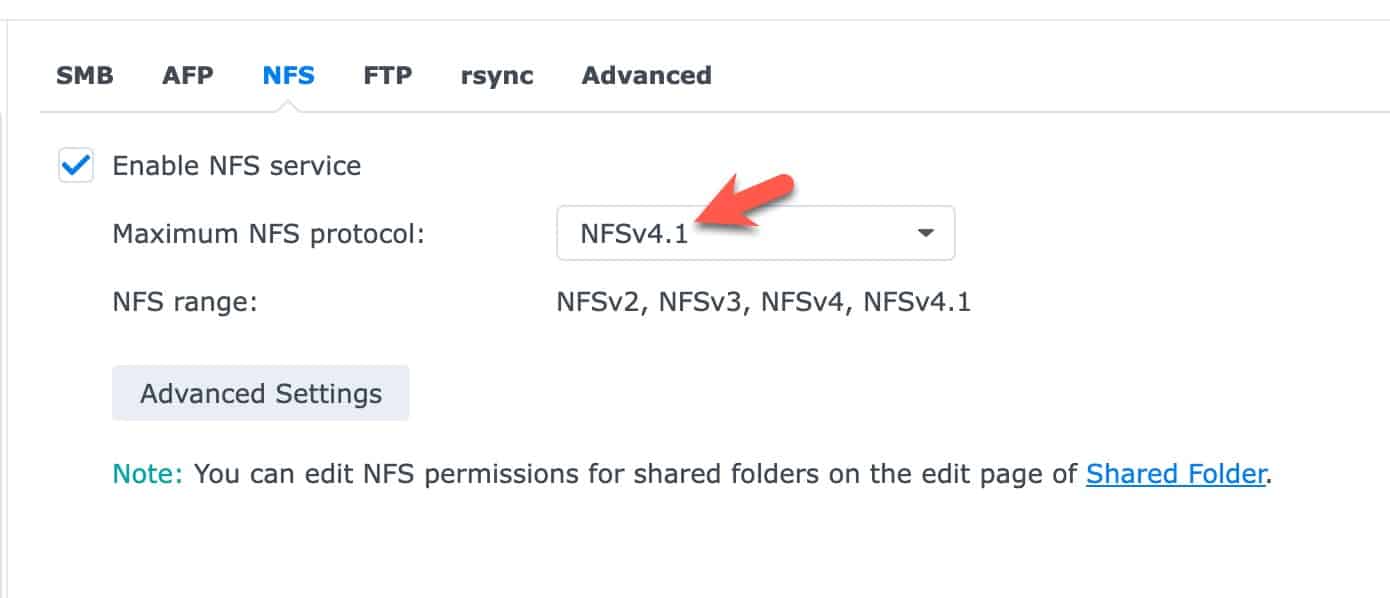
7. In the Synology Control panel to go File Services in the left pane.
8. Click on NFS and make sure NFS is enabled. We will be using NFSv3, but you can change the maximum version to NFSv4.1 for future proofing. Click Apply.
9. Open a SSH session to your Plex LXC.
10. Run the following commands:
					apt update
apt install nfs-common
11. Now let’s make a media library mount directory (pick any name or path you want), and let’s do a test mount:
					mkdir -p /mnt/Media
nano /etc/fstab
12. Add the following line, change the IP and mount paths as needed, then save and exit Nano.
10.13.2.230:/volume1/Media /mnt/Media nfs vers=3,nouser,atime,auto,retrans=2,rw,dev,exec 0 0
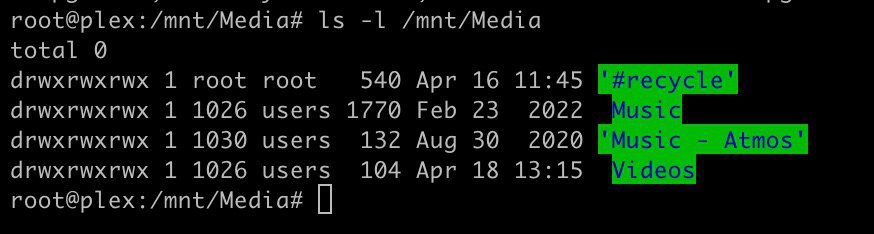
13. Test the mount. You should not get any permission denied or other messages. Silent completion means it worked. The directory listing should show files/folders on your Synology.
					mount -a
ls -l /mnt/Media
14. Go into the Plex web UI, and in the left pane all the way at the bottom under Manage click on Libraries.
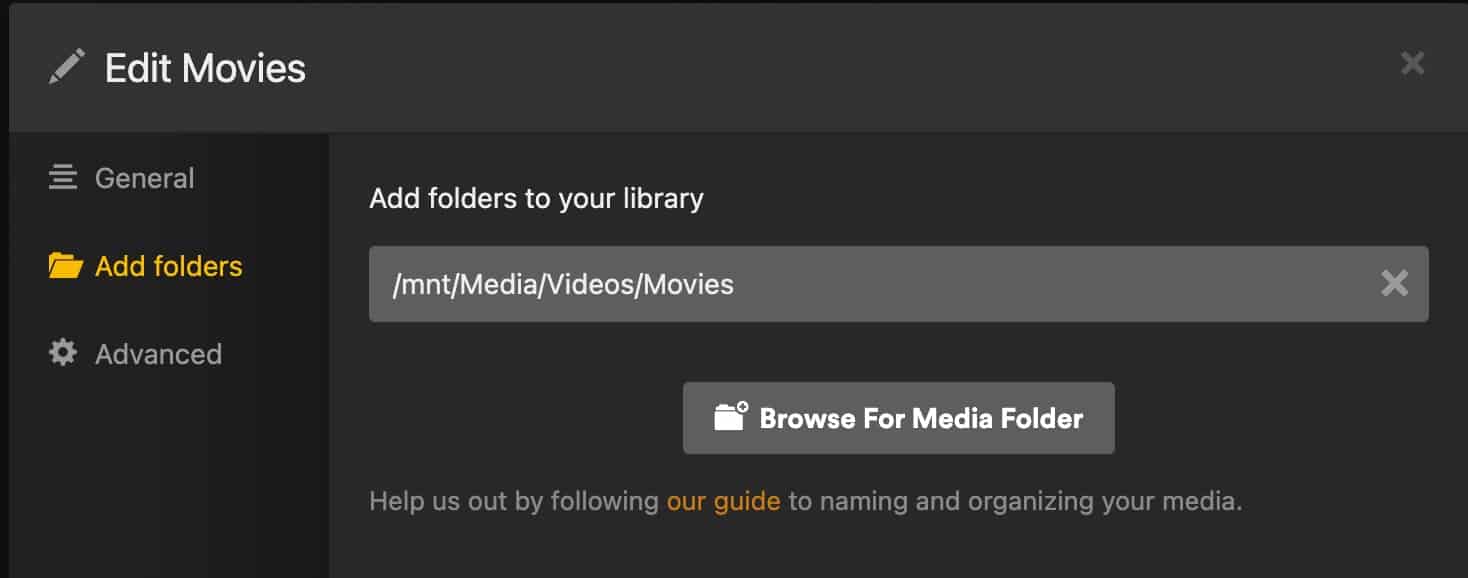
15. For each library hover over the name and click Edit Library.
16. Click on Add folders and modify the path. In my case I just substituted ‘mnt‘ for ‘volume1‘. Click on Save Changes and wait while it processes the folder. Repeat for each library.
NAS Mount Monitoring (Optional)
There may be times when you reboot your NAS or there’s a network hiccup and your Plex LXC loses the NAS NFS mount. This optional section will setup a cron job to check the mount status every 10 minutes, and if the specified media mount isn’t mounted it will attempt to mount the NFS share.
- SSH into your Plex LXC and run the following command:
					mkdir /opt/plex
nano /opt/plex/nas_check.sh
2. Paste in the code below and change the mount= path to your NAS Media share. Save and exit Nano.
					#!/bin/bash
mount="/mnt/Media"

if grep -qs "$mount" /proc/mounts; then
  echo "It's mounted."
else
  echo "It's not mounted."
  mount "$mount"
  if [ $? -eq 0 ]; then
   echo "Mount success!"
  else
   echo "Something went wrong with the mount..."
  fi
fi
3. Change permissions on the script:
chmod 555 /opt/plex/nas_check.sh
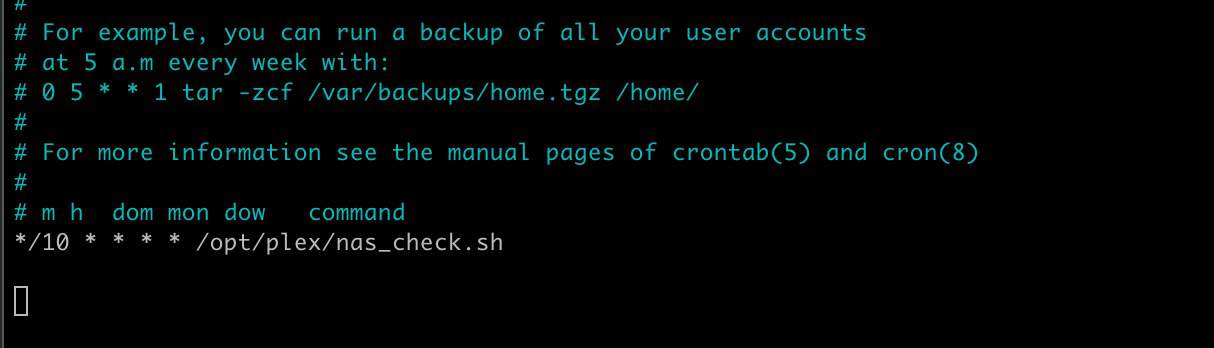
4. Open the crontab:
crontab -e
5. Add the following line in the crontab. Save and exit.
*/10 * * * * /opt/plex/nas_check.sh
6. Just to make sure everything works after a reboot, reboot your Plex LXC and verify that your Plex media library plays.
Summary
Migrating your Plex Media server from a Synology to a Plex LXC on Proxmox is not too hard. Nearly all of your configuration settings are maintained. And assuming you mount your existing Media Library from the Synology, Plex will re-associate the media files with its internal database. It will go through your music library and re-analyze each track, but all metadata, ratings, and play lists should remain intact.


please disregard! missed the squash all users to admin part–we’re good!
I love this guide and your Plex LXC guide. I’m following the same path as you–started with Synology NAS & Plex but outgrowing it, wanted to try a faster server w/ Proxmox & Plex in a container while still retaining the Synology NAS as a dedicated NAS. Your instructions are detailed and you explain the WHY which is missing in most guides. Thank you!
Great guide, thank you!
One thing when creating the tar file isn’t the path to the Cache folder to exclude missing the PMS folder? Shouldn’t it be:
tar –exclude=’./Plex Media Server/Cache’ -zcvf plexserver.tar.gz “./Plex Media Server”
instead of
tar –exclude=’./Cache’ -zcvf plexserver.tar.gz “./Plex Media Server”
It seems like you’re right because creating the tar file was taking forever for me and I realized it was because the cache wasn’t being excluded. I canceled it out and ran your modified version and it did the trick. Thank you for this!
Thanks for the reminder. I’ll update my post.
Btw thank you so much for this tutorial and the one on installing Plex in an LXC. It helped me tremendously and saved me a lot of headache. Your guides are great and very much appreciated!
Thank you!
Thank you for this!
When cleaning up and double checking logs that everything was working I found my dmesg is absolutely full of this logline:
Searching the web for what this means or what causes it has not been fruitful. I get roughly one new message per second, and it has not stopped since mounting my NFS volume – the error persists across reboots of my Plex LXC and my Synology DS918+ NAS. It also continues to fill the logs when plexmediaserver is stopped and I’ve umounted /mnt/Media. It just never stops.
I have my NFS share mounted as Read-Only both in Synology and my fstab. I tried switching to RW to see if that made a difference, but it didn’t.
This is only an annoyance but any thoughts?
My fstab
Thank you for all your tutorials, since i’m just approaching to the Proxmox universe they helped me installing Proxmox, creating a plex lxc and migrating all the data/metadata from windows in a blink of an eye.
Just one thing i would like to point out: since now there’s the possibility to create an unprivilegde plex lxc (as mentioned in your blog https://www.derekseaman.com/2023/04/proxmox-plex-lxc-with-alder-lake-transcoding.html it would be a good idea to update this blog explaining that for NFS mounting inside the LXC it must be a priviledge one, otherwise it would not be possible.
Another good thing (and it would help all the noobs like me) would be to explain how to mount correctly an NFS share in Proxmox giving the possibility to the LXC to reach it).
Thank you again 🙂
Hi Derek,
Thanks for the perfect explanation! It’s very well described. However, I’m running into one issue. When testing the mount, I’m getting the error message “mount.nfs: Operation not permitted”. Do you have any idea what I might be doing wrong?
I’ve created a shared folder named “Test” on the Synology. I’ve placed one file in it (LG video).
Then I execute the following commands:
mkdir -p /mnt/Test
nano /etc/fstab
And I add this line:
IP:/volume1/Test /mnt/Test nfs vers=3,nouser,atime,auto,retrans=2,rw,dev,exec 0 0
Finally, I want to test if everything is working fine with this code:
mount -a
ls -l /mnt/Test
But I’m getting the error message. I’ve followed the Synology instructions exactly. Any idea what might be wrong?
Thanks!”
I need to update the article. For mounting NFS, the LXC needs to be privileged.
Hello Derek,
Thank’s a lot for yours guides.
I moved my Synology Plex Server on my new Proxmox platform, with a NFS mount.
It works very well but… only on my LAN
The redirection of the port 32400 works to my Synology Plex Server but doesn’t to my Plex LXC
NB: I try each plex server separately.
canyouseeme.org confirms that the LXC is unreachable
I think there is a network configuration problem on my LXC but i can’t find it and as i moved the library from Synology Plex configuration to Proxmox LXC Plex configuration i ask also myself if there is possibly reasons to have some mismatch which do confusing Plex
I precise that i tried to redirect port 8006 to access PVE Proxmox from Internet and it works.
I only can’t access Plex LXC
If you have any idea or direction to search?
Thank you more
LB
Hello Derek
That’s it, the problem i spoke in my message (Laurent / June 13, 2024 2:30 am) is now solved 😀
I made a mistake
I created 2 LXCs with the same hostname and IP address.
I’ve never started both at the same time but when I did port forwarding I used the hostname and it pointed to the wrong LXC. I should have used the Ethernet address Well, Plex works…
One more time i send you a big thank for your guides
Have a good day
Bests Regards
L.B
I’m not able to sftp to the plex lxc…
Always: