Update 5/31/2016: Got all my parts and built the PC. Apparently there’s an industry wide problem with the Z170 HDMI 2.0 output that results in blank screens on many new 4K monitors (works at 1080P). I’ve seen it reported on the Intel forums for Asus and Gigabyte motherboards. I opened a ticket with Gigabyte today. For the time being I’m using my nVidia GTX 760 Ti for dual 4K, and it works great for 60Hz support. No HDCP 2.2, but today that’s not a big deal. YouTube 4K streams are smooth on this card.
Update 6/4/2016: None of the Thunderbolt adapters I tried solved my dual head 4K 60Hz problem. The Intel forums moderator for the thread following this issue is less than helpful. So I doubt this Intel driver problem will get fixed anytime soon. Thus, I’m now recommending a PCIe graphics card *IF* you want dual 4K 60Hz displays. If you are OK with just dual 1080P or 1440P, the built-in Intel graphics are just fine. The AMD Radeon RX480, due out end of June 2016, looks like the best choice for full 4K/HDCP 2.2 compatibility. It also supports HDR, DisplayPort 1.3/1.4, and H.265 hardware encode/decode offload. It should run around the $200 mark, which is great. In my mind, this AMD card checks all of the 4K “boxes” and should even provide a great gaming experience for resolutions less than 4K.
—
So my home PC, which is a daily ‘beater’ PC, was just over its 3 year anniversary mark. It’s a SandyBridge PC, and has served me well. While I wasn’t seeing any real performance issues (I’m not a gamer), I figured it was a good time to spec out a new PC and get all the latest goodies like NVMe, USB 3.1, ThunderBolt 3, 4K graphics, etc. In the past year I upgraded my home theater to 4K, so figured it was about time to do the same for my workstation.
Note, this is NOT a gaming rig nor do I care about overclocking. Think of this as state-of-the-art desktop PC for office work, photography, watching 4K YouTube videos, Netflix, etc. Power was also a concern, as well as being super quiet. If you want to read all about the Skylake processors and Z170 chipset, check out Anand’s article here.
I found this great website called PCPartPicker that lets you build a system, get an estimated cost, and does compatibility checks. You can find the full parts list for this build here. It also estimates system power, and my configuration comes out to 169w. It also lists the website with the lowest price and a very cool price history feature.
Researching this build I learned more about display protocols, chipsets, and HD copy protection than I ever wanted to know. This is a complicated field. Put on your thinking cap! If you aren’t in a hurry for a new PC but are thinking early 2017 you will upgrade, then watch out for the Kaby Lake CPUs and 200 series chipsets. These provide minor tweaks over the Skylake and Z170 series chipset.
Processor
First up, I had to choose the processor. I wanted the latest Intel offering (Skylake), but still stay within a reasonable budget. Intel does an amazing job with their ARK pages where you can quickly see processor specs, list prices, and features. So I wondered over to the 6th Generation Intel Core i7 Processor list. A quad core processor with hyperthreading is all I need, so I had a few choices. I chose the i7-6700 which was released in late 2015. It’s a 14nm process, 4 cores, 8 threads, and 3.4GHz base frequency and just 65w TDP. It also has Intel HD Graphics 530 built in, which supports 4K @ 60Hz. You can pick it up from Amazon for $298.
If you want to constrain your budget a bit, the i5-6600k is an excellent choice, with real world performance nearly that of the i7 big brother. It’s about $50 cheaper at $242 from Amazon. This processor is unlocked, meaning you have an easy time overclocking if you are into that.
Motherboard
Now that I have chosen a processor, the next major component is the motherboard. For this, I had a few requirements which eliminated 99% of the shipping boards. First, for full future compatibility, I wanted HDMI 2.0 and HDCP 2.2. HDMI 2.0 enables 4K at 60Hz, which the i7-6700 supports. While HDCP isn’t a show stopper for a workstation, if you ever want to play UHD content on your PC it will be required. I also wanted the fastest possible flash storage, and that would be NVMe M.2 (or U.2) x4 support. This interface far exceeds SATA III, at 32Gb/s (vs. 6Gbps)! SATA SSDs are now old school and “slow”.
So after extensive research, only two motherboards met this requirement. The Gigabyte GA-Z170X-Gaming 7 and the Asus Z170-Deluxe. The Asus option was the most expensive, around $300, and had built-in WiFi. My house has wired GiG-E, so I didn’t need WiFi. The Gigabyte option was around $200, didn’t have WiFi, but had better audio and met all my other requirements. It also has USB 3.1, and Thunderbolt 3 (click here for all the advantages of Gigabyte’s usage of Intel’s Alpine Ridge chip). I called Gigabyte tech support, and they confirmed it will support dual 4K @ 60Hz (with HDCP 2.2 via HDMI) displays using the Intel Iris graphics.
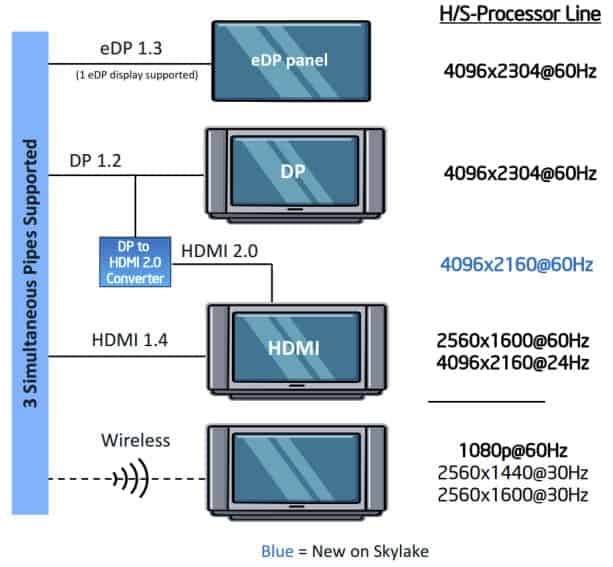
Other articles I’ve read said the Skylark processors can drive 2x 4K @ 60Hz monitors, so the Gigabyte support agent was right. If you want to get geeky, you can check out the spec sheet of the HDMI bridge chip here which clearly states 4K @60Hz and HDCP 2.2). The motherboard only supports DP 1.2a, which does not have HDCP 2.2. Even the Kaby Lake chipset (due out this year) is rumored to only support DP 1.2a. We will likely have to wait until Cannon Lake in 2017 for a supporting chipset. So should you want to connect this MB to a TV for 4K gaming/UHD content, only use the HDMI port. We will need to wait for a DP 1.3 MB to get HDCP 2.2 via DP…in late 2017. There is a DisplayPort 1.2 to HDMI 2.0 w/ HDCP 2.2 dongle that you can buy. That would HDCP 2.2 enable dual monitors. You can find the Club-3D dongle specs here and buy it on Amazon for $29. You can pick up the Gigabyte board from Amazon for $195.
Graphic below is from Anandtech:
Note: Gigabyte has a number of firmware updates that you need to apply, including one each for HDMI 2.0 and Thunderbolt 3, along with a BIOS update. You can find the updates here. If you are super concerned about security, you can add a TPM 2.0 module.

If you disagree with using the built-in Intel Iris graphics, then you will need to buy a third party PCIe graphics card. But, according to Intel, the Skylake GPUs will beat 80% of the discrete video cards on the market. So unless you are a hardcore gamer, try the integrated graphics first. Unfortunately, we are in a time of flux and finding a discrete video card that supports HDMI 2.0 and HDCP 2.2 is nearly impossible. I did see mentioned that the GTX-960 does have HDMI 2.0 and HDCP 2.2. I’m sure later this year it will be much more common. So if you can live with the Intel graphics for now, I would wait and get a new graphics card later this year or validate that it does support HDCP 2.2. The GTX-960s seem to start at $190 and go up from there. You can see an example on Newegg, where it does call out HDMI 2.0 support. This article claims it has HDCP 2.2 support. But a post here says HDCP 2.2 isn’t yet enabled/functional. Who is right? I don’t know.
This MB has significantly upgraded audio via the Creative Sound Core3D quad-core processor. This should provide improved audio over the ever present cheap Realtek chips. However, this MB also has dedicated USB DAC ports (two of them) for use with a USB DAC. The Verge has a good write-up on various DAC options that run around $100. Personally I’m sticking with the built-in audio.
Memory
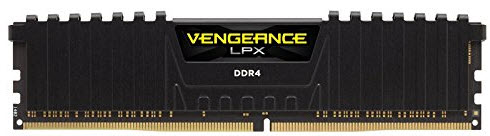
Next up, was memory. My old PC has DDR3, but that’s been eclipsed by DDR4. Corsair is a good brand, so I looked through their options for a 16GB kit (2x8GB). The Vengeance LPX line is their high performance memory, and has built-in heat spreaders. It also has a lifetime warranty, which is great. I settled on the Vengeance LPX 32ooMHz C16 kit. On Amazon it’s just $70 for 16GB, which is a great price. The motherboard has 4 DIMM slots, so you could bump it up to 32GB if you needed the memory.
Flash Storage
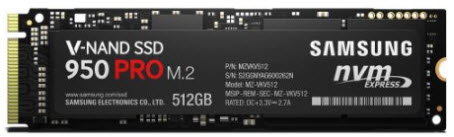
Next up was flash storage for my boot drive. As I previously mentioned, SATA III SSDs are slow and bottlenecked by the old 6Gbps interface. If you truly want the best storage today, it’s NVMe. The various options can be a bit confusing, so let me quickly cover those. NVMe is fastest when used with a PCIe Gen3 x4 interface. You can use either the M.2 connector which lets you mount the NVMe module directly to the motherboard. Or, you can use the U.2 connector. The U.2 module fits into the same M.2 slot, but allow you to plug in a U.2 cable to an externally mounted NVMe drive such as the Intel 750 series. The Gigabyte motherboard comes with dual PCIe Gen3 x4 M.2 connectors, so I wanted a NVMe solution to match. I decided on the Samsung 950 Pro 512GB. You can buy it from Amazon for $316. Yes it does cost more per GB than a SATAIII SSD, but it has 5x the bandwidth. Plus you don’t have to deal with cables and mounting a 2.5″ drive in your chassis. Samsung offers a 256GB version for $177 if that is more appealing.
Build note: Install this NVMe module on the bottom M.2 connector, so it uses less SATA PCIe lanes. If you want to go hog wild and get dual NVMe modules, you lose all but SATA_5 on the Intel SATA controller. But there’s an additional SATA controller which gives you two more SATA ports. I also read one customer removed the sticker and placed tiny heat sinks on each memory module. You can find those here.
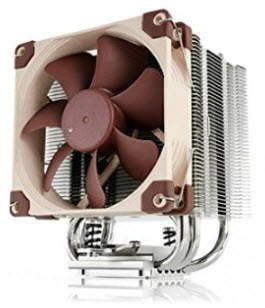
CPU Cooler
Now, I wanted to find a super quiet CPU cooler. I will be sitting next to this box, so the last thing I want is a noisy PC. Noctua is a stellar brand in the CPU cooling and case fan world, so I went a checked out their products. I wasn’t planning on overclocking, so I didn’t see anything too crazy or something like water cooling. I also wanted to make sure it wouldn’t interfere with the DIMM slots or PCIe cards. Noctua’s 6 year warranty was also appealing. I decided to get the Noctua NH-U9S. It met all my requirements, had stellar reviews, and is nearly silent in operation. You can find it on Amazon for $58.
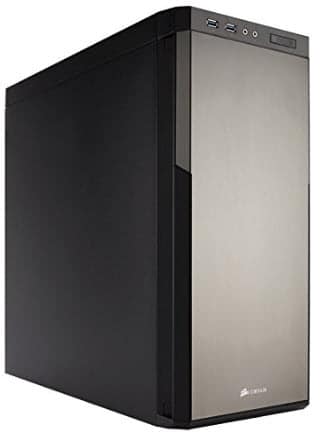
Case
One of the final pieces is the case. Cases are very personal, and people have strong opinions. For me, I really don’t care. I don’t need clear sides, fancy lights, or a lot of storage bays. Given the size of the CPU fan, I could not use a super slim HTPC style case. So a mid-tower case it was, and I wanted something quiet. It should also support USB 3.0 ports, which really is standard these days. I stumbled upon the Corsair Carbide Series 330R Quiet mid-tower case. I liked the fact that it has noise reducing damping material, smart airflow, lots of fan options, tool free disk drive installation, and looked very clean. It can be had on Amazon for $103. Do take note that it does NOT come with a power supply, so this case is more expensive than some that come with (crappy) power supplies. Reviews did mention the front case fan wasn’t silent, so I picked up the Noctua NF-A14 PWM fan, which I’ve read is nearly silent. It’s on Amazon for $22.
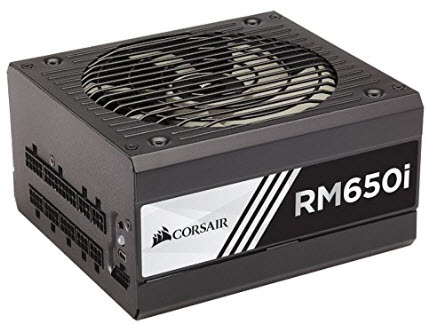
Power Supply
Because the case doesn’t come with a power supply, it was time to do a little research. For maximum efficiency, you don’t want to get a PS that is vastly over rated what you will be drawing. You also want to look for near silent (or totally) silent operation. Modular power supplies are also great, which avoids having to bunch up a lot of cables in your case and making for a messy installation or interfering with airflow. I’ve had excellent past experience with Seasonic, but I also knew Corsair was a solid choice. I did not want to spend a bundle, since this is not a high wattage gaming rig. But I do value quality and features. I settled on the Corsair RMi Series, which comes with some unique monitoring software that is fed via a USB cable to the power supply. I wanted the lowest wattage version, which unfortunately was a beefy 650 watts. So I’ll be running on the low end of the efficiency scale. But it does feature a fanless mode, if the power draw is sufficiently low. You can find it on Amazon for $120. Yes, you can most certainly find cheaper solutions (like a SeaSonic S12II-430 for half the price). So feel free to spend less. But I like quality, and the monitoring software as gimmicky as it may be, tipped me over the edge.
4K Monitors
Update 5/26/2016: After more intense research, I found a great monitor.
Here’s where the rubber meets the road, and quite frankly the current solutions are extremely scarce. The problem is HDCP 2.2, or should I say, the lack of support. After extensive googling and research I found the LG 27UD88-W that supports HDMI 2.0 and HDCP 2.2. And it even has a USB 3.0 type-c connector on it as well. It retails for $699. You can buy it from Amazon for $668. There is the 32″ Dell UP3216Q monitor that advertises HDMI 2.0 and HDCP 2.2. It’s a pricey $1,400. It’s a sure bet that more 24″ and 27″ HDMI 2.0 and HDCP 2.2 4K monitors will ship, the question is just when. Monitors can last a good 5 years or more, and the good 4K monitors can run north of $700. So I want to get something that will last 5+ years. There are cheaper 4K options (such as those from Dell), but a big hobby of mine is photography so accurate colors are a must. The LG option specific states accurate colors, is calibrated, and aimed at video/photography enthusiasts. I’m in!
If your budget is more around $500 per monitor and highly accurate colors are not a requirement, then I would wait on a purchase. No doubt HDCP 2.2 compliant 24″ and 27″ monitors will be released, and I would bet by the end of 2016.
Mass Storage
If you are in the market for quality mass storage, check out the HGST Deskstar NAS lineup at Amazon. You can get a 4TB 7.2K SATA drive for $164. HGST got the highest reliability marks in a BackBlaze blog post you can read here. If you want the enterprise grade SATA drive the 4TB “ISE” model runs $275 at Amazon. It has twice the MTBF of the consumer NAS drive.
Summary
I tried to balance quality, performance, price, while meeting my requirements in a solid workstation. The total price without tax and shipping comes in around $1,200. Yes, you could shave off some $$ by going with cheaper/slower parts. I also left out spinning HDD and optical media. I was thinking of a UHD/4K Blu-ray drive, but decided against it. First, we are too early in the UHD uptake to see any real drive options (a quick search didn’t turn any up). Second, I’m not planning on viewing UHD movies on my PC. That’s why I have a 4K home theater. Even UHD Blu-ray players are scarce, with Samsung being the primary option. Later this year I’ll re-investigate 4K monitors and hopefully the market will have a few HDMI 2.0/HDCP 2.2 options. Remember, only the HDMI port supports HDCP 2.2, so if you connect this MB to a 4K TV, use the HDMI port.
After I get all of the parts and assemble it, I’ll update this post with any gotchas. So if you are thinking about buying these parts, you might want to wait a few weeks until I can fully test the system with Windows 10 x64. It should work just fine, though. Remember that the free upgrade to Windows 10 expires on July 29th. So I plan on loading this PC with my old copy of Windows 8.1, activate, then upgrade to Windows 10. I could use the free Samsung utility to drive copy my old Windows 10 SSD to the NVMe drive, but then Windows will become deactivated and I’ve seen accounts of Microsoft refusing re-activating and telling customers they need to buy a copy.
Do take note that Amazon will cover return postage of any DOA item, unlike many other retailers like NewEgg. So if you have the choice between Amazon and say NewEgg, lean towards Amazon.


I remember those early Z170 days; the 4K blank screen issue you mentioned was such a headache for early adopters. It’s funny how integrated graphics were promised to handle 4K at 60Hz, but in reality, many of us had to fall back on a discrete card like your GTX 760 Ti just to get a stable signal.
I recently went through a similar process of trying to balance power and noise. I’ve been running a ProLiant DL360 with a 14 Core 2.6GHz Xeon https://serverorbit.com/pc-and-servers/proliant-dl360/14-core-2-6ghz-xeon for my home lab, and while that setup is a total beast for virtualization, the 1U fan noise is basically a jet engine. Moving toward a “quiet” workstation with a Noctua cooler like the NH-U9S is a huge relief for a home office. It’s a bit of a culture shock going from 14 physical cores down to a quad-core i7, but for daily office work and photography, the silence is worth the trade-off in raw multi-threaded muscle.
Do you think we’ve finally reached a point where integrated graphics are truly reliable for 4K workflows, or is it still safer to just budget for a mid-range dedicated card from the start?