
I’m actually using ILIO in my current VDI architecture, so I was quite familiar with the performance (which is great!). But I had never heard of CloudVolumes. CloudVolumes is a startup and their v1.0 product went GA within the last two months. Immidio is somewhat similar to AppSense, and provides user environment personalization/control.
What I found particularly compelling about CloudVolumes was the ability to live add applications to running VMs (client and server OS), and just store one copy of the app that thousands of VMs could share. Big space savings! “Hot adding” apps literally appeared in seconds on the desktop when the administrator assigned them to a running VM. Check out the videos on Vimeo for demos.
What the product could enable is the use of non-persistent VDI base VMs which run from a single golden image, yet to the user seem persistent. There’s an ability for the user to install their own apps (which you can disable), and retain personalized information. So you could have a pool of non-persistent VMs, assign CloudVolume “AppStacks” to a user, and when the user gets their random VM it gets assembled on the fly with their applications and personal data (if enabled).
You can leverage native VDI products to create and maintain your VMs, such as VMware Composer and XenDesktop MCS/PVS. This is different from some competing solutions that use their own technology to assemble a desktop and bypass native VDI image management. Personally I’d lean towards native VM image management tools that VMware and Citrix provide.
Frankly, all of this sounded almost too good to be true. And the company says the technology is coming to physical computers as well, but declined to give a public timeframe when that might happen. This isn’t a VDI only solution either, as they tout providing support for server workloads such as SQL, IIS and XenApp. Instantly assign an “AppStack” to your XenApp server, so they claim, and provision dozens of apps with a few clicks.
Anyone that has worked with me knows I don’t hold back with vendors and giving candid input on how their product really sucks (a lot really do suck), or is really awesome. So I wanted to put their technology to the test and see for myself whether it really works as well as they tout. It’s only a 1.0 product, so I’ve tempered my expectations and expect a few rough edges. I shot the company over a list of 20+ questions which we discussed in a conference call this past week. Given their answers, I felt it was worth trying out in my personal lab to see if it’s spectacular or a flop. I have yet to use the product, so I’m blogging about this as I do my first install and I honestly don’t know what the end result will be.
Basic CloudVolumes Installation
I reviewed the system requirements and found that the CloudVolumes Manager was supported on Windows Server 2008 R2, vSphere 5.0 or later, and worked with IE 9, 10 and FireFox 10, 11. Support for Windows Server 2012 and Hyper-V were not available in this version. For the CloudVolumes agent it supports Windows 7 32-bit, Windows 7 64-bit, and Windows Server 2008 R2. No official fully tested support for Windows 8 or Windows Server 2012, although the company did say it “should” work but hasn’t gone through the full QA cycle. A remote SQL database is optional and only needed when deploying multiple Cloud Manager environments.
I provisioned a Windows Server 2008 R2 VM for the CloudVolumes Manager, and created two Windows 7 x64 VMs. One was a “clean” master that will be used to create the AppStacks and the other will be a target computer. At this point I didn’t want to yet stand up VMware View or XenDesktop, since I wasn’t even sure how well the product would work.
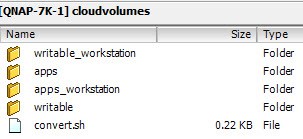
Next up, which I found a little strange, is the need to copy a .zip file to a VMware Datastore then run an unzip and convert command to create their special VMDK files. Normally I’m used to deploying OVA files to create VMs/VMDKs. But the process was easy enough, and just required SSH to be turned on the ESXi host to run the script. The result was the following directory structure on my datastore.
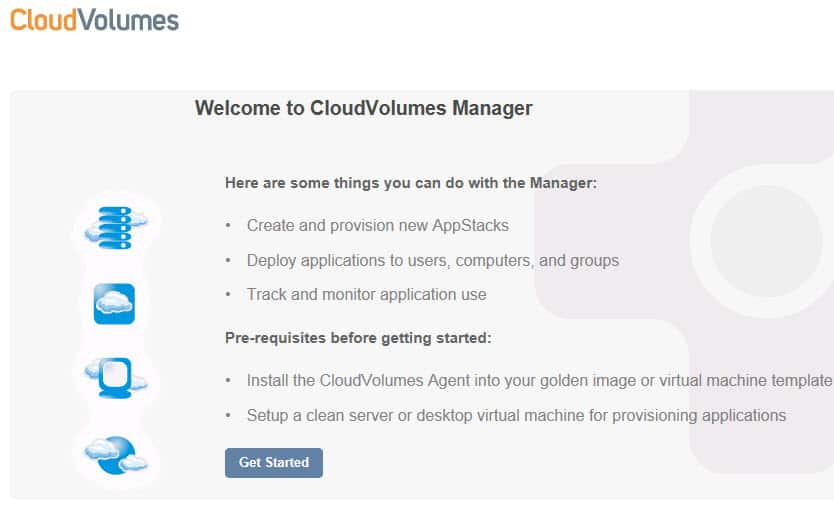
Now that the VMDK files were ready (NO VMs were created or harmed during this process), I moved over to my Windows Server 2008 R2 server so I could install the CloudVolumes manager. I started the installation wizard, chose the Manager role, and it then proceeded to install SQL express (or you could point it to an existing SQL server). The installer finished without any problems, and I then launched the CloudVolumes Manager console in IE 10.
That’s it for Part 1 of my CloudVolumes installation. At this point my Windows 7 packaging VM is patching, and I un-installed my regular baked-in apps so that it’s as clean as possible. In Part 2 we configure licensing, Active Directory, vCenter credentials, and datastores. Check it out!


Great Post Thanks a lot 🙂
الربح من النت