This series includes:
VMware View 5.1 Installation Part 1 – View Connection Server
This is the second installment in the VMware View 5.1 installation and configuration series. The first part covered the installation of View connection server and its SSL certificate. This post covers the optional component, View Composer 3.0. Composer is part of the View Premier bundle, and allows you to deploy link-clones for stateless VDI.
Unlike the Connection server, the View Composer 3.0 requires a SQL database back-end. Unfortunately, View Composer does NOT support Windows authentication if the SQL server is not on the Composer server. This is disappointing, as SQL authentication is not secure and other VMware products fully support Windows authentication to SQL such as vCenter, VUM, and UMDS. I would strongly uge you configure SQL transport encryption so that the weak SQL authentication is wrapped in SSL. For some guidance on configuring SQL SSL, check out this article.
Let’s get started on installing VMware Composer 3.0:
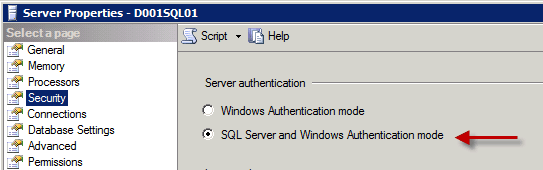
1. If your SQL server is not co-located with your Composer 3.0 server, then make sure your SQL server allows mixed mode authentication. To verify the authentication mode open Microsoft SQL Server Management studio. In the Object Explorer right click on the SQL server name and select Properties. Then click on Security, and change the authentication mode to SQL Server and Windows Authentication mode. Restart the SQL services if you had to change the mode.
2. You need to create the View composer database. You can do this manually, or modify the script below to suit your sizing requirements and file paths. You can cut and paste the script below into the Microsoft SQL Server Management Studio, then click on Execute.
USE master
create database “SD01-vCenter Composer”
on
( name = ‘SD01-vCenter Composer’,
filename = ‘K:Microsoft SQL ServerMSSQLDataSD01-vCenter_Composer.mdf’,
size = 250MB,
filegrowth = 25MB )
log on
( name = ‘SD01-vCenter Composer log’,
filename = ‘L:Microsoft SQL ServerMSSQLDataLogsSD01-vCenter_Composer.ldf’,
size = 100MB,
filegrowth = 10MB )
COLLATE SQL_Latin1_General_CP1_CI_AS;
GO
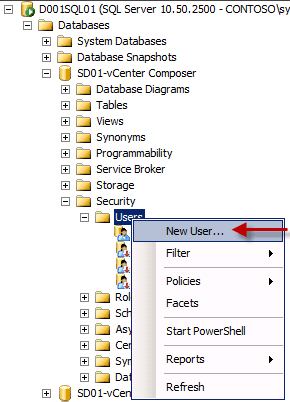
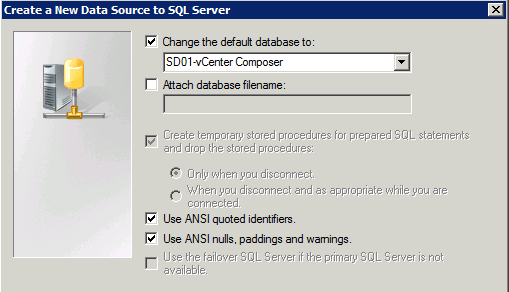
3. Since Composer uses SQL authentication, you need to create an account within SQL server. Pay close attention to the password policy, as it may default to require you to change password at next login, which is not what we want for a service account. Change the default database to the Composer database.

4. Next, we need to give the SQL account permissions to the Composer database. To do this we need to add a new user to the SQL database Give the SQL account db_owner permissions for the schema and database.

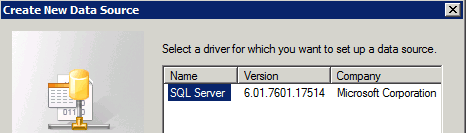
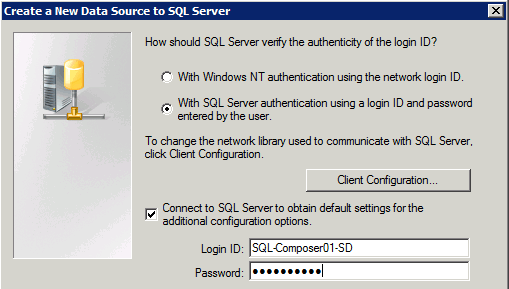
5. Switch over to what will be the View Composer server (could be your vCenter server, your View Composer server or a another server). Install the Microsoft SQL Native Client, then start the Composer installation and click through the wizard unitl you get to the database configuration. Click on ODBC DSN Setup then click on System DSN.
6. Click Add and on the next screen the SQL Server should be listed. Click Finish.
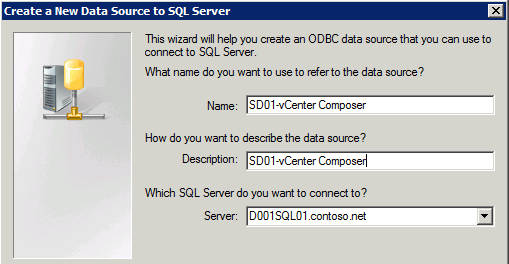
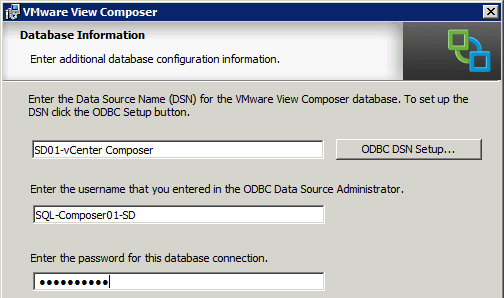
7. On the next screen fill in the DSN name you want to use, and the FQDN of the SQL server. Copy the name to the clipboard.
8. Select SQL Authentication then enter the SQL account credentials that you created in SQL server.
12. If you are installing Composer on the same server as View Connection server, you should already have a SSL certificate installed if you followed my previous instructions here. If you are installing on the vCenter server or another server, then follow that link and do steps 1-7 to install a SSL certificate. Select the appropriate certificate by looking at the thumbprint.
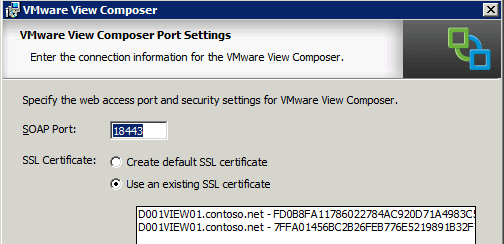
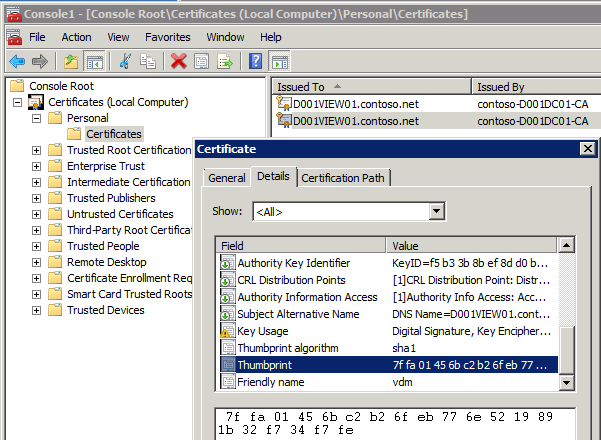
To lookup the certificate thumbprint open a blank MMC, add the certificate snap-in for the computer account, then open the Details of the right certificate and look for the Thumbprint value.


SoAct…I installed it as administrator (right clicking on the installer) and it went through fine. I initially had the install bomb out, likely for the reason you pointed out.
Thanks for the great article Derek. Much appreciated.