One of the tasks you should complete during the installation of the Cisco UCS Manager is configuring the Fabric Interconnects with a trusted SSL certificate. The procedure is straight forward, and only needs to be completed once, since the two Fabric Interconnects are clustered and the configuration is replicated between the two devices. In my example I’m using a Windows Server 2008 R2 Certificate Authority, but any CA should work, but the steps will vary a bit.
1. Login to your Windows CA web services site (https://yourCA/certsrv) and click on Download a CA certificate, certificate chain, or CRL.
2. On the next screen select the current root certificate, Base 64 encoding, and then click on Download CA certificate chain.

3. Save the P7B certificate file and open it in a text editor such as Notepad. Paste the contents of the file to the clipboard.
4. Login to the Cisco UCSM and click on the Admin tab. Right click on Key Management and select Create Trusted Point. Enter a name for this trust point, such as the name of your CA. Then paste the contents of the clipboard into the certificate chain window. Click OK.

5. Right click on Key Management and select Create Key Ring. Enter a keyring name, and select the modulus (I’d pick 2048). Left click on the new keyring and then click on Create Certificate Request. In the certificate request fill out the information appropriate. Use the FQDN for the “DNS” field and for the “Subject” name use the short hostname. The IP address should be the UCSM VIP (cluster) IP address. Click OK.

6. In the next window copy the request text to the clipboard. Login to your Windows CA then click on Request a certificate, advanced certificate request, then submit a certificate request by using a base-64 encoded CMC of PKCS#10 file. Paste the certificate request into the window provided, and select the appropriate certificate template, such as web server.

7. Download the certificate as Base 64 encoded, open it in notepad, then copy the contents to the clipboard. Back in UCSM under the certificate request expand Certificate and select the appropriate trust point, then paste the certificate into the window. Click Save Changes.
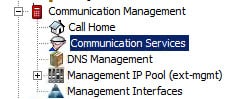
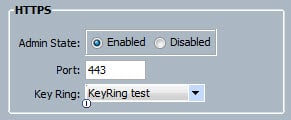
8. In the Admin tab under Communication Management click on Communication Services. Change the HTTPS configuration to use the new keyring that you configured.
9. If you now log out of UCSM and connect to the URL with your web browser your browser should now show a trusted certificate for the management interface.
And there you go! Your UCS Fabric Interconnects are now using a trusted SSL certificate. Yes, we can now all sleep better at night.


Thank you so much for this well written and informative guide. Had much help from this!
Hi,
In our lab we have a problem the ucsm cluster ip is changed and the ssl certificate still shows the old ip as the publisher.
Can u guide me how to generate new selfsigned ssl certificate for the default key ring in UCSM
Dude, thank you so much! Helped out big time!
All, For anyone havine issues iwth the "Split Certifcate" please see this link.
https://supportforums.cisco.com/thread/2159906
This is a fantastic blog – thanks.
i dont know if other people got this issue but i have had it twice, after applying all the certificates and trustpoint. When you access the UCS site you will still be shown the default keyring. If you logon to the UCS cli and then run the commands to check the keyring – it will show the new keyring with newly created trustpoint. This is confusing because the inbuilt https daemon on the fabrics hasnt been restarted. i found no documentation anywhere to help with this.
basically you have to go through to the following on the CLI.
scope security
scope keyring “exact name of the keyring”
https disable
commit buffer
https enable
commit buffer