A high availability VDI deployment, such as XenDesktop 5, demands that you use multiple servers to provide broker redundancy. As such, a load balancer such as the Citrix Netscaler comes in mighty handy. The NetScaler can also act as an ICA proxy between a trusted and untrusted network, such as the internet and your corporate network. Now that I’ve gotten XenDesktop 5 running in my lab, I wanted to see what it takes to configure the NetScaler Access Gateway feature to allow external inbound connections and serve up a nice VDI desktop.
As the configuration is somewhat complex, let’s start with the easy part, creating your own SSL certificate and importing it into the NetScaler. Now in the real world you’d need to use a trusted CA like Verisign, or your clients won’t trust the Access Gateway and the Citrix receiver will not launch. However, if you are in a lab or home environment you can use your own CA just to get the flavor how it works.
In my lab I’m using the latest NetScaler VPX release, which is v9.3 build 48.6.nc. First we need to use OpenSSL to create a private key, then a certificate request, convert the private key, then submit to my Microsoft CA, and finally import into the NetScaler. Figuring out this process was a bit easier than VMware makes it for importing certs into an ESXi host, so you have that going for you.
1. Login to the NetScaler and click on the SSL folder in the left pane.
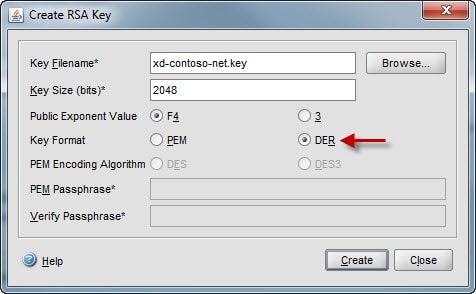
2. Generate a private RSA key by clicking on Create RSA Key. Use a filename that is easily associated with the FQDN of the certificate and I would use a .key extension to denote it’s the private key. 2048 bits is the maximum keysize, so I’d go for that. Change the format to DER. Click on Create then Close.
3. On the NetScaler SSL page click on Create CSR. Type in a file name for the certificate request (I’d suggest a .req extension), then browse to the private key file you just created. In the Common Name field enter the FQDN you want your certificate to be bound to. Fill in the other information as needed. Click on Create then Close.

4. Back on the SSL page click on Manage Certificates then locate the REQ file, highlight it, then click on View. Copy the contents to the clipboard. Close the window.
5. Assuming you are using a Windows Server 2008 R2 CA, perform these steps:
- Go to the certificate home page and click on Request a certificate.
- Select Advanced certificate request.
- Select Submit a certificate request by using a base-64-encoded….
- Paste the certificate into the window and change the template to web server.
- Download a DER encoded certificate (not the certificate chain) using a logical name like xd-contoso-net.cert.
6. Back on the NetScaler and open the SSL folder then click on Certificates.
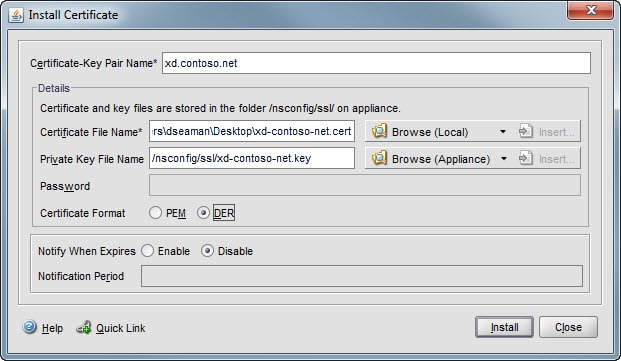
7. Right click in the SSL window and select Install.
8. I would suggest the FQDN for the pair name, browse locally to the certificate file name, then browse on the appliance for the private key, and change the certificate format to DER.


Dear derek:
Good jobs.Thanks for you sharing ,May I have a question ?It’s this apply for VMware View with the connection server load balance?