The Aqara FP300 is the new kid on the block when it comes to smart home presence sensors. But the FP300 does not just do presence sensing, but also supports temperature, humidity and light sensors. What really makes this device exciting is that it’s battery powered! I’ve been eagerly waiting on the FP300 release for months. Spoiler alert: It does NOT disappoint.
Update January 17, 2026: Aqara has updated the Zigbee mode firmware to version 5841, up from the launch version of 5234. Check out my post for all the details: Home Assistant: Updating Aqara FP300 Zigbee Firmware
Introduction
The Aqara FP300 is a very compact smart sensor that packs five different monitoring capabilities into one battery-powered device. Unlike traditional motion sensors that might miss you when you’re sitting still, this sensor combines multiple detection methods (mmwave and PIR) to keep tabs on what’s happening in your space. Here are the five main features:
• Accurate people detection – Uses two types of sensors (heat detection and 60 GHz mmWave) to know when someone is in the room, even if they’re just sitting quietly at a desk or lying in bed. The FP300 can NOT distinguish between pets and humans. If your pet is large enough, it may trigger presence detection.
• Light level monitoring – Measures how bright your room is for advanced home automation.
• Temperature tracking – Keeps an eye on room temperature so you can trigger your AC or heater to maintain comfortable conditions.
• Humidity sensing – Monitors moisture in the air, useful for controlling humidifiers, dehumidifiers, or exhaust fans.
• Wireless and flexible placement – Runs on two coin batteries that last 2-3 years, and can be mounted on walls, ceilings, corners, or magnetic surfaces without any wiring needed.
The FP300 supports two networking protocols: Zigbee and Thread via different firmware images. If you choose the Thread firmware, you automatically get Matter support. Depending on which home automation platform you are using, here is my suggested deployment:
- Home Assistant – Zigbee firmware with Zigbee2MQTT. No Aqara hub needed if you have an existing Zigbee coordinator.
- Apple Home – Zigbee firmware + Aqara hub (suggest the M3) + Aqara iOS App. The Aqara M3 hub can be paired to Apple Home via Matter, so you can access the sensors in Apple Home.
Only when the FP300 is in Zigbee mode do you have full access to all of the configuration settings. The FP300 with Thread/Matter firmware is EXTREMELY limited in the parameters you can configure. In fact, it really hobbles the functionality to the point that I would have a hard time recommending it.
Aqara is rumored to be working on adding custom Matter configuration clusters for all the advanced features, but who knows if, or when, that will ever materialize. If they do implement this, that could theoretically let platforms like Home Assistant natively configure all of the advanced features in Thread mode. Inovelli does this with their white series (Thread/Matter) dimmers and fan switches.
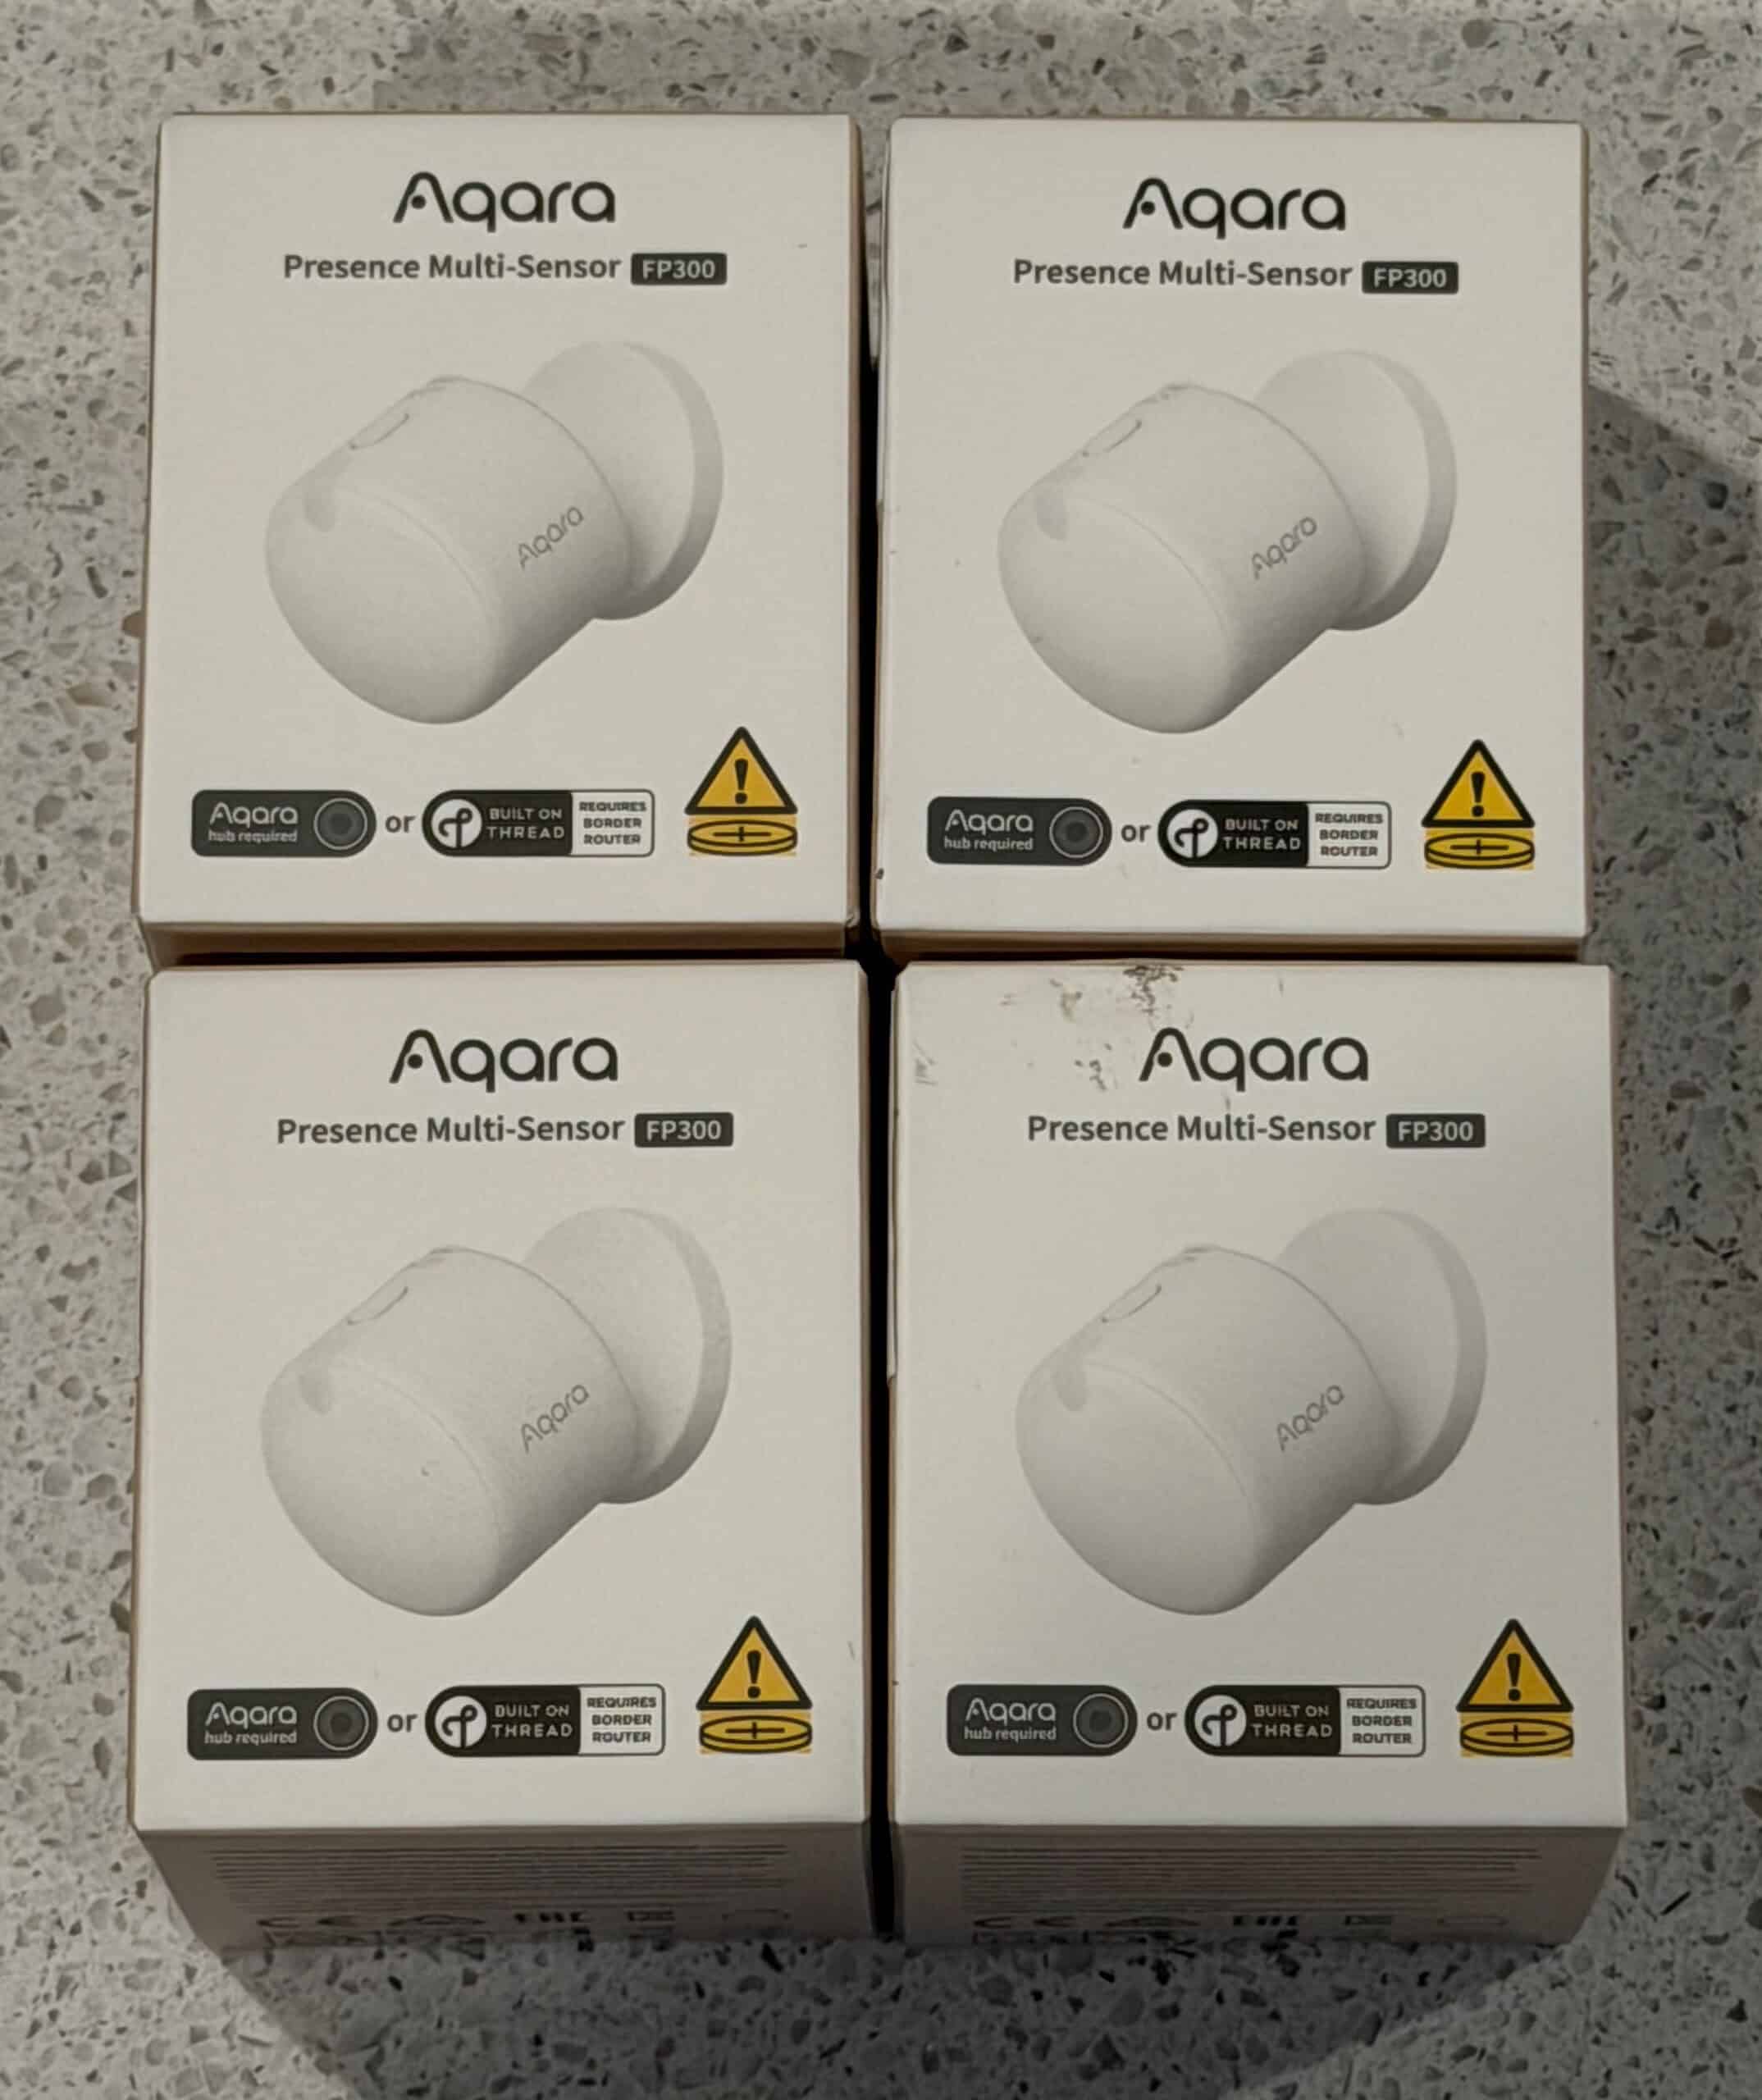
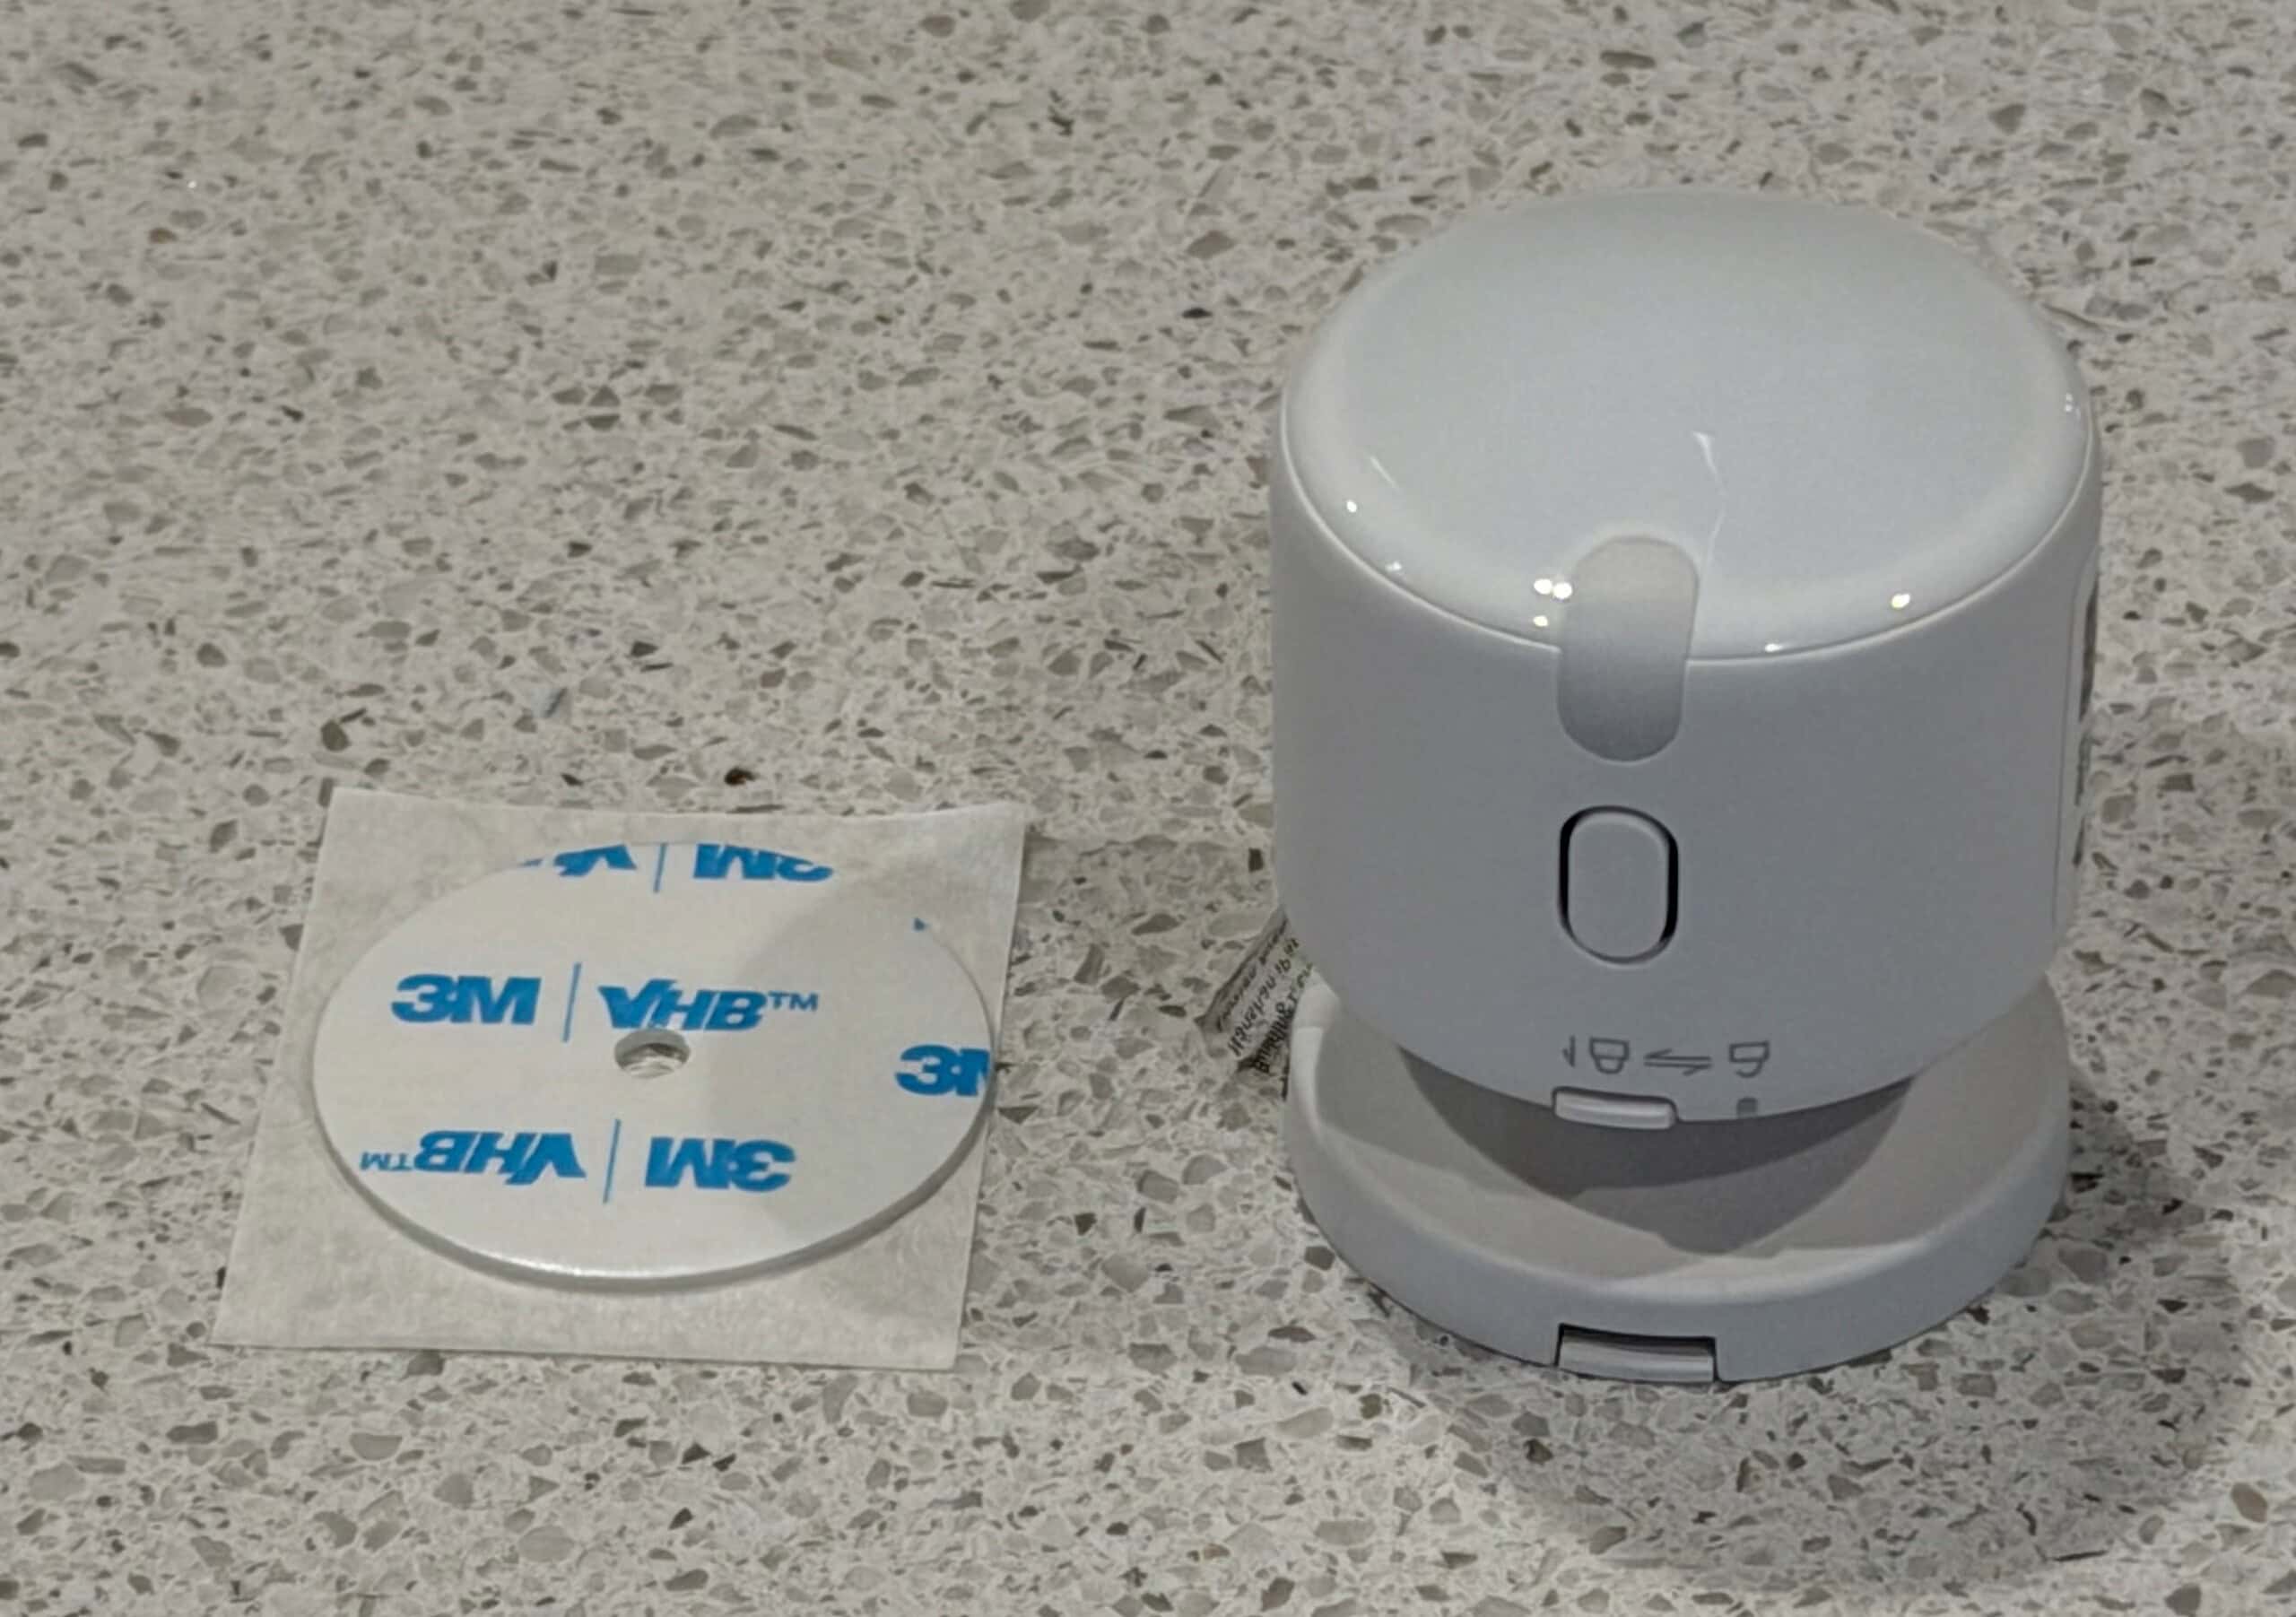
When you unpack the FP300 (US Amazon version) you only get the FP300 and an adhesive pad. Amazon advertises you get a metal mounting disc and screw, but that is NOT the SKU that Amazon set me (and others), which is a bummer. If you want a corner mount, a member of the community has this 3D printer mount available.
Differences with the Aqara FP2
The Aqara FP2 is a similar, but older mmWave presence sensor. For me, the FP2 has been fantastic after a rough start with buggy firmware. I still plan on using FP2s in certain areas, but more on that later. There are a few major differences between the FP2 and FP300:
- Power: The FP2 must be powered by USB power. No battery options. The FP300 is only battery powered, by two coin batteries (CR2450).
- Zones: The FP2 supports up to 30 zones and 320 detection areas laid out in a 2D format that you configure with the Aqara app. The FP300 has 24 detection distances, but not unique zones.
- Sensors: The FP2 only has mmWave and light sensors. No temperature or humidity. The FP300 has presence, temperature, humidity and light. Exclusive to the FP2 are also fall detection and sleep detection.
- People Detection: The FP2 can (sometimes) track how many people are in a room. The FP300 merely reports presence when at least one person is in the room. No ‘person count’ tracking.
For most users the FP300 will be the better choice. However, as I cover later, I still have specific niche use cases that will keep using the FP2s.
Initial Configuration
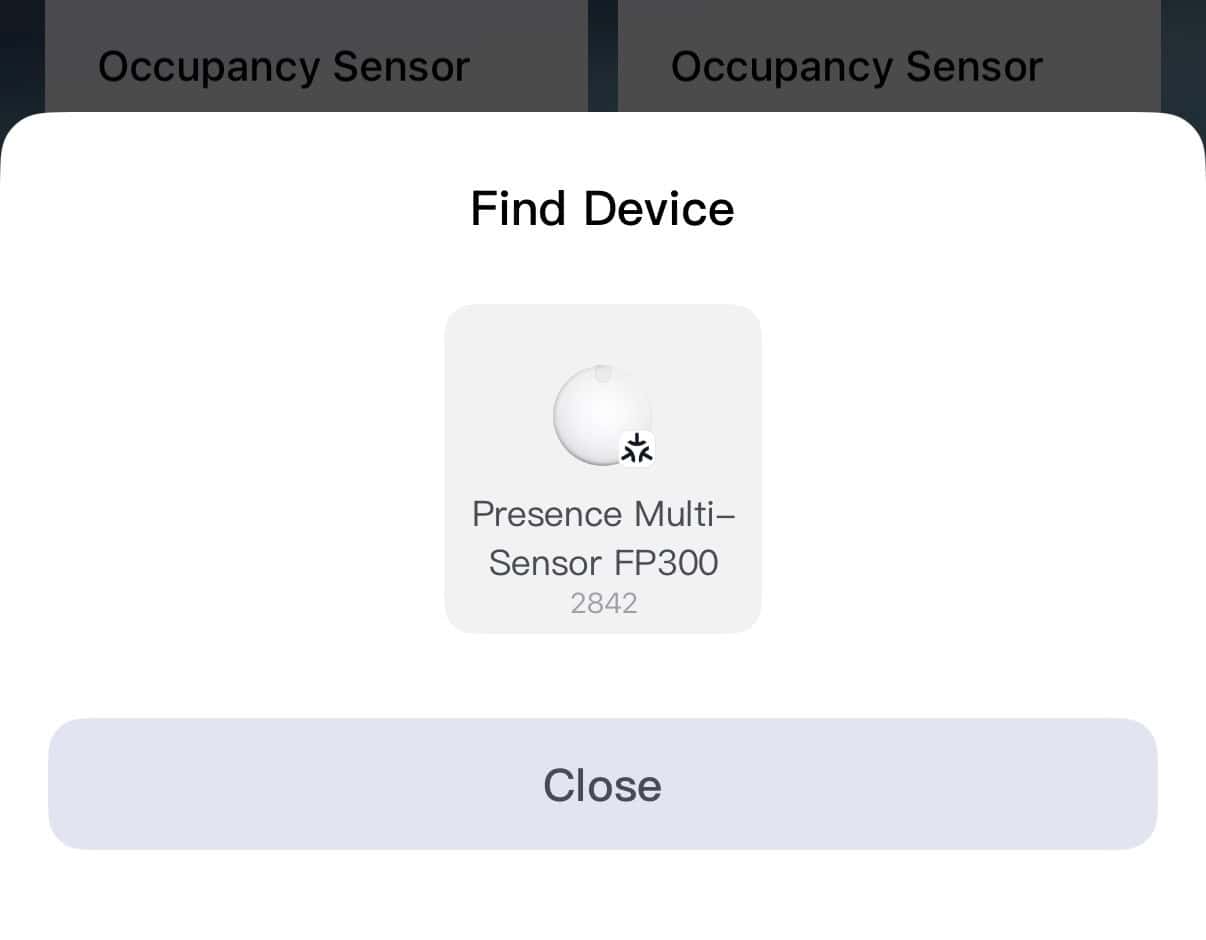
The FP300 ships with the Thread/Matter firmware by default. To cross-flash it to Zigbee mode you need the Aqara app on your phone. Launch the Aqara app after pulling the battery tab on the FP300. It should automatically detect your FP300.
Tap on the FP300 then select the Zigbee protocol.
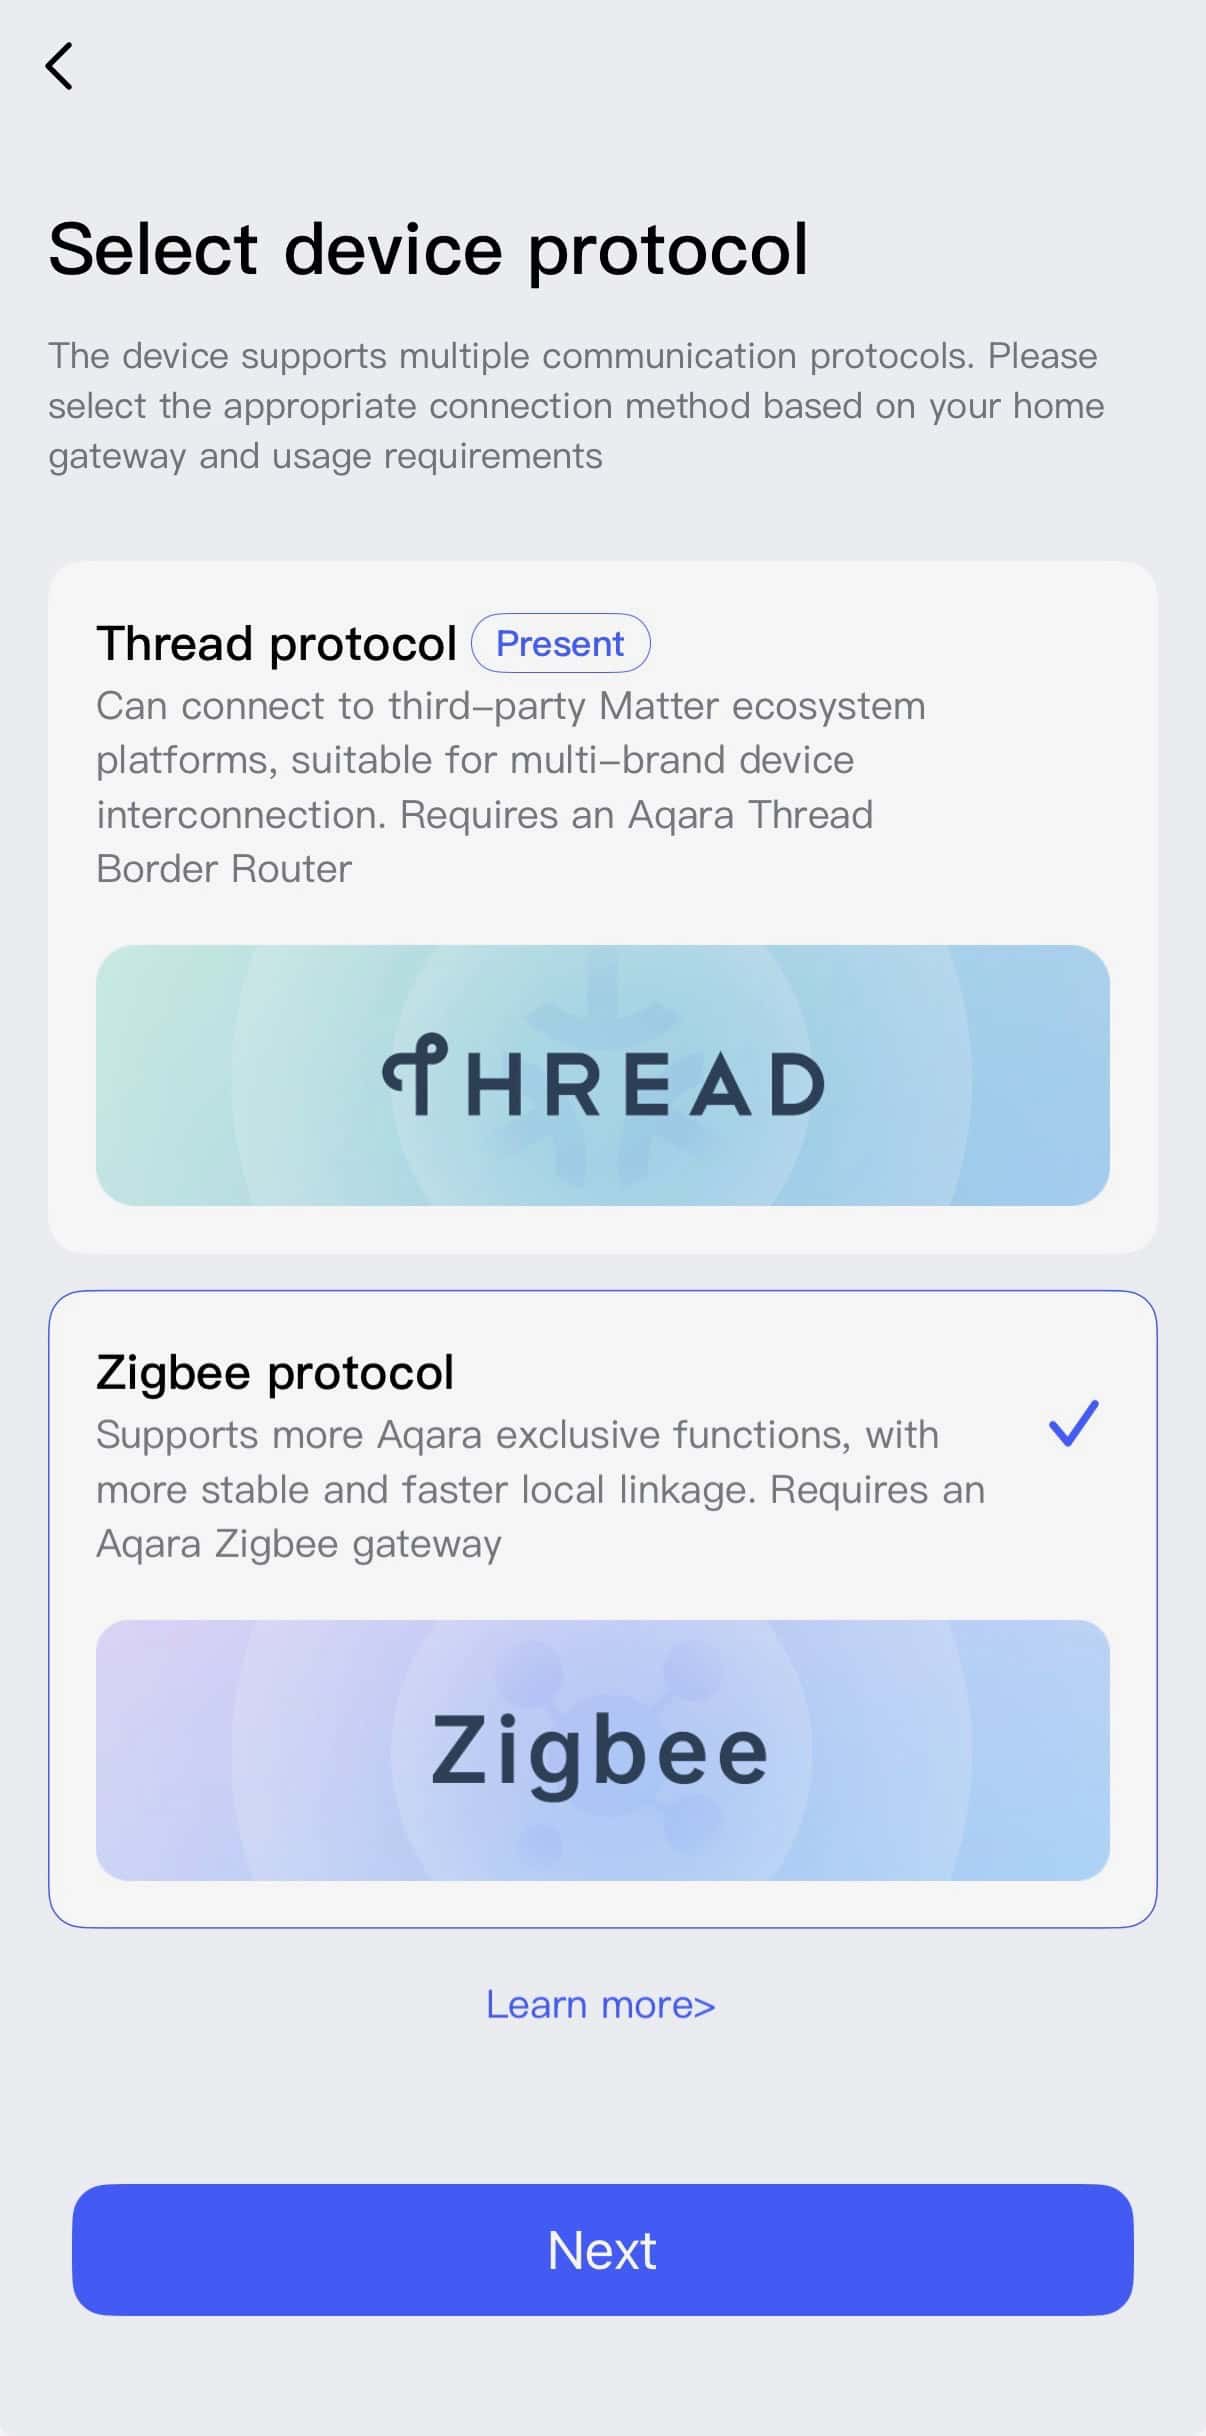
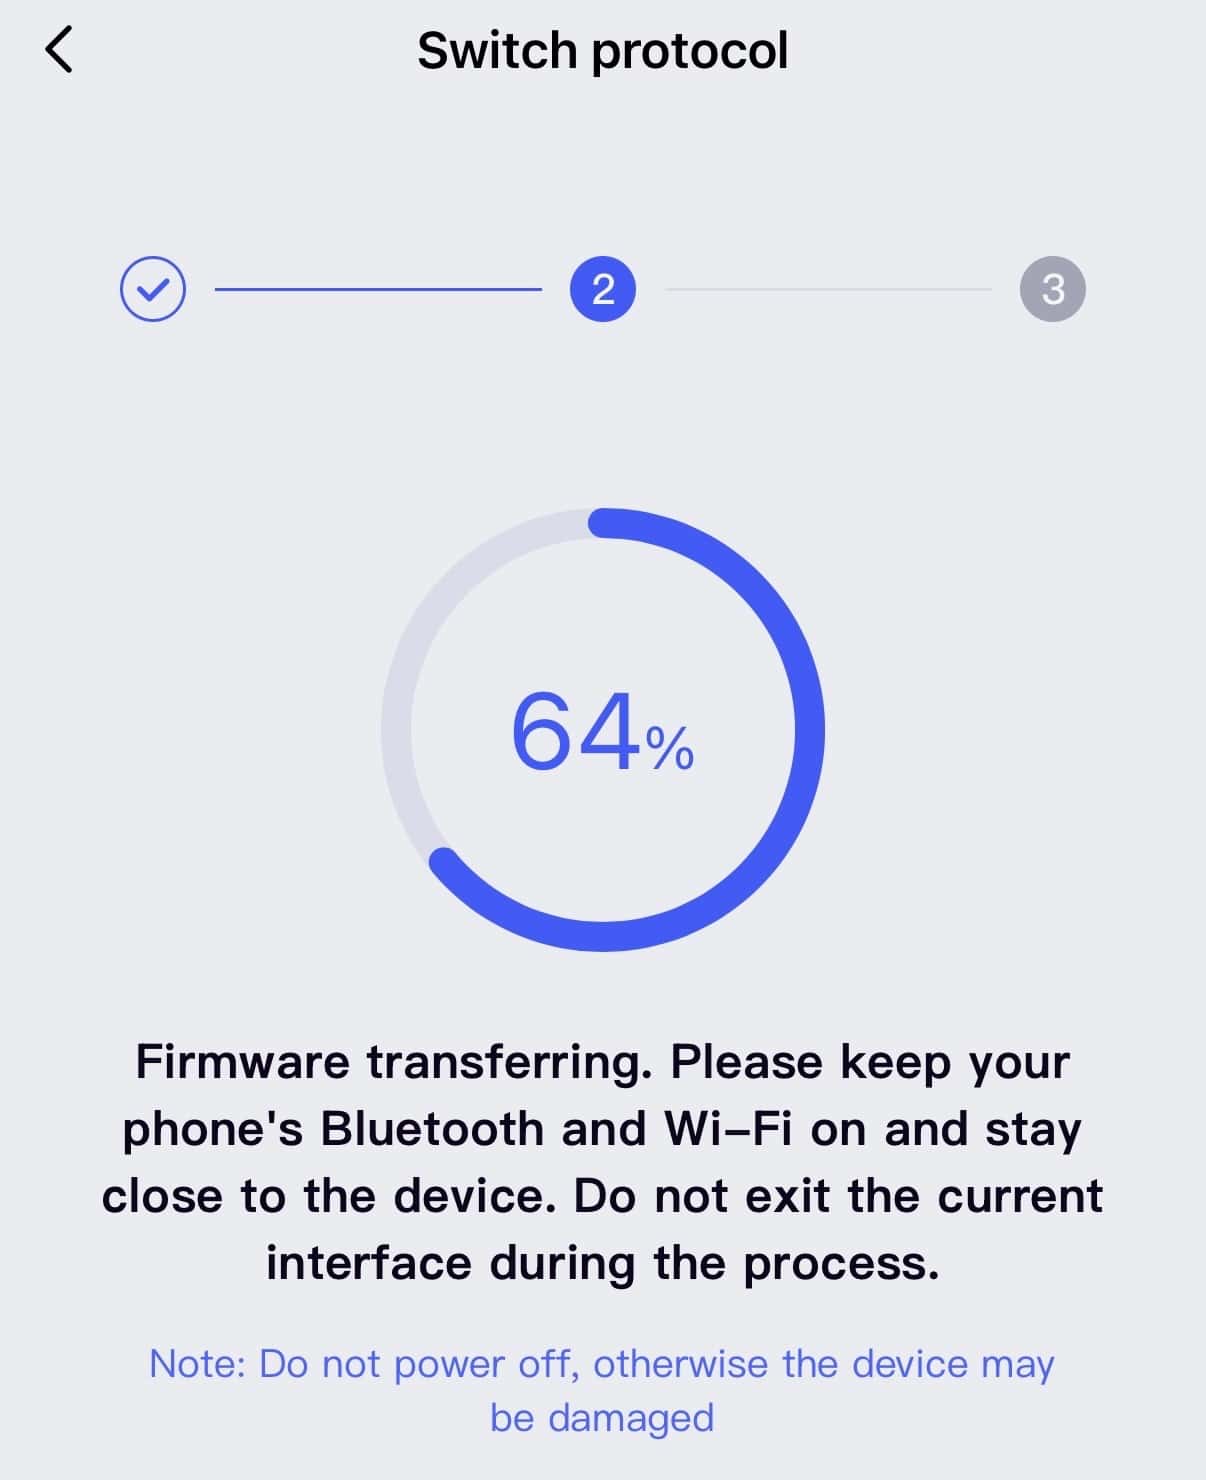
Confirm you want to flash your FP300 for Zigbee.
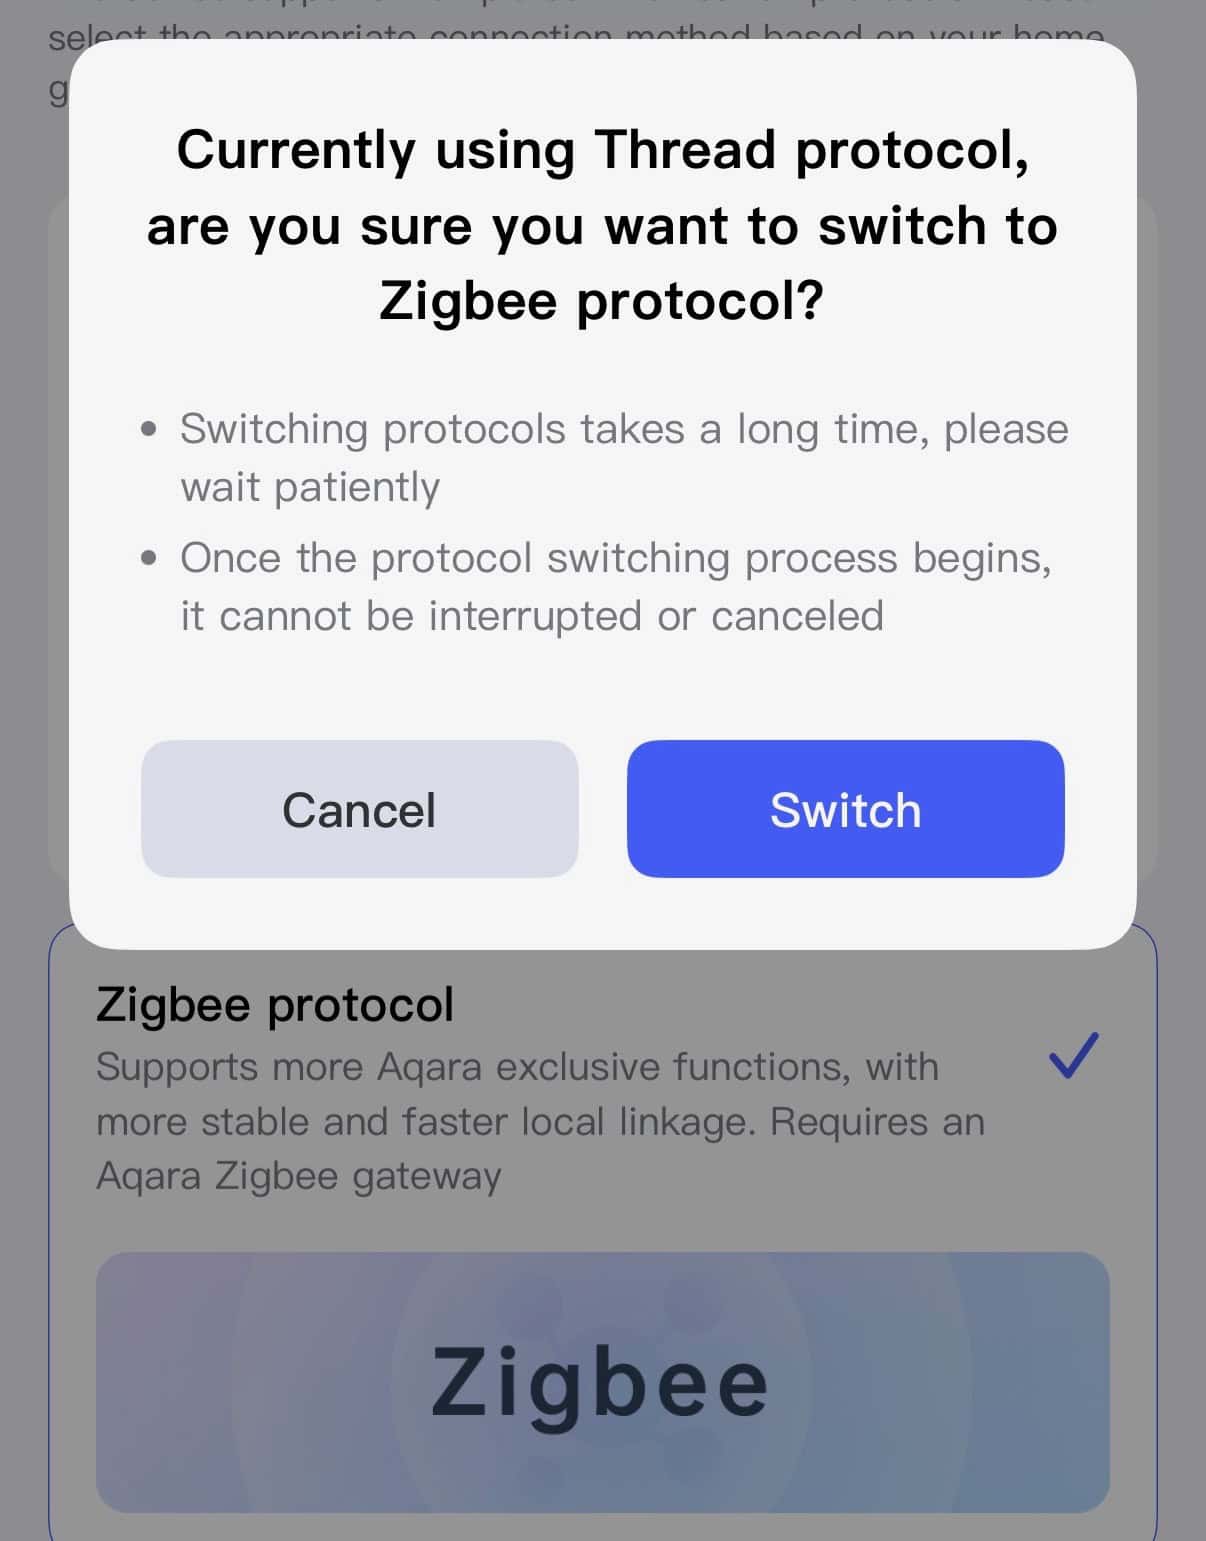
Wait a couple of minutes for the download and flashing process to complete.
Home Assistant Provisioning
To use the FP300 with Home Assistant in Zigbee mode you need a Zigbee coordinator like the TubesZB EFR32 MGM24 PoE Coordinator, along with the Zigbee2MQTT add-on.
Immediately after the FP300 is flashed with the Zigbee firmware it goes into pairing mode. Go into Home Assistant and turn on Permit Join in Zigbee2MQTT. Within a few seconds you should get a new device at the top of the list. Please note that as of the publication date of this post, ZHA does not yet have support for the FP300. Stick with Z2M for now.
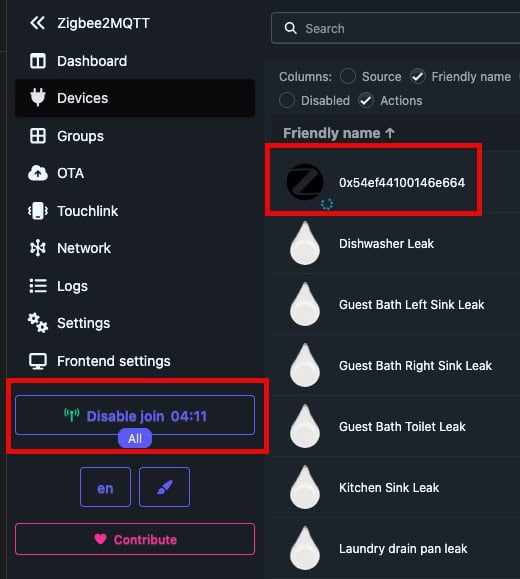
Rename the device as you wish.

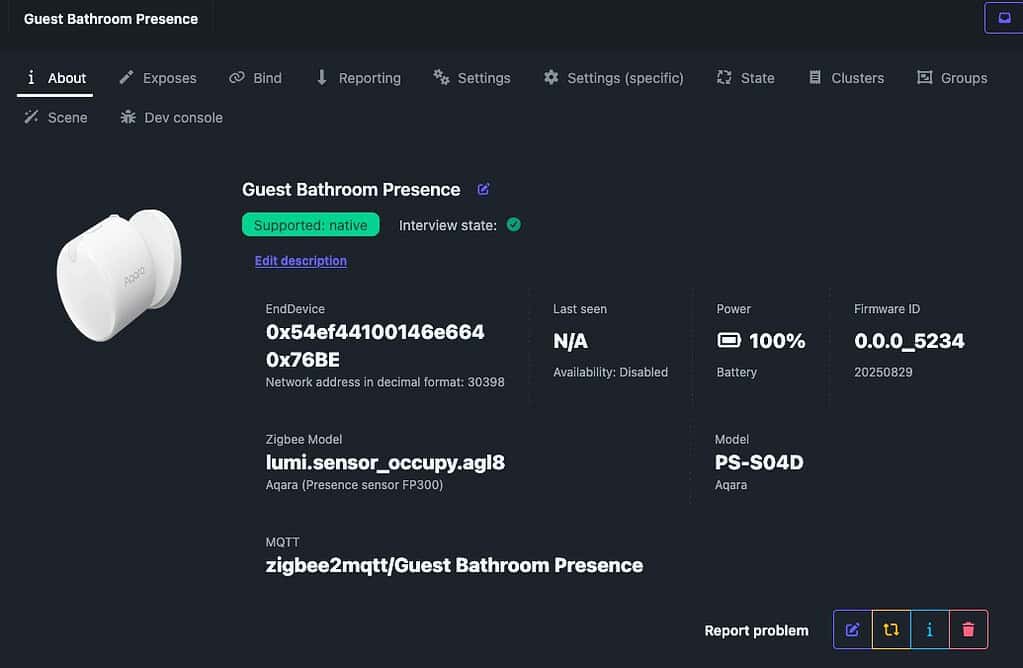
In Z2M click on About, and you should see all the details about your new FP300.
If you are also an Apple Home user, you can easily pass through the various FP300 entities to Apple Home via the Homekit bridge add-on. This will allow you to view or use the FP300 sensors in Apple Home, should you have that need.
Home Assistant Configuration
When the FP300 is in Zigbee mode, Zigbee2MQTT has an extensive list of configuration parameters you can tweak.
General Settings:
- Motion Sensitivity: low/medium/high
- Presence detection: mmWave/PIR/both
- AI Interference mode: On/Off
- AI Sensitivity adaptive mode: On/Off
- Absence delay timer (cool down period): 10 to 300 seconds
- PIR detection interval: 2 to 300 seconds
- Start Spacial learning
- Restart Device
- Identify
Temperature & Humidity:
- Sampling: Off/low/medium/high/custom
- Sampling period (custom mode): 0.5 to 3600 seconds
- Temp reporting interval (custom mode): 600 – 3600 seconds
- Temp reporting threshold (custom mode): 0.2 to 3 degrees
- Temp reporting mode (custom mode): Threshold/interval/both
- Humidity reporting interval (custom mode): 600 to 3600 seconds
- Humidity reporting threshold (custom mode): 2 to 10%
- Humidity reporting mode (custom mode): Threshold/interval/both
Light:
- Sampling: Off/low/medium/high/custom
- Sampling period (custom mode): 0.5 to 3500 seconds
- Reporting interval (custom mode): 20 to 3600 seconds
- Reporting threshold (custom mode): 3 to 20%
- Reporting mode (custom mode): Threshold/interval/both
Detection Zones:
- Track target distance: Near real time target distance display
- Detection range: 0 to 16777215 (unknown units)
- 24 detection ranges: Various from 0m to 6.75m
LED light:
- Disable night
- Schedule start time
- Schedule end time
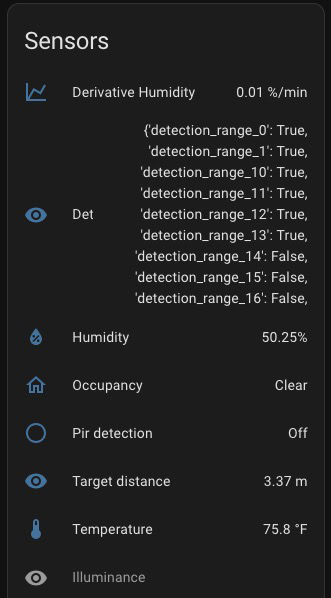
After you pair the FP300 to Home Assistant, you get the following sensors (light is disabled in my case). Take note that I created a custom humidity derivative sensor to trigger my exhaust fan.
Real World Experience
I’ve had the FP300s for a few days now, and so far I’m really impressed. I was dying to dump my Arre temp/humidity sensors in the trash (horrific battery life), and also replace my Aqara FP2 with a battery sensor in my bathrooms.
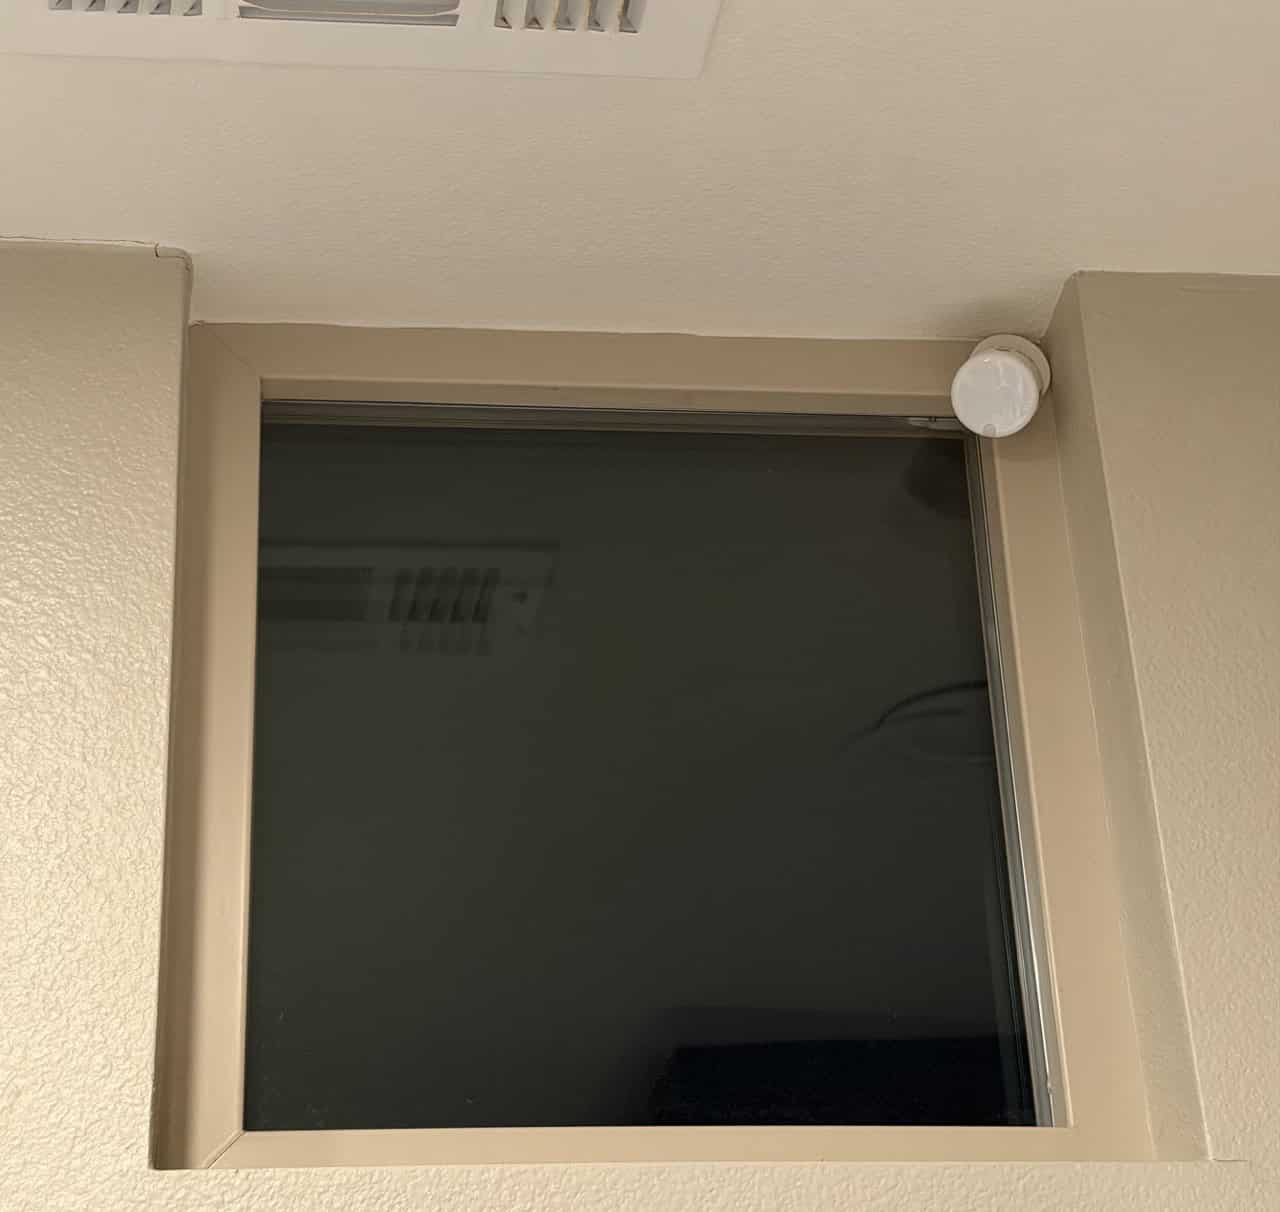
After a bit of tweaking the parameters, the FP300 has been a huge success. I’ve pulled my FP2 and Arre sensors and now completely rely two FP300s in my bathroom. One is in the main area (with shower) and the other is in the toilet area.
The main FP300 turns on my exhaust fan about 2 minutes after I turn on my shower. The motion sensor is almost nearly instant when I step foot in my bathroom. I’ve tuned the distance zone such that walking by the bathroom in the hall does NOT trigger the lights, but stepping one foot in the bathroom does turn the lights on. Very slick!
For the main FP300 I’ve disabled the light sensor, and in the toilet area I disabled the light/temp/humidity sensors to save on battery life. Speaking of battery life, Aqara says Zigbee mode can last up to three years and up to two years in Thread mode.
Home Assistant note: If you disable any of the sensors (temp/humidity or light), be sure to disable the corresponding entity in Home Assistant. HA seems to keep the last known value forever when you disable the sensor.
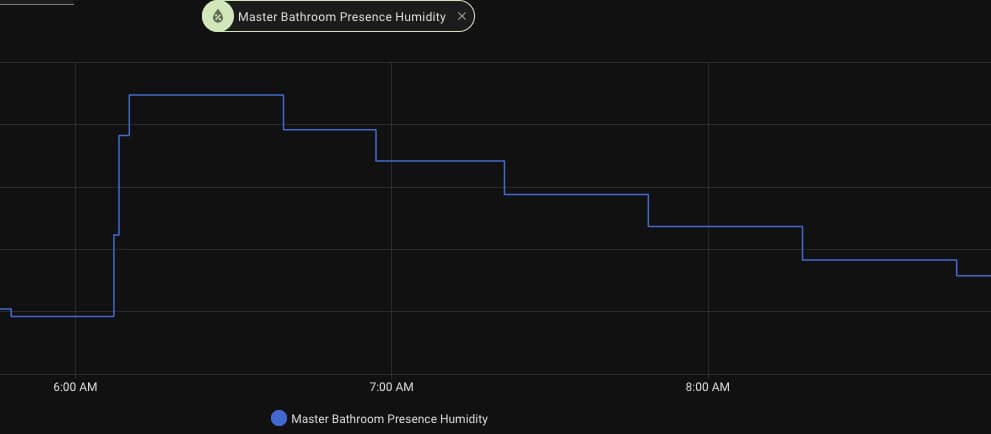
The graph below shows the humidity readings shortly before a shower, and for two hours after. You can see very smooth and consistent reporting of values, which is key for automations.
And yes, the FP300 does detect me in the shower through a heavy glass partition. I’ve taken multiple showers and my presence has been detected continuously the whole time.
Home Assistant Automations
With the Aqara FP300s I use three Home Assistant automation blueprints:
All three are by the fantastic “Blacky” community member. I cannot say enough good things about the quality and breadth of his Home Assistant blueprints. Check them (and many more) out.
My Motion/Presence Sensor Strategy
I’m a huge fan of Aqara devices. I think both their industrial design and software functionality is generally top notch. The Aqara FP2s are a bit more finicky, and for some they are trash. However, with my tuning and use cases, they are excellent and rock solid. To cover all of my motion and presence needs I’m using the following strategy:
- Aqara Motion and Light sensor P2 Thread/Matter: Areas with transient motion such as halls and entry doors.
- Aqara FP300 (Zigbee mode): Areas the need presence/temp/humidity sensors without the need for highly detailed motion zones. Also, locations where a USB powered device is not practical.
- Aqara FP2 (Wi-Fi + Homekit): Areas which multiple motion zones are needed and sensor placement is near an outlet.
I’m now in the process of removing all my Eve Thread/Matter sensors and reducing the number of FP2s in my house. I have 8 FP2s, but will be reducing that number as I find areas which are better suited for the FP300. In the near future 100% of my presence/motions sensors will be Aqara based.
Summary
I’ve been eagerly anticipating the release of the Aqara FP300 presence sensor. And I’m glad to report that it has not let me down. While it does not have the highly configurable zones that the Aqara FP2 has, it offers enough configuration options which can make it a valuable addition to your smart home. It is very responsive and the temperature and humidity sensors report consistent values, allowing for easy automation triggers. Two thumbs up!


Hi Derek,
Thank you for writing this piece. It is really helpful in making a decision what sensor to buy.
I would like to ask you something though. Can you connect to the sensor in the Aqara app without an Aqara hub? I believe you have to change the mode from Matter to Zigbee in the app right?
Thanks in advance!
Yes, no hub is needed to switch between firmware types.
how to do you check and apply a new firmware in zigbee mode under HA?
in Zigbee2MQTT there is no option
Very good question. I’m not sure at this point.
There is an option and they appear under OTA. However, I noticed that there was a newer firmware (mentioned in Aqara forum, I seem to recall), but Zigbee2MQTT showed no updates. What I did was to reset FP300 (5 secs press on button) and add to Aqara as Thread device. Once firmware download/change was complete, stopped adding (I don’t have Aqara hub) in app and started adding from new, but this time changed back to Zigbee. Once firmware change was complete, set Zigbee2MQTT to allow pairing and device was added back under the same name, so all my automations remained intact. I now see I have Zigbee firmware version 0.0.0_5841 (20260105) – ( up from 0.0.0_5234), and this updated to Stack: 3.a build 41
Thanks for the tip! I was able to confirm this method does in fact update the firmware with no loss of Z2M/HA settings.
Hi Derek. Thank you so much for your guides. Your guide with the fp2 and HA was a life saver. I just configured my fp300 with this guide but I could not configure zigbeetomqtt so I use a custom file with zha and was able to add it to HA.
I have one doubt, won’t we be able to see it in the aqara app? Like With the fp2 that I can see, and configure it, in the app and see the sensors on HA
Thank you for the post, I was happy to see that the Aqara could be used with a hub. I have the ZHA adapter and found this post useful to help get all the sensors in HA.
https://forum.aqara.com/t/aqara-fp300-with-home-assistant-zha-weeks-of-real-world-use/188762/7
Thank you for typing this up, your writing is clear and perfectly thorough. i had 3 FP2 sensors and don’t like their HomeKit requirement or detection zone square thing, it’s not granular enough. I purchased 2 FP300s and am very excited to use them! Cheers from Cali!
Thanks for the guide. I have two FP300, configured through Zigbee2MQTT to HA. Under controls, I have several setting that should be available. However, I cannot change any of them. Under Zigbee2MQTT, device, I can’t change them there either. Have you had the same experience?
I have pressed the button once to wake, no joy.
awesome write up thank you. can I ask what you set your temp and humidity settings to? I found this page after discoverin my derivative sensor wasnt updating and came to realise it was because of the temp and huimidity reporting settings. Would love to follow your settings as it seems you are using the same blueprint and confirmed it works
Sure!
Temp/Humidity sampling:
Custom; period: 30 seconds
Temp reporting interval: 3600
Temp reporting threshold: 1
Temp reporting mode: Threshold/interval
Humidity reporting interval: 3600
Humidity reporting threshold: 2%
Humidity reporting mode: threshold/interval