Blog Series
SQL 2014 Always-on AG Pt. 1: Introduction
SQL 2014 Always-on AG Pt. 2: VM Deployment
SQL 2014 Always-on AG Pt. 3: Service Accounts
SQL 2014 Always-on AG Pt. 4: Node A Install
SQL 2014 Always-on AG Pt. 5: Unattended Node B
SQL 2014 Always-on AG Pt. 6: Cluster Configuration
SQL 2014 Always-on AG Pt. 7: TempDB
SQL 2014 Always-on AG Pt. 8: Max Mem & Email
SQL 2014 Always-on AG Pt. 9: SQL Maintenance
SQL 2014 Always-On AG Pt. 10: AAG Setup
SQL 2014 Always-On AG Pt. 11: File Share Witness
Node A SQL Installation
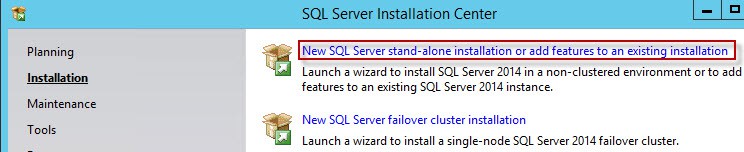
1. Mount the SQL 2014 installation ISO to your first SQL server and launch the installer.
2. Since Always-On AGs does NOT use the traditional clustering technology or clustering services, select the SQL server stand-alone installation option.
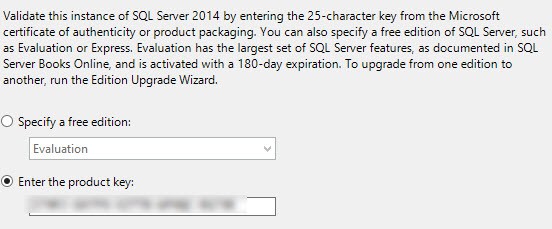
3. On the license key page make sure you have a production-quality license key. Click Next.
4. On the next page accept the license key and if you want, enable the customer experience improvement program. Click Next.
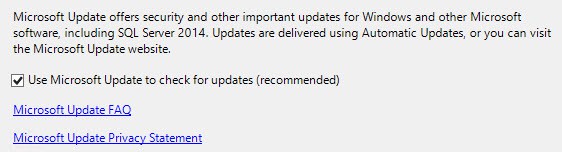
5. One neat feature of the SQL installer is the ability to download and apply updates as part of the installation process. In a highly managed SQL environment you probably don’t want to do this. But this is a home lab, so I’m good with any MS provided updates. Click Next.
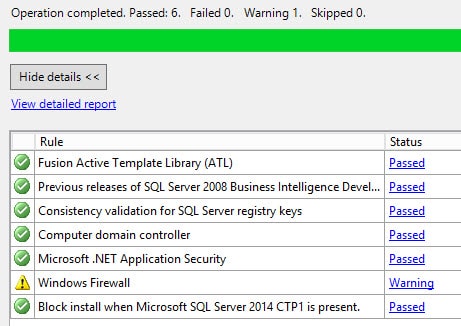
6. As part of the installation the installer conducts a series of system checks. Make sure all is well here. Click Next.
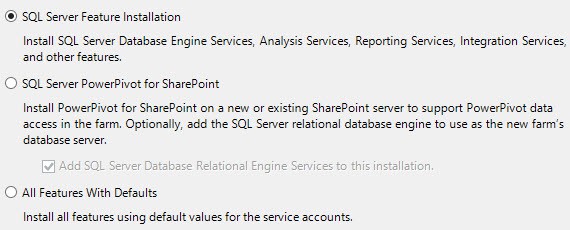
7. Next up we want to select SQL server feature installation.
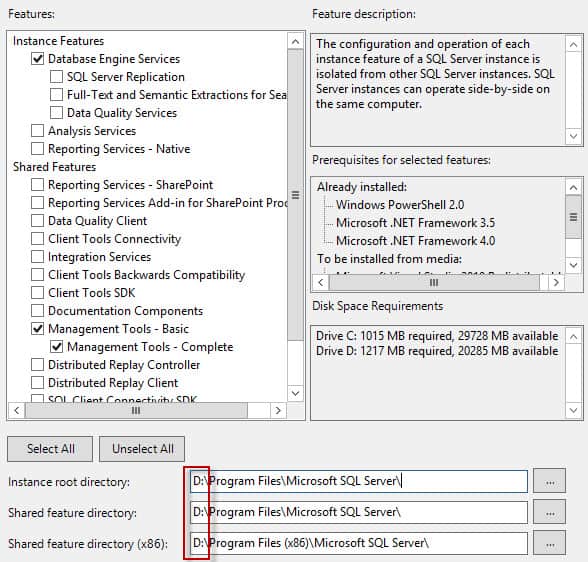
8. Next up we have to decide what SQL features we want installed. This will be very dependent on your environment. For this case I’ll just do the minimum, which is the SQL database engine and the full set of management tool. Add other services as needed. Be sure to change the installation path to the D drive, if you are following my drive letter configuration.
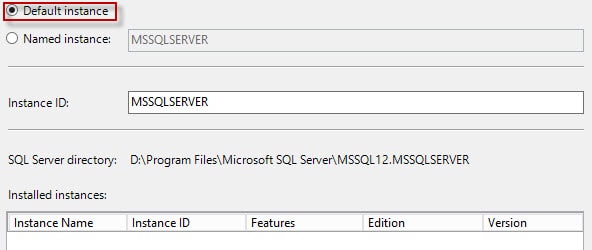
9. Now we need to decide on the SQL instance details. Here I’m just using the default instance, since this is a fresh VM. Click Next.
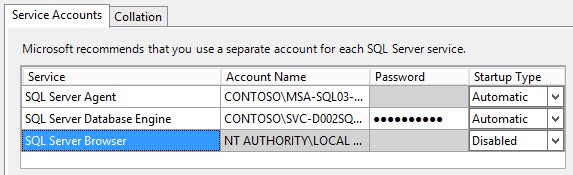
10. Here we need to select our service accounts. The GUI is intelligent enough to blank out the password field for the gMSA account. From the picker select your two service accounts. On the second tab you can change the collation. I’m leaving it the default, so won’t show a screenshot.
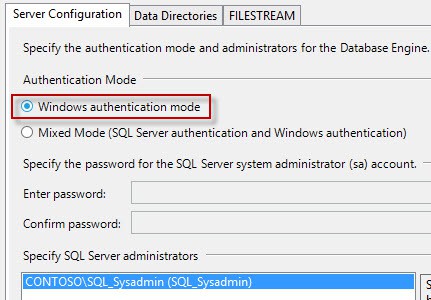
11. Next up choosing the authentication option (Windows is the most secure), and also selecting the security group you created earlier as the SQL administrator. Click on the Data Directories tab.
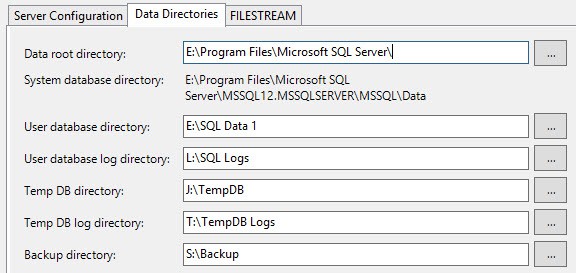
12. Assuming you are using my suggested drive configuration, we need to customize most of the install paths as shown below. Click Next.
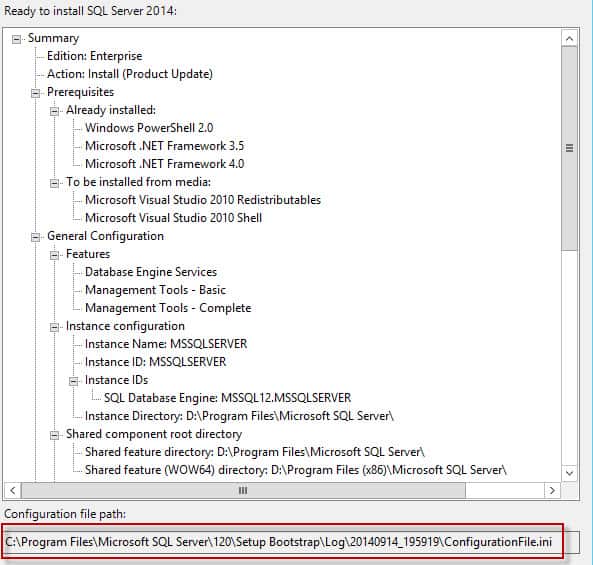
13. Review all of the configuration settings. Note at the bottom of the window is the path to the automatically generated .INI file. Browse to this location and copy the .INI file to a safe place. We will use this as the basis of our unattended install on the second node. Click Install and wait for it to complete.
Summary
In this installment we have installed the first node of our two-node SQL 2014 AlwaysOn Availability group. We’ve also captured the resulting INI file, such that we can use it to replicate our settings on the second node. This reduces human error, and speeds up the installation process. In the fifth installment we will install SQL 2014 on the second node.


